Table of Contents
Advertisement
Advertisement
Table of Contents

Related Manuals for 2Wire 2701HGV-W


Summary of Contents for 2Wire 2701HGV-W
-
Page 1: Installation Guide
2Wire Gateway Installation Guide For 2701HGV-W... - Page 2 Notice to Users ©2008 2Wire, Inc. All rights reserved. This manual in whole or in part, may not be reproduced, translated, or reduced to any machine- readable form without prior written approval. 2WIRE PROVIDES NO WARRANTY WITH REGARD TO THIS MANUAL, THE SOFTWARE, OR OTHER INFORMATION CONTAINED HEREIN AND HEREBY EXPRESSLY DISCLAIMS ANY IMPLIED WARRANTIES OF MERCHANTABILITY OR FITNESS FOR ANY PARTICULAR PURPOSE WITH REGARD TO THIS MANUAL, THE SOFTWARE, OR SUCH OTHER INFORMATION, IN NO EVENT SHALL 2WIRE, INC.
-
Page 3: Table Of Contents
Wireless Connection ..........5 Non-2Wire Wireless Adapter Configuration ......6 USB Connection . -
Page 4: Getting Started
Remove or Disable Conflicting Applications Internet sharing software and PC based firewall applications typically interfere with the 2Wire gateway, and should be removed or disabled before you install the gateway. The 2Wire gateway provides the same features as the products listed below. -
Page 5: Connect The First Computer To The Gateway
USB are also provided. The first computer you connect to the network is used to configure the 2Wire gateway for proper operation. Choose one of the following methods to connect your first computer to the gateway. Save and close all open programs before you begin connecting your gateway. -
Page 6: For Wall-Mounted Phones
Connect the First Computer to the Gateway To install the DSL filter: Locate the phone jack where you want to connect your 2Wire gateway. Insert the DSL filter into the jack. If you have a phone, answering machine, fax machine, satellite TV... -
Page 7: Ethernet Connection
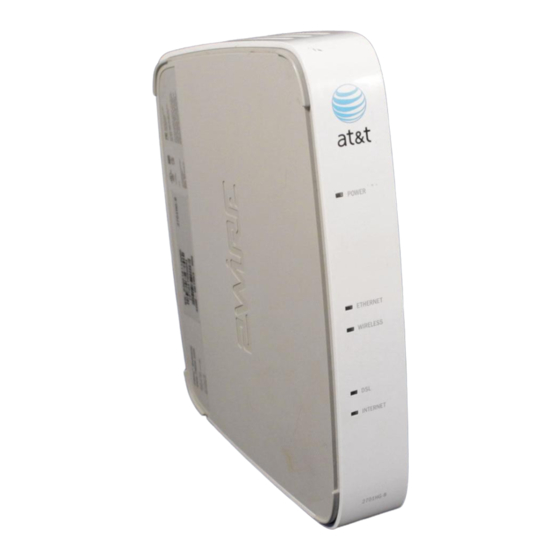
POWER ETHERNET 2Wire gateway are green. If they are not, see “Understanding the Indicator Lights” on page 18. The indicator light will not turn green until the gateway software has been installed and an Internet INTERNET... -
Page 8: Wireless Connection
Install your wireless adapter according to the manufacturer’s instructions (see note below). Note: If you use a 2Wire wireless adapter (PC card or USB adapter) for wireless networking, the 2Wire CD automatically configures it to communicate with the gateway during setup. If you are NOT using a 2Wire wireless adapter, you must manually configure your adapter to communicate with the gateway using the information on page 6. -
Page 9: Non-2Wire Wireless Adapter Configuration
Use the network adapter configuration software or Windows network connection wizard to set the network name (SSID) and encryption key (WEP). a. The network name is the word “2WIRE” (in all capital letters), followed by the last three digits of the gateway serial number (for example, 2WIRE110). -
Page 10: Usb Connection
Connect the First Computer to the Gateway USB Connection Figure 3. Gateway Connected Via USB Connect the provided AC power adapter from the 2Wire gateway’s port to an electrical outlet. POWER light on the front of the gateway should be green. -
Page 11: Install The 2Wire Gateway Usb Driver - Windows
10.2.1 to 10.2.6, 10.3.3 to 10.3.9, 10.4.0, and 10.4.1. Before making your USB connection to the gateway, you must install the 2Wire gateway USB driver on your computer. The following instructions are for USB installation on Macintosh computers running OS 10.2. -
Page 12: Run The 2Wire Setup Wizard
Run the 2Wire Setup Wizard Windows XP/2K/ME/98SE Insert the 2Wire CD and follow the on-screen instructions. If the 2Wire Setup Wizard does not automatically start: − Double-click the My Computer icon located on the desktop. − Double-click the icon that corresponds to your CD-ROM drive. -
Page 13: Add Computers To The Network
Add Computers to the Network After your first computer is connected to the 2Wire gateway and your Internet connection has been established, you can connect other computers to the network. Use any of the following methods to connect additional computers to your network. -
Page 14: Ethernet Connection
Add Computers to the Network Ethernet Connection Figure 4. Gateway Connected to Second Computer Via Ethernet Connect an Ethernet cable from the any available port on the gateway to your LOCAL ETHERNET computer’s Ethernet port. 1. The number of Ethernet ports vary by model (from one to four). If your gateway has four Ethernet ports, you can connect up to four computers to your network via Ethernet. -
Page 15: Usb Connection
Figure 5. Gateway Connected to Second Computer Via USB Connect the provided blue USB cable from the gateway’s port to the USB port on your computer. USB-PC Install the USB driver (refer to page 8 for instructions). Repeat “Run the 2Wire Setup Wizard” on page 9. -
Page 16: Wireless Connection
If you are NOT using a 2Wire wireless adapter, you must manually configure your adapter to communicate with the gateway using the information on page 6. -
Page 17: Diagnostics
Understanding Broadband Redirect Messages If the 2Wire gateway detects a connection problem or an intermittent service error, it generates an error or alert (Broadband Redirect Message) and displays the message within your Web browser. The following messages contain information that can help you resolve some of the most common installation or network conflicts. -
Page 18: No Dsl Connection - Unable To Train
Diagnostics No DSL Connection - Unable to Train When setting up a DSL broadband network, all active phone devices must have a phone line filter installed. Without the filter, the DSL connection will be unstable, resulting in a poor or no DSL connection. If phone line filters are missing, line noise and/or echo can affect the DSL connection. -
Page 19: Broadband Link Is Currently Not Available - Dsl Connection Issue
Diagnostics Broadband Link is Currently Not Available - DSL Connection Issue This error message is displayed because the gateway was unable to establish a broadband network connection. Check to ensure that all cables are correctly connected, and the cable end securely attached to the port. -
Page 20: Router Behind Router Detected
IPs via NAT. The best solution is to remove the third-party router from your LAN since the 2Wire gateway can manage your home network. If this option is not acceptable, move the third-party router to DMZPlus Mode by clicking button.. -
Page 21: Understanding The Indicator Lights
Diagnostics Understanding the Indicator Lights The 2Wire gateway has numerous indicator lights that can be used to diagnose installation and connection problems. The following table describes how to interpret the indicator lights. Power Light Operating State The gateway is not getting power. - Page 22 Diagnostics Phone Lights Operating State Not used on this model Not used on this model DSL Light Operating State The gateway is powered off or booting up. Blinking green (slow) The gateway is attempting to establish a connection to your broadband service(s).
-
Page 23: Appendix A: Install The Gateway On Other Operating Systems
Appendix A: Install the Gateway on Other Operating Systems Follow these instructions if you are using an operating system that is not supported by the 2Wire CD (such as any Macintosh OS prior to 10.2, UNIX, or Linux). There are many ways to set up your network, but typically the first computer is located in the same room as the gateway and your DSL connection. -
Page 24: Usb Connection
Note: Connecting your computer to the gateway using USB requires an available USB port. Only one Windows or Macintosh computer can be directly connected to the 2Wire gateway using the USB connection. The following instructions are for Macintosh computers running OS 9.x. -
Page 25: Configuring The Internet Connection
USB port. Open the network Control Panel by selecting the Apple icon > Control Panel > TCP/IP Verify that “Connect Via: 2Wire USB Remote NDIS…” is selected to set the network adapter as active. Click to complete your installation. -
Page 26: Regulatory Information
Equipment Repairs Do not, under any circumstances, attempt any service, adjustments, or repairs on this equipment. Instead, contact your local 2Wire distributor or service provider for assistance. Failure to comply may void the product warranty. Location – Environmental Considerations Do not plug the power pack into an outdoor outlet or operate the terminal outdoors. - Page 27 If trouble is experienced with this equipment, please contact 2Wire, or your local 2Wire distributor or service center in the U.S.A. for repair and/or warrant information.
- Page 28 Regulatory Information MPE/SAR Labeling WARNING: While this device is in operation, a separation distance of at least 20 cm (8 inches) must be maintained between the radiating antenna inside the Equipment Under Test (EUT) and the bodies of all persons exposed to the transmitter in order to meet the FCC RF exposure guidelines.
Need help?
Do you have a question about the 2701HGV-W and is the answer not in the manual?
Questions and answers