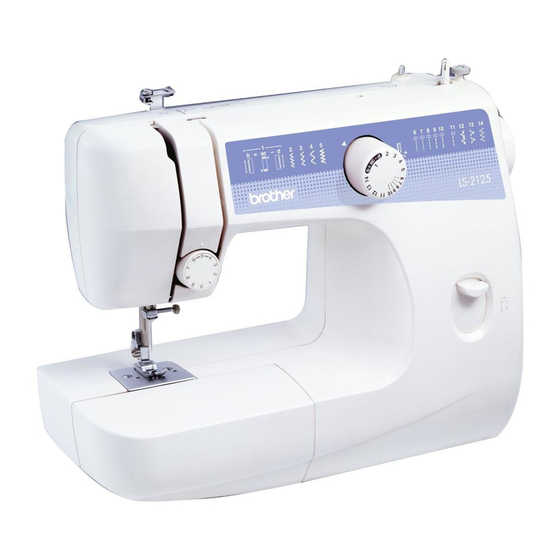
Brother LS-2125i - Basic Sewing And Mending Machine Operation Manual
Users manual - english
Hide thumbs
Also See for LS-2125i - Basic Sewing And Mending Machine:
- Instruction manual (67 pages) ,
- Instruction manual (72 pages) ,
- Service manual (21 pages)
Table of Contents

Related Manuals for Brother LS-2125i - Basic Sewing And Mending Machine


Summary of Contents for Brother LS-2125i - Basic Sewing And Mending Machine
- Page 1 KNOWING YOUR SEWING MACHINE SEWING BASICS UTILITY STITCHES APPENDIX Basic Sewing and Mending Machine Operation Manual http://solutions.brother.com Please visit us at where you can get product support and answers to frequently asked questions (FAQs).
-
Page 3: Important Safety Instructions
“IMPORTANT SAFETY INSTRUCTIONS” When using the sewing machine, basic safety precautions should always be followed, including the following: “Read all instructions before using.” DANGER – To reduce the risk of electric shock: 1. The sewing machine should never be left unattended when plugged in. Always unplug this sewing machine from the electrical outlet immediately after using and before cleaning. - Page 4 FOR USERS IN THE UK, EIRE, MALTA AND CYPRUS ONLY If this machine is fitted with a three-pin non-rewireable BS plug then please read the following. IMPORTANT If the available socket outlet is not suitable for the plug supplied with this equipment, it should be cut off and an appropriate three-pin plug fitted.
- Page 5 CONGRATULATIONS ON CHOOSING OUR MACHINE To fully enjoy all the features, we suggest that you study the manual before using the machine. PLEASE READ BEFORE USING THIS MACHINE For safe operation 1. Be sure to keep your eye on the needle while sewing. Do not touch the handwheel, thread take- up lever, needle, or other moving parts.
-
Page 6: Table Of Contents
—————————————————————————————————————————————————————————— CONTENTS 1. KNOWING YOUR SEWING MACHINE ............6 NAMES OF MACHINE PARTS AND THEIR FUNCTIONS ............ 6 The main parts ..............................6 Needle and presser foot section ........................8 Flat bed attachment ............................8 ACCESSORIES ........................9 USING YOUR SEWING MACHINE ...................10 Power supply precautions .......................... - Page 7 ZIPPER INSERTION ......................40 APPLIQUÉ, MONOGRAMMING AND EMBROIDERING ..........41 Appliqués ............................... 41 Monogramming and embroidering ......................... 41 DECORATIVE STITCHING ....................43 Gathering ............................... 43 Shell tuck stitching ............................43 Elastic stitching .............................. 44 4. APPENDIX .....................45 MAINTENANCE ........................45 Oiling ................................45 Changing the bulb ............................
-
Page 8: Knowing Your Sewing Machine
KNOWING YOUR SEWING MACHINE ————————————————————————————————————————— KNOWING YOUR SEWING MACHINE NAMES OF MACHINE PARTS AND THEIR FUNCTIONS The main parts a Buttonhole fine-adjusting screw (page 38) d Upper tension control dial (page 28) Turn the buttonhole fine-adjusting screw to adjust This controls the tension of the upper thread. buttonhole stitching when it is not uniform. - Page 9 g Built-in handle n Presser foot lever (page 16) Use the presser foot lever to raise and lower the presser h Spool pin (page 12 and 16) foot. The spool pin holds the spool of thread. o Bobbin winding pre-tension disc/thread guide (page 12 i Bobbin winder (page 12) and 16) The bobbin winder winds thread onto the bobbin for...
-
Page 10: Needle And Presser Foot Section
KNOWING YOUR SEWING MACHINE ————————————————————————————————————————— Flat bed attachment Needle and presser foot section The accessories are stored in a compartment inside the flat bed attachment. Lift the bottom of the flat bed attachment toward you, and then pull the flat bed attachment out to remove it. -
Page 11: Accessories
ACCESSORIES The following accessories are stored in the flat bed attachment. We have designed these accessories to help you be able to carry out most sewing tasks. Note (For U.S.A. only) ● Foot controller: Model KD-1902, N This foot controller can be used on the following machine models: LS-2220/2720/1520/2125/2125i. -
Page 12: Using Your Sewing Machine
KNOWING YOUR SEWING MACHINE ————————————————————————————————————————— USING YOUR SEWING MACHINE Power supply precautions Be sure to observe the following precautions concerning the power supply. WARNING ● Use only regular household electricity for the power source. Using other power sources may result in fire, electric shock, or damage to the machine. -
Page 13: Foot Controller
To turn off the machine, set the main power Foot controller switch to “ ”. The sewing lamp goes off when the machine is turned off. CAUTION ● When connecting the foot controller, be sure to turn off the sewing machine in order to Note prevent the machine from accidentally being ●... -
Page 14: Threading The Machine
KNOWING YOUR SEWING MACHINE ————————————————————————————————————————— THREADING THE MACHINE Winding the bobbin This section describes how to wind the thread onto the bobbin. 1 Pulling it in as far as possible. a Pre-tension disk b Bobbin winder shaft c Bobbin CAUTION ●... - Page 15 While holding the end of the thread, gently Cut the thread, slide the bobbin winder shaft press the foot controller to wind the thread to the left and remove the bobbin. around the bobbin a few times. Then stop the machine.
-
Page 16: Lower Threading
KNOWING YOUR SEWING MACHINE ————————————————————————————————————————— Open the shuttle cover behind the flat bed Lower threading attachment at the front of the machine. Install the bobbin wound with thread. CAUTION ● Winding the bobbin improperly may cause the thread tension to loosen, breaking the needle and resulting in injury. - Page 17 Pull the trailing thread through the slot, down and to the left, as shown below, until it enters the delivery eye under the tension spring. a Tension spring Hold the bobbin case by the latch, fully insert the bobbin case into the shuttle race, and then release the latch.
-
Page 18: Upper Threading
KNOWING YOUR SEWING MACHINE ————————————————————————————————————————— Upper threading Set the upper thread and thread the needle. a Spool pin b Thread guide (rear) c Thread guide (front) d Thread take-up lever CAUTION ● Make sure you thread the machine properly. Otherwise, the thread could tangle and break the needle. Raise the presser foot using the presser foot Pull up the spool pin as far as possible, and lever. - Page 19 While holding the thread as shown below, Put the thread behind the needle bar thread pull it between the tension discs. guide above the needle. The thread can easily be passed behind the needle bar thread guide by holding the thread in your left hand, then feeding the thread with your right hand.
-
Page 20: Drawing Up The Lower Thread
KNOWING YOUR SEWING MACHINE ————————————————————————————————————————— Drawing up the lower thread Lightly hold the end of the upper thread. Pull out about 15 cm (6 inches) of both threads and pull them toward the back of the machine under the presser foot. a Upper thread While holding the end of the upper thread, a Upper thread... -
Page 21: Replacing The Needle
REPLACING THE NEEDLE This section provides information on sewing machine needles. Needle precautions Be sure to observe the following precautions concerning the handling of the needle. Failure to observe these precautions is extremely dangerous. Be sure to read and carefully follow the instructions below. CAUTION ●... -
Page 22: Checking The Needle
KNOWING YOUR SEWING MACHINE ————————————————————————————————————————— CAUTION Replacing the needle ● The appropriate fabric, thread and needle Replace the needle as described below. Use the combinations are shown in the table on the screwdriver and a needle that has been determined previous page. - Page 23 Hold the needle with your left hand, and then While holding the needle with your left hand, use a screwdriver to turn the needle clamp use the screwdriver to tighten the needle screw counterclockwise to remove the clamp screw by turning it clockwise. needle.
-
Page 24: Sewing With A Twin Needle (Option)
KNOWING YOUR SEWING MACHINE ————————————————————————————————————————— Sewing with a twin needle (Option) We have designed your machine so you can sew with the optional twin needle and two top threads. You can use the same color or two different colors of thread for making decorative stitches. The stitches available for twin-needle sewing are straight stitches 6 through 10 and zigzag stitch 2. -
Page 25: Replacing The Presser Foot
REPLACING THE PRESSER FOOT CAUTION ● Always turn off the power before you change the presser foot. If you leave the power on and step on the controller, the machine will start and you may be injured. ● Always use the correct presser foot for the stitch pattern you have chosen. If you use the wrong presser foot, the needle may strike the presser foot and bend or break, and may cause injury. -
Page 26: Removing The Presser Foot Holder
KNOWING YOUR SEWING MACHINE ————————————————————————————————————————— ■ Attaching the presser foot holder Raise the presser foot lever to check that the presser foot is securely attached. Align the presser foot holder with the lower- left side of the presser bar. Removing the presser foot a Presser foot holder holder b Presser bar... -
Page 27: Sewing Basics
SEWING BASICS SEWING Basic sewing operations are described below. Before operating the sewing machine, read the following precautions. CAUTION ● While the machine is in operation, pay special attention to the needle location. In addition, keep your hands away from all moving parts such as the needle and handwheel, otherwise injuries may occur. ●... -
Page 28: Selecting Stitching
SEWING BASICS ——————————————————————————————————————————————————— Selecting stitching Turning the stitch selection dial in either direction, select the desired stitch. aPattern selection dial Number on dial Stitch name Pattern Page 4-step automatic buttonhole Zigzag stitch Zigzag stitch 32, 41 Zigzag stitch Zigzag (satin) stitch Straight stitch 33, 35, (Center needle position) -
Page 29: Starting To Sew
While holding the end of the thread and the Starting to sew fabric with your left hand, turn the handwheel toward you (counterclockwise) with your right hand to lower the needle to the starting Turn on the sewing machine. point of the stitching. Raise the needle to its highest position by turning the handwheel toward you (counterclockwise). -
Page 30: Sewing In Reverse
SEWING BASICS ——————————————————————————————————————————————————— Pull the fabric to the left side of the machine, Thread tension and then pass the threads through the thread cutter on the back of the presser foot bar to The thread tension will affect the quality of your cut them. - Page 31 ■ Upper tension is too loose ■ Bobbin tension is too loose Loops appear on the wrong side of the fabric. Loops may appear on the surface of the fabric when sewing thin fabric with thin thread. Note a Wrong side ●...
-
Page 32: Useful Sewing Tips
SEWING BASICS ——————————————————————————————————————————————————— USEFUL SEWING TIPS Various ways to achieve better results for your sewing projects are described below. Refer to these tips when sewing your project. Trial sewing Sewing curves A trial piece of fabric should be sewn since, depending Stop sewing, and then slightly change the sewing on the type of fabric and stitching being sewn, the direction to sew around the curve. -
Page 33: Sewing Thin Fabrics
Sewing thin fabrics When sewing thin fabrics, the stitching may become misaligned or the fabric may not feed correctly. If this occurs, place thin paper or stabilizer material under the fabric and sew it together with the fabric. When you have finished sewing, tear off any excess paper. -
Page 34: Utility Stitches
UTILITY STITCHES —————————————————————————————————————————————————— UTILITY STITCHES USEFUL STITCHES Start sawing. Zigzag stitches You can use the zigzag stitches to join together seams and finish them in one operation. They are also useful for sewing stretch materials. Number Stitch name Application on dial Zigzag stitch Overcasting and •... -
Page 35: Basic Stitching
Basic stitching Blind hem stitching Straight stitches are used for sewing plain seams. You can use the Blind Hem Stitch to finish the edge Two stitches are available for basic stitching. of a project, like the hem of a pair of trousers, without the stitch showing. - Page 36 UTILITY STITCHES —————————————————————————————————————————————————— Use a chalk to mark on the fabric about 5 mm Unfold the edge of fabric, and position the (3/16 inches) from the edge of the fabric, and fabric with the wrong side facing up. then baste it. <Seen from the side>...
-
Page 37: Darning
Position the fabric so that the needle slightly catches the fold of the hem, and then lower Darning the presser foot lever. For invisible stitching, make sure that both Reinforce points that will be subject to strain. threads are the same color as the fabric. Number on dial Stitch name Application... -
Page 38: Buttonhole Sewing
UTILITY STITCHES —————————————————————————————————————————————————— BUTTONHOLE SEWING Buttonholes can be sewn and buttons can be sewn on. Number on dial Stitch name Application Memo ● Before sewing buttonholes, check the stitch 4-step Buttonholes on length and width by sewing a trial automatic medium weight buttonhole on a scrap piece of fabric. - Page 39 Stop sewing when the needle is at the left side Insert a pin at the end of the buttonhole of the stitching, and then raise the needle by stitching to prevent the stitching from being turning the handwheel toward you. cut, and then use a seam ripper to cut towards the pin and open the buttonhole.
-
Page 40: Adjusting Buitching Stitching
UTILITY STITCHES —————————————————————————————————————————————————— Button sewing Adjusting buitching stitching Buttons can be sewn on with the sewing machine. Buttons with 2 or with 4 holes can be attached. If the stitching on the two sides of the buttonhole is not uniform, the stitching can adjusted with the Measure the distance between the holes in the buttonhole fine-adjusting screw. - Page 41 Turn the handwheel toward you (counterclockwise) to check that the needle correctly goes into the two holes of the button. If the needle hits the button, return to step CAUTION ● When sewing, be sure that the needle does not touch the button, otherwise the needle may bend or break.
-
Page 42: Zipper Insertion
UTILITY STITCHES —————————————————————————————————————————————————— ZIPPER INSERTION You can use the zipper foot “I” to sew different types of zippers, and can easily position it to the right or left side of the needle. When sewing the right side of the zipper, attach the shank to the left pin of the zipper foot. When sewing the left side of the zipper, attach the shank to the right pin of the zipper foot. -
Page 43: Appliqué, Monogramming And Embroidering
APPLIQUÉ, MONOGRAMMING AND EMBROIDERING Zigzag stitches can be used for sewing appliqués, monogramming and embroidering. Carefully sew around the edge of the design. Number Stitch name Application on dial Zigzag stitch Overcasting and attaching appliqués. Zigzag stitch Select the desired width. - Page 44 UTILITY STITCHES —————————————————————————————————————————————————— ■ Monogramming Select a stitch. Sew the lettering at a constant speed by moving the hoop slowly. Draw the lettering (for monogramming) or design (for embroidering) on the surface of the fabric. Put the fabric in the embroidery hoop with the surface of the fabric facing up inside the well.
-
Page 45: Decorative Stitching
DECORATIVE STITCHING Various decorative stitches can be sewn with this sewing machine. Gathering Shell tuck stitching Number on dial Stitch name Application Number Stitch name Application on dial Attaching zippers, Straight stitch basic stitching, (Center needle and sewing Shell tuck stitch Shell tuck stitching position) gathers or darning, etc. -
Page 46: Elastic Stitching
UTILITY STITCHES —————————————————————————————————————————————————— ■ Joining fabric Elastic stitching Put the edges of the two pieces of fabric together, and then place them under the presser foot with the fabric edges under the Number center of the presser foot. Stitch name Application on dial Then, start sewing the edges of the two... -
Page 47: Appendix
APPENDIX MAINTENANCE Simple sewing machine maintenance operations are described below. Oiling Changing the bulb Turn off the machine and unplug it. CAUTION Put 2 to 3 drops of oil at each of the points ● Unplug the power supply cord before indicated below. -
Page 48: Cleaning The Machine Surface
APPENDIX ————————————————————————————————————————————————————— Replace the sewing light bulb. Cleaning the shuttle race CAUTION ● Be sure to unplug the machine before cleaning it, otherwise injuries or an electric shock may occur. Turn off the machine and unplug it. Raise the needle and the presser foot, and then remove the presser foot and the needle. -
Page 49: Cleaning The Feed Dogs
Remove the hook by grasping its center post Attach the bobbin case, the presser foot and and pulling it out. the needle before using the machine. Cleaning the feed dogs CAUTION ● Make sure you unplug the machine before you clean it. Otherwise, you may get an electric shock or be injured. -
Page 50: Repacking The Machine
APPENDIX ————————————————————————————————————————————————————— Repacking the machine Note ● Remember to return the screw to its original Keep the carton and packing materials for future use. setting before starting your next project. When packing up the machine again, pack it properly as described below. ■... - Page 51 ■ Bobbin tension is too tight Loops appear on the wrong side of the fabric. a Wrong side b Surface c Upper thread d Lower thread e Loops appear on wrong side of fabric Solution Increase the tension by turning the upper tension- control dial to a higher number.
-
Page 52: Troubleshooting
APPENDIX ————————————————————————————————————————————————————— TROUBLESHOOTING If the machine stops operating correctly, check the following possible problems before requesting service. You can solve most problems by yourself. If you need additional help, the Brother Solutions Center offers the latest FAQs and troubleshooting tips. Visit us at [http://solutions.brother.com]. If the problem persists, contact your dealer or the nearest authorized service center. - Page 53 Symptom Possible cause How to put it right Reference The needle is bent or blunt. Replace the needle. page 20 You have not inserted the needle Insert the needle properly. page 20 properly. Replace the needle plate. The area around the hole in the nee- Contact your retailer or the nearest –...
- Page 54 APPENDIX ————————————————————————————————————————————————————— Symptom Possible cause How to put it right Reference You have not threaded the upper Thread the upper thread and wind thread properly or fitted the bobbin page 14, 16 the bobbin thread properly. properly. You have not fitted the spool prop- Fit the spool properly.
-
Page 55: Index
INDEX accessories ..............9 satin stitching ..............32 appliqués ..............41 seam ripper ..............37 sewing machine needles ..........19 shell tuck stitching ............43 basic stitching ...............33 shuttle hook removal ............47 blind hem stitching ............33 shuttle race cleaning .............47 bobbin ................14 spool pin ...............12 bobbin case .............. - Page 56 English XE4592-001 Printed in China...
Need help?
Do you have a question about the LS-2125i - Basic Sewing And Mending Machine and is the answer not in the manual?
Questions and answers
How do I instal the presser foot holder assembly
To install the presser foot holder assembly on the Brother LS-2125i:
1. Align the presser foot holder with the presser bar so that it fits into the slot.
2. Use the presser foot screw to secure the presser foot holder assembly in place.
3. Attach the appropriate presser foot to the holder for the stitching you plan to do.
This answer is automatically generated