Table of Contents
Advertisement
Quick Links
Advertisement
Table of Contents
Troubleshooting

Related Manuals for Philips FWM589/19


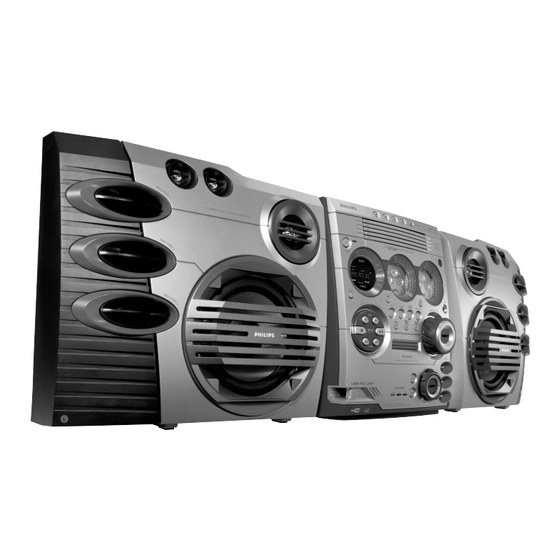
Summary of Contents for Philips FWM589/19
- Page 1 M589 M589 Mini Hi-Fi System...
- Page 2 ANTES DE USAR SU APARATO. CAUTION AVISO IMPORTANTE Use of controls or Philips Mexicana, S.A. de C.V. no se hace responsable por daños o desperfectos causados por: adjustments or performance – Maltrato, descuido o mal uso, presencia de of procedures other than insectos o roedores (cucarachas, ratones etc.).
- Page 4 Energy Star As an ENERGY STAR Partner, Philips has determined that this product meets the ENERGY STAR guidelines for energy efficiency.
- Page 5 Index English ------------------------------------------------ 6 Français -------------------------------------------- 29 Español --------------------------------------------- 52 -------------------------------------------------------- 75...
-
Page 6: Table Of Contents
Software installation ........14 Specifications ........... 26 Using MusicMatch software ......15 Connecting USB PC link ........15 Philips Sound Agent 2 ........16 Troubleshooting ......27~28 Enabling digital CD audio output ....16 Basic Operations Switching on/off ..........17 Switching to active mode ...... -
Page 7: General Information
General Information Refer to the type plate on the rear of the Do not block the vents system for identification and supply – In a cabinet, allows about 10cm (4 inches) of ratings. free space all around the system for adequate ventilation. -
Page 8: Functional Overview
Functional Overview £ ™ ‹ ¡ ∞ & ¤ § ⁄ & º ≥ • ª PREV•PRESET 4 (TITLE –) (í) Main unit and remote control NEXT•PRESET 3 (TITLE +) (ë) ECO POWER indicator – CD: selects a track or selects a title from MP3 –... -
Page 9: Control Buttons Available On The Remote Control Only
– Turns on/off the random play mode. modes are only available when the optional ¤ DISPLAY software, Philips Sound Agent 2 is activated – Displays the album and title name for MP3 disc. during USB PC Link application. ‹ –... -
Page 10: Connections
Connections VOLTAGE SELECTOR 110V- 127V 220V- 240V NOT FOR ALL VERSIONS Rear panel Game console Front panel... -
Page 11: Step 1: Connecting Fm/Mw Antennas
Connections Warning! Notes: – Please note that the voltage selector – Ensure that the speaker cables are correctly located at the rear of this system is connected. Improper connections may damage the preset at 220V from the factory. For system due to short-circuit. countries that operate at 110V-127V, –... -
Page 12: Step 6: Inserting Batteries Into The Remote Control
Connections Step 6: Inserting batteries into the remote control Open the battery compartment cover. Insert two batteries type R06 or AA, following the indications (+-) inside the compartment. Close the cover. Using the remote control to operate the system Aim the remote control directly at the remote sensor (iR) on the main unit. -
Page 13: Gameport Operations
Gameport Operations Press AUX•GAME until “GAMEPORT” is About Gameport display. Gameport allows you to connect your game console to this mini system which enables you to Press MODE (or GAME SOUND on enjoy a total game immersion experience remote) to select the type of sound setting through powerful sound output. -
Page 14: Usb Pc Link
Driver, Philips Sound Agent 2 and Software installation MusicMatch Jukebox software. Notes: – Minimum OS requirement for Philips Sound Agent 2: Windows 2000 or XP. – During installation, your previous MusicMatch Jukebox software on your PC will be replaced. Declarations Windows and Pentium are trademarks of Microsoft Corporation and Intel Corporation. -
Page 15: Using Musicmatch Software
FAQ (Frequently Asked Questions) stored in your USB PC Link installer disc or visit Add music files to My Music Library “www.audio.philips.com” for the latest update on FAQ. Add files to My Library by dragging and dropping audio tracks from anywhere in Connecting to USB PC Link Windows, into the My Library window. -
Page 16: Philips Sound Agent 2
To exit, select another active mode or press Ç. Philips Sound Agent 2 Philips Sound Agent 2 is a BONUS software provided with Philips Audio system to enhance the quality of MP3 Music playback via USB PC Link. -
Page 17: Basic Operations
Basic Operations Switching on/off Setting the clock The clock can be set in either 12-hour or Switching to active mode 24-hour mode ("11:59 " or "23:59" for example). ● Press CD, TUNER, AUX or USB PC LINK. (00: Switching to Eco Power standby mode ●... -
Page 18: Dimming System's Display Screen
All other sound effects (DSC, VAC or DBB) will be switched off automatically. ➜ If MAX SOUND is activated together with Philips Sound Agent 2, the PRESET and REVERB sound effect will be switched automatically to Neutral and No Environment modes... -
Page 19: Disc Operations
Disc Operations IMPORTANT! Basic playback controls – This system is designed for regular Load discs (page 3 - P4). discs. Therefore, do not use any accessories such as disc stabiliser rings or To play all discs on the disc trays disc treatment sheets, etc., as offered on ●... -
Page 20: Playing An Mp3 Disc
Disc Operations Playing an MP3 disc Repeat and shuffle You can select and change the various play modes before or during playback. TITLE T008 Repeat play Press REPEAT on the remote repeatedly to select : T001 A – to repeat playback of the current track. Load an MP3 disc. -
Page 21: Programming The Disc Tracks
Disc Operations Notes: Programming the disc tracks – If the total playing time reached 100 minutes or Programming tracks is possible when playback is if one of the programmed tracks has a number stopped. Up to 99 tracks can be stored in the greater than 30, then “—:—”... -
Page 22: Tuner Operations
Tuner Operations Press É Å on the main unit to start installation. IMPORTANT! ➜ “INSTALL TUNER” is displayed. Make sure the FM and MW antennas are ➜ All previously stored radio stations will be connected. replaced. ➜ Once completed, the last tuned radio station Tuning to radio stations will be played. -
Page 23: Selecting A Preset Radio Station
Tuner Operations Selecting a preset radio station ● In tuner mode, press í or ë. ➜ The preset number, radio frequency, and waveband are displayed. Deleting a preset radio station ● Press and hold Ç until “PRESET DELETED” is displayed. ➜... -
Page 24: Timer Operations
Timer Operations ● At the preset time, the selected sound Setting the timer source will be played for 30 minutes The system can switch on to CD, TUNER or before it switches to Eco Power standby USB PC LINK mode automatically at a preset mode (if no button is pressed within the time time, serving as an alarm to wake you up. -
Page 25: Setting The Sleep Timer
Timer Operations Other Connection Setting the sleep timer Listening to an external source The sleep timer enables the system to switch to You can listen to the sound of the connected Eco Power standby mode automatically at a external device through your system’s speakers. preset time. -
Page 26: Specifications
Specifications AMPLIFIER TUNER Output power ........6500 W PMPO FM wave range ........87.5 – 108 MHz ..............2 x 200 W RMS MW wave range (9 kHz) ..... 531 – 1602 kHz Signal-to-noise ratio ......≥ 62 dBA (IEC) MW wave range (10 kHz) ... -
Page 27: Troubleshooting
Do not open the system as there is a risk of electric shock. If a fault occurs, first check the points listed below before taking the system for repair. If you are unable to remedy a problem by following these hints, consult your dealer or Philips for help. -
Page 28: Troubleshooting
✔ Press and hold DEMO STOP on the main unit to switch The system displays features automatically and buttons start flashing. off the demonstration mode. Refer to the FAQ (Frequently Asked Questions) on the supplied CD-ROM or visit our website “www.audio.philips.com” for latest update on FAQ.
Need help?
Do you have a question about the FWM589/19 and is the answer not in the manual?
Questions and answers