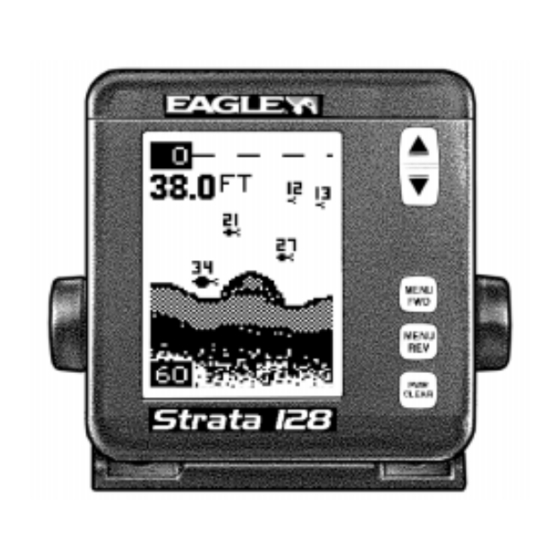
Eagle Strata 128 Portable Install And Operation Instructions
Eagle fish finder user manual
Hide thumbs
Also See for Strata 128 Portable:
Table of Contents
Advertisement
Strata 128 Plus
Strata 128 Plus
Strata 128 Plus
Strata 128 Plus
Strata 128 Plus
Strata 128 Por
Strata 128 Por
Strata 128 Por table
Strata 128 Por
Strata 128 Por
StrataV
StrataV
StrataV iew
StrataV
StrataV
INST
INST
ALLA
ALLA
INST
INST ALLA
INST
ALLA
ALLA TION AND OPERA
Strata 128
Strata 128
Strata 128
Strata 128
Strata 128
TION AND OPERA
TION AND OPERA
TION AND OPERA
TION AND OPERA TION
INSTR
INSTR
INSTR UCTIONS
INSTR
INSTR
iew
iew
iew
iew
UCTIONS
UCTIONS
UCTIONS
UCTIONS
1
table
table
table
table
TION
TION
TION
TION
®
Advertisement
Table of Contents

Related Manuals for Eagle Strata 128 Portable


Summary of Contents for Eagle Strata 128 Portable
- Page 1 Strata 128 Strata 128 Plus Strata 128 Plus Strata 128 Plus Strata 128 Plus Strata 128 Plus Strata 128 Por Strata 128 Por Strata 128 Por table Strata 128 Por Strata 128 Por StrataV StrataV StrataV iew StrataV StrataV INST...
-
Page 2: Table Of Contents
ASP (Advanced Signal Processing) ... 34 SIMULATOR ... 34 TROUBLESHOOTING ... 35 WARRANTY ... 38 Copyright © 1998, Eagle Electronics Copyright © 1998, Eagle Electronics Copyright © 1998, Eagle Electronics Copyright © 1998, Eagle Electronics Copyright © 1998, Eagle Electronics All features and specifications in this manual are subject to change All screens in this manual are simulated. -
Page 3: Introduction
INTRODUCTION Thank you for purchasing an Eagle sonar. Your sonar unit is a high quality sonar designed for both professional and novice fishermen. All of our sonars have an automatic feature that finds and displays the bottom, fish, structure, and more! All you have to do is press the on key. However, if you wish to fine tune the unit, all you have to do is press the menu key. -
Page 4: Transducer Installation
Transducer Installation The transducer included with your sonar is a transom mount transducer The “kick-up” mounting bracket helps prevent damage if the transducer strikes an object while the boat is moving. If the transducer does “kick- up”, the bracket can easily be pushed back in place without tools. Read this manual carefully before attempting the installation. -
Page 5: Shoot-Thru-Hull Vs. Transom Mounting
Shoot-thru-hull v.s. Transom Mounting (Strata 128 and Strata 128 Plus Only) Typically, shoot-thru-hull installations give excellent high speed opera- tion and good to excellent depth capability. There is no possibility of damage from floating objects. It can't be knocked off when docking or loading on the trailer. - Page 6 2. Slide the transducer between the two ratchets. Temporally slide the bolt though the transducer assembly and hold it against the transom. Looking at the transducer from the side, check to see if it will adjust so that its face is parallel to the ground. If it does, then the “A” position is correct for your hull.
- Page 7 CAUTION! CAUTION! CAUTION! CAUTION! CAUTION! CLAMP THE TRANSDUCER CABLE TO CLAMP THE TRANSDUCER CABLE TO CLAMP THE TRANSDUCER CABLE TO CLAMP THE TRANSDUCER CABLE TO CLAMP THE TRANSDUCER CABLE TO TRANSOM NEAR THE TRANSDUCER. THIS TRANSOM NEAR THE TRANSDUCER. THIS TRANSOM NEAR THE TRANSDUCER.
- Page 8 5. Remove the transducer from the bracket and re-assemble it with the cable passing through the bracket over the bolt as shown above. At- tach the transducer to the transom. Slide the transducer up or down until it’s aligned properly on the transom as shown above. Tighten the bracket’s mounting screws.
-
Page 9: Trolling Motor Bracket Installation
TROLLING MOTOR BRACKET INSTALLATION (StrataView Only) 1. Attach the TMB-S bracket to the transducer as shown below using the hardware supplied with the transducer. (Note: The internal tooth washer is supplied with the TMB-S.) INTERNAL TOOTH WASHER BOLT 2. Slide the adjustable strap supplied with the TMB-S through the slot in the transducer bracket and wrap it around the trolling motor. - Page 10 SHOOT-THRU-HULL (Strata 128 and Strata 128 Plus Only) The transducer installation inside a fiberglass hull must be in an area that does not have air bubbles in the resin or separated fiberglass layers. The sonar signal must pass through solid fiberglass. A success-...
-
Page 11: Shoot-Thru-Hull Installation
(TROLLING SPEED) Shoot-thru-hull Installation (Strata 128 and Strata 128 Plus Only) 1. Make certain the area is clean, dry, and free of oil or grease, then sand both the inside surface of the hull and the face of the transducer with 100 grit sandpaper. -
Page 12: Fish Arches
hull. Place the transducer into the epoxy, twisting and turning it to force any air bubbles out from under the transducer face. The face of the transducer should be parallel with the hull, with a minimum amount of epoxy between the hull and transducer. After the epoxy dries, route the cable to the sonar unit. -
Page 13: Power Connections
This unit has reverse polarity protection. No damage will occur if the power wires are reversed. However, the unit will not work until the wires are attached correctly. TO SONAR UNIT TO SPEED/TEMP SENSOR (STRATA 128 PLUS & STRATAVIEW ONLY) WARNING! BLACK WIRE 12 VOLT... -
Page 14: Bracket Installation
Bracket Installation - Permanent mount units only You can install the sonar unit on the top of a dash or from an overhead with the supplied bracket. It can also be installed in the dash with an optional IDA-3 mounting kit. If you use the supplied bracket, you may be interested in the optional GBSA-1 swivel bracket kit. -
Page 15: Installing The Batteries
"D" CELL BATTERY After installing the batteries, close the case and plug the power cable on the battery case into the Strata 128 Portable. Turn the sonar unit on. If it doesn't work, make certain the battery terminals are making good contact against the battery contacts. -
Page 16: Portable Transducer Assembly
receive about portable units result from stale batteries. Make certain the ones you buy are fresh. Always remove batteries from the battery compartment before storing the unit as dead batteries can leak and corrode the contacts. In cold weather the efficiency of dry cell batteries drops with the tempera- ture. -
Page 17: Speed/Temperature Sensors
Clean the chosen area of the hull before attaching the suction cup. Locate the transducer on the hull as shown below. Don't allow the bracket to go below the hull, as water pressure against it can cause the suction cup to come off at speed. -
Page 18: Sensor Chart
(Note: Do not use these sensors in any other combination.) ST-TBK = 1 speed sensor and 1 temperature display ST-T BK + TS-2BK = 2 temp sensors and one speed sensor ST-TBK + TS-2BK + TS-3BK = 3 temp sensors and one speed sensor TS-1BK = 1 temperature sensor TS-12BK = 2 temperature sensors TS-1BK + TS-2BK = 2 temperature sensors... - Page 19 TS-12 BK Sensor Chart (Note: Do not use these sensors in any other combina- tion.) TS-3 BK Three Temperature Sensors (Water, T-2, and T-3) STRATA PLUS OR STRATAVIEW POWER CABLE ST-TBK TS-2 BK TS-3 BK Three Temperature Sensors plus Speed (Water, T-2, T-3, and Speed) STRATA PLUS OR STRATAVIEW...
-
Page 20: Keyboard Basics
KEYBOARD BASICS The unit sounds a tone when you press any key. This tells you the unit has ac- cepted a command. PWR/CLEAR Use this key to turn the unit on. It also clears menu selections and the menus from the screen. This key also turns the unit off. -
Page 21: Operation
OPERATION MENUS This unit uses menus to guide you through the unit’s functions and features. The menu key accesses these features, allowing you to cus- tomize the unit to your particular needs and water conditions. All you have to do to leave one menu and enter another is press the menu key repeatedly. -
Page 22: Zoom
After you select the desired range, press the PWR key to clear the display. If you wait a few seconds, it will automatically clear. This unit has the following ranges: 10, 20, 40, 60, 120, 240, 480, and 900 feet. 5, 10, 20, 40, 60, 100, 200, and 300 meters. - Page 23 This means the unit is tracking the bottom in a zoom window, always keeping it on the display. Press the up arrow key to decrease the zoom size, press the down arrow key to increase the zoom size. When the unit is switched into the zoom mode, the letters “ZM”...
-
Page 24: Sensitivity
SENSITIVITY The sensitivity menu lets you control the unit’s ability to pick up echoes. A low sensitivity level excludes much of the bottom information, fish signals, and other detail. High sensitivity settings lets you see features, but it can also clutter the screen with noise and other unwanted signals. Typically, the best sensitivity level shows a good, solid bottom signal with grayline. -
Page 25: Fish Id
® Grayline is adjustable. Since it shows the difference between strong and weak echoes, changing the level may require a different sensitivity setting. To change the Grayline level, first press the MENU key until the Grayline menu appears. Now press the up arrow key to increase the level, the down arrow to decrease it. -
Page 26: Fish Track
The Fish ID feature can’t be used when the unit is in the manual mode. If you turn the automatic feature off, the Fish ID feature will automatically be turned off, also. FISH TRACK™ This unit automatically displays the depth of a target when the Fish ID feature places a fish symbol on the screen as shown below. -
Page 27: Chart Speed
digital depth display are read from the center element only. To turn the TargetTrack feature off, simply press the MENU key until its menu appears as shown at right, then press the down arrow key. CHART SPEED The rate echoes scroll across the screen is called the chart speed. -
Page 28: Display Mode
DISPLAY MODE The Strata 128 has three different screen modes. The Strata 128 Plus and Strataview both have eight modes. To change modes, press the MENU key until the “DISP MODE” (Display Mode) menu appears. Then press the up or down arrow keys until the desired mode number appears. The modes... - Page 29 STRATA 128 PLUS and STRATAVIEW ONLY CHT 1 (Chart #1) This is the default mode used when the unit is first turned on. It has the following features: 1. Automatic On 2. Fish ID Feature On 3. Digital Depth Display On...
- Page 30 STRATA 128 PLUS and STRATAVIEW ONLY (cont.) CHT 4 (Chart #4) Same as Chart-1, but with water tempera- ture and speed added. CHT 5 (Chart #5) This is the High Speed Scroll mode. It shifts the chart speed into high gear, scrolling ech- oes at a high rate.
- Page 31 Chart 2 and 4, when more than one temperature probe is connected to a Strata 128 Plus or a StrataView. To do this, press a MENU key until the "TEMP PROBE" menu appears as shown at right.
-
Page 32: Depth Alarms
ALARMS FISH ALARM The Fish Alarm sounds a tone when a fish symbol appears on the screen. To use the fish alarm, press the menu key until the “FISH ALARM” menu appears on the screen. Now press the up arrow key to turn the alarm on. Repeat the above steps to turn the fish alarm off. -
Page 33: Back Light
Deep Alarm The deep alarm adjusts the same as the shallow alarm. Use the “DEEP ALARM” menu to adjust the deep alarm. When the bottom signal goes deeper than the setting, an alarm tone sounds. LIGHTS The display is backlighted for night use. To turn the backlights on or off, press the menu key repeatedly until the BACK LIGHT menu appears. -
Page 34: Asp (Advanced Signal Processing)
shows a graph of the contrast. The screen will also show the effects of the change. If you reach the maximum or minimum level, a tone sounds alerting you to the limits. The menu will clear automatically after a few seconds or you can press the PWR key to clear the screen. -
Page 35: Troubleshooting
TROUBLESHOOTING - IMPORTANT INFORMATION! If your unit is not working, or if you need technical help, please use the following troubleshooting section before contacting the factory customer service department. It may save you the trouble of returning your unit. Unit won’t turn on: 1. - Page 36 the digital will flash continuously. It may change the range to limits far greater than the water you are in. If this happens, place the unit in the manual mode, then change the range to a realistic one, (for example, 0- 100 feet) and increase the sensitivity.
-
Page 37: Electrical Noise
ELECTRICAL NOISE A major cause of sonar problems is electrical noise. This usually appears on the sonar’s display as random patterns of dots or lines. In severe cases, it can completely cover the screen with black dots, or cause the unit operate erratically, or not at all. -
Page 38: Warranty
EAGLE ELECTRONICS FULL ONE-YEAR WARRANTY “We", “our”, or “us” refers to EAGLE ELECTRONICS, a division of LEI, the manufacturer of this product. “You” or “your” refers to the first person who purchases this product as a consumer item for personal, family, or household use. -
Page 39: How To Obtain Service
How to Obtain Service (Canadian Customers Only) We back your investment in quality products with quick, expert service and genuine Eagle replacement parts. If you need service or repairs, contact the Eagle Factory Customer Service Department at the toll-free number listed below. A technician may be able to solve the problem and save you the inconvenience of returning your unit. -
Page 40: Eagle Electronics Po Box
180 days rather than one year. For further details, please call us at the above number. Eagle Electronics may find it necessary to change or end our shipping policies, regulations, and special offers at any time. We reserve the right to do so without notice.
Need help?
Do you have a question about the Strata 128 Portable and is the answer not in the manual?
Questions and answers
I need the part round to fix my strata 128 on my boat I need the part number and where can I find it in montreal, canada
The document does not provide a specific part number for the Eagle Strata 128 Portable. However, for service or accessory orders in Canada, including Montreal, you can contact:
Lowrance/Eagle Canada
919 Matheson Blvd. E.
Mississauga, Ontario L4W 2R7
Fax: 416-629-3118
You may also contact your local marine dealer for assistance with parts and service.
This answer is automatically generated