Garmin GPSMAP 696 Owner's Manual
Portable aviation receiver
Hide thumbs
Also See for GPSMAP 696:
- Owner's manual (240 pages) ,
- Quick reference manual (44 pages) ,
- Declaration of conformity (1 page)
Table of Contents
Advertisement
Quick Links
Advertisement
Table of Contents

Related Manuals for Garmin GPSMAP 696


Summary of Contents for Garmin GPSMAP 696
- Page 1 GPSMAP ® 695/696 Portable Aviation Receiver Owner’s Manual...
- Page 3 OVERVIEW GPS NAVIGATION FLIGHT PLANNING HAZARD AVOIDANCE ADDITIONAL FEATURES APPENDICES INDEX...
- Page 5 Garmin. Garmin hereby grants permission to download a single copy of this manual and of any revision to this manual onto a hard drive or other electronic storage medium to...
- Page 6 Terrain data is obtained from third party sources. Garmin is not able to independently verify the accuracy of the terrain data.
- Page 7 System and is solely responsible for its accuracy and maintenance. The GPS system is subject to changes which could affect the accuracy and performance of all GPS equipment. Portions of the Garmin GPSMAP 695/696 utilize GPS as a precision electronic NAVigation AID (NAVAID). Therefore, as with all NAVAIDs, information presented by the GPSMAP 695/696 can be misused or misinterpreted and, therefore, become unsafe.
- Page 8 FAA/FCC regulations. NOTE: The Garmin GPSMAP 695/696 has a very high degree of functional integrity. However, the pilot must recognize that providing monitoring and/or self-test capability for all conceivable system failures is not practical. Although unlikely, it may be possible for erroneous operation to occur without a fault indication shown by the GPSMAP 695/696.
- Page 9 NOTE: The data contained in the terrain and obstacle databases comes from government agencies. Garmin accurately processes and cross-validates the data, but does not guarantee the accuracy and completeness of the data. NOTE: This product, its packaging, and its components contain chemicals known to the State of California to cause cancer, birth defects, or reproductive harm.
- Page 10 • Added menu options to WPT page for viewing departure and destination airports. • Added displaced runway threshold distance on airport review page. • Added suggested indicated altitude on E6B page. RR-10 Garmin GPSMAP 695/696 Owner’s Manual 190-00919-00 Rev. G...
- Page 11 Added Icing Forecast info. • Updated Chartview and FliteChart info. • Updated AOPA Airport Directory to just Airport Directory where applicable. • Updated System Messages. • Updated Data Field Options • Updated database information. RR-11 190-00919-00 Rev. G Garmin GPSMAP 695/696 Owner’s Manual...
- Page 12 Correct missing ‘Mark’ waypoint operation (695 units only) System Software Version 5.00-6.00 changes: • Added GDL 39 support August, System Software Version 6.00-6.20 changes: • Added TargetTrend 2012 ™ • Added GDL 39 Serial Pass-Through RR-12 Garmin GPSMAP 695/696 Owner’s Manual 190-00919-00 Rev. G...
-
Page 13: Table Of Contents
2.4 Using Map Displays ......................46 Map Orientation......................... 47 Map Range ........................48 Map Panning ........................49 Measuring Bearing and Distance ..................51 Topography ........................52 Satellite View ........................53 Map Symbols ........................54 190-00919-00 Rev. G Garmin GPSMAP 695/696 Owner’s Manual... - Page 14 4.1 Weather Information ....................103 SiriusXM Weather (696 only) .................... 104 Data Link weather (FIS-B) ....................124 4.2 Terrain ..........................141 Terrain Information ......................142 Obstacle Information ......................142 Terrain and Obstacle Color Code..................143 Garmin GPSMAP 695/696 Owner’s Manual 190-00919-00 Rev. G...
- Page 15 Exporting Track Logs and User Waypoints ................205 Importing/Exporting Flight Plans ..................205 Installation & Interfacing Information ................207 Connecting the Power/Data Cable ..................207 Connecting to a Garmin VHF Comm Radio ................ 208 190-00919-00 Rev. G Garmin GPSMAP 695/696 Owner’s Manual...
- Page 16 AOPA Airport Directory Notice ..................256 AC-U-KWIK LICENSE AGREEMENT ..................256 Weather Data Warranty ....................257 XM Satellite Radio Service Agreement ............... 258 irius FCC Compliance....................... 258 Industry Canada Compliance .................... 258 Index ..........................Index-1 Garmin GPSMAP 695/696 Owner’s Manual 190-00919-00 Rev. G...
-
Page 17: Section 1 Overview
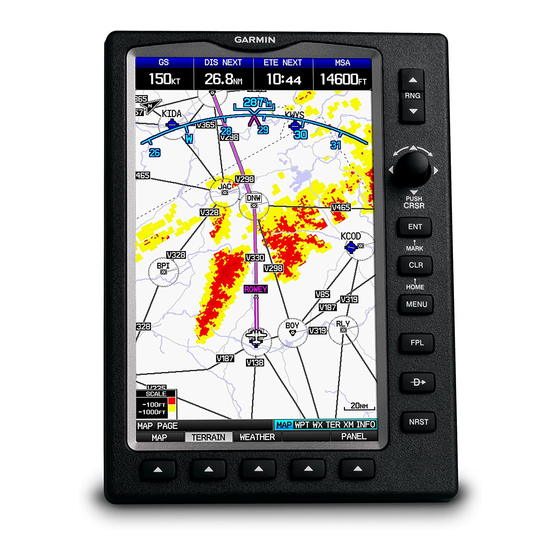
VGA (800x480) color display. 7” WVGA (800x480) Color Display Power Button SD Card Slot External GPS Antenna Connector Audio (Head- phones/Line Out) USB Connector External Power/Serial Port Connector Battery Pack Backlit Keypad Unit Overview 190-00919-00 Rev. G Garmin GPSMAP 695/696 Owner’s Manual... -
Page 18: Battery Care And Charging
• Do not use a sharp object to remove the battery. • Do not recharge the battery out of the unit. • Only replace with a Garmin Nickel Metal Hydride battery pack. Using another battery presents a risk of fire or explosion. To purchase a replacement battery, see your Garmin dealer or the Garmin Web site. -
Page 19: Charging The Battery Pack
Applying external power to the GPSMAP 695/696 automatically turns on the unit for full operation. If the battery is present and needs to be charged, the external power source charges the battery while the unit is in use. 190-00919-00 Rev. G Garmin GPSMAP 695/696 Owner’s Manual... -
Page 20: Turning The Unit On/Off
The first time the unit is turned on, the receiver must collect satellite data and establish its present location. To ensure proper initialization, the GPSMAP 695/696 is shipped from the factory in AutoLocate mode, which allows the receiver to “find itself” anywhere in the world. Garmin GPSMAP 695/696 Owner’s Manual 190-00919-00 Rev. G... - Page 21 Press the ENT Key to acknowledge this information. Database Initialization After acknowledgement of the database information, the pilot is prompted to acknowledge a data link weather advisory. Data link Weather Advisory Press the ENT Key to acknowledge this information. 190-00919-00 Rev. G Garmin GPSMAP 695/696 Owner’s Manual...
-
Page 22: Gps Receiver Status
• Lost Satellite Reception—the receiver is no longer tracking enough satellites for a 2D or 3D fix Constellation Receiver Status Diagram Signal Strength Bar PRN Number 45° Above PRN Number Horizon Horizon GPS Status (Info Page) Garmin GPSMAP 695/696 Owner’s Manual 190-00919-00 Rev. G... -
Page 23: Acquiring Satellites
- No bar—Receiver is looking for the indicated satellite - Gray bar—Receiver has collected the necessary data and the satellite signal can be used - Green bar—Satellite is being used for the GPS solution 190-00919-00 Rev. G Garmin GPSMAP 695/696 Owner’s Manual... -
Page 24: Gpsmap 695/696 Controls
Turn the FMS Joystick clockwise to access a dropdown menu Turn the FMS Joystick to change the selected value within the highlighted field Move the FMS Joystick to highlight fields or move the map pointer when interacting with the page Garmin GPSMAP 695/696 Owner’s Manual 190-00919-00 Rev. G... - Page 25 Press to display the Nearest Page for viewing the nearest airports, intersections, NDBs, VORs, waypoints, frequencies, and airspaces Softkey Press to select the softkey shown above the bezel key on the unit Selection Keys 190-00919-00 Rev. G Garmin GPSMAP 695/696 Owner’s Manual...
-
Page 26: Accessing System Functionality
3) Press the ENT Key to select the desired option. 4) Press the FMS Joystick, the CLR Key, the EXIT Softkey, or the MENU Key to remove the menu and cancel the operation. Garmin GPSMAP 695/696 Owner’s Manual 190-00919-00 Rev. G... -
Page 27: Data Entry
(RECENT WPTS), nearest airports (NRST APTS), and flight plan waypoints (FPL WPTS). The GPSMAP 695/696 automatically fills in the identifier, facility and city fields with the information for the selected waypoint. 190-00919-00 Rev. G Garmin GPSMAP 695/696 Owner’s Manual... - Page 28 FMS Joystick to move the cursor, until the fields are complete. d) Press the ENT Key to confirm entry. 4) Press the FMS Joystick or the CLR Key to cancel data entry (the field reverts back to its previous information). Garmin GPSMAP 695/696 Owner’s Manual 190-00919-00 Rev. G...
-
Page 29: Pages
Selecting a Main Page using the FMS Joystick: 1) If necessary press the FMS Joystick to begin interaction with the Navigation Bar. 2) Turn the FMS Joystick until the desired page is selected (MAP, WPT, WX, TER, XM, INFO). 190-00919-00 Rev. G Garmin GPSMAP 695/696 Owner’s Manual... -
Page 30: Main Pages
Overview • Main Pages Traffic Page (TRF) Map Page (MAP) Waypoint Page (WPT) XM Audio Page (XM) (optional) Weather Page (WX) (optional) Info Page (INFO) Terrain Page (TER) Garmin GPSMAP 695/696 Owner’s Manual 190-00919-00 Rev. G... - Page 31 • ATC (Air Route Traffic Control Center)—bearing, distance, and frequency. • FSS (Flight Service Station)—name, bearing, distance, frequency, and VOR (if applicable). • ASPC (Airspace)—name, time to entry (when applicable), and status. 190-00919-00 Rev. G Garmin GPSMAP 695/696 Owner’s Manual...
- Page 32 Nearest User Waypoints (USR) Visual Reporting Point (VRP) (Atlantic Unit) Nearest Cities (CTY) Nearest Airport Weather (WX) Nearest ARTCC (ATC) Nearest VORs (VOR) Nearest FSS (FSS) Nearest NDBs (NDB) Nearest Airspace (ASPC) Nearest Intersections (INT) Garmin GPSMAP 695/696 Owner’s Manual 190-00919-00 Rev. G...
- Page 33 Selecting the main menu pages: 1) Press the MENU Key twice. The Main Menu is displayed. 2) Turn or move the FMS Joystick to highlight the desired menu option and press the ENT Key. 190-00919-00 Rev. G Garmin GPSMAP 695/696 Owner’s Manual...
-
Page 34: Main Page Softkeys
When a softkey function is disabled, the softkey label is subdued (dimmed). Softkey Softkey Names (Displayed) Bezel Mounted Softkeys (Press) Softkeys (WPT Page) Garmin GPSMAP 695/696 Owner’s Manual 190-00919-00 Rev. G... -
Page 35: Map Page Softkeys
IFR MAP Softkey selected VFR MAP Displays VFR map information and softkeys LOW AWY Low Altitude (Victor) Airways displayed HIGH AWY High Altitude Airways (Jet Routes) displayed BACK Returns to top-level softkeys 190-00919-00 Rev. G Garmin GPSMAP 695/696 Owner’s Manual... -
Page 36: Waypoint Page Softkeys
Animates NEXRAD Radar and Satellite Mosaic weather INFO Displays XM Information LEGEND Displays weather legends TERRAIN PAGE SOFTKEYS SETTINGS DISABLE Terrain (TER) Page Softkeys SETTINGS Displays the Terrain Setup Page DISABLE Toggles terrain alerts on/off. Garmin GPSMAP 695/696 Owner’s Manual 190-00919-00 Rev. G... - Page 37 (Unrestricted): All traffic is displayed. INFO Softkey selected STATIONS Displays ADS-B ground station(s) information. SETUP Select to set pressure altitude sensor on or off in the GDL 39. EXIT Returns to the Traffic Page. 190-00919-00 Rev. G Garmin GPSMAP 695/696 Owner’s Manual...
-
Page 38: Info Page Softkey
MUTE VOL - Decreases SiriusXM audio volume VOL + Increases SiriusXM audio volume MUTE Toggles SiriusXM audio on/off BACK Returns to top-level softkeys INFO PAGE SOFTKEY MESSAGES MESSAGES Displays system status messages Garmin GPSMAP 695/696 Owner’s Manual 190-00919-00 Rev. G... -
Page 39: Flight Planning Softkeys
Displays the available flight plans to import from the SD Card EXPORT Exports the selected flight plan EXIT Exits the Flight Plan Pages VERTICAL NAVIGATION (VNAV) PAGE SOFTKEYS CAPTURE EXIT CAPTURE Captures/cancels VNAV profile EXIT Exits the Flight Plan Pages 190-00919-00 Rev. G Garmin GPSMAP 695/696 Owner’s Manual... -
Page 40: Nearest Page Softkeys
EXIT Exits the Nearest Pages Various softkeys revert to the previous level after 45 seconds of inactivity (e.g., PAN MAP, VOLUME, etc), other softkeys require manual de-selection (e.g., TERRAIN, WEATHER, PANEL, etc.). Garmin GPSMAP 695/696 Owner’s Manual 190-00919-00 Rev. G... -
Page 41: System Settings
System Setup Menu Restoring system setting defaults: 1) Press the MENU Key twice to display the Main Menu. 2) Turn or move the FMS Joystick to highlight ‘System Setup...’ and press the ENT Key. 190-00919-00 Rev. G Garmin GPSMAP 695/696 Owner’s Manual... -
Page 42: Display
1) Press the MENU Key twice to display the Main Menu. 2) Turn or move the FMS Joystick to highlight ‘System Setup...’ and press the ENT Key. 3) With ‘Display’ highlighted press the ENT Key. Garmin GPSMAP 695/696 Owner’s Manual 190-00919-00 Rev. G... - Page 43 1) Press the MENU Key twice to display the Main Menu. 2) Turn or move the FMS Joystick to highlight ‘System Setup...’ and press the ENT Key. 3) With ‘Display’ highlighted press the ENT Key. 190-00919-00 Rev. G Garmin GPSMAP 695/696 Owner’s Manual...
-
Page 44: Sound
1) Press the MENU Key twice to display the Main Menu. 2) Turn or move the FMS Joystick to highlight ‘System Setup...’ and press the ENT Key. 3) Turn or move the FMS Joystick to highlight ‘Sound’ and press the ENT Key. Garmin GPSMAP 695/696 Owner’s Manual 190-00919-00 Rev. G... -
Page 45: Units
4) With the desired unit highlighted adjust the unit measurement by turning the FMS Joystick. 5) Press the FMS Joystick, the CLR Key, the EXIT Softkey or the MENU Key to remove the menu. Units Setup Page 190-00919-00 Rev. G Garmin GPSMAP 695/696 Owner’s Manual... -
Page 46: Date & Time
4) Move the FMS Joystick to highlight the desired field, and select the desired option by turning the FMS Joystick. 5) Press the FMS Joystick, the CLR Key, the EXIT Softkey or the MENU Key to remove the menu. Garmin GPSMAP 695/696 Owner’s Manual 190-00919-00 Rev. G... -
Page 47: Interface
4) Move the FMS Joystick to highlight the desired field, and select the desired option by turning the FMS Joystick. 5) Press the FMS Joystick, the CLR Key, the EXIT Softkey or the MENU Key to remove the menu. 190-00919-00 Rev. G Garmin GPSMAP 695/696 Owner’s Manual... -
Page 48: Power
ENT Key. 3) Turn or move the FMS Joystick to highlight ‘Power’ and press the ENT Key. 4) Turn the FMS Joystick to select ‘On’ or ‘Off’, and press the ENT Key. Garmin GPSMAP 695/696 Owner’s Manual 190-00919-00 Rev. G... -
Page 49: Setting Airport Criteria
5) Move the FMS Joystick to highlight the desired field and turn the FMS Joystick to select the desired option from the menu. Press the ENT Key if necessary to highlight the next field. 190-00919-00 Rev. G Garmin GPSMAP 695/696 Owner’s Manual... -
Page 50: Utilities
5) Press the MENU Key. 6) With ‘Restore Default’ highlighted press the ENT Key. UTILITIES Refer to Appendix F for information on Flight Log, Track Log, E6B, Aircraft Profile, and Weight & Balance. Garmin GPSMAP 695/696 Owner’s Manual 190-00919-00 Rev. G... -
Page 51: Section 2 Gps Navigation
The page layout of the Map, Terrain, and Info Pages can be independently configured by the user. Page Layout Map Only Map with Panel 4 Data Bar Fields 8 Data Bar Fields 12 Data Bar Fields 6 Data Bar Fields and HSI Page Layout 190-00919-00 Rev. G Garmin GPSMAP 695/696 Owner’s Manual... -
Page 52: Data Bar Fields
4) Turn the FMS Joystick to access the list of options, then turn or move the FMS Joystick to highlight the desired option and press the ENT Key. Data Bar Field Selection Garmin GPSMAP 695/696 Owner’s Manual 190-00919-00 Rev. G... -
Page 53: Data Bar Field Options
• Estimated Time Arrival HUMIDITY) (DESTINATION) (ETA DEST) • Weather (Temperature) (WX TEMP) • Estimated Time of Arrival (NEXT) (ETA NEXT) • Weather (Wind) (WX WIND) • Estimated Time to VNAV (VNAV Time) 190-00919-00 Rev. G Garmin GPSMAP 695/696 Owner’s Manual... -
Page 54: Compass Arc
(similar to the bug indicator on the HSI) can be set to ‘Bearing’ (default), ‘Course to Steer’, a specific heading reference (‘User Selected’), or ‘Off’. Garmin GPSMAP 695/696 Owner’s Manual 190-00919-00 Rev. G... -
Page 55: Gps Navigation
4) Move the FMS Joystick to highlight the ‘Compass Arc’ field. 5) Turn the FMS Joystick to access the ‘On/Off’ drop down list. 6) Turn or move the FMS Joystick to highlight ‘Off’, and press the ENT Key. 190-00919-00 Rev. G Garmin GPSMAP 695/696 Owner’s Manual... -
Page 56: Panel
Course to Steer is the recommended direction to steer in order to reduce cross-track error and return to the course line. The Course Deviation Indicator, or needle, indicates how far off course, left or right, based on its placement along the course deviation scale. Garmin GPSMAP 695/696 Owner’s Manual 190-00919-00 Rev. G... -
Page 57: Changing The Cdi Scale
ENT Key. The ‘Set CDI Scale’ Menu appears. 3) Turn or move the FMS Joystick to highlight the desired menu option, and press the ENT Key. Map Page Menu Set CDI Scale Menu 190-00919-00 Rev. G Garmin GPSMAP 695/696 Owner’s Manual... -
Page 58: Setting The Bug Indicator
2) Turn or move the FMS Joystick to highlight ‘Set OBS and Hold’, and press the ENT Key. 3) Turn the FMS Joystick to select the desired course to the destination, and press the ENT Key. Garmin GPSMAP 695/696 Owner’s Manual 190-00919-00 Rev. G... -
Page 59: Vertical Navigation (Vnav)
At 500 ft above the target altitude, the “Approaching Target Altitude” message appears, the ‘Estimated Time To VNAV’ goes blank, and the VNAV indicator disappears from the HSI. 190-00919-00 Rev. G Garmin GPSMAP 695/696 Owner’s Manual... -
Page 60: Using The Vnav Feature
2) Turn the FMS Joystick to select the Vertical Navigation Page. 3) Press the FMS Joystick to activate the cursor. 4) Enter the desired profile into the fields, and press the EXIT Softkey. Garmin GPSMAP 695/696 Owner’s Manual 190-00919-00 Rev. G... - Page 61 3) Turn or move the FMS Joystick to highlight ‘Capture VNAV Profile’ or ‘Cancel Capture’, and press the ENT Key. Selecting ‘Capture VNAV Profile’ centers the VNAV indicator on the HSI (when displayed). 190-00919-00 Rev. G Garmin GPSMAP 695/696 Owner’s Manual...
-
Page 62: Using Map Displays
• Map Pointer information (distance and bearing to pointer, location of pointer, name, and other pertinent information) • Map range • Aircraft icon (representing present position) • Flight plan legs • User waypoints • Track vector Garmin GPSMAP 695/696 Owner’s Manual 190-00919-00 Rev. G... -
Page 63: Map Orientation
2) Turn or move the FMS Joystick to highlight ‘Set Up Map’ and press the ENT Key. 3) Turn the FMS Joystick to highlight the ‘General’ Menu. a) Move the FMS Joystick to highlight the ‘Orientation’ field. 190-00919-00 Rev. G Garmin GPSMAP 695/696 Owner’s Manual... -
Page 64: Map Range
To change the map range on any map, use the down arrow on the RNG Key to zoom in (decreasing), or the up arrow to zoom out (increasing). When the selected range exceeds the resolution of the map data, ‘overzoom’ appears below the map range scale. Garmin GPSMAP 695/696 Owner’s Manual 190-00919-00 Rev. G... -
Page 65: Map Panning
• Highlight and select locations on the map • Review information for a selected airport, NAVAID, or user waypoint • Designate locations for use in flight planning • View airspace and airway information 190-00919-00 Rev. G Garmin GPSMAP 695/696 Owner’s Manual... -
Page 66: Panning The Map
2) Move the FMS Joystick to move the Map Pointer around the map. 3) Press the FMS Joystick to remove the Map Pointer and re-center the map on the aircraft’s current position. Garmin GPSMAP 695/696 Owner’s Manual 190-00919-00 Rev. G... -
Page 67: Measuring Bearing And Distance
4) To exit the Measure Bearing/Distance option, press the FMS Joystick; or select ‘Stop Measuring’ from the Page Menu and press the ENT Key. Reference Point Measurement Line Pointer Map Page Menu Map Page (Measure Distance) 190-00919-00 Rev. G Garmin GPSMAP 695/696 Owner’s Manual... -
Page 68: Topography
4) Move the FMS Joystick to highlight the ‘Topo Shading’ field. 5) Turn the FMS Joystick to select ‘On’ or ‘Off’, and press the ENT Key. TOPO Softkey VFR MAP Softkey Topographic Data (Map Page) Garmin GPSMAP 695/696 Owner’s Manual 190-00919-00 Rev. G... -
Page 69: Satellite View
4) Move the FMS Joystick to highlight the ‘Satellite View’ field. 5) Turn the FMS Joystick to select ‘On’ or ‘Off’, and press the ENT Key. SAT VIEW Softkey VFR MAP Softkey Satellite View (Map Page) 190-00919-00 Rev. G Garmin GPSMAP 695/696 Owner’s Manual... -
Page 70: Map Symbols
4) Move the FMS Joystick to highlight the ‘Detail Level’ field. 5) Turn the FMS Joystick to select the desired detail level (‘Most’, ‘More’, ‘Normal’, ‘Less’, or ‘Least’), and press the ENT Key. Garmin GPSMAP 695/696 Owner’s Manual 190-00919-00 Rev. G... -
Page 71: Airports & Navaids
6) Using the FMS Joystick select the desired option and press the ENT Key. 7) Press the FMS Joystick, the CLR Key, or the EXIT Softkey to return to the Map Page with the changed settings. 190-00919-00 Rev. G Garmin GPSMAP 695/696 Owner’s Manual... -
Page 72: Cities & Roads
7) Press the FMS Joystick, the CLR Key, or the EXIT Softkey to return to the Map Page with the changed settings. Map Setup Page (City Category) Map Setup Page (Road Category) Garmin GPSMAP 695/696 Owner’s Manual 190-00919-00 Rev. G... -
Page 73: Airspace
High Altitude Airways (or Jet Routes) primarily serve airliners, jets, turboprops, and turbocharged piston aircraft operating above 18,000 feet MSL. Jet Routes start at 18,000 feet MSL and extend upward to 45,000 feet MSL (altitudes above 18,000 feet 190-00919-00 Rev. G Garmin GPSMAP 695/696 Owner’s Manual... -
Page 74: Displaying/Removing Airways
1) From the Map Page, press the MAP Softkey. 2) Press the IFR MAP Softkey (if necessary). 3) With the LOW AWY and/or HIGH AWY Softkeys selected, press the FMS Joystick to display the Map Pointer. Garmin GPSMAP 695/696 Owner’s Manual 190-00919-00 Rev. G... - Page 75 5) Press the ENT Key to display the review page for the airway. Low Altitude Airway Review Page 6) Press the FMS Joystick, the CLR Key, or the ENT Key to exit the review page and return to the Map Page. 190-00919-00 Rev. G Garmin GPSMAP 695/696 Owner’s Manual...
-
Page 76: Waypoints
• Runway lighting type: No Lights, Part Time, Full Time, Unknown, or PCL Freq (for pilot-controlled lighting) • COM Availability: TX (transmit only), RX (receive only), PT (part time), * (additional information available) Garmin GPSMAP 695/696 Owner’s Manual 190-00919-00 Rev. G... - Page 77 (turning it counter-clockwise brings up the waypoint selection submenu - press the CLR Key to remove it), or move the FMS Joystick to select the facility name, or city field. 4) Press the ENT Key. 190-00919-00 Rev. G Garmin GPSMAP 695/696 Owner’s Manual...
-
Page 78: Selecting A Runway
5) Move the FMS Joystick to place the cursor in the ‘Runways’ Box, on the runway designator. Runways Box (Waypoint Page) 6) Turn the FMS Joystick to display the desired runway (if more than one) for the selected airport. Garmin GPSMAP 695/696 Owner’s Manual 190-00919-00 Rev. G... -
Page 79: Frequencies
2) Press the FMS Joystick to activate the cursor. 3) Move the FMS Joystick to place the cursor in the ‘Frequencies’ Box, on the frequency denoted with an *. Additional Frequency Information (Waypoint Page) 190-00919-00 Rev. G Garmin GPSMAP 695/696 Owner’s Manual... -
Page 80: Nearest Information
From the User Waypoint Information Page, press the DELETE or EDIT softkeys to make changes to the selected user waypoint. 5) To return to the Nearest Page, press the FMS Joystick, the ENT Key, or the CLR Key. Garmin GPSMAP 695/696 Owner’s Manual 190-00919-00 Rev. G... -
Page 81: Nearest Airport Criteria
PRIVATE or HELIPORT Softkeys. Setting nearest airport criteria: 1) With the Nearest Airports Page displayed, press the MENU Key. 2) Turn or move the FMS Joystick to select 'Set Airport Criteria' from the Page Menu. 190-00919-00 Rev. G Garmin GPSMAP 695/696 Owner’s Manual... -
Page 82: Weather Information
3) Turn the FMS Joystick clockwise to begin entering an airport identifier (turning it counter-clockwise brings up the waypoint selection submenu - press the CLR Key to remove it). 4) Press the ENT Key. Garmin GPSMAP 695/696 Owner’s Manual 190-00919-00 Rev. G... - Page 83 5) Turn the FMS Joystick to scroll up or down on the page. 6) To return to the Nearest Airport Weather Page, press the FMS Joystick, the ENT Key, or the CLR Key. Nearest Airport Weather Page Weather Information Page 190-00919-00 Rev. G Garmin GPSMAP 695/696 Owner’s Manual...
-
Page 84: Intersections
Select an NDB: 1) From the Waypoint Page, press the INFO Softkey if necessary. 2) Press the FMS Joystick to activate the cursor. Garmin GPSMAP 695/696 Owner’s Manual 190-00919-00 Rev. G... -
Page 85: Vors
- press the CLR Key to remove it), or move the FMS Joystick to select the facility name, or city field. 4) Press the ENT Key. 190-00919-00 Rev. G Garmin GPSMAP 695/696 Owner’s Manual... -
Page 86: User Waypoints
Main Menu (User Waypoints Selected) c) Press the NEW Softkey. The message “Create a New User Waypoint?” message is displayed. The current aircraft position is the default location of the new waypoint. Garmin GPSMAP 695/696 Owner’s Manual 190-00919-00 Rev. G... - Page 87 Turn or move the FMS Joystick to highlight the desired symbol from the menu, and press the ENT Key. Symbol Field (Selected) User Waypoint Name Field New Waypoint Window (Symbol Selected) 190-00919-00 Rev. G Garmin GPSMAP 695/696 Owner’s Manual...
- Page 88 EDIT Softkey. The Edit Waypoint Window is displayed. 4) Move the cursor to the desired field(s) and make any necessary changes (to edit the Reference Waypoints, press the REF WPTS Softkey). 5) With ‘Done’ highlighted, press the ENT Key. Garmin GPSMAP 695/696 Owner’s Manual 190-00919-00 Rev. G...
-
Page 89: Deleting User Waypoints
5) Press the DELETE Softkey. ‘No’ is highlighted in the confirmation window. 6) Highlight ‘Yes’ and press the ENT Key. User Waypoints can also be deleted by ‘Symbol’ or ‘Distance’ from the User Waypoints Page Menu. 190-00919-00 Rev. G Garmin GPSMAP 695/696 Owner’s Manual... -
Page 90: Airspace
4) Press the ENT Key to display the Airspace Information Page. 5) Press the FREQS Softkey (if available) to display frequency and additional airport information similar to the Waypoint Information Page. Nearest Airspace Page Airspace Information Page Garmin GPSMAP 695/696 Owner’s Manual 190-00919-00 Rev. G... -
Page 91: Airspace Alert Messages
SMART AIRSPACE ™ Smart Airspace shows airspace at and immediately surrounding the aircraft’s ™ current altitude in bold. Airspaces at all other altitudes are de-emphasized. De-emphasized Bold Airspace Airspace Smart Airspace ™ 190-00919-00 Rev. G Garmin GPSMAP 695/696 Owner’s Manual... -
Page 92: Direct-To Navigation
CLR Key to remove it), press the RECENT Softkey to display a list of recent waypoints, or move the FMS Joystick to select the facility name, or city field. 3) Press the ENT Key. 4) With ‘Activate’ highlighted, press the ENT Key. Direct-to Window Garmin GPSMAP 695/696 Owner’s Manual 190-00919-00 Rev. G... - Page 93 1) Press the NRST Key. 2) Select the desired airport (the nearest one is already selected). 3) Press the Direct-to Key. 4) Press the ENT Key. 5) With ‘Activate’ highlighted, press the ENT Key. 190-00919-00 Rev. G Garmin GPSMAP 695/696 Owner’s Manual...
- Page 94 2) Move the FMS Joystick to highlight 'Stop Navigation' or ‘Resume Flight Plan’ if a flight plan was active. 3) Press the ENT Key. If a flight plan is still active, the GPSMAP 695/696 resumes navigating the flight plan along the closest leg. Garmin GPSMAP 695/696 Owner’s Manual 190-00919-00 Rev. G...
-
Page 95: Section 3 Flight Planning
Changing the information shown in the data fields: From the Active Flight Plan Page or the Saved Flight Plan Page, move the FMS Joystick (right or left) to quickly change the third data field. 190-00919-00 Rev. G Garmin GPSMAP 695/696 Owner’s Manual... -
Page 96: Flight Planning
5) Turn or Move the FMS Joystick to highlight the desired option from the list and press the ENT Key. First Data Second Data Third Data Field Field Field Data Field Selection (Active Flight Plan Page) Garmin GPSMAP 695/696 Owner’s Manual 190-00919-00 Rev. G... -
Page 97: Flight Plan Creation
FMS Joystick left or right. All other Data Fields can be changed through the ‘Change Data Fields’ option of the Page Menu. Data Fields Active Non- Active Active Active Flight Plan Page 190-00919-00 Rev. G Garmin GPSMAP 695/696 Owner’s Manual... - Page 98 4) Turn the FMS Joystick to display the Insert Waypoint Window (turning it clockwise displays a blank Insert Waypoint Window, turning it counter- clockwise displays the a list of recent waypoints (RECENT WPTS), nearest airports (NRST APTS), or flight plan waypoints (FPL WPTS)). Garmin GPSMAP 695/696 Owner’s Manual 190-00919-00 Rev. G...
-
Page 99: Adding Waypoints To An Existing Flight Plan
Turn the FMS Joystick counter-clockwise to display a list of recent waypoints (RECENT WPTS), nearest airports (NRST APTS), or flight plan waypoints (FPL WPTS)). c) Select the desired waypoint from the submenu. d) Press the ENT Key. 190-00919-00 Rev. G Garmin GPSMAP 695/696 Owner’s Manual... - Page 100 6) Turn the FMS Joystick to display a drop down list of available approaches. 7) Turn or move the FMS Joystick to highlight the desired approach and press the ENT Key. 8) With ‘Select Approach’ highlighted, press the ENT Key. Garmin GPSMAP 695/696 Owner’s Manual 190-00919-00 Rev. G...
-
Page 101: Graphical Flight Planning
APPEND Softkey and press the ENT Key Insertion Rubber Point Band indicator USE MAP Softkey Graphical Flight Plan Window 190-00919-00 Rev. G Garmin GPSMAP 695/696 Owner’s Manual... - Page 102 USE MAP Softkey to activate the map pointer. Or: Press the MENU Key and select ‘Edit on Map’. 3) Move the FMS Joystick to highlight the desired flight plan leg to be modified. Garmin GPSMAP 695/696 Owner’s Manual 190-00919-00 Rev. G...
- Page 103 Selected Waypoint Flight Plan Page (Waypoint Selected with Map Pointer) 6) With the desired waypoint highlighted, press the ENT Key. The flight plan is now modified to include the added waypoint. 190-00919-00 Rev. G Garmin GPSMAP 695/696 Owner’s Manual...
-
Page 104: Flight Plan Storage
Plan name (departure and destination waypoints, by default), and the selected Data Fields. 5) Press the FMS Joystick or DONE Softkey to exit the Saved Flight Plan Page. Flight Plan List Page Saved Flight Plan Page Garmin GPSMAP 695/696 Owner’s Manual 190-00919-00 Rev. G... -
Page 105: Flight Plan Activation
3) Press the FMS Joystick to activate the cursor and move the FMS Joystick to highlight the waypoint leg to be activated. 4) Press the Direct-to Key twice. The “Activate Leg XXXXX - XXXXX?” window is displayed. 190-00919-00 Rev. G Garmin GPSMAP 695/696 Owner’s Manual... -
Page 106: Editing Speed And Fuel Flow
3) Select the desired aircraft or create a new one. 4) Move the FMS Joystick to the ‘Fuel Flow’ field, turn the FMS Joystick to enter the appropriate fuel flow, and press the ENT Key. Garmin GPSMAP 695/696 Owner’s Manual 190-00919-00 Rev. G... - Page 107 3) Move the FMS Joystick to the ‘Plan Speed’ field. 4) Using the FMS Joystick, enter the desired speed, and press the ENT Key. 5) Repeat Steps 3 and 4 for ‘Fuel Flow’, and press the DONE Softkey. 190-00919-00 Rev. G Garmin GPSMAP 695/696 Owner’s Manual...
-
Page 108: Copying Flight Plans
1) Press the FPL Key and turn the FMS Joystick to display the Flight Plan List Page. 2) Press the FMS Joystick to activate the cursor, and turn or move the FMS Joystick to highlight the desired flight plan. Garmin GPSMAP 695/696 Owner’s Manual 190-00919-00 Rev. G... -
Page 109: Deleting The Active Flight Plan
Deleting the Active Flight Plan: 1) Press the FPL Key to display the Active Flight Plan Page. 2) Press the MENU Key 3) With ‘Stop Navigation’ highlighted, press the ENT Key. Active Flight Plan Page Menu 190-00919-00 Rev. G Garmin GPSMAP 695/696 Owner’s Manual... -
Page 110: Inverting A Flight Plan
1) Press the FPL Key to display the Active Flight Plan Page. 2) Press the MENU Key, turn or move the FMS Joystick to highlight ‘Invert Flight Plan’, and press the ENT Key. An “Invert the Active Flight Plan?” confirmation window is displayed. Garmin GPSMAP 695/696 Owner’s Manual 190-00919-00 Rev. G... -
Page 111: Importing/Exporting Flight Plans
2) Press the FMS Joystick to activate the cursor, and turn or move the FMS Joystick to highlight the desired flight plan. 3) Press the EXPORT Softkey and press the ENT Key. Or: Press Menu and with “Export Flight Plan” highlighted press ENT. 190-00919-00 Rev. G Garmin GPSMAP 695/696 Owner’s Manual... -
Page 112: Approaches
Active Flight Plan Page for quick activation when needed. “Activate Approach” also adds the procedure to the end of the flight plan but immediately begins to provide guidance to the first waypoint in the approach. Select Approach Window Garmin GPSMAP 695/696 Owner’s Manual 190-00919-00 Rev. G... -
Page 113: Selecting An Approach
MENU Key. The Show Chart Menu is displayed. Select Approach Menu 2) Press the ENT Key. A chart displaying the selected approach is displayed. 3) Press the EXIT Softkey to return to the Select Approach Window. 190-00919-00 Rev. G Garmin GPSMAP 695/696 Owner’s Manual... - Page 114 Joystick to activate the cursor. b) Move the FMS Joystick to highlight the approach, and press the ENT Key. “Activate XXXXX Approach?” window is displayed. c) With ‘Yes’ highlighted, press the ENT Key. Garmin GPSMAP 695/696 Owner’s Manual 190-00919-00 Rev. G...
- Page 115 Plan Page. 3) Press the RMV APPR Softkey, and press the ENT Key. Or: On the Saved Flight Plan Page, press the MENU Key and highlight ‘Remove Approach’ and press the ENT Key. 190-00919-00 Rev. G Garmin GPSMAP 695/696 Owner’s Manual...
-
Page 116: Activating Vectors-To-Final
(final approach fix [FAF]). On the Active Flight Plan Page, a Vectors-to-Final symbol appears beside the first approach waypoint. Vectors-to-Final Symbol Final Course Extension VECTORS Softkey Vectors-to-Final (Active Flight Plan Page) Garmin GPSMAP 695/696 Owner’s Manual 190-00919-00 Rev. G... -
Page 117: Trip Planning
2) Turn or move the FMS Joystick to highlight ‘Cancel Vectors-to-Final’ and press the ENT Key. 3.6 TRIP PLANNING Refer to Appendix F (Utilities) for information on Flight Log, Track Log, E6B Calculator, Aircraft Profile, and Weight & Balance. 190-00919-00 Rev. G Garmin GPSMAP 695/696 Owner’s Manual... - Page 118 Flight Planning Blank Page Garmin GPSMAP 695/696 Owner’s Manual 190-00919-00 Rev. G...
-
Page 119: Section 4 Hazard Avoidance
XM, or GDL FIS-B). The default is ‘AUTO’ which will use XM over GDL FIS-B if both are available. 6) Press the FMS Joystick, the CLR Key, or the EXIT Softkey to return to the previous page. 190-00919-00 Rev. G Garmin GPSMAP 695/696 Owner’s Manual... -
Page 120: Siriusxm Weather (696 Only)
From the SiriusXM Audio Page press the INFO Softkey. 1) From the WX Page press the MENU Key to display the WX Page Menu. 2) Turn or move the FMS Joystick to highlight ‘WEATHER PRODUCTS’ and press the ENT Key. Garmin GPSMAP 695/696 Owner’s Manual 190-00919-00 Rev. G... -
Page 121: Hazard Avoidance
• Sun strobes, when the radar antenna points directly at the sun • Military aircraft deploy metallic dust (chaff) which can cause alterations in radar scans • Interference from buildings or mountains, which may cause shadows 190-00919-00 Rev. G Garmin GPSMAP 695/696 Owner’s Manual... - Page 122 The dBZ values increase as returned signal strength increases. Precipitation intensity is displayed using colors corresponding to the dBZ values. NEXRAD Data RADAR Legend Garmin GPSMAP 695/696 Owner’s Manual 190-00919-00 Rev. G...
- Page 123 Echo Tops at or above the altitude you select are displayed, in 5,000 foot increments up to 70,000 ft. Echo Tops can be helpful in determining the severity of thunderstorms. Echo Tops Data 190-00919-00 Rev. G Garmin GPSMAP 695/696 Owner’s Manual...
- Page 124 10 mph, and a triangle flag is 50 mph. Winds Aloft Data Wind Direction Calm 15 Knots 5 Knots 20 Knots Wind Flag 10 Knots 50 Knots Winds Barbs Garmin GPSMAP 695/696 Owner’s Manual 190-00919-00 Rev. G...
- Page 125 Lightning data shows the approximate location of cloud-to-ground lightning strikes. A strike icon represents a strike that has occurred within a two-kilometer region and within the last seven minutes. The exact location of the lightning strike is not displayed. Lightning Data 190-00919-00 Rev. G Garmin GPSMAP 695/696 Owner’s Manual...
- Page 126 TAF (Terminal Area Forecast) is the standard format for 24-hour weather forecasts. TAFs may contain some METAR data, but generally cover a smaller area. It typically forecasts significant weather changes, temporary changes, probable changes, and expected changes in weather conditions. Garmin GPSMAP 695/696 Owner’s Manual 190-00919-00 Rev. G...
- Page 127 The METAR flag color is determined by the information in the METAR text. The METAR flag is gray when the METAR text does not contain adequate information to determine flight conditions. METAR Selected With Map METAR Legend Pointer 190-00919-00 Rev. G Garmin GPSMAP 695/696 Owner’s Manual...
- Page 128 A SIGMET is widespread and must affect or be forecast to affect an area of at least 3,000 square miles. SIGMETs are displayed as a yellow-dashed line. AIRMET Selected With Map AIRMET/SIGMET Legend Pointer Garmin GPSMAP 695/696 Owner’s Manual 190-00919-00 Rev. G...
- Page 129 PIREP text is displayed on the Weather (WX) Page. An abbreviated version can be viewed by panning over the PIREP box. Using the Map Pointer, highlight the desired PIREP and press the ENT Key to display the decoded text. 190-00919-00 Rev. G Garmin GPSMAP 695/696 Owner’s Manual...
-
Page 130: Freezing Levels
Hazard Avoidance PIREP Data on Weather Page Decoded PIREP Data FREEZING LEVELS Freezing Level shows contours for the lowest forecast altitude where icing conditions are likely to occur. Freezing Level Data Garmin GPSMAP 695/696 Owner’s Manual 190-00919-00 Rev. G... - Page 131 (not specific to aircraft type). The CIP product is not a forecast, but a representation of the current conditions at the time of the analysis. Altitudes can be displayed in 3,000-foot increments up to 30,000 feet MSL. 190-00919-00 Rev. G Garmin GPSMAP 695/696 Owner’s Manual...
- Page 132 Supercooled Large Droplet (SLD) icing conditions are characterized by the presence of relatively large, supercooled water droplets indicative of freezing drizzle and freezing rain aloft. SLD threat areas are depicted as magenta dots over the CIP colors. Icing Forecast Data and Legend Garmin GPSMAP 695/696 Owner’s Manual 190-00919-00 Rev. G...
- Page 133 Forecasts are available for intervals of 12, 24, 36, and 48 hours. Forecast Data Sunny Thunderstorms Windy Very Hot Partly Cloudy Rain Haze Mostly Cloudy Freezing Rain Foggy Cloudy Snow Very Cold Fronts Legend Forecast Legend 190-00919-00 Rev. G Garmin GPSMAP 695/696 Owner’s Manual...
- Page 134 SEA SURFACE TEMPERATURE NOTE: Sea Surface Temperature data requires Master Mariner SiriusXM subscription. The surface temperatures of coastal and large inland bodies of water are displayed. Sea Temperature Data Sea Temperature Data and Legend Garmin GPSMAP 695/696 Owner’s Manual 190-00919-00 Rev. G...
- Page 135 Data’, ‘NEXRAD’, and/or ‘Fronts’ on the Navigation Map. Additional information about the following can be displayed by panning over the display on the map: • Storm Cells • METARs • SIGMETs • TFRs • AIRMETs 190-00919-00 Rev. G Garmin GPSMAP 695/696 Owner’s Manual...
- Page 136 4) Press the PAN MAP Softkey to get abbreviated information about the selected weather product or map feature (if available). 5) With the desired weather product selected press the ENT Key to get detailed information (if available). Garmin GPSMAP 695/696 Owner’s Manual 190-00919-00 Rev. G...
- Page 137 Auto, range settings). 6) Press the ENT Key to select an option. 7) Press the FMS Joystick, the CLR Key, or the EXIT Softkey to return to the Map Page with the changed settings. 190-00919-00 Rev. G Garmin GPSMAP 695/696 Owner’s Manual...
- Page 138 2) Turn the FMS Joystick to view the desired weather legend (Radar, Fronts, METAR, AIRMET, Turbulence Forecast, or Other). 3) With ‘DONE’ highlighted, press the ENT Key to return to the Weather (WX) Page. Garmin GPSMAP 695/696 Owner’s Manual 190-00919-00 Rev. G...
- Page 139 Select ‘Animate Weather’ and press the ENT Key to begin animation. 4) To stop animation, press the MENU Key again, turn or move the FMS Joystick to select ‘Stop Animation’ and press the ENT Key. 190-00919-00 Rev. G Garmin GPSMAP 695/696 Owner’s Manual...
-
Page 140: Data Link Weather (Fis-B)
XM, or GDL FIS-B). The default is ‘AUTO’ which will use XM over GDL FIS-B if both are available. 6) Press the FMS Joystick, the CLR Key, or the EXIT Softkey to return to the previous page. Garmin GPSMAP 695/696 Owner’s Manual 190-00919-00 Rev. G... - Page 141 Therefore, weather data is not immediately available. No pilot action is required to receive FIS-B weather information. Weather product status can be viewed on the dedicated Weather Page,or the Data Link Page from the Tools menu. 190-00919-00 Rev. G Garmin GPSMAP 695/696 Owner’s Manual...
- Page 142 8 hours As Available otherwise 12 hours 8 hours AIRMET 12 hours As Available As Available, then at 15 SIGMET 12 hours minute intervals for 1 hour PIREP 8 hours As Available Garmin GPSMAP 695/696 Owner’s Manual 190-00919-00 Rev. G...
- Page 143 NEXRAD radar coverage is not currently available or is not being collected are indicated in grayish-purple (Weather (WX) Page Only). Radar capability may exists in these areas, but it is not active or is off-line. 190-00919-00 Rev. G Garmin GPSMAP 695/696 Owner’s Manual...
-
Page 144: Nexrad Abnormalities
(decibels of Z). “Reflectivity” (designated by the letter Z) is the amount of transmitted power returned to the radar receiver. The dBZ values increase as returned signal strength increases. Precipitation intensity is displayed using colors corresponding to the dBZ values. Garmin GPSMAP 695/696 Owner’s Manual 190-00919-00 Rev. G... - Page 145 When Combined radar data is viewed, Regional Radar data is displayed on top of CONUS data and the time shown in the lower left corner is associated with Regional Radar data only. 190-00919-00 Rev. G Garmin GPSMAP 695/696 Owner’s Manual...
- Page 146 Hazard Avoidance FIS-B Radar (CONUS) FIS-B Radar (Regional) FIS-B Radar (Combined) Garmin GPSMAP 695/696 Owner’s Manual 190-00919-00 Rev. G...
-
Page 147: Winds Aloft
ISA temperature is also shown. Temperatures are color coded with temperatures near and below freezing are shown as shades of blue, green for temperatures just above freezing and shades of orange are used for warmer temperatures. 190-00919-00 Rev. G Garmin GPSMAP 695/696 Owner’s Manual... - Page 148 TAF (Terminal Area Forecast) is the standard format for 24-hour weather forecasts. TAFs may contain some of the same code as METAR data. It typically forecasts significant weather changes, temporary changes, probable changes, and expected changes in weather conditions. Garmin GPSMAP 695/696 Owner’s Manual 190-00919-00 Rev. G...
- Page 149 3,000 square miles at any one time. AIRMETs are routinely issued for six-hour periods and are amended as necessary due to changing weather conditions. AIRMETs are displayed as colored, dashed lines. 190-00919-00 Rev. G Garmin GPSMAP 695/696 Owner’s Manual...
- Page 150 TFRs are routinely issued for activities such as sporting events, dignitary visits, military depots, and forest fires. TFRs are represented as an area highlighted by red (active) or yellow (not yet active). Garmin GPSMAP 695/696 Owner’s Manual 190-00919-00 Rev. G...
- Page 151 PIREP box. Using the Map Pointer, highlight the desired PIREP and press the ENT Key to display the decoded text. Urgent (UUA) PIREP Routine (UA) PIREP Selected PIREP Data 190-00919-00 Rev. G Garmin GPSMAP 695/696 Owner’s Manual...
- Page 152 XM, or GDL FIS-B). The default is ‘AUTO’ which will use XM over GDL FIS-B if both are available. 3) Press the FMS Joystick, the CLR Key, or the EXIT Softkey to return to the previous page Garmin GPSMAP 695/696 Owner’s Manual 190-00919-00 Rev. G...
- Page 153 3) If necessary, move the FMS Joystick to highlight the type field and turn the FMS Joystick to scroll through a list of available options. 4) Press the PAN MAP Softkey to get abbreviated information about the selected weather product or map feature (if available). 190-00919-00 Rev. G Garmin GPSMAP 695/696 Owner’s Manual...
- Page 154 7) Press the FMS Joystick, the CLR Key, or the EXIT Softkey to return to the Map Page with the changed settings. Map Setup Page (Weather Category) Map Setup Page (WX Report Category) Garmin GPSMAP 695/696 Owner’s Manual 190-00919-00 Rev. G...
- Page 155 2) Turn or move the FMS Joystick to select ‘Animate Weather’ and press the ENT Key. 3) To stop animation, press the MENU Key again, turn or move the FMS Joystick to select ‘Stop Animation’, and press the ENT Key. 190-00919-00 Rev. G Garmin GPSMAP 695/696 Owner’s Manual...
- Page 156 Press the MENU Key, turn or move the FMS Joystick to select ‘Stop Animation’, and press the ENT Key. Viewing FIS-B NOTAMs: 1) From the Waypoints Page press NOTAMS Softkey. 2) If needed, scroll up or down using the FMS Joystick. NOTAMS Information Page Garmin GPSMAP 695/696 Owner’s Manual 190-00919-00 Rev. G...
-
Page 157: Terrain
Alert windows appear on all pages (except the Terrain (TER) Page) to inform the pilot of proximity to the terrain and obstacles, as well as an unsafe descent rate. These alerts depend on user-defined parameters in the Terrain Page setup. 190-00919-00 Rev. G Garmin GPSMAP 695/696 Owner’s Manual... -
Page 158: Terrain Information
> 1000’ Impact Points WARNING: Red obstacle is above or within 100’ below current aircraft altitude CAUTION: Yellow obstacle is between 100’ and 1000’ below current aircraft altitude Terrain Obstacle Colors and Symbology Garmin GPSMAP 695/696 Owner’s Manual 190-00919-00 Rev. G... -
Page 159: Terrain And Obstacle Color Code
‘High’ sensitivity, which annunciates all red and yellow alerts at the time set in Look Ahead Time. ‘Medium’ sensitivity annunciates all of the red and the highest priority of yellow alerts. ‘Low’ only annunciates red alerts. ‘Off’ disables the alert. 190-00919-00 Rev. G Garmin GPSMAP 695/696 Owner’s Manual... - Page 160 3) Turn the FMS Joystick to make changes to the highlighted field. 4) With ‘Done’ highlighted press the ENT Key, or press the CLR Key to accept the changes and exit the Terrain Setup window. Terrain Setup Garmin GPSMAP 695/696 Owner’s Manual 190-00919-00 Rev. G...
- Page 161 4) Turn the FMS Joystick to make changes to the highlighted field. 5) With ‘Done’ highlighted press the ENT Key, or press the CLR Key to accept the changes and exit the Terrain Setup window. 190-00919-00 Rev. G Garmin GPSMAP 695/696 Owner’s Manual...
-
Page 162: Terrain Alerts
The following aural terrain alerts are issued when flight conditions meet parameters that are set within the software algorithms, and are dependant on the sensitivity level set in the Terrain Setup Menu. Garmin GPSMAP 695/696 Owner’s Manual 190-00919-00 Rev. G... - Page 163 3) Move the FMS Joystick to select ‘Sound’, and press the ENT Key. 4) Move the FMS Joystick to highlight the ‘Terrain Audio’ field. 5) Turn the FMS Joystick to select ‘On’ or ‘Off’, and press the ENT Key. 190-00919-00 Rev. G Garmin GPSMAP 695/696 Owner’s Manual...
-
Page 164: Traffic Information
The GPSMAP 695/696 is compatible with two different traffic sources; TIS-A traffic via a Garmin Mode S Transponder (GTX 330), or ADS-B/TIS-B traffic via a GDL 39. When the GPSMAP 696 is configured with both a Mode S transponder capable of receiving TIS-A traffic and a GDL 39 capable of receiving ADS-B/TIS-B traffic the GPSMAP 695/696 will automatically switch between traffic sources. -
Page 165: Traffic Information Service (Tis-A)
TRAFFIC INFORMATION SERVICE (TIS-A) NOTE: Refer to Appendix E for general information regarding TIS-A. Refer to Appendix D for configuration information. The GPSMAP 695/696 supports TIS-A input from a Garmin Mode S transponder, such as the GTX 330. SYSTEM STATUS The traffic system status is annunciated in the upper right corner of the Map Page. - Page 166 4) Move the FMS Joystick to highlight the ‘Alert Volume’ field. 5) Turn the FMS Joystick to select the desired volume (0-10). 6) Press the EXIT Softkey or FMS Joystick to exit. Garmin GPSMAP 695/696 Owner’s Manual 190-00919-00 Rev. G...
-
Page 167: Traffic Warning Window
6) Using the FMS Joystick select the desired option and press the ENT Key. 7) Press the FMS Joystick, the CLR Key, or the EXIT Softkey to return to the Map Page with the changed settings. 190-00919-00 Rev. G Garmin GPSMAP 695/696 Owner’s Manual... - Page 168 Pointer is activated. 2) Move the FMS Joystick to highlight the desired traffic. Traffic Range and Altitude Separation using Traffic Ground Map Pointer Track Range Rings Traffic Warning Window TIS-A (Map Page) Garmin GPSMAP 695/696 Owner’s Manual 190-00919-00 Rev. G...
-
Page 169: Data Link Traffic (Gdl 39)
ADS-B In, ADS-B Out, and ADS-B participating. ADS-B In refers to the capability to receive ADS-B information. ADS-B Out refers to the capability to transmit ADS-B information. ADS-B participating refers 190-00919-00 Rev. G Garmin GPSMAP 695/696 Owner’s Manual... - Page 170 Currently, rule-compliant ADS-B Out capability in the United States requires a TSO’ed SBAS-enabled GPS, such as a Garmin GPS 400W or similar, and one of two possible data links: 1090 ES transponder or a 978 MHz UAT. Either data link system is capable of transmitting the aircraft’s position, velocity, identification, and other...
- Page 171 GPS and 1090 ES transponder, a GBT may not identify it as an ADS-B participating aircraft. The squitter of some 1090 ES transponders, including the Garmin GTX 330, must be configured to communicate that the aircraft has 978 MHz receive capability in order to be identified as an ADS-B participating aircraft.
-
Page 172: System Status
The GDL 39 also has a pressure altitude sensor to aid in displaying the relative altitude of received traffic information. If the GDL 39 is used onboard a pressurized aircraft, the pressure altitude sensor should be turned off. Garmin GPSMAP 695/696 Owner’s Manual 190-00919-00 Rev. G... -
Page 173: Traffic Description
Proximity Advisories are issued for any traffic within 6 nautical miles and +/- 1,200’. Non-directional airborne Traffic Advisory (TA) Non-directional off-scale airborne Traffic Advisory (TA). Displayed at outer range ring at proper bearing. 190-00919-00 Rev. G Garmin GPSMAP 695/696 Owner’s Manual... - Page 174 Refer to the following table for details. Altitude Look Ahead Vertical Horizontal (Geodetic) Time (sec.) Separation (ft.) Separation (nm.) Below 5,000 +/-850 5,000-10,000 +/-850 10,000-20,000 +/-850 20,000-42,000 +/-850 1.10 Above 42,000 +/-1,200 1.10 Traffic Advisories Garmin GPSMAP 695/696 Owner’s Manual 190-00919-00 Rev. G...
- Page 175 4) Move the FMS Joystick to highlight the ‘Alert Volume’ field. 5) Turn the FMS Joystick to select the desired volume (0-10). 6) Press the EXIT Softkey or FMS Joystick to exit. 190-00919-00 Rev. G Garmin GPSMAP 695/696 Owner’s Manual...
-
Page 176: Displaying Traffic Data
4) Move the FMS Joystick to highlight ‘Traffic Symbol’, or ‘Traffic Label’ field. 5) Turn the FMS Joystick to select ‘OFF’, ‘AUTO’ or range settings for Traffic Symbol and Traffic Label, and press the ENT Key. Garmin GPSMAP 695/696 Owner’s Manual 190-00919-00 Rev. G... - Page 177 Pointer is activated. 2) Move the FMS Joystick to highlight the desired traffic. Traffic Range and Altitude Separation using Map Pointer Traffic Information using Map Pointer Absolute Motion Vector Traffic (Map Page) 190-00919-00 Rev. G Garmin GPSMAP 695/696 Owner’s Manual...
- Page 178 9000 feet below the aircraft. Typically used during descent phase of flight. • UNREST (unrestricted): All traffic is displayed. 3) To return to the Traffic Page, press the BACK Softkey. Garmin GPSMAP 695/696 Owner’s Manual 190-00919-00 Rev. G...
- Page 179 500 feet Aircraft above own aircraft) Identification (tail number or Flight Altitude Trend (up ID number) arrow indicates climbing, down arrow indicates descending) Traffic Absolute Motion Vector Example ADS-B Traffic Symbol 190-00919-00 Rev. G Garmin GPSMAP 695/696 Owner’s Manual...
- Page 180 Mode Traffic Display Range Rings Traffic's Predicated Relative Location in 2 minutes Traffic's Predicated Relative Location in 2 minutes Traffic System Status Receiving TragetTrend Air-to-Air Look-ahead Time Traffic Page TargetTrend (GDL 39) Garmin GPSMAP 695/696 Owner’s Manual 190-00919-00 Rev. G...
- Page 181 Motion vector selection is made from the Traffic Page Menu by enabling/disabling TargetTrend. Absolute vectors are selected by default and are replaced when TargetTrend is enabled. Enabling/Disabling TargetTrend: On the Traffic Page, press the TREND Softkey. 190-00919-00 Rev. G Garmin GPSMAP 695/696 Owner’s Manual...
- Page 182 Hazard Avoidance Blank Page Garmin GPSMAP 695/696 Owner’s Manual 190-00919-00 Rev. G...
-
Page 183: Section 5 Additional Features
Resolution is greater at lower map ranges. The SafeTaxi feature can be seen on the Map Page and the Waypoint Page 190-00919-00 Rev. G Garmin GPSMAP 695/696 Owner’s Manual... -
Page 184: Additional Features
4) Move the FMS Joystick to highlight the ‘Safe Taxi’ Field. 5) Turn the FMS Joystick to access the menu options. 6) Turn or move the FMS Joystick to select ‘On’ or ‘Off’, and press the ENT Key. Garmin GPSMAP 695/696 Owner’s Manual 190-00919-00 Rev. G... -
Page 185: Safetaxi Cycle Number And Revision
The SafeTaxi Region, Version, Cycle, Effective date, and Expiration date of the database cycle can also be found in the Main Menu, under ‘Database Information’. The SafeTaxi database is provided by Garmin. Refer to Appendix C for instructions on updating the SafeTaxi database. - Page 186 Therefore, when the aircraft symbol appears within one of these areas, the aircraft position indicated is relative to the chart planview, not to the off-scale area. Off-Scale Area Off-Scale Areas Sample Chart Indicating Off-Scale Areas Garmin GPSMAP 695/696 Owner’s Manual 190-00919-00 Rev. G...
- Page 187 3) Press the FMS Joystick to activate the cursor. 4) Turn the FMS Joystick to access a drop-down menu of available charts. 5) Turn or move the FMS Joystick to select the desired chart, and press the ENT Key. 190-00919-00 Rev. G Garmin GPSMAP 695/696 Owner’s Manual...
-
Page 188: Aircraft Symbol
Showing/Hiding the aircraft symbol on the chart: Press the Key to show/hide the aircraft symbol. The Aircraft Symbol Hidden Icon (circle with a line) is displayed in the lower right corner when the aircraft symbol is hidden. Garmin GPSMAP 695/696 Owner’s Manual 190-00919-00 Rev. G... -
Page 189: Chart Range
NOTAMs’ option will be displayed at the bottom of the drop-down menu of available charts. Select the ‘Chart NOTAMs’ option from the chart menu to display the applicable NOTAM information. Drop-down Chart Menu Chart Notams 190-00919-00 Rev. G Garmin GPSMAP 695/696 Owner’s Manual... -
Page 190: Flitecharts
Therefore, when the aircraft symbol appears within one of these areas, the aircraft position indicated is relative to the chart planview, not to the off- scale area. Garmin GPSMAP 695/696 Owner’s Manual 190-00919-00 Rev. G... - Page 191 Additional Features Off-Scale Areas Off-Scale Area Off-Scale Areas Off-Scale Area Sample Chart Indicating Off-Scale Areas NOTE: Do not maneuver the aircraft based solely upon the geo-referenced aircraft symbol. 190-00919-00 Rev. G Garmin GPSMAP 695/696 Owner’s Manual...
- Page 192 The “CHART NOT AVAILABLE” banner does not refer to the FliteCharts ® subscription, but rather the availability of a particular airport chart selection or procedure for a selected airport. Chart Not Available Banner Garmin GPSMAP 695/696 Owner’s Manual 190-00919-00 Rev. G...
-
Page 193: Chart Range
To quickly zoom all the way out, press the Softkey. Press it again to return to the previous range. Airport Identifier Chart Field Field Available Approaches FliteChart Softkey FliteCharts (Waypoint (WPT) Page) ® 190-00919-00 Rev. G Garmin GPSMAP 695/696 Owner’s Manual... -
Page 194: Aircraft Symbol
Aircraft Position on Chart Aircraft Symbol Displayed on Chart (Waypoint Page) Aircraft Not Shown Icon Aircraft Not Shown Icon (Waypoint Page) Garmin GPSMAP 695/696 Owner’s Manual 190-00919-00 Rev. G... -
Page 195: Flitecharts Cycle Number And Expiration Date
The Power-up Page indicates any of four different possible criteria for chart availability. These indications are whether the databases are not configured, not available, current, or out of date. 190-00919-00 Rev. G Garmin GPSMAP 695/696 Owner’s Manual... -
Page 196: Airport Directory Data
2) Press the AOPA or DIRECTORY Softkey. 3) To return to the map, press the ENT Key, the CLR Key, or the FMS Joystick. Icon Description Restaurant on Field Self Serve Fuel Courtesy Car Airport Directory Service Icons Garmin GPSMAP 695/696 Owner’s Manual 190-00919-00 Rev. G... - Page 197 Additional Features Airport Identifier Field Service Icon Scroll Bar Airport Directory Softkey Airport Directory Information (Waypoint (WPT) Page) 190-00919-00 Rev. G Garmin GPSMAP 695/696 Owner’s Manual...
-
Page 198: S Irius Xm Radio Entertainment (Gpsmap 696)
GXM 40, allows it to play entertainment programming. Refer to the GXM 40 Owner’s Manual for more information on activating SiriusXM Satellite Radio. Accessing the Radio ID: From the XM Audio Page press the INFO Softkey. Garmin GPSMAP 695/696 Owner’s Manual 190-00919-00 Rev. G... -
Page 199: Using S Irius Xm Radio
SiriusXM Satellite Radio. Selecting the XM Audio Page: 1) Press the FMS Joystick to interact with the page navigation bar. 2) Turn the FMS Joystick to select the XM Audio Page. 190-00919-00 Rev. G Garmin GPSMAP 695/696 Owner’s Manual... -
Page 200: Selecting A Category
Selecting a category: 1) Select the CATEGORY Softkey on the XM Audio Page. The Category Field is highlighted. Category Field 2) Turn the FMS Joystick to highlight the desired category. Garmin GPSMAP 695/696 Owner’s Manual 190-00919-00 Rev. G... -
Page 201: Selecting A Channel
Key. 1) Press the FMS Joystick. Move the FMS Joystick to highlight the Channel Field (if necessary). 2) Turn the FMS Joystick to highlight the desired channel and press the ENT Key. 190-00919-00 Rev. G Garmin GPSMAP 695/696 Owner’s Manual... -
Page 202: Using Favorites
1) Press the FMS Joystick to activate the cursor. Move the FMS Joystick to highlight the Category Field (if necessary). 2) Turn the FMS Joystick to highlight the Favorites category. 3) Move the FMS Joystick to select the desired channel and press the ENT Key. Garmin GPSMAP 695/696 Owner’s Manual 190-00919-00 Rev. G... -
Page 203: Adjusting The Volume
2) Select the MUTE Softkey to mute the audio. Select the MUTE Softkey again to unmute the audio. Press and hold the VOLUME Softkey to mute and unmute the audio. Volume Control 190-00919-00 Rev. G Garmin GPSMAP 695/696 Owner’s Manual... -
Page 204: Electronic Checklists
NOTE: The information described in this section is not intended to replace the checklist information described in the AFM. NOTE: Garmin does not create, modify, or update GPSMAP 695/696 checklists and thus cannot be responsible for the availability and/or content. -
Page 205: Section 6 Appendices
Internal problem with your GXM 40 antenna. Contact Garmin Product Support. Database Error Internal problem with the unit. Contact your dealer or Garmin Product Support to have the unit repaired. Fuel Tank A reminder for switching fuel tanks. The reminder message repeats at the specified interval after the beginning of each trip. - Page 206 Transfer Complete Data Transfer was completed. VNAV Cancelled VNAV function has been cancelled due to a change in the active route. Waypoint Already Exists A waypoint with the same name already exists. Garmin GPSMAP 695/696 Owner’s Manual 190-00919-00 Rev. G...
-
Page 207: Airspace Messages
The following aural terrain alerts are issued when flight conditions meet parameters that are set within the software algorithms, and are dependant on the sensitivity level set in the Terrain Setup Menu. 190-00919-00 Rev. G Garmin GPSMAP 695/696 Owner’s Manual... -
Page 208: Data Field Options
“to” waypoints. Distance (Destination) (DIST The distance to the destination waypoint in the DEST) Active Flight Plan. Distance (Next) (DIST NEXT) The distance to the next waypoint in the Active Flight Plan. Garmin GPSMAP 695/696 Owner’s Manual 190-00919-00 Rev. G... - Page 209 Ground Track (TRK) The direction of aircraft movement relative to a ground position. Minimum Safe Altitude (MSA) Uses Grid MORAs to determine a safe altitude within ten miles of the aircraft’s present position. 190-00919-00 Rev. G Garmin GPSMAP 695/696 Owner’s Manual...
- Page 210 The relative humidity at the nearest weather HUMIDITY) reporting station. Weather (Temperature) (WX The temperature at the nearest weather TEMP) reporting station. Weather (Wind) (WX WIND) The wind speed and direction at the nearest weather reporting station. Garmin GPSMAP 695/696 Owner’s Manual 190-00919-00 Rev. G...
-
Page 211: Abnormal Operation
• A blinking red question mark will appear over the airplane icon on the map. • The ‘Lost Satellite Reception’ message will display. • Any GPS dependent data fields will not be available. GPS Signal Lost 190-00919-00 Rev. G Garmin GPSMAP 695/696 Owner’s Manual... -
Page 212: Hazard Display With Loss Of Gps Position
Appendix B HAZARD DISPLAY WITH LOSS OF GPS POSITION If the Terrain Page doesn’t have at least a 3D fix (i.e. altitude unknown), a Red X will be displayed. Terrain Page Red X Garmin GPSMAP 695/696 Owner’s Manual 190-00919-00 Rev. G... -
Page 213: Sd Card Use And Databases
CD-ROM data to ® the optional SD Card. For compatible MapSource products, refer to the Garmin web site at www.garmin. ® com/cartography. INSTALLING AND REMOVING SD CARDS Install the SD Card in the slot located on the top, left side of the unit. Install or remove the SD Card at any time, whether the unit is on or off. -
Page 214: Gpsmap 695/696 Databases
Press ENT Key to acknowledge. If you insert an SD Card and get a card format not recognized message, try removing the card and reinserting it. If the card is still not recognized, contact Garmin Product Support or your Garmin dealer. - Page 215 Optional airport directory databases such as AC-U-KWIK are also supported. AC- U-KWIK provides complete listings of FBOs, charter companies, fuel suppliers, ground transportation, maintenance and catering services at public airports across the world. 190-00919-00 Rev. G Garmin GPSMAP 695/696 Owner’s Manual...
- Page 216 VORs, NDBs, and more. Updates to the navigation database are available every 28 days online (www.fly. garmin.com). There are two navigation database products available: the Jeppesen Navigation Database, which is sourced by Jeppesen, and the US VFR Navigation Database sourced by AeroNav Products, a division of the FAA.
- Page 217 It is very important to note that not all obstacles are necessarily charted and therefore may not be contained in the obstacle database. This database is updated on a 56-day cycle. 190-00919-00 Rev. G Garmin GPSMAP 695/696 Owner’s Manual...
-
Page 218: Updating Gpsmap 695/696 Databases
UPDATING GPSMAP 695/696 DATABASES The GPSMAP 695/696 database updates can be obtained by visiting the ‘flyGarmin’ website (www.fly.garmin.com). The ‘flyGarmin’ website requires the unit’s ID to update databases. This allows the databases to be encrypted with the unit’s unique ID when copied to the SD Card. - Page 219 • Verbatim 96504 SD Card Reader or equivalent • Updated database obtained from the flyGarmin website • SD Card, 2 GB recommended (Garmin recommends Verbatim 96504) 1) After the data has been copied to the SD Card, insert the SD card in the SD card slot of the unit.
- Page 220 ENT Key. The database status is updated. Update Databases Page (Database Status Updated) 4) Press the RESTART Softkey. Once the database(s) have been successfully updated, the SD Card can be removed from the unit. Garmin GPSMAP 695/696 Owner’s Manual 190-00919-00 Rev. G...
-
Page 221: Exporting Track Logs And User Waypoints
3) Using the FMS Joystick highlight the desired flight plan to import. 4) Press the IMPORT Softkey and press the ENT Key. Or: Press Menu and with ‘Import Flight Plan’ highlighted press ENT. 190-00919-00 Rev. G Garmin GPSMAP 695/696 Owner’s Manual... - Page 222 2) Press the FMS Joystick to activate the cursor, and turn or move the FMS Joystick to highlight the desired flight plan. 3) Press the EXPORT Softkey and press the ENT Key. Or: Press Menu and with ‘Export Flight Plan’ highlighted press ENT. Garmin GPSMAP 695/696 Owner’s Manual 190-00919-00 Rev. G...
-
Page 223: Installation & Interfacing Information
Ground (Black) Data In (Yellow) Data Out (Blue) Power (Red) Power/Data Connector on the GPSMAP 695/696 Unit Power (Red) Data In (Yellow) Ground (Black) Data Out (Blue) Power/Data Connector on the Cable 190-00919-00 Rev. G Garmin GPSMAP 695/696 Owner’s Manual... -
Page 224: Connecting To A Garmin Vhf Comm Radio
Bare Wire Power/Data Cable for the GPSMAP 695/696 Unit CONNECTING TO A GARMIN VHF COMM RADIO The GPSMAP 695/696 can also output frequency data to a Garmin aviation radio. Currently the two models supported are the SL30 nav/comm and the SL40 comm. -
Page 225: Connecting To A Computer
1) Connect the small end of your cable to the connector on the left side of the GPSMAP 695/696. 2) When using the supplied USB Data Cable, connect the larger end of the cable to an available USB data port. 190-00919-00 Rev. G Garmin GPSMAP 695/696 Owner’s Manual... -
Page 226: Information About Usb Drivers
GPS units, customize them (if you have an image editing program on your PC), and send them back to your GPS unit. You can download xImage from the Garmin Web site at www.garmin.com/ximage. Refer to the help file for complete instructions about using xImage. -
Page 227: Interfacing
The following formats are supported for connection of external devices: NMEA 0180, 0182, 0183 (versions 1.5, 2.0, 2.3, 3.01), ASCII Text Output, and Garmin proprietary formats for connecting to a Mode S transponder for TIS-A data, and to a Garmin aviation NAV/COM radio. - Page 228 NMEA data, at 9600 baud, and VHF frequency tuning information to a Garmin Nav/Comm radio. • GTX TIS-A In—receives TIS-A data from a Garmin Mode S transponder or other compatible device. • GTX TIS-A In/NMEA & VHF Out—receives TIS-A data and transmits out both NMEA data, at 9600 baud, and VHF frequency tuning information to a Garmin Nav/Comm radio.
-
Page 229: Connecting To A Gtx 330 Mode S Transponder
REMOTE + TIS-A and set the GPSMAP 695/696’s Serial Data Format to GTX TIS-A In or GTX TIS-A In/NMEA & VHF Out (refer to the Interfacing section). For more information, see Appendix E and the GTX 330 Transponder Installation Manual. 190-00919-00 Rev. G Garmin GPSMAP 695/696 Owner’s Manual... -
Page 230: Connecting To A Gdl 39
4) Select ‘Interface’ and press the ENT Key. 5) With the Serial Data Format field highlighted, turn the FMS Joystick to select ‘Garmin Data Transfer’. To GDL 39 Power/ Data Port GDL 39 Power/Data Cable to GPSMAP 695/696 Garmin GPSMAP 695/696 Owner’s Manual 190-00919-00 Rev. G... - Page 231 GDL 39. You can view the GDL 39 update progress on the Data Link Information Page. 190-00919-00 Rev. G Garmin GPSMAP 695/696 Owner’s Manual...
- Page 232 695/696. On the Interface Setup Page, the following serial formats are available for GDL 39 Pass-Through: • NMEA Out • Aviation In • Aviation In/NMEA & VHF Out • GTX TIS-A In • GTX TIS-A In/NMEA & VHF Out. • None Garmin GPSMAP 695/696 Owner’s Manual 190-00919-00 Rev. G...
- Page 233 Black Black Bare Wire GDL 39 TxB GDL 39 RxB Orange Orange White/Orange White/Orange Cable (P/N 010-11206-15) Additional Additional Serial Serial Device Rx Device Tx GPSMAP695/695 to GDL 39 Bare Wire Installation 190-00919-00 Rev. G Garmin GPSMAP 695/696 Owner’s Manual...
- Page 234 • Data Available—receiving TIS-A data from the transponder. • Data Unavailable—connection to transponder established, but TIS-A service is unavailable. • Lost Connection—an error occurred or the connection to the transponder was lost. Garmin GPSMAP 695/696 Owner’s Manual 190-00919-00 Rev. G...
-
Page 235: Using An External Gps Antenna (Optional)
The optional GA25 MCX antenna can be used. Connect the antenna to the connector located on the left side of the unit. MCX Connector (for an optional external antenna) GPSMAP 695/696 MCX Connector 190-00919-00 Rev. G Garmin GPSMAP 695/696 Owner’s Manual... - Page 236 Appendix D Blank Page Garmin GPSMAP 695/696 Owner’s Manual 190-00919-00 Rev. G...
-
Page 237: General Tis-A Information
TAS/TCAS uses an airborne interrogator with a half-second update rate, while TIS-A utilizes the terminal Mode-S ground interrogator and accompanying data link to provide a five-second update rate. TIS-A and TAS/TCAS have similar ranges. 190-00919-00 Rev. G Garmin GPSMAP 695/696 Owner’s Manual... -
Page 238: Tis-A Limitations
NOTE: TIS-A is unavailable at low altitudes in many area of the United States. This is often the case in mountainous regions. NOTE: Garmin is not responsible for Mode S geographical coverage. Operation of the ground stations is the responsibility of the FAA. Refer to the AIM for a Terminal Mode S radar site map. - Page 239 • By telephone to the nearest Flight Service Station (FSS) facility • By FAA Form 8000-7, Safety Improvement Report (postage-paid card can be obtained at FAA FSSs, General Aviation District Offices, Flight Standards District Offices, and General Aviation Fixed Base Operators) 190-00919-00 Rev. G Garmin GPSMAP 695/696 Owner’s Manual...
- Page 240 Appendix E Blank Page Garmin GPSMAP 695/696 Owner’s Manual 190-00919-00 Rev. G...
-
Page 241: Utilities
An optional FlightBook software package is available to further simplify your flight record keeping. For details about FlightBook, visit the Garmin Web site at www. garmin.com/aviation. Recording begins when your speed exceeds 30 knots and you gain 250 feet of altitude. - Page 242 Appendix F Flight Log List Flight Log Review Garmin GPSMAP 695/696 Owner’s Manual 190-00919-00 Rev. G...
-
Page 243: Track Log
100%, the most recent track points start to overwrite the least recent track points (if ‘Wrap’ is selected in the Record Mode Field). To avoid losing track points, save the track log when it approaches the 99% mark. 190-00919-00 Rev. G Garmin GPSMAP 695/696 Owner’s Manual... -
Page 244: Displaying/Removing The Track Log On The Map Page
2) Turn or move the FMS Joystick to select ‘Track Log’ from the Main Menu, and press the ENT Key. 3) Move the FMS Joystick to highlight the desired field. 4) Turn the FMS Joystick to select the desired setting. Garmin GPSMAP 695/696 Owner’s Manual 190-00919-00 Rev. G... -
Page 245: Clearing The Track Log
2) Turn or move the FMS Joystick to select ‘Track Log’ from the Main Menu, and press the ENT Key. 3) Press the SAVE Softkey. (Or press the MENU Key, with ‘Save Active Track‘ selected, press the ENT Key.) The ‘Save Active Track?’ window is displayed. 190-00919-00 Rev. G Garmin GPSMAP 695/696 Owner’s Manual... -
Page 246: Heading Line
4) With an SD card inserted, press the EXPORT Softkey. HEADING LINE The GPSMAP 695/696 draws an electronic “heading line” on the Map Page. The heading line can be set to time or distance. Garmin GPSMAP 695/696 Owner’s Manual 190-00919-00 Rev. G... - Page 247 ENT Key. If necessary, move the FMS Joystick to set the desired time or distance, and press the ENT Key. 6) Press the FMS Joystick, the CLR Key, or the EXIT Softkey to return to the Map Page. 190-00919-00 Rev. G Garmin GPSMAP 695/696 Owner’s Manual...
-
Page 248: E6B Calculator
Enter the aircraft’s airspeed indicator value. • Total Air Temp— required entry for density altitude/true airspeed calculation. Total Air Temperature (TAT) is the temperature of the air including the heating effect caused Garmin GPSMAP 695/696 Owner’s Manual 190-00919-00 Rev. G... - Page 249 ENT Key. 2) Enter the aircraft heading shown on the directional gyro or compass into the ‘Heading’ field, and press the ENT Key. Head/Tail Wind, Wind From, and Wind Speed are calculated. 190-00919-00 Rev. G Garmin GPSMAP 695/696 Owner’s Manual...
-
Page 250: Aircraft Profile
Accessing the aircraft profile: 1) Press the MENU Key twice to open the Main Menu. 2) Turn or move the FMS Joystick to highlight ‘Aircraft Profile’, and press the ENT Key. Aircraft Profile Page Garmin GPSMAP 695/696 Owner’s Manual 190-00919-00 Rev. G... - Page 251 2) Turn the FMS Joystick to select the desired aircraft profile to be deleted. 3) Press the DELETE Softkey. The ‘XXXXXX Will Be Deleted’ window is displayed. 4) With ‘OK’ highlighted, press the ENT Key. 190-00919-00 Rev. G Garmin GPSMAP 695/696 Owner’s Manual...
-
Page 252: Weight & Balance
5) To empty the aircraft, press the Menu Key and select ‘Empty Aircraft’, or press the EMPTY Softkey. NOTE: This information is only for flight planning purposes. Consult the aircraft’s pilot operating handbook for the official weight and balance data. Garmin GPSMAP 695/696 Owner’s Manual 190-00919-00 Rev. G... -
Page 253: Epe Circle
3) Turn the FMS Joystick to select the ‘Miscellaneous’ from the horizontal list. 4) Move the FMS Joystick to highlight the desired feature. 5) Turn the FMS Joystick to select ‘On’ or ‘Off’, and press the ENT Key. 190-00919-00 Rev. G Garmin GPSMAP 695/696 Owner’s Manual... -
Page 254: Proximity Waypoints
2) Turn or move the FMS Joystick to highlight ‘User Waypoints’, and press the ENT Key. 3) Press the PROXIMITY Softkey. The Proximity Waypoints Page is displayed. 4) Turn the FMS Joystick to select ‘On’ or ‘Off’, and press the ENT Key. Garmin GPSMAP 695/696 Owner’s Manual 190-00919-00 Rev. G... -
Page 255: Deleting Proximity Waypoints
4) Press the CLR Key or the MENU Key and select ‘Remove Selected Waypoint’ or ‘Remove All Waypoints’. 5) Press the ENT Key. The ‘Remove Proximity Waypoint for XXXX’ Window is displayed 6) With ‘Yes’ highlighted, press the ENT Key. 190-00919-00 Rev. G Garmin GPSMAP 695/696 Owner’s Manual... - Page 256 Appendix F Blank Page Garmin GPSMAP 695/696 Owner’s Manual 190-00919-00 Rev. G...
-
Page 257: Display Symbols
Military, Serviced Civilian, Soft/Unknown Towered, Serviced Surface, Non-serviced Civilian, Soft/Unknown Soft Surface, Non-serviced Surface, Serviced Soft Surface, Serviced Atlantic Database Airports Soft Surface, Private Paved, Private Seaplane Base Heliport Americas/Pacific Database Airports 190-00919-00 Rev. G Garmin GPSMAP 695/696 Owner’s Manual... -
Page 258: Ifr Symbols
Medium City ILS/DME or DME only Large City VORTAC Miscellaneous TACAN Navaids IFR SYMBOLS Item Symbol Item Symbol VFR, Soft/unknown Surface, Low-Altitude Non-serviced VFR, Soft/unknown Surface, High- Altitude Serviced Atlantic Database Airports Airways Garmin GPSMAP 695/696 Owner’s Manual 190-00919-00 Rev. G... - Page 259 VOR/DME VFR, Soft Surface, Non- ILS/DME or DME Only serviced VFR, Soft Surface, Serviced VORTAC VFR, Soft Surface, Private TACAN VFR, Paved, Private Navaids VFR Seaplane Base VFR Heliport Americas/Pacific Database Airports 190-00919-00 Rev. G Garmin GPSMAP 695/696 Owner’s Manual...
-
Page 260: Airspace Symbols
Prohibited, or Warning Area Danger, Alert, or Training Area Radar Area Restricted, Prohibited, or ATZ, TIZ Warning Area Radar Area Misc/Unknown ATZ, TIZ IFR Americas/Pacific Database MATZ ADIZ Misc/Unknown VFR Americas/Pacific Database Garmin GPSMAP 695/696 Owner’s Manual 190-00919-00 Rev. G... - Page 261 Appendix G Item Symbol Item Symbol Danger or Alert Training Area Area Restricted, IFR Atlantic Database Exceptions Prohibited, or Warning Area Training Area VFR Atlantic Database Exceptions 190-00919-00 Rev. G Garmin GPSMAP 695/696 Owner’s Manual...
- Page 262 Appendix G Blank Page Garmin GPSMAP 695/696 Owner’s Manual 190-00919-00 Rev. G...
-
Page 263: Map Datum And Location Formats
The most common format is latitude and longitude, which is used by all Garmin units. You can change the location format to use with other coordinate systems. Several other grids, including a user-definable grid (for the advanced user), are available. - Page 264 Appendix H Blank Page Garmin GPSMAP 695/696 Owner’s Manual 190-00919-00 Rev. G...
-
Page 265: Glossary
The compass direction from the present position to a destination waypoint. ºC degrees Celsius Calibrated Indicated airspeed corrected for installation and Airspeed instrument errors. centimeter communication radio Course The line between two points to be followed by the aircraft. 190-00919-00 Rev. G Garmin GPSMAP 695/696 Owner’s Manual... - Page 266 Estimated Time The estimated time it takes to reach the destination Enroute waypoint from the present position, based upon current ground speed. Estimated Time of Arrival Estimated Time Enroute ºF degrees Fahrenheit Garmin GPSMAP 695/696 Owner’s Manual 190-00919-00 Rev. G...
- Page 267 The velocity that the aircraft is travelling relative to a ground position. Ground Track see Track Ground speed Heading The direction an aircraft is pointed, based upon indications from a magnetic compass or a properly set directional gyro. mercury hectopascal 190-00919-00 Rev. G Garmin GPSMAP 695/696 Owner’s Manual...
- Page 268 HG inches of mercury kilogram kilohertz kilometer knot latitude pound The portion of a flight plan between two waypoints. localizer longitude meter Missed Approach Point METAR Meteorological Aviation Routine Garmin GPSMAP 695/696 Owner’s Manual 190-00919-00 Rev. G...
- Page 269 Omni Bearing Selector pounds per square inch quantity revolutions per minute SBAS Satellite-Based Augmentation System Secure Digital second(s) SIGMET Significant Meteorological Information Traffic Advisory TACAN Tactical Air Navigation System Terminal Aerodrome Forecast 190-00919-00 Rev. G Garmin GPSMAP 695/696 Owner’s Manual...
- Page 270 VHF Omni-directional Range VORTAC very high frequency omnidirectional range station and tactical air navigation Vertical Speed Indicator Vertical Speed Required vector to final WAAS Wide Area Augmentation System waypoint weather Crosstrack Error Garmin GPSMAP 695/696 Owner’s Manual 190-00919-00 Rev. G...
-
Page 271: License Agreement And Warranty
This Garmin product is warranted to be free from defects in materials or workmanship for one year from the date of purchase. Within this period, Garmin will, at its sole option, repair or replace any components that fail in normal use. Such repairs or replacement will be made at no charge to the customer for parts or labor, provided that the customer shall be responsible for any transportation cost. -
Page 272: Aopa Airport Directory Notice
Appendix J Garmin retains the exclusive right to repair or replace the unit or software or offer a full refund of the purchase price at its sole discretion. SUCH REMEDY SHALL BE YOUR SOLE AND EXCLUSIVE REMEDY FOR ANY BREACH OF WARRANTY. -
Page 273: Weather Data Warranty
SiriusXM and Garmin further do not warrant the accuracy, reliability, completeness or timeliness of the traffic and weather information disclosed on the Radio Service. In no event will SiriusXM and Garmin, their data suppliers, service providers, marketing/distribution, software or Internet partners or hardware manufacturers be liable to you or to any third party for any direct, indirect, incidental, consequential, special, exemplary or punitive damages or lost profits resulting from use of or interruptions in the transmission or reception of the Services. -
Page 274: S Irius Xm Satellite Radio Service Agreement
• Consult the dealer or an experienced radio/TV technician for help. This product does not contain any user-serviceable parts. Repairs should only be made by an authorized Garmin service center. Unauthorized repairs or modifications could result in permanent damage to the equipment, and void your warranty and your authority to operate this device under Part 15 regulations. - Page 275 Rebroadcast 154 E6B 232 EPE Circle 237 Backlight 28 EXPORT 23, 95, 205, 206, 230 Battery 2 Bearing/distance, measuring 51 FCC 258 FIS-B 154 cable 207 FlightBook 225 cards, data 197 Index-1 190-00919-00 Rev. G Garmin GPSMAP 695/696 Owner’s Manual...
- Page 276 Airspaces 74, 75 Jeppesen database NDB 68, 69 updates 197 VORs 69 Nearest Information 64 NEXRAD 127, 128 NMEA 211, 212, 213 Legends 139 limited warranty 255 Loss of GPS 195 Obstacles 142 Index-2 Garmin GPSMAP 695/696 Owner’s Manual 190-00919-00 Rev. G...
- Page 277 Weight & Balance 236 Functionality 10 winds aloft 233 System ID 202 Winds Aloft 131 TAFs 132 xImage 210 Temperatures Aloft 131 X symbol on terrain 142 Terrain 141 Alerts 143, 146 TIS-A Index-3 190-00919-00 Rev. G Garmin GPSMAP 695/696 Owner’s Manual...
-
Page 278: Index
Index Blank Page Index-4 Garmin GPSMAP 695/696 Owner’s Manual 190-00919-00 Rev. G... - Page 280 Liberty House, Bulls Copse Road Hounsdown Business Park Southampton, SO40 9RB, U.K. p: 44/0870.8501241 f: 44/0870.8501251 Garmin Corporation No. 68, Jangshu 2nd Road Shijr, Taipei County, Taiwan p: 886/2.2642.9199 f: 886/2.2642.9099 www.garmin.com 190-00919-00 Rev. G © 2008, 2012 Garmin Ltd. or its subsidiaries...
Need help?
Do you have a question about the GPSMAP 696 and is the answer not in the manual?
Questions and answers
how do I determine the size of the EP E Circle to use?
The size of the Estimated Position Error (EPE) Circle for the Garmin GPSMAP 696 is determined using Dilution of Precision (DOP) and other factors to calculate horizontal position error. DOP measures the quality of satellite geometry, including the number of satellites received and their relative positions.
This answer is automatically generated