
Related Manuals for Electrolux EOD3410AOK


Summary of Contents for Electrolux EOD3410AOK
- Page 1 ....................EOD3410A EN OVEN USER MANUAL...
-
Page 2: Table Of Contents
ENVIRONMENT CONCERNS ........... . 26 WE’RE THINKING OF YOU Thank you for purchasing an Electrolux appliance. You’ve chosen a product that brings with it decades of professional experience and innovation. Ingenious and stylish, it has been designed with you in mind. -
Page 3: Safety Information
ENGLISH SAFETY INFORMATION Before the installation and use of the appli- • The sides of the appliance must stay ad- ance, carefully read the supplied instruc- jacent to appliances or to units with the tions. The manufacturer is not responsible same height. -
Page 4: Care And Cleaning
– be careful when you remove or install the accessories. WARNING! • Discoloration of the enamel has no effect Risk of injury, burns or electric on the performance of the appliance. It is shock or explosion. not a defect in the sense of the warranty law. - Page 5 ENGLISH DISPOSAL WARNING! Risk of injury or suffocation. • Disconnect the appliance from the mains supply. • Cut off the mains cable and discard it. • Remove the door catch to prevent chil- dren and pets to get closed in the appli- ance.
-
Page 6: Product Description
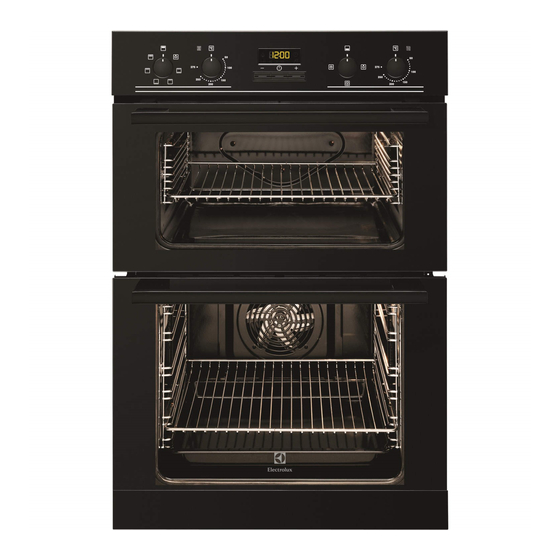
PRODUCT DESCRIPTION GENERAL OVERVIEW Knob for the top oven functions Knob for the top oven temperature Temperature indicator Electronic programmer Knob for the main oven functions Knob for the main oven temperature Heating element Oven lamp Fan and heating element... -
Page 7: Before First Use
ENGLISH BEFORE FIRST USE WARNING! Set the function and the maximum Refer to "Safety information" chap- temperature. ter. Let the appliance operate for one hour. Set the function and the maximum INITIAL CLEANING temperature. Let the appliance operate for ten mi- •... -
Page 8: Daily Use
DAILY USE WARNING! To deactivate the appliance, turn the Refer to "Safety information" chap- knob for the top oven functions and ter. the knob for the top oven temperature to the Off position. COOLING FAN ACTIVATING AND When the appliance operates, the cooling DEACTIVATING THE MAIN fan switches on automatically. - Page 9 ENGLISH Oven function Application To roast or roast and bake the food that requires the Ultra Fan same cooking temperature, using more than one shelf, without flavour transference. Defrost To defrost frozen food.
-
Page 10: Clock Functions
10 www.electrolux.com CLOCK FUNCTIONS ELECTRONIC PROGRAMMER Function indicators Time display Button + Selection button hr min Button - Clock function Application Time of day To set, change or check the time of day. Minute Minder To set a countdown time. This function has no effect on the operation of the oven. - Page 11 ENGLISH CANCELLING THE CLOCK FUNCTIONS Press the Selection button again and again until the necessary function indi- cator flashes. Press and hold the button -. The clock function goes out after some seconds.
-
Page 12: Using The Accessories
12 www.electrolux.com USING THE ACCESSORIES WARNING! GRILLING SET Refer to "Safety information" chap- The grilling set includes the roasting pan ter. grid and the deep roasting pan. You can use the roasting pan grid in two INSERTING THE OVEN positions: turned up or down. -
Page 13: Helpful Hints And Tips
ENGLISH HELPFUL HINTS AND TIPS WARNING! Adapt your usual settings (temperature, Refer to "Safety information" chap- cooking times) and shelf levels to the val- ter. ues in the tables. • With longer baking times, the oven can The temperature and baking times be switched off about 10 minutes before in the tables are guidelines only. -
Page 14: Top Oven
14 www.electrolux.com Baking results Possible cause Remedy Oven temperature too Set a higher oven temperature Cake is too dry Cake is too dry Baking time too long Set a shorter baking time Oven temperature too Set a lower oven temperature and a... -
Page 15: Main Oven
ENGLISH Approx Cook Temperature Food Time Shelf Position [°C] (mins) Fish Pie (Potato 190 - 200 20 - 30 Topped) Fruit Pies, Crum- 190 - 200 30 - 50 bles Milk Puddings 150 - 170 90 - 120 Pasta Lasagne etc. 170 - 180 40 - 50 Pastry:... - Page 16 16 www.electrolux.com Temperature Approx Cook Time Food [°C] (mins) Bread 190 - 210 30 - 35 Cakes: - Small & Queen 160 - 170 18 - 25 - Sponges 160 - 170 20 - 25 - Madeira 140 - 160...
- Page 17 ENGLISH Meat Temperature [°C] Cooking Time Pork/ Veal/ Ham 30-40 minutes per ½ kg 160 - 180 (1lb) and 30-40 minutes over Chicken 15-20 minutes per ½ kg 160 - 180 (1lb) and 20 minutes over Turkey/ Goose 15-20 minutes per ½ kg 160 - 180 (1lb) and 20 minutes over Duck...
- Page 18 18 www.electrolux.com Grill Time Food (mins in total) Kidneys - Lamb/Pig 6 - 10 Sausages 20 - 30 Steaks - Rare 4 - 6 - Medium 6 - 8 - Well Done 12 - 15 Toasted Sandwiches 3 - 4 DEFROSTING •...
-
Page 19: Care And Cleaning
ENGLISH CARE AND CLEANING WARNING! sharp edged objects or dishwasher. It Refer to "Safety information" chap- can destroy nonstick coating! ter. Stainless steel or aluminium ap- pliances: • Clean the front of the appliance with a Clean the oven door with a wet soft cloth with warm water and cleaning sponge only. -
Page 20: Oven Ceiling
20 www.electrolux.com OVEN CEILING The heating element folds down. The oven ceiling is ready to clean. You can fold down the heating element on Installing the heating element the oven ceiling to clean the oven ceiling easily. Install the heating element in opposite sequence. -
Page 21: Oven Lamp
ENGLISH Hold the door glass panels on their top edge one by one and pull them upwards out of the guide Clean the glass panel with water and soap. Dry the glass panel carefully. Installing the door and the glass panels When the cleaning is completed, install the glass panels and the oven door. -
Page 22: What To Do If
22 www.electrolux.com WHAT TO DO IF… WARNING! Refer to "Safety information" chap- ter. Problem Possible cause Remedy The oven does not heat The appliance is deactiva- Activate the appliance. ted. The oven does not heat The clock is not set. -
Page 23: Installation
ENGLISH INSTALLATION WARNING! The built-in unit must meet the sta- Refer to "Safety information" chap- bility requirements of DIN 68930. ter. min. 600 min. 550 min. 560 max. 570 min. 2000 min. 907 min. 300 16 5 874-879... - Page 24 24 www.electrolux.com 2x 3,5x25...
-
Page 25: Great Britain & Ireland - Guarantee/Customer Service
Before calling Electrolux appliance or any part thereof is out an engineer, please ensure you have proved to be defective by reason only of read the details under the heading "What to faulty workmanship or materials, we will, at do if... -
Page 26: Environment Concerns
26 www.electrolux.com ENVIRONMENT CONCERNS and electronic appliances. Do not dispose Recycle the materials with the symbol with appliances marked with the symbol Put the packaging in applicable containers to recycle it. the household waste. Return the product Help protect the environment and human... - Page 27 ENGLISH...
- Page 28 892950106-B-022012...
Need help?
Do you have a question about the EOD3410AOK and is the answer not in the manual?
Questions and answers