Asko DC7583 Operating Instructions Manual
Drying cabinet
Hide thumbs
Also See for DC7583:
- Mode d'emploi (36 pages) ,
- Instrucciones de operación (32 pages) ,
- Operating instructions manual (28 pages)
Table of Contents
Advertisement
Advertisement
Table of Contents

Related Manuals for Asko DC7583


Summary of Contents for Asko DC7583
- Page 1 Operating instructions DC7573/7583...
- Page 2 sxsdsdf...
-
Page 3: Operating Instructions
Drying Cabinet Save these instructions for future reference Dear Customer, Thank you for choosing this quality product from ASKO. We hope it will meet your expectations and ful ll your needs for many years to come. Scandinavian design combines clean lines, everyday functionality, and high quality. -
Page 4: Table Of Contents
Contents Safety instructions Care Grounding instructions Cleaning Interrupting a program When the drying cabinet is not used Packing material Troubleshooting Disposal The machine will not start Description of the drying cabinet Overheating cut-off Control panel Drying takes too long Assembly area The garments do not dry, or are Electrical requirements too dry... -
Page 5: Safety Instructions
WARNING! • The interior of the machine should be cleaned periodically by an authorized ASKO service agent. RISK OF FIRE! • Do not place items exposed to cooking oils in your drying cabinet. - Page 6 Safety instructions • The drying cabinet is manufactured and labeled for recycling. When it is no longer useful, contact your local refuse collection service for advice on how to properly dispose of the drying cabinet for recycling. • Damaged power cables should only be replaced by a certified professional.
-
Page 7: Grounding Instructions
Safety instructions Grounding instructions WARNING! Grounding instructions for a grounded, cord-connected appliance Do not allow children to play with In the event of malfunction or breakdown, grounding will reduce the risk of electric shock by the tumble dryer. providing a path of least resistance for electric The drying cabinet does not start automatically current. -
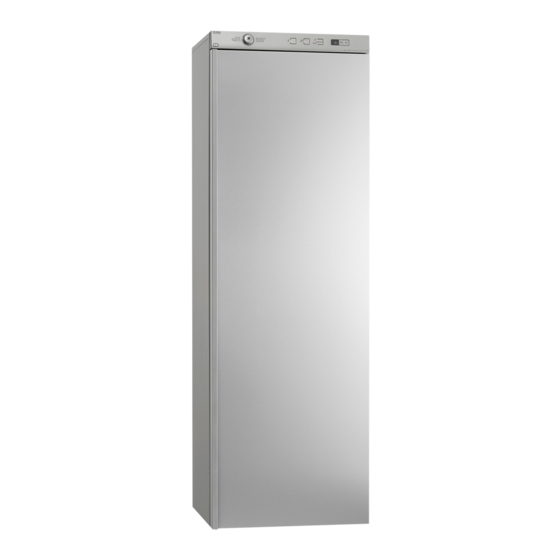
Page 8: Description Of The Drying Cabinet
Description of the drying cabinet 1. Connector 7. Door hanger for light items 2. Control panel 8. Middle hanger section 3. Hanging hooks 9. Glove hanger 4. Serial number plate (inside) 10. Lower hanger section 5. Upper hanger section 11. Shoe rack (accessory) 6. -
Page 9: Control Panel
Control panel Main power switch Display window Program selector Start Options buttons Stop Customer Care Center 1-800-898-1879 www.askousa.com... -
Page 10: Assembly Area
1695-1720 • The power socket should be easy to reach once the drying cabinet has been installed. DC7583 This also applies when the drying cabinet is 1835-1860 installed in a recess or the like. See the "Electrical installation"... -
Page 11: Electrical Requirements
Electrical requirements User liability Electrical connection • Connect to an individual branch circuit. It is the responsibility of the user to contact a Minimum 16 AWG required and 15 amps qualified electrician if a power outlet as described overcurrent-protective device. in this manual is not available. -
Page 12: Vent Connection
Vent connection 1. Moist air out Moist air can be evacuated in two 2. Air intake ways: • Exhaust air from the drying cabinet is channeled to an exhaust duct or an outlet in Minimum 300 the wall using a UL-approved vent hose. mm to the Recommended! ceiling... - Page 13 Vent connection Connection to the exhaust duct The drying cabinet can be connected to the exhaust duct in two ways: When the cabinet is on, 1589 ft (45 m ) moist air/hour is evacuated. Make sure that air can enter With draft check the room to replace the moist air that has been The existing valve is replaced with the draft check...
- Page 14 Vent connection Permanently fitted to the exhaust duct (some markets only) The exhaust air duct valve must be replaced with a transition section (not supplied). Do not fit valves found in the building’s ventilation system inside the drying cabinet. 1. Transition section The drying cabinet is permanently fitted to the exhaust duct Customer Care Center 1-800-898-1879...
-
Page 15: Installation
Installation Unpacking WARNING! • The cabinet can easily tip over if not screwed into place. At least two persons should handle the drying cabinet. • Packing material such as plastic and cellular plastic should be kept out of the reach of children. -
Page 16: Assembly Kit
Installation 1. Draft check (not included) Assembly kit 2. Vent hose (not included) 3. Connector with two securing screws, x 1 4. Securing screws for securing against wall, x 2 5. Plastic plug, x 2 6. Cover plugs for cabinet feet, x 4 7. -
Page 17: Positioning
Installation 4. Slide the cabinet back into place and screw it Positioning in position with the supplied screws. 1. Place the drying cabinet where it is to stand. 5. Fit the cover plugs. 2. Open the door and adjust the level of the drying cabinet so that it stands firmly on all four feet. -
Page 18: Installing As A Built-In Cabinet
19,7-22,6" (500-575 mm). It must be as thick as the difference between assembly depth “B” and 23,6" (600 mm). If DC7583 assembly depth “B” is 24,4" (620 mm), batten 64-1/2"- thickness “A” must be 0,8" (20 mm). -
Page 19: Vent Connection
Installing as a built-in cabinet Vent connection Min 0,4" If the drying cabinet is built-in, fit the connector Min 3/8" air gap through the vent opening in the top section of the recess. The drying cabinet is then installed where it is to stand. -
Page 20: Reversing The Door
Reversing the door Be aware of the risk of strain injuries. At least two WARNING! persons should handle the drying cabinet. Rehanging the door 1. Place the drying cabinet on its back. 2. Loosen the hinge plate, see figure 1. 3. -
Page 21: Operation
Operation WARNING! To reduce the risk of electric shock or injury to persons, read the "Important Safety Instructions" section before operating this appliance. Sort the garments • Remove any dry garments from the drying cabinet to reduce the drying time for the remaining garments. -
Page 22: Close The Drying Cabinet Door And Switch On The Main Power Switch
Operation Close the drying cabinet door Program selection and switch on the main power Always follow the garment’s washing instructions if these are stated. Select the switch. program to suit the most delicate garment. If a softener or antistatic agent are used when laundering, the manufacturer's instructions for the use of these products must be followed. -
Page 23: Selecting Options
Operation Timed dry Time Saver Drying with heat. You can set a custom drying The program is shortened by about 12 minutes. time. Recommended when drying shoes and You can choose Time Saver with all programs boots or the like. Select the time by pressing the except Air Fluff. -
Page 24: Drying Program Finished
Operation Adding or removing garments You can stop the drying cabinet after starting a program by opening the door. Hang or remove garments, close the door again, and press the Start button. A new estimate of the remaining program time will be displayed after a few minutes. -
Page 25: Care
Care Cleaning High-pressure washers must not be used! • The cabinet panels can be cleaned using a mild soap solution and a damp cloth. • Dust collects easily around the air intake on top of the cabinet. This can interfere with the cabinet's operation and possibly cause problems. -
Page 26: Troubleshooting
Troubleshooting The machine will not start Error messages Check If F2 flashes on the display, the maximum • that the door is closed properly. permitted program time has been reached. Read • that the main power switch is on. "Drying takes too long" in the "Troubleshooting" •... -
Page 27: Service
Service Make sure you know the model designation, type designation, and serial number before contacting Article no. xxxxxxxx the Customer Care Center. Serial no. xxxxxxxx The model designation and serial number can be Model xxxxxx found on the serial number plate, which is found on the inside of the cabinet. - Page 28 Length of warranty Two-Year Full ASKO replacement parts and/or repair labor to correct defect in materials or workmanship. Ser- From date of purchase. vice must be provided by an authorized ASKO service agent. Third Year Full ASKO replacement parts and/or repair labor to correct defect in materials or workmanship.
- Page 29 Service Warranty In no event shall ASKO Appliances Inc. be responsible for any incidental or ASKO Appliances Inc. will not pay for: consequential damages. Service calls to: Some states will not allow the exclusion or 1. Correct the installation of the appliance.
-
Page 30: Technical Information
630" (16 m) Size: Height DC7573: 66,9" (1700 mm) DC7583: 72,4" (1840 mm) Adjustable DC7573: 66,7" (1695 mm)-67,7" (1720 DC7583: 72,2" (1835 mm)-73,2" (1860 Width 23,4" (595 mm). Depth 23,6" (600 mm) without handle, 24,4" (620) with handle. Weight: approx. 137 lb (62 kg) -
Page 31: Energy Consumption And Drying Times
Technical information Energy consumption and drying times Drying of spun laundry *) Settings Energy consumption Drying time in Heat hrs:min Auto normal dry, normal tempera- 0.6 kWh/kg 1:10 normal temperature ture. Auto normal dry, low temperature. 0.3 kWh/kg 1:00 low temperature Cold dry 0.06 kWh/kg 8:00... - Page 32 Notes Customer Care Center 1-800-898-1879 www.askousa.com...
- Page 33 Notes Customer Care Center 1-800-898-1879 www.askousa.com...
-
Page 34: Quick Guide
Quick guide Fabrics Press the Start button • Sort and hang fabrics of the same type together to ensure they dry as evenly as possible. Drying program finished Turn on the main power switch • "End" appears on the display when the program is finished. - Page 35 sxsdsdf...
Need help?
Do you have a question about the DC7583 and is the answer not in the manual?
Questions and answers