Asko DC7573 Operating Instructions Manual
Dryer cabinet
Hide thumbs
Also See for DC7573:
- Operating instructions manual (36 pages) ,
- Mode d'emploi (36 pages) ,
- Instrucciones de operación (32 pages)
Table of Contents
Advertisement
Operating Instructions
Dryer cabinet
Dear Customer,
Thank you for choosing this quality product from ASKO.
We hope it will meet your expectations and ful l your needs
for many years to come. Scandinavian design combines clean
lines, everyday functionality and high quality. These are key
characteristics of all our products and the reason they are
greatly appreciated throughout the world.
To get the most out of your new machine, we recommend that
you read the operating instructions before using the machine.
The operating instructions also include information on how
you can help protect the environment.
ASKO DC7573, 7583
Advertisement
Table of Contents

Related Manuals for Asko DC7573


Summary of Contents for Asko DC7573
-
Page 1: Operating Instructions
Operating Instructions Dryer cabinet Dear Customer, Thank you for choosing this quality product from ASKO. We hope it will meet your expectations and ful l your needs for many years to come. Scandinavian design combines clean lines, everyday functionality and high quality. These are key characteristics of all our products and the reason they are greatly appreciated throughout the world. -
Page 2: Table Of Contents
Contents Safety instructions Care Safety Cleaning Interrupting a program When the dryer cabinet is not used Packing material Troubleshooting Recycling The machine will not start To minimize the risk of fire in a Overheating cut-out dryer cabinet, the following should Drying takes too long be observed: The garments do not dry, or are... -
Page 3: Safety Instructions
Safety instructions • Clean the inside of the dryer cabinet regularly. Read the operating instructions and keep them in a safe place! WARNING! Never stop a dryer cabinet before the program is completed unless you immediately remove all the laundry and spread it out so that the heat can disappear. -
Page 4: To Minimize The Risk Of Fire In A Dryer Cabinet, The Following Should Be Observed
Safety instructions To minimize the risk of fire in a removers (some brands), turpentine, waxes and wax removers. dryer cabinet, the following should • Items containing foam rubber (also known as be observed: latex foam) or similarly textured rubberlike • Items that have been spotted or soaked with materials should not be dried in a dryer cabinet vegetable or cooking oil constitute a fire hazard on a heat setting. -
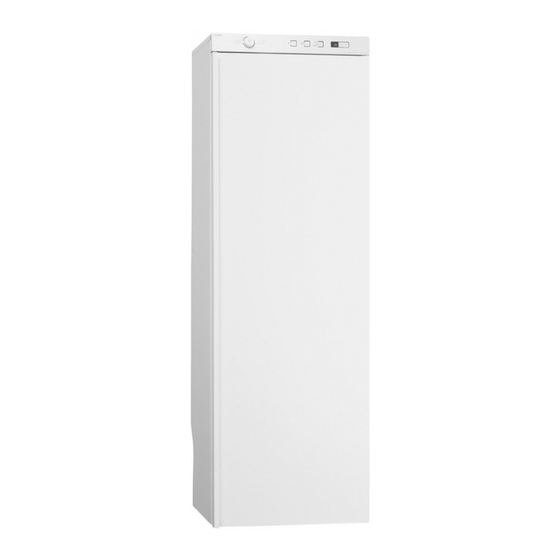
Page 5: Description Of The Dryer Cabinet
Description of the dryer cabinet 1. Connector 7. Door hanger for light goods 2. Control panel 8. Middle hanger section 3. Hanging hooks 9. Glove hanger 4. Type plate (inside) 10. Lower hanger section 5. Upper hanger section 11. Shoe rack (accessory) 6. -
Page 6: Control Panel
Control panel Main power switch Display window Program selector Start Options buttons Stop... -
Page 7: Assembly Area
2 m of the top section of the dryer O102 cabinet. The dryer cabinet has a 2 m long earthed cable with plug connected at the top. DC7573 The power outlet must be positioned so that 1695-1720 an extension cord is not necessary. -
Page 8: Electrical Requirement
Electrical requirement User liability Electrical connection • The dryer cabinet is to be connected to It is the responsibility of the user to contact a 220-240V, 1-Phase, 50-60Hz and the qualified electrician if a power outlet as described protective power outlet. The power outlet must in this manual is not available. -
Page 9: Connect To The Ventilation
Connect to the ventilation 1. Moist air out Evacuation of the moist air can be 2. Air intake performed in two ways: • Waste air from the dryer cabinet is led to an evacuation duct or an outlet in the wall using Minimum 300 the vent hose supplied. - Page 10 Connect to the ventilation Connection to the evacuation duct Permanently fitted to the evacuation duct (only some markets) When the cabinet is on 45 m moist air/hour is The exhaust air duct valve must be replaced with evacuated. Make sure that air can enter the room a transition section (not supplied).
-
Page 11: Installation
Installation Unpacking WARNING! • The cabinet can easily tip over if not screwed in position. At least two persons should handle the dryer cabinet. • Packing material such as plastic and cellular plastic should be kept inaccessible to children. Observe the risk of suffocation to small children when they come into contact with plastic materials. -
Page 12: Assembly Set
Installation 1. Draught check (some markets) x 1 Assembly set 2. Ventilation hose (some markets) x 1 3. Connector with two securing screws x 1 4. Securing screws for securing against the wall 5. Plastic plug x 2 6. Cover plug for the cabinet feet x 4 7. -
Page 13: Positioning
Installation Positioning Fastening 1. Place the dryer cabinet in the intended 1. Place the dryer cabinet in the intended position. position, open the door and pull out the top 2. Open the door and adjust the level of the dryer hanger section. -
Page 14: Installing In A Built-In Cabinet
“B” is the same as the depth A=B-600 of the dryer cabinet you can go directly to point 10 below. DC7573 8. Cut a wooden batten (2) with the thickness “A” 1500-1525 and length between 500-575 mm. It must be as thick as the difference between the assembly depth “B”... -
Page 15: Connect To The Ventilation
Installing in a built-in cabinet Connect to the ventilation If the dryer cabinet is in-built, fit the connector Min 10 mm through the ventilation opening in the top section of the built-in cabinet. The dryer cabinet is then fitted in its intended position. 1. -
Page 16: Door Hanging
Door hanging WARNING! Be aware of the risk of strain injuries. At least two persons should handle the dryer cabinet. Rehanging the door 1. Place the dryer cabinet on its back. 2. Loosen the hinge plate, see figure 1. 3. Lift off the door, loosen the glove hanger and the switch plate from the main power switch. Turn the glove hanger a half-turn and fit in the same fastening hole. -
Page 17: Operation
Operation Sort the garments • Remove any dry garments from the dryer cabinet to reduce the drying time for the remaining garments. • Attempt to dry garments of the same type of fabric to produce an even drying result. Otherwise, with a mixed load, there is a risk that the garments will not be dry. -
Page 18: Program Selection
Operation Program selection Timed dry Always follow the garment’s washing Drying with heat. You can decide on a fixed drying instructions if these are stated. Select the time yourself. Recommended when drying shoes program to suit the most delicate garment. If and boots or the like. -
Page 19: Press The Start Button
Operation Loading or removing garments Time saver You can stop the dryer cabinet after starting a The program is shortened by about 12 minutes. program by opening the door. Hang in or remove You can choose Time saver with all programs garments, close the door again and press the except Revitalise. -
Page 20: Care
Care Cleaning High-pressure washers must not be used! • The cabinet panels can be cleaned using a mild soap solution and damp cloth. • Dust collects easily around the air intake on top of the cabinet. This can cause disturbances which in turn can result in downtime. -
Page 21: Troubleshooting
Troubleshooting The machine will not start Check • that the door is closed correctly. • that the main power switch is on. • that the machine is not programmed to start at a specific time (e.g. 13.30) • that the plug is connected. •... -
Page 22: Service
Service Make sure you know the model designation, type designation, and serial number before contacting Article no. xxxxxxxx service. Serial no. xxxxxxxx The model designation and serial number can be Model xxxxxx found on the type plate, which is placed on the inside of the cabinet. -
Page 23: Technical Information
180 m /hour Hanger length: 16 m Size: Height DC7573: 1700 mm DC7583: 1840 mm Adjustable DC7573: 1695 mm-1720 mm DC7583: 1835 mm-1860 mm Width 595 mm. Depth 600 mm without handle, 620 with handle. Weight: approx. 62 kg Colour:... -
Page 24: Energy Consumption And Drying Times
Technical information Energy consumption and drying times Drying of sup wash *) Settings Energy consumption Drying time in Heat hrs:min Auto normal dry, normal tempera- 0.6 kWh/kg 1:10 normal temperature ture. Auto normal dry, low temperature. 0.3 kWh/kg 1:00 low temperature Cold dry 0.06 kWh/kg 8:00... - Page 25 Your notes...
- Page 26 Your notes...
- Page 27 Your notes...
-
Page 28: Quick Guide
Quick guide Fabrics Press the Start button • Sort and hang fabrics of the same type together to ensure that they dry as evenly as possible. Drying program finished Turn on the main power switch • 'End' appears on the display when the program is finished.
Need help?
Do you have a question about the DC7573 and is the answer not in the manual?
Questions and answers