Table of Contents
Advertisement
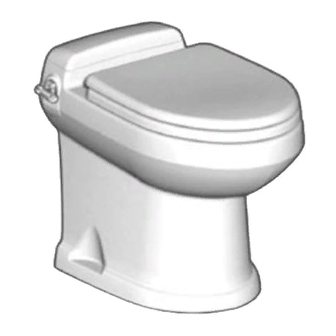
CONCERTO
®
ELECTRIC FLUSH, GRAVITY DISCHARGE TOILET
OWNER'S MANUAL
3400 Series
3300 Series
(with remote flush switch)
(with flush handle)
WARNING
!
This manual must be read and under-
stood before installation, adjustment,
service, or maintenance is per-
formed. Modification of this product
can result in property damage.
Dometic Corporation • Sanitation Systems
13128 State Rt 226, PO Box 38
Big Prairie, OH 44611
SeaLand Product Customer Service: 1-800-321-9886
(8:00 a.m. - 5:00 p.m. ET)
1
Advertisement
Table of Contents

Related Manuals for Dometic 3300


Summary of Contents for Dometic 3300
- Page 1 Modification of this product can result in property damage. Dometic Corporation • Sanitation Systems 13128 State Rt 226, PO Box 38 Big Prairie, OH 44611 SeaLand Product Customer Service: 1-800-321-9886...
-
Page 2: Table Of Contents
ORDERING PARTS Dometic is ready to assist you in the event service is required. Before calling, please have the following information available. Your cooperation in having this information ready is appreciated and allows us to better meet your needs. -
Page 3: Concerto Toilet Dimensions
CONCERTO TOILET DIMENSIONS TOILET INSTALLATION INSTRUCTIONS System Requirements: • 2 GPM (10.6 lpm) or larger water pump. • 1/2-inch (12.7 mm) water line terminating in 1/2-inch MPT fitting (to connect to toilet water supply hose). • 4-bolt floor (closet) flange. SeaLand flanges available include 3-inch spigot, socket, MPT, or 45-degree swivel socket. - Page 4 STEP 5a: For through-the-floor water line and electrical wires, mark another centerline 6 inches (152 mm) from the back wall (fig. 4). Fig. 4 STEP 5b: For through-the-wall water line and electrical wires, mark a centerline 8 inches (203 mm) up from the floor centerline (fig.
- Page 5 FOR MODEL 3400 TOILET WITH REMOTE SWITCH OPERATION, see page 7 for wall switch installation instructions. STEP 9: WITH THE ELECTRICAL POWER OFF, route #14 gauge stranded copper wire from 12 VDC ground and positive 12 VDC from the fuse panel through a 7- or 8-amp fuse or circuit breaker.
- Page 6 STEP 16: With toilet close to floor flange, connect flex- ible water supply hose to the water line fitting (fig. 17). Fig. 17 STEP 17: Insert the positive (+) 12 VDC wire into position 1 of the green terminal block and tighten the screw securely.
-
Page 7: Remote Flush Switch Installation
MODEL 3400 REMOTE FLUSH SWITCH INSTALLATION 3400 series toilets feature a remote flush switch to control the “Flush” and “Add Water” functions. Follow the instructions below for switch installation. STEP 1: Select a location for the switch. 8 feet of cable (2.4 m) is provided. You may need to supply more wire, depending on how far you locate the switch from the toilet. -
Page 8: Important Information Before Operation
1. Fill freshwater tank and add deodorant to holding tank through toilet bowl. 2. Make sure all guests understand the operation of the toilet system. 3300 models: This flushing instruction label is located under the seat, and is easily read when the seat is raised. -
Page 9: Operating Instructions
1. Adding More Water To Toilet Bowl Pull up the flush handle (3300 model) or push "Add Water" switch (3400 model) until the desired water level is attained. To prevent overflowing the toilet, a timer inside the control module limits the amount of water that can be added. -
Page 10: Proper Cleaning And Maintenance
PROPER CLEANING AND MAINTENANCE The Concerto toilet should be cleaned regularly for maximum sanitation and operational efficiency. You can clean it just as you would a household toilet. Do not use caustic chemicals, such as drain-opening types, as they will damage the seals. -
Page 11: Winterizing
Formaldehyde versus Non-Formaldehyde: Dometic manufactures both types of deodorants. Generally speak- ing, formaldehyde formulas control odor very effectively at all temperatures and with all degrees of water hardness. -
Page 12: Flush Mechanism Components
floor. 2. Remove access cover from top of china and set it aside. FLUSH HANDLE COMPONENTS (3300 series) Flush Handle Flush Switch REMOTE FLUSH SWITCH (3400 series) Flush Valve... -
Page 13: Toilet System Electrical Specifications
TOILET SYSTEM ELECTRICAL SPECIFICATIONS Maximum standby current (amps): Maximum operating current (amps): Flush motor locked rotor current (amps): Maximum voltage Minimum voltage: Input power wire size All other wires size: Fuse size (amps) 12VDC .070 14.5 14 ga. 18 ga. -
Page 14: Troubleshooting
TROUBLESHOOTING A volt/ohmmeter (VOM) and the Toilet Wiring Diagram may be required for this section. Caution: Portions of this section will require that power be applied to the toilet. Keep hands away from the flush ball, motor drive arm and rotor shaft to prevent personal injury during testing and troubleshooting. The control module uses a microprocessor to provide all the automatic and timing functions. -
Page 15: Toilet Operation
TROUBLESHOOTING (cont’d) ERROR CODE CORRECTIVE PROCEDURES Condition Mode Switch in SERVICE position. Valve Open Limit Switch problem. Valve Closed Limit Switch problem. TOILET OPERATION SYMPTOM 1. Toilet will not flush and water will not enter toilet bowl. Condition +5V status light is off: +5V status light is on: SYMPTOM 2. - Page 16 TROUBLESHOOTING (cont’d) SYMPTOM 3. Flush valve will not close. Condition/Procedure Mode Switch is in SERVICE position: Foreign object prevents the flush valve from closing and the safety circuit locked flush valve in open position: Check the voltage output to the flush valve motor at pins 9 and 10 on the control module as follows: SYMPTOM 4.
- Page 17 TROUBLESHOOTING (cont’d) SYMPTOM 6. Water will not stay in bowl. Condition/Procedure Put Mode Switch in “Service” position: Worn or damaged flush valve ball and seal: SYMPTOM 7. Water will not shut off and overflows the toilet. Procedure Check the “WATER VALVE” status light: SYMPTOM 8.
-
Page 18: Wiring Diagrams
WIRING DIAGRAMS 3300 SERIES (with flush handle) 3400 SERIES (with remote flush switch) -
Page 19: Customer Service
There is a strong, worldwide network to assist in servicing and maintaining your sanitation system. For the Authorized Service Center near you, please call from 8:00 a.m. to 5:00 p.m. (ET) Monday through Friday. You may also write us at Dometic Corp., P.O. Box 38, Big Prairie Ohio 44611. Telephone: 1 800-321-9886 U.S.A. -
Page 20: Limited Warranties
If this Dometic product is placed in commercial or business use, it will be warranted, to the original purchaser only, to be free of defects in material and workmanship for a period of ninety (90) days from the date of purchase.
Need help?
Do you have a question about the 3300 and is the answer not in the manual?
Questions and answers