HP KN744AA - Notebook QuickDock Port Replicator User Manual
Hp quickdock 2.0 docking station - user guide
Hide thumbs
Also See for KN744AA - Notebook QuickDock Port Replicator:
- Quick setup (2 pages) ,
- User manual (43 pages) ,
- Maintenance and service manual (42 pages)
Table of Contents
Advertisement
Quick Links
Advertisement
Table of Contents

Related Manuals for HP KN744AA - Notebook QuickDock Port Replicator


Summary of Contents for HP KN744AA - Notebook QuickDock Port Replicator
- Page 1 HP Notebook QuickDock User Guide...
- Page 2 © Copyright 2006, 2008 Hewlett-Packard Development Company, L.P. Microsoft, Windows, and Windows Vista are trademarks or registered trademarks of Microsoft Corporation in the United States and/or other countries. The information contained herein is subject to change without notice. The only...
-
Page 3: Table Of Contents
Table of contents 1 Getting started Identifying components ........................2 Front components ........................ 2 Rear components ........................ 2 Right-side components ......................3 Left-side components ......................3 Setting up the QuickDock ........................5 Step 1: Connect to AC power ....................5 Step 2: Connect the computer ..................... -
Page 5: Getting Started
Getting started This chapter identifies the visible hardware features of the HP Notebook QuickDock and provides the instructions for setting up the QuickDock. NOTE: The QuickDock may have features that are not supported by your computer. For information on supported signals that are transmitted through the computer expansion port, refer to your computer user guide. -
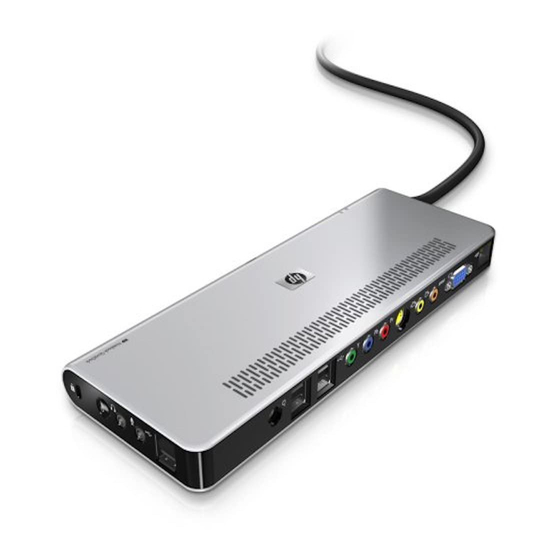
Page 6: Identifying Components
Identifying components Front components Component Description Connection indicator light On: The computer is connected and turned on. AC power connect light On: The QuickDock is connected to AC power. Consumer infrared lens Detects the infrared signal of an optional remote control. Rear components Component Description... -
Page 7: Right-Side Components
Right-side components Component Description Security cable slot Attaches an optional security cable to the QuickDock. NOTE: The security cable is designed to act as a deterrent, but it may not prevent the computer from being mishandled or stolen. Power button Turns on the computer. - Page 8 Component Description Expansion cable Connects the QuickDock to a computer. Good dock connection light On: The computer is connected and turned on. Chapter 1 Getting started...
-
Page 9: Setting Up The Quickdock
Setting up the QuickDock Step 1: Connect to AC power WARNING! To reduce the risk of electric shock or damage to your equipment: Plug the power cord into an AC outlet that is easily accessible at all times. Disconnect power from the product by unplugging the power cord from the AC outlet. If provided with a 3-pin attachment plug on the power cord, plug the cord into a grounded (earthed) 3- pin outlet. - Page 10 Connect the expansion cable to the expansion port on the computer (2), matching the icon on the computer expansion port with the icon on the end of the expansion cable. CAUTION: To prevent damage to the expansion port, be sure that you correctly align the expansion cable to the expansion port on the computer.
- Page 11 If the computer is off, follow either of these steps to turn it on: ● Press the power button on the computer. NOTE: The power button location on the computer varies by computer series and model. – or – ● Press the power button on the QuickDock.
-
Page 12: Step 3: Prevent The Computer From Sleeping
Step 3: Prevent the computer from sleeping To ensure that the computer does not sleep when the lid is closed: Click Start, and then click Control Panel. Click Power Options, and then click the Advanced tab. In the Power Buttons section, click Do nothing from the When I close the lid of my portable computer list, and then click OK. -
Page 13: Using The Quickdock
Using the QuickDock QuickDock guidelines ● Operating systems—For optimal performance, use the QuickDock with HP or Compaq computers running Microsoft® Windows® XP or the Windows Vista® operating system. ● Power—To use QuickDock features, AC power must be connected to the QuickDock. The QuickDock supplies power to the computer while the computer and QuickDock are connected. -
Page 14: Connecting To A Network
Connecting to a network NOTE: To communicate using the modem on your computer and an analog telephone line, connect one end of a modem cable to the RJ-11 (modem) jack on your computer and the other end to an RJ-11 telephone jack. -
Page 15: Connecting Usb Devices
Connecting USB devices The QuickDock has 6 USB ports: 2 ports on the right side and 4 ports on the rear. Use these ports to connect optional external USB devices, such as a keyboard or mouse. Connecting USB devices... -
Page 16: Connecting To A Vga Display Device
Connecting to a VGA display device The QuickDock can also be connected to an external VGA display device, such as a monitor or a projector, through the external monitor port. NOTE: The external monitor port on the computer is disabled when the computer is connected to the QuickDock. -
Page 17: Connecting Audio
Connecting audio NOTE: Do not connect more than one audio device to the QuickDock. Connecting analog audio devices To connect analog audio: Connect one end of an audio Y-cable (purchased separately) to the headphone jack on the right side of the QuickDock (1). Connect the other end to the red and white audio-in jacks on your television or stereo equipment (2). - Page 18 Connect the other end of the cable to the digital audio jack on your television or stereo equipment (2). Refer to your television or stereo equipment user guide for the jack name and location. Chapter 2 Using the QuickDock...
-
Page 19: Connecting An Optional Security Cable
Connecting an optional security cable NOTE: The security cable is designed to act as a deterrent, but it may not prevent the computer from being mishandled or stolen. To install a security cable: Loop the security cable around a secured object. Insert the key (1) into the cable lock (2). -
Page 20: Disconnecting The Computer
Disconnecting the computer To disconnect the computer from the QuickDock: Press and hold the buttons on the sides of the expansion cable (1), and then remove the cable ▲ from the computer (2). NOTE: The location of the expansion port on the computer varies by computer series and model. Chapter 3 Disconnecting the computer... -
Page 21: Troubleshooting
Troubleshooting Solving common problems The following tables list possible problems and the recommended solutions. General use and connection problems Problem Possible cause Solution The good dock connection light is off. The computer is not on. Turn on the computer. The QuickDock is not connected to AC Connect the AC adapter to the power. -
Page 22: Audio Problems
Audio problems Problem Possible cause Solution Headphones or other audio device Headphones or another audio device is Disconnect the headphones or other connected to the QuickDock does not connected to the headphone jack on the audio device from the headphone jack on produce sound. -
Page 23: Getting More Information
Getting more information ● For comprehensive information about your computer, as well as governmental agency and safety information about the use of your computer, access Help and Support by clicking Start, and then clicking Help and Support. ● The HP Web site (http://www.hp.com) provides product news and software updates. Technical support If you cannot solve a problem using the troubleshooting tips in this chapter, you may need to contact technical support. -
Page 24: Index
Index Help and Support 19 power connector 5 AC power connect light 2 power connector 1 2 analog audio 13 power connector 2 2 infrared (IR) lens, consumer 2 audio connection power light 7 analog 13 digital 13 jacks RJ-45 (network) jack 2, 10 troubleshooting 18 audio-in (microphone) 3 audio-in (microphone) jack 3...
Need help?
Do you have a question about the KN744AA - Notebook QuickDock Port Replicator and is the answer not in the manual?
Questions and answers