LaCie 526 User Manual
User manual
Hide thumbs
Also See for 526:
- Quick install manual (24 pages) ,
- Specifications (2 pages) ,
- Hardware (4 pages)
Table of Contents
Advertisement
Quick Links
LaCie 500 Series LCD Monitor
Table of Contents
1. Introduction to Your LaCie 500 Series LCD Monitor . .................................................... 7
1.1. 500 Series LCD Monitor Features .................................................................................................... 7
1.2. Box Content . .................................................................................................................................. 8
2. Installing Your LaCie 500 Series LCD Monitor ............................................................. 9
3. Using Your LaCie 500 Series LCD Monitor . ................................................................ 12
3.1. Physical Adjustments ..................................................................................................................... 12
3.1.1. Raise and Lower the Monitor Screen ................................................................................... 12
3.1.2. Screen Tilt ........................................................................................................................ 12
3.1.3. Screen Rotation ................................................................................................................ 13
3.1.4. Swivel .............................................................................................................................. 13
3.1.5. Remove the Monitor Stand for Mounting . ............................................................................ 14
3.1.6. Flexible Arm Installation . .................................................................................................... 15
4. OSD (On-Screen Display) Control Menu Functions .................................................... 16
4.1. Brightness/Contrast Controls ......................................................................................................... 17
4.2. Auto Adjust (Analog Input Only) .................................................................................................... 17
4.3. Image Controls ............................................................................................................................ 18
4.4. Color Control Systems .................................................................................................................. 19
4.5. Tools . .......................................................................................................................................... 20
4.6. Menu Tools ................................................................................................................................. 22
4.7. Information .................................................................................................................................. 23
4.8. OSD Warnings . ............................................................................................................................ 24
4.9. Advanced Menu Functions ........................................................................................................... 24
4.10. Using the Picture Mode Function . ................................................................................................ 35
4.11. Using the Auto Brightness Function . .............................................................................................. 36
5. Troubleshooting ........................................................................................................ 38
6. Contacting Customer Support ................................................................................... 40
6.1. LaCie Technical Support Contacts.................................................................................................. 41
7. Warranty Information ............................................................................................... 42
Table of Contents
page 1
Advertisement
Table of Contents

Related Manuals for LaCie 526


Summary of Contents for LaCie 526
-
Page 1: Table Of Contents
LaCie 500 Series LCD Monitor Table of Contents User Manual page 1 Table of Contents 1. Introduction to Your LaCie 500 Series LCD Monitor ............. 7 1.1. 500 Series LCD Monitor Features ....................7 1.2. Box Content ........................... 8 2. Installing Your LaCie 500 Series LCD Monitor ............. 9 3. Using Your LaCie 500 Series LCD Monitor ..............12 3.1. Physical Adjustments ........................12 3.1.1. Raise and Lower the Monitor Screen ................... 12 3.1.2. Screen Tilt ........................12 3.1.3. Screen Rotation ........................ -
Page 2: User Manual
LaCie 500 Series LCD Monitor Forward User Manual page 2 Copyrights energy and, if not installed and used in cause interference with radio and tele- accordance with the instructions, may vision reception. Copyright © 2009 LaCie. All rights re- served. No part of this publication may be cause harmful interference to radio U.S. Responsible Party: LaCie, LTD communications. However, there is no reproduced, stored in a retrieval system, or transmitted in any form or by any means, guarantee that interference will not occur Address: 22985 NW Evergreen Pkwy in a particular installation. If this equip-... -
Page 3: Safety Precautions And Maintenance
Maintenance hour to allow the impression to fade If liquid has been spilled, or objects ❖ away. have fallen into the monitor. DO NOT OPEN THE MONITOR. There When operating the LaCie 500 Series ❖ ❖ If the monitor has been exposed to rain ❖ are no user serviceable parts inside and LCD Monitor with a 220-240V AC or water. -
Page 4: Health And Ergonomic Precautions
LaCie 500 Series LCD Monitor Health and Ergonomic Precautions User Manual page 4 Health Ergonomic Rest your eyes periodically by focus- most of the time (the screen or refer- ❖ ing on an object at least 20 feet away. ence material) directly in front of you to Precautions Blink often. minimize turning your head while you are typing. -
Page 5: Environmental Regulations
The mark on electrical and electronic prod- removal laws. as signal cables or power cords. When you Manufacturer’s Recycling and Energy Information LaCie is strongly committed to environ- This monitor features an advanced energy itor enters a single Energy Saving mode. mental protection and sees recycling as saving capability. When a VESA Display one of the company’s top priorities in trying... -
Page 6: Monitor Specifications
LaCie 500 Series LCD Monitor Monitor Specifications User Manual page 6 Monitor Specifications 526 LCD Monitor Technology: H-IPS POL Diagonal display: 25.5” (64.9 cm) Active Display: 550 (H) x 344 (V) mm Resolution: Some systems may not support all modes listed. 720 x 400* at 70 Hz to 85 Hz; 640 x 480* at 60 Hz to 85 Hz; 800 x 600* at 56 Hz to 85 Hz; 832 x 624* at 75 Hz; 1024 x 768* at 60 Hz to 85 Hz; 1152 x 864* at 70Hz to 85 Hz; 1152 x 870* at 75 Hz; 1280 x 960* at 60 Hz; 1280 x 1024* at 60 Hz to 85 Hz; 1600 x 1200* at 60 Hz to 75 Hz ;1200 x 1920* at 60 Hz 1920 x 1200 at 60 Hz – LaCie recommends this resolution for optimal display performance. The LaCie 526 supports HDTV resolutions (1920x1080p@50Hz, 1920x1080p@60Hz, 1280x720p@60Hz, 1280x720p@50Hz) as well as 720x480p@60Hz and 720x576p@50Hz Pixel pitch: 0.287 mm, 89 PPI Gamut: 102% NTSC Color depth:... -
Page 7: Introduction To Your Lacie 500 Series Lcd Monitor
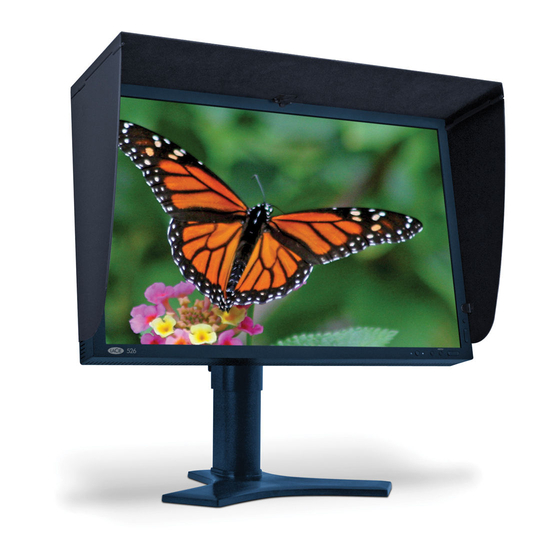
LaCie 500 Series LCD Monitor Introduction User Manual page 7 1. Introduction to Your LaCie 500 Series LCD Monitor Thank you for purchasing the LaCie 500 Series LCD Monitor. Designed for serious graphics professionals, this advanced line of LCD monitors features 12-bit gamma correction to meet the most stringent demands for color accuracy and control. 1.1. 500 Series LCD Monitor Features ❖ Large 25.5’’ diagonal size and wide 16:10 format enhances productivity by reducing the need for scrolling through docu- ments and switching windows. The wide aspect ratio allows full 1:1 scale display of two full pages with additional space for application palettes and toolbars. ❖ High 1920x1200 resolution and HDCP Content Protection technology is ideal for high resolution graphics and video applications. -
Page 8: Box Content
LaCie 500 Series LCD Monitor Introduction User Manual page 8 1.2. Box Content Your LaCie 500 Series LCD Monitor box should contain the moni- tor and accessories as follows: LaCie 500 Series LCD Monitor with tilt/swivel/pivot/height adjustable stand easyHood US power cord CE power cord Screws (optional for mounting the monitor to a flexible arm) Cable cover Video signal cable (15-pin mini D-SUB male to DVI-A) Video signal cable (DVI-D to DVI-D cable) LaCie Utilities CD-ROM (includes the User Manual, Monitor ICC Profiles and blue eye pro calibration software) Quick Install Guide Cleaning Cloth LaCie 300 Series LCD Monitor LaCie 500 Series LCD Monitor Version 2.0... -
Page 9: Installing Your Lacie 500 Series Lcd Monitor
Mac Cable Adaptor (Not included) Fig. 01 Fig. 02 Fig. 03 To attach the LCD monitor to your system, follow these instruc- tions: 1. Turn off the power to your computer. TECHNICAL NOTE: Some Macintosh systems do not require a Macintosh cable adapter. 2. For the PC or Mac® with DVI digital output: attach the DVI signal cable to the display interface of your system (Fig. 01). Tighten all screws. 3. For the PC with analog output: attach the 15-pin mini D-SUB to DVI-A signal cable to the display interface of your system (Fig. 02). 4. For the Mac with analog output: first connect the Macintosh cable adapter (furnished separate from LaCie) to the com- puter display interface. Second, attach the 15-pin mini D-SUB signal cable to the Macintosh cable adapter (Fig. 03). continued on next page>>... - Page 10 LaCie 500 Series LCD Monitor Installing Your LaCie Monitor User Manual page 10 30° Highest Tilt Stand Position DVI-I DVI-D D-SUB Fig. 04 Fig. 05 Fig. 06 DC-Out 5. Place hands on each side of the monitor to tilt the LCD panel to a 30-degree angle and gently tilt in an upward direction to the highest position (Fig. 04). 6. Attach all cables to their appropriate interfaces (Fig. 04). 7. To keep the cables neatly organized, place them into the cable management system that is built into the stand.
- Page 11 LaCie 500 Series LCD Monitor Installing Your LaCie Monitor User Manual page 11 Fig. 08 Fig. 09 7. Hold all cables firmly and place the cable cover onto the stand. To remove the cable cover, lift the cover off as shown in Fig. 8. Connect one end of the power cord to the AC inlet on the back of the monitor and the other end to the power outlet. 9. The Vacation Switch on the left side of the monitor must be turned on in order to use the front power button. It is best...
-
Page 12: Using Your Lacie 500 Series Lcd Monitor
LaCie 500 Series LCD Monitor Using Your LaCie Monitor User Manual page 12 3. Using Your LaCie 500 Series LCD Monitor 3.1. Physical Adjustments Fig. 11 Fig. 12 3.1.1. Raise and Lower the Monitor Screen The monitor may be raised or lowered in either Portrait or Land- TECHNICAL NOTE: Handle with care when raising, lowering, scape modes. and tilting the monitor screen. To raise or lower the screen, place hands on each side of the monitor and lift or lower to the desired height (Fig. 11 and Fig. -
Page 13: Screen Rotation
LaCie 500 Series LCD Monitor Using Your LaCie Monitor User Manual page 13 Fig. 14 Fig. 15 3.1.3. Screen Rotation Mac Users Portrait mode may be adjusted in System Preferences>Displays. Se- Before rotating, the screen must be raised to its highest level in order lect the Rotate pull down menu, then 90°. to avoid an accidental fall and pinching your fingers. To raise the screen, place your hands on each side of the monitor and lift to the PC Users highest position (Fig. 12). Please regard the manual for your video board to determine how best to make the adjustment to Portrait Mode. If your video board does not... -
Page 14: Remove The Monitor Stand For Mounting
LaCie 500 Series LCD Monitor Using Your LaCie Monitor User Manual page 14 3.1.5. Remove the Monitor Stand for Mounting To prepare the monitor for mounting: 1. Disconnect all cables. 2. Place hands on each side of the monitor and lift it to the high- est position (Fig. 12). Fig. 17 3. Place monitor face down on a non-abrasive surface (Fig. 17). Q u i c k R e l e a s e Lever Fig. 18... -
Page 15: Flexible Arm Installation
LaCie 500 Series LCD Monitor Using Your LaCie Monitor User Manual page 15 3.1.6. Flexible Arm Installation This LCD monitor is designed for use with a flexible arm. Follow the following steps: See section 3.1.5. Remove the Monitor Stand for Mounting for instructions on how to remove the stand. 2. To attach the LaCie monitor to a flexible arm, use the four screws that were removed in 3.1.5. Remove the Monitor Stand for Mounting (Fig. 20). IMPORTANT INFO: When mounting, use ONLY the screws that are included with your LaCie monitor to avoid any damage to the monitor and/or the stand. To meet the safety requirements,... -
Page 16: Osd (On-Screen Display) Control Menu Functions
LaCie 500 Series LCD Monitor OSD Control Menu Functions User Manual page 16 4. OSD (On-Screen Display) Control Menu Functions To access the OSD menu, press MENU. To change the sig- TECHNICAL NOTE: The OSD must be closed in order to nal input, press SELECT. change the signal input. Landscape Portrait 1 POWER Turns the monitor on and off. 2 LED Indicates that the power is on via the blue LED. 3 INPUT/SELECT Enters the OSD Control menu and submenus. Changes the input source when not in the OSD Control menu. 4 MENU/EXIT Access to the OSD menu. Exits the OSD Control menu and submenu. -
Page 17: Brightness/Contrast Controls
LaCie 500 Series LCD Monitor OSD Control Menu Functions User Manual page 17 4.1. Brightness/Contrast Controls Symbol Menu title Explanation BRIGHTNESS Adjusts the overall image and background screen brightness. When PROGRAMMABLE is set by PICTURE MODE, the BRIGHTNESS cannot be adjusted. CONTRAST Adjusts the image brightness in relation to the background. BLACK LEVEL Adjusts the BLACK LEVEL. 4.2. Auto Adjust (Analog Input Only) Symbol Menu title Explanation Automatically adjusts the IMAGE POSITION and H. SIZE settings and FINE settings. -
Page 18: Image Controls
LaCie 500 Series LCD Monitor OSD Control Menu Functions User Manual page 18 4.3. Image Controls Symbol Menu title Explanation LEFT/RIGHT Controls Horizontal Image Position within the display area of the LCD. DOWN/UP Controls Vertical Image Position within the display area of the LCD. H.SIZE (V.SIZE) Adjusts the horizontal size. If the AUTO ADJUST function does not provide a satisfactory (Analog Input Only) picture setting, further tuning can be performed using the H.SIZE (OR V.SIZE) function (dot clock). A Moiré test pattern may prove helpful in finding your ideal setting. Please be advised that this setting may alter the width of the picture. Use the LEFT/RIGHT Menu to center the image on the screen and note that the image should be homogeneous. H.SIZE H.SIZE H.SIZE value is incorrect value is improved value is correct FINE Improves focus, clarity, and image stability. Use the FINE function to complement or en-... -
Page 19: Color Control Systems
LaCie 500 Series LCD Monitor OSD Control Menu Functions User Manual page 19 4.4. Color Control Systems Symbol Menu title Explanation For presets 1, 2, 3 and 5, the following levels can be adjusted: TEMPERATURE Adjusts the white temperature. A lower color temperature will veer toward red while a higher color temperature will appear more blue. WHITE (White Balance): If TEMPERATURE requires further adjustment, the individual R/G/B levels of the white point can be adjusted. To adjust them, use CUSTOM as your TEMPERATURE selection. Adjusts the hue of each color*. Use color bars to view the change in color with each adjustment. SATURATION Adjusts the depth of each color*. Press the RIGHT button and the color vividness in- creases. OFFSET Adjusts the brightness of each color*. Press the RIGHT button and the color brightness increases. sRGB Standard color space that is device independent. This preset approximates the color gamut of the most common computer displays and peripherals. This preset is not adjustable via the OSD. NATIVE Default Color temperature of the LCD Module without calibration (Not adjustable). -
Page 20: Tools
LaCie 500 Series LCD Monitor OSD Control Menu Functions User Manual page 20 4.5. Tools Symbol Menu title Explanation SHARPNESS This function digitally maintains crisp images with all signal timings. It adjusts continuously to set images as distinct or as soft as you prefer. It may be set independently by different timings. DVI SELECTION This function selects the DVI input mode (DVI-I). When the DVI selection has been changed, the computer has to be restarted. AUTO By using the D-SUB to DVI-A cable, the DVI SELECTION is ANALOG. By using the DVI-D to DVI-D cable, the DVI SELECTION is DIGITAL. DIGITAL DVI digital input is available. ANALOG DVI analog input is available. EDID EXTENSION Selects the type of input to be used with EDID EXTENSION. (Digital Input Only) NORMAL: When a PC or other computer equipment is connected, select NORMAL. ENHANCED: When a DVD player or other type of high definition device is connected, select ENHANCED. When EDID EXTENSION has been changed, the connected equipment must be restarted. - Page 21 LaCie 500 Series LCD Monitor OSD Control Menu Functions User Manual page 21 Symbol Menu title Explanation VIDEO DETECT Selects the method of video detection when more than one computer is connected. FIRST The video input must be switched to FIRST mode. When the primary video input signal is lost, the monitor searches for a secondary signal from the alternate video input port. If a video signal is present, the monitor will automatically switch to the active source. The monitor will not look for other video signals while the primary video source is present. LAST The video input must be switched to LAST mode. No matter if a video source is playing in the primary video port, the monitor will switch signals if video is present in the alternate, or secondary port. NONE The monitor will not search the alternate video input port unless the port has been turned OFF TIMER The monitor will automatically power down after a preset period of use. Before powering off, a message will appear on the screen asking if the user wants to delay the shut off time by 60 minutes. Press any OSD button to accept the delay. To adjust the preset period of time, select ON, then press SELECT and LEFT or RIGHT. UNIFORMITY Electronically compensates for the slight variations in the white uniformity level, as well as for deviations in color that may occur throughout the display area of the screen. These variations are characteristic of LCD panel technology. This function improves the color and...
-
Page 22: Menu Tools
LaCie 500 Series LCD Monitor OSD Control Menu Functions User Manual page 22 4.6. Menu Tools Symbol Menu title Explanation LANGUAGE OSD Control menus are available in eight languages. OSD LEFT/RIGHT You can choose where you would like the OSD Control image to appear on your screen. Selecting OSD Location allows you to manually adjust the position of the OSD Control menu Left or Right. OSD DOWN/UP You can choose where you would like the OSD Control image to appear on your screen. Selecting OSD Location allows you to manually adjust the position of the OSD Control menu Down or Up. OSD TURN OFF The OSD Control menu will stay on as long as it is use. In the OSD TURN OFF submenu, you can select how long the monitor waits after the last touch of a button to shut off the OSD Control menu. The preset choices are 10-120 seconds by 5 second steps. OSD LOCK OUT Lock out access to all or some of the OSD Control functions. When attempting to activate OSD controls while in the LOCK OUT mode, a screen will appear indicating the OSD Controls are locked. There are four types of OSD LOCK OUT: OSD LOCK OUT with BRIGHTNESS and CONTRAST control: To activate this OSD Lock Out function, press the SELECT and UP buttons simultaneously. -
Page 23: Information
LaCie 500 Series LCD Monitor OSD Control Menu Functions User Manual page 23 Symbol Menu title Explanation RESOLUTION NOTIFIER The optimal resolution is 1920 x 1200. If ON is selected, a message will appear on the screen after 30 seconds, notifying you that the resolution is not at 1920 x 1200. HOT KEY When this function is set to ON, you can adjust BRIGHTNESS (LEFT or RIGHT buttons) and CONTRAST (DOWN or UP buttons) when the OSD menu is off. The standard OSD can be accessed with the EXIT button. FACTORY PRESET Selecting Factory Preset allows you to reset all OSD control settings back to the factory settings. Individual settings can be reset by highlighting the control to be reset and press- ing the RESET button. 4.7. Information Symbol Explanation Provides information about the current resolution being displayed, technical data, and the horizontal and vertical frequencies. Provides the model and serial numbers of your monitor. -
Page 24: Osd Warnings
LaCie 500 Series LCD Monitor OSD Control Menu Functions User Manual page 24 4.8. OSD Warnings Explanation OSD Warning menus disappear with the EXIT button. NO SIGNAL Provides a warning when there is no Horizontal or Vertical Sync. After the power is turned on or when there is a change of input signal, the No Signal window will appear. RESOLUTION NOTIFIER This function gives a warning to use the optimal resolution. The RESOLUTION NOTIFIER window will open after power is turned on, when there is a change of input signal, or the video signal doesn’t have proper resolution. OUT OF RANGE Recommends the optimal resolution and refresh rate. The OUT OF RANGE menu will open after the power is turned on, upon receiving a change of input signal, or the video signal does not have proper timing. PORTRAIT WARNING When the monitor is used in the portrait position, the brightness value will be reduced to 250 cd/m . If the PORTRAIT WARNING is ON, a message will appear on the screen for ten seconds. LUMINANCE WARNING When the backlight cannot display the desired luminance, a message will appear on the display. To avoid this, reduce the BRIGHTNESS level or set the AUTO LUMINANCE function to OFF (4.9. Advanced Menu Functions, TAG1). 4.9. Advanced Menu Functions To access the advanced menu: Make certain your monitor is off. - Page 25 LaCie 500 Series LCD Monitor OSD Control Menu Functions User Manual page 25 Menu title Explanation Tag1 BRIGHTNESS Adjusts the overall image and screen background brightness. Press LEFT or RIGHT to adjust. When AUTO LUMINANCE is OFF or 2, the brightness level is adjusted/measured using percentage (%). When AUTO LUMINANCE is 1 or 3, the brightness level is adjusted/measured using cd/m This is the “Estimated Brightness” level. The upper portion (higher settings) of the brightness level is adjusted using the backlight output. If a very low brightness level (low setting) is used, the contrast level may be reduced. The display will digitally compensate for low brightness level. It this occurs, the indicator on the OSD will turn magenta. When selecting PROGRAMMABLE from the PICTURE MODE menu (4.10. Using the Picture Mode Function), you cannot select BRIGHTNESS. CONTRAST Adjusts the image brightness and contrast in relation to the background. Press LEFT or RIGHT to adjust. AUTO CONTRAST Adjusts the image displayed for non-standard video inputs. Press SELECT to adjust. Any (Analog Input Only) adjustment requires the image to have white portions. AUTO BLACK LEVEL Automatically adjusts the black level. Any adjustment requires the image to have black por- (Analog Input Only) tions. Press SELECT to activate Auto Adjust.
- Page 26 LaCie 500 Series LCD Monitor OSD Control Menu Functions User Manual page 26 Menu title Explanation Tag2 R-H.POSITION Adjusts the position of the red component of the image. Press LEFT or RIGHT to adjust. (Analog Input Only) G-H.POSITION Adjusts the position of the green component of the image. Press LEFT or RIGHT to adjust. (Analog Input Only) B-H.POSITION Adjusts the position of the blue component of the image. Press LEFT or RIGHT to adjust. (Analog Input Only) R-FINE Adjusts the FINE setting of the red component of the image. Press LEFT or RIGHT to adjust. (Analog Input Only) G-FINE Adjusts the FINE setting of the green component of the image. Press LEFT or RIGHT to adjust. (Analog Input Only) B-FINE Adjusts the FINE setting of the blue component of the image. Press LEFT or RIGHT to adjust. (Analog Input Only) R-SHARPNESS Adjusts the FINE setting of the blue component of the image. Press LEFT or RIGHT to adjust. (Analog Input Only) continued on next page>>...
- Page 27 LaCie 500 Series LCD Monitor OSD Control Menu Functions User Manual page 27 Menu title Explanation Tag2 G-SHARPNESS Adjusts the sharpness of the green component of the image. Press LEFT or RIGHT to adjust. (Analog Input Only) B-SHARPNESS Adjusts the sharpness of the blue component of the image. Press LEFT or RIGHT to adjust. (Analog Input Only) DVI Long Cable Compensates for image degradation caused by using a long DVI cable. There are 4 possible (Digital Input Only) settings, with “0” being the lowest level of compensation and “3” being the highest level. The default setting is “1”. Tag3 AUTO ADJUST Automatically adjusts the Image Position, H.Size settings, and Fine settings. Press SELECT to (Analog Input Only) activate AUTO ADJUST. SIGNAL ADJUST Determines when the AUTO ADJUST is activated. The choices are SIMPLE and FULL. Press (Analog Input Only) LEFT or RIGHT to select. H-size, Fine, H/V Position...
- Page 28 LaCie 500 Series LCD Monitor OSD Control Menu Functions User Manual page 28 Menu title Explanation Tag3 A-NTAA SW The Advanced No Touch Auto Adjust function is able to recognize new signals even when (Analog Input Only) the resolution and the refresh rate have not been changed. If several PCs are connected to the monitor, each transmitting very similar (or even the same) resolution and refresh rate signals, the monitor recognizes the new signal and automatically optimizes the picture. OFF: A-NTAA is disabled. ON: If a change in signal is detected, A-NTAA will adjust the monitor to the optimal settings. If no change in the signal is detected then A-NTAA does not activate. The screen will be blank while the monitor optimizes the signal. Tag4 H. POSITION Controls Horizontal Image Position within the display area of the LCD. Press LEFT or RIGHT to adjust. V. POSITION Controls Vertical Image Position within the display area of the LCD. Press LEFT or RIGHT to adjust. H. SIZE Adjusts the horizontal size of the screen. If AUTO ADJUST does not give you a satisfac- (Analog Input Only) tory picture setting, a further tuning can be performed using the H.SIZE (V.SIZE). A Moiré test pattern may assist in optimizing your settings. Please note that this function may alter the width of the picture. Use LEFT or RIGHT to center the image on the screen. The image should be homogeneous.
- Page 29 LaCie 500 Series LCD Monitor OSD Control Menu Functions User Manual page 29 Menu title Explanation Tag4 V. RESOLUTION Adjusts the vertical size by increasing or decreasing the setting. Press the RIGHT button to expand the height of the image on the screen. Press the LEFT button to narrow the height of the image on the screen. EXPANSION Sets the zoom method. FULL: The image is expanded to 1920 x 1200 regardless of the resolution. ASPECT: The image is expanded without changing the aspect ratio. OFF: The image is not expanded. CUSTOM: When CUSTOM is selected as the Expansion mode, you can adjust the H. ZOOM, V. ZOOM, and ZOOM POS. H.ZOOM The image is expanded from 1 to 3 times in the horizontal (H. EXPANSION) direction by (Available in Custom 0.01 increments. Expansion mode only) V.ZOOM The image is expanded from 1 to 3 times in the vertical (V. EXPANSION) direction by 0.01 (Available in Custom increments. Expansion mode only) ZOOM POS. Sets the point from which the screen will be expanded when either H.ZOOM or V.ZOOM (Available in Custom are adjusted in Expansion mode. Options are CENTER and LEFT TOP.
- Page 30 LaCie 500 Series LCD Monitor OSD Control Menu Functions User Manual page 30 Menu title Explanation Tag6 COLOR Color Control Systems: Seven preset color settings. CONTROL For preset settings 1, 2, 3 and 5, the following levels can be adjusted: TEMPERATURE: Adjust the white temperature. A lower color temperature will make the screen reddish and a higher color temperature will make the screen bluish. WHITE (White Balance): Use only if TEMPERATURE needs further adjustment. Individual R/G/B levels of the white point can be adjusted. To adjust the R/G/B levels, CUSTOM must be showing as the TEMPERATURE selection. HUE: Adjusts the hue of each color*. The change in color will appear on screen and the menu color bars will show the amount of adjustment. SATURATION: Adjusts the color depth of each color*. Press the RIGHT button to increase the color vividness. OFFSET: Adjusts the color brightness of each color*. Press the RIGHT button and the color brightness increases. *RED, YELLOW, GREEN, CYAN, BLUE and MAGENTA. NATIVE, sRGB: Original color presented by the LCD panel that is not adjustable. PROGRAMMABLE: The color tone set up with the downloaded application software. NOTE: When sRGB, Adobe® RGB and PROGRAMMABLE are set by PICTURE MODE, you cannot select COLOR CONTROL. Tag7 SHARPNESS This function digitally maintains crisp images with all timings. It adjusts continuously to set images as distinct or as soft as you prefer. It may be set independently by different timings.
- Page 31 LaCie 500 Series LCD Monitor OSD Control Menu Functions User Manual page 31 Menu title Explanation Tag7 VIDEO DETECT Selects the method of video detection when more than one computer is connected. FIRST The video input must be switched to FIRST mode. When the primary video input signal is lost, the monitor searches for a secondary signal from the alternate video input port. If a video signal is present, the monitor will automatically switch to the active source. The moni- tor will not look for other video signals while the primary video source is present. LAST The video input must be switched to LAST mode. No matter if a video source is playing in the primary video port, the monitor will switch signals if video is present in the alternate, or secondary port. NONE The monitor will not search the alternative video input port. OFF TIMER The monitor will automatically power down after a preset period of use. Before powering off, a message will appear on the screen asking if the user wants to delay the shut off time by 60 minutes. Press any OSD button to accept the delay. POWER MANAGER The POWER MANAGER has three settings: Monitor does not go into power save mode when the input signal is lost. STANDARD Monitor enters power save mode automatically when the input signal is lost. OPTION Monitor enters power save mode automatically when the amount of surrounding light goes below the level that is determined by the user. When in power save mode, the LED on the...
- Page 32 LaCie 500 Series LCD Monitor OSD Control Menu Functions User Manual page 32 Menu title Explanation Tag7 UNIFORMITY This function electronically compensates for the slight variations in the white UNIFORMITY level as well as for deviations in color that may occur throughout the display area of the screen. These variations are characteristic of LCD panel technology. This function improves the color and evens out the luminance uniformity of the display. NOTE: Using the UNIFORMITY feature does reduce the overall peak luminance of the dis- play. If greater luminance is desired over the uniform performance of the display, then UNIFORMITY should be turned off. UNIFORMITY LEVEL You may select the level for UNIFORMITY adjustments.
- Page 33 LaCie 500 Series LCD Monitor OSD Control Menu Functions User Manual page 33 Menu title Explanation Tag8 OSD LOCK OUT Lock out access to all or some of the OSD Control functions. When attempting to activate OSD controls while in the LOCK OUT mode, a screen will appear indicating the OSD Con- trols are locked. There are four types of OSD LOCK OUT: OSD LOCK OUT with BRIGHTNESS and CONTRAST control: To activate this OSD Lock Out function, press the SELECT and UP buttons simultaneously. To deactivate this OSD Lock Out, press the SELECT and UP buttons simultaneously while in the OSD menu. BRIGHTNESS and CONTRAST can be adjusted while in this lock out mode. OSD LOCK OUT with no control: To activate this OSD Lock Out function, press the SELECT and RIGHT buttons simultaneous- ly. To deactivate this OSD Lock Out, press the SELECT and RIGHT buttons simultaneously while in the OSD menu. No controls can be adjusted while in the lock out mode.
- Page 34 LaCie 500 Series LCD Monitor OSD Control Menu Functions User Manual page 34 Menu title Explanation Tag9 PORTRAIT WARNING When the monitor is used in the Portrait position, the brightness value will be reduced to 250 cd/m maximum. If the Portrait Warning is ON, a message will appear on the screen for ten seconds. DDC/CI DDC/CI ENABLE/DISABLE: Turns on or off the two way communication and control of the monitor. INPUT SETTING Video Band Width (Analog Input Only): Used when there is too much noise on the screen. Press LEFT or RIGHT to select. The higher the number, the greater the correction. Sync Threshold (Analog input only): Adjusts the slice level of a synchronization signal. Press SELECT to move the adjustment menu. Adjusts the sensitivity of the separate or composite input signals. Try this option if the FINE adjustment does not successfully eliminate the noise. SOG Threshold (Analog input only): Adjusts the sensitivity of the Sync On Green input sig- nals. Adjusts the slice level when separating synchronization from the Sync On Green signal input. Press LEFT or RIGHT to select. CLAMP POSITION: Operating your monitor at a non-standard timing may cause images to appear darker than normal or have color distortion. The CLAMP POSITION control will adjust images to their normal state. TagA TILING A single screen displaying up to 25 monitors, TILING allows for viewing multiple signals. It will be able to divide up to five each on the Horizontal and the Vertical.
-
Page 35: Using The Picture Mode Function
LaCie 500 Series LCD Monitor OSD Control Menu Functions User Manual page 35 4.10. Using the Picture Mode Function TECHNICAL NOTE: When PROGRAMMABLE is selected, you Choose the Picture mode that is best suited to display the cannot adjust the BRIGHTNESS or use AUTO LUMINANCE. selected content. You may adjust the BRIGHTNESS, AUTO LUMINANCE and UNIFORMITY while in this mode. There are four Picture modes: STANDARD, sRGB, Adobe RGB, and PRO- GRAMMABLE. TECHNICAL NOTE: To make adjustments using Adobe RGB • To access the Picture mode, press the RESET button while mode, choose sRGB mode then press SELECT. the OSD menu is not active. •... -
Page 36: Using The Auto Brightness Function
LaCie 500 Series LCD Monitor OSD Control Menu Functions User Manual page 36 4.11. Using the Auto Brightness Function The brightness of the LCD screen can be set to increase or de- crease depending on the amount of ambient light in the room. If the room is bright, the monitor becomes correspondingly bright. If the room is dim, then the monitor will dim accordingly. The purpose of this function is to make the viewing experience more comfortable to the eye in a variety of lighting conditions. The Auto Brightness function is set to OFF by default. When AUTO LUMINANCE is ON, this function is disabled. - Page 37 LaCie 500 Series LCD Monitor OSD Control Menu Functions User Manual page 37 When the AUTO BRIGHTNESS function is enabled, the BRIGHT- NESS level of the screen adjusts automatically according to the light- ing conditions of the room (Fig. 24). BRIGHTNESS level set BRIGHTNESS range for the monitor to use when ambient lighting level is low. BRIGHTNESS level set for the monitor to use when ambient lighting level is high. Bright condition area room bright condition dark bright Dark condition area Screen Brightness value by AUTO BRIGHTNESS function Fig. 24...
-
Page 38: Troubleshooting
LaCie 500 Series LCD Monitor Troubleshooting User Manual page 38 5. Troubleshooting In the event that your LaCie 500 Series LCD Monitor is not work- If your manual does not reflect the configurations of the product ing correctly, please refer to the following checklist to aid in de- that you purchased, please check our website for the most current termining how to fix the problem. Additional tips are regularly version available. updated on the FAQ page published on our website: www.lacie. com. If you need further assistance, please contact your LaCie reseller or LaCie Technical Support (6. Contacting Customer Support). Manual Updates LaCie is constantly striving to give you the most up-to-date, com- prehensive User Manuals available on the market. It is our goal to provide you with a friendly, easy-to-use format that will help you quickly install and utilize the many functions of your new device. Problem Solution No picture. The signal cable should be completely connected to the display card/computer. - Page 39 LaCie 500 Series LCD Monitor Troubleshooting User Manual page 39 Problem Solution Image persistence Please be aware that LCD Technology may experience a phenomenon known as Image Persistence. Image persistence occurs when a residual or “ghost” image of a previous image remains visible on the screen. Un- like CRT monitors, LCD monitors’ image persistence is not permanent, but constant images being displayed for a long period of time should be avoided. To alleviate image persistence, turn off the monitor for as long as the previous image was displayed. For example, if an image was on the monitor for one hour and a residual image remains, the monitor should be turned off for one hour to erase the image. NOTE: As with all personal display devices, LaCie recommends displaying moving images and using a mov- ing screen saver at regular intervals whenever the screen is idle or turning off the monitor when not in use. Message OUT OF Image is displayed only roughly (pixels are missing) and OSD warning OUT OF RANGE is displayed: Either ❖ RANGE is displayed signal clock or resolution is too high. Choose one of the supported modes. (screen is either blank OSD warning OUT OF RANGE is displayed on a blank screen: Signal frequency is out of range. Choose ❖ or shows rough im- one of the supported modes. ages only) Image is unstable, The signal cable should be completely attached to the computer. ❖ unfocused, or swim- Use the OSD Image Adjust controls to focus and adjust display by increasing or decreasing the Fine setting. ❖ ming is apparent When the display mode is changed, the OSD Image Adjust settings may need to be readjusted.
-
Page 40: Contacting Customer Support
Before You Contact Customer Support Read the User Manual and review the Troubleshooting section. bleshooting checklist, and you still cannot get your LaCie monitor to work properly, please contact us. Before contacting us, make If your question is related to monitor calibration, please refer sure that you are in front of your computer and that you have the to the Troubleshooting section of the LaCie blue eye pro User following information on hand: Manual. Launch the LaCie blue eye pro application and verify that your monitor is plugged to the DVI connection in the “About” section. Then perform a monitor Calibration Report and have it ready when contacting Technical Support. -
Page 41: Lacie Technical Support Contacts
LaCie 500 Series LCD Monitor Contacting Customer Support User Manual page 41 6.1. LaCie Technical Support Contacts LaCie Asia LaCie Australia Contact us at: Contact us at: http://www.lacie.com/asia/contact/ http://www.lacie.com/au/contact/ LaCie Belgium LaCie Canada Contact us at: Contact us at: http://www.lacie.com/be/contact/ (Français) http://www.lacie.com/caen/contact/ (English) LaCie Denmark LaCie Finland Contact us at: Contact us at: http://www.lacie.com/dk/contact http://www.lacie.com/fi/contact/ LaCie France LaCie Germany Contact us at: Contact us at: http://www.lacie.com/fr/contact/ http://www.lacie.com/de/contact/ LaCie Italy Japan - ELECOM CO. LTD... -
Page 42: Warranty Information
LaCie 500 Series LCD Monitor Warranty User Manual page 42 7. Warranty Information LaCie warrants your monitor against any defect in material and workmanship, under normal use, for the period designated on IMPORTANT INFO: Register online for free technical support: your warranty certificate. In the event this product is found to be www.lacie.com/register defective within the warranty period, LaCie will, at its option, re- pair or replace the defective drive. This warranty is void if: The monitor was operated/stored in abnormal use or mainte- ❖ nance conditions; The monitor is repaired, modified, or altered, unless such re- ❖ pair, modification or alteration is expressly authorized in writ- ing by LaCie; The monitor was subjected to abuse, neglect, lightning strike, ❖ electrical fault, improper packaging or accident; The monitor was installed improperly; ❖ ❖...
Need help?
Do you have a question about the 526 and is the answer not in the manual?
Questions and answers