Advertisement
Available languages
Available languages
Quick Links
Advertisement

Related Manuals for LaCie 526


Summary of Contents for LaCie 526
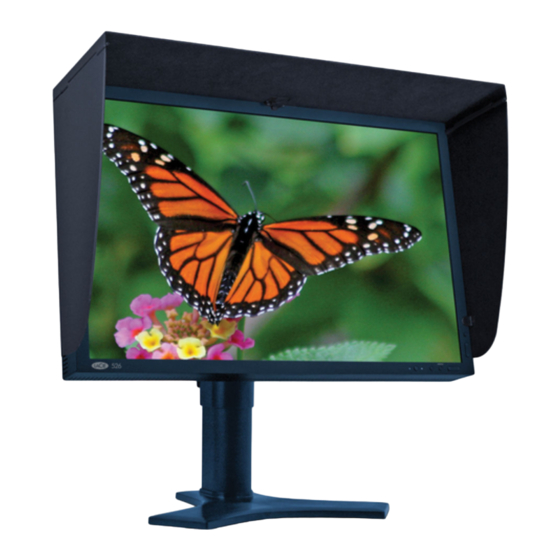
- Page 1 LaCie 500 Series LCD Monitor Quick Install Guide...
-
Page 3: Package Contents
• DVI Video cable • DVI-VGA cable • Cable cover • LaCie Monitor easyHood • LaCie Display Utilities CD-ROM (including LaCie blue eye pro Calibration Software and User Manual) • Quick Install Guide • Monitor cleaning cloth Protect your investment – register for free technical support: www.lacie.com/register... - Page 4 Monitor Installation Steps 1. Power off your computer. 2. Connect the signal cable to the monitor and then to your computer.
- Page 5 3. Connect the power cable to the monitor and to a wall outlet.
- Page 6 4. Power on your computer, your monitor, and the “vacation switch” on the left side of the monitor. vacation switch power on button Refer to the User Manual located on the LaCie Display Utilities CD-ROM for complete instructions.
- Page 7 Hood Installation Steps 1. Lift the hood behind the monitor and insert the clasp over the monitor handle. Once the clasp is secured, lower the middle panel forward and into place.
- Page 8 2. Lift side panels and attach Velcro stickers to the 500 Series monitor so they line up with the Velcro on the hood. 3. When calibrating the monitor, simply unfold the hook to attach your calibrator.
- Page 9 Pour des instructions détaillées, veuillez vous reporter au Manuel de l’utilisateur que vous trouverez sur le CD-ROM d’utilitaires d’affichage LaCie. Procédure d’installation de la visière 1. Soulevez la visière derrière le moniteur et insérez le fermoir sur la poignée du moniteur.
- Page 10 2. Sollevare i pannelli laterali e incollare le strisce adesive in Velcro al monitor LaCie 500, facendo attenzione ad allineare le strisce con la palpebra. 3. Per calibrare il monitor, allentare il gancio e montare il calibratore.
- Page 11 Monitor der Serie 500 passend zu den Klettverschlüssen an der Blende an. 3. Zur Kalibrierung des Monitors nehmen Sie einfach den Haken ab, um den Kalibrator anzuschließen. Schützen Sie Ihre Investitionen – Registrieren Sie sich für kostenlosen Support: www.lacie.com/register Copyright © 2007 LaCie.
- Page 12 LaCie 500 Series LCD Monitor 1. Levantar la visera por detrás del monitor. Introducir el cierre por encima del asa. Una vez asegurado el cierre, hay que bajar el panel intermedio hacia adelante y ponerlo en su lugar.
- Page 13 LaCie 500 Series LCD Monitor Beknopte installatiehandleiding Stappen voor installatie van beeldscherm 1. Zet uw computer uit. 2. Sluit de signaalkabel aan op het beeldscherm en vervolgens op uw computer. 3. Sluit de voedingskabel aan op het beeldscherm en op een wandcontactdoos.
- Page 14 LaCie Display Utilities. Procedimento de instalação da pala 1. Coloque a pala por detrás do monitor e introduza o fecho sobre a pega do monitor. Quando as patilhas e o fecho estiver fixado, baixe o painel intermédio e instale-o no devido lugar.
- Page 15 3. När skärmen ska kalibreras fäller du helt enkelt ut kroken och sätter fast kalibratorn. Skydda din investering – registrera dig för gratis teknisk support på: www.lacie.com/register. Copyright © 2007, LaCie.
- Page 16 2. Løft sidepanelerne, og fastgør velcrobåndene på 500-serie-skærmen, således at de flugter med kappens velcrobånd. 3. Når skærmen kalibreres, skal du ganske enkelt folde krogen ud for at tilslutte din kalibrator. Beskyt din investering – bliv registreret, og modtag gratis teknisk support: www.lacie.com/register Copyright © 2007, LaCie.
- Page 17 2. Kytke signaalikaapeli näyttöön ja sitten tietokoneeseen. 3. Kytke virtajohto näyttöön ja pistorasiaan. 4. Kytke virta tietokoneeseen, näyttöön ja näytön vasemmalla puolella olevaan lomakytkimeen. Täydelliset ohjeet ovat LaCie Display Utilities -CD-ROM-levyllä olevassa käyttöoppaassa. Heijastussuojan asennus 1. Nosta heijastussuoja näytön taakse, ja aseta pidike näytön kahvan ympäri.
- Page 18 2. Podłącz przewód sygnałowy do monitora, a następnie do komputera. 3. Podłącz przewód zasilający do monitora i gniazda ściennego. 4. Włącz komputer, monitor i przycisk funkcji całkowitego wyłączenia (vacation switch) po lewej stronie monitora. Dokładne instrukcje można znaleźć w Podręczniku użytkownika na płycie CD-ROM LaCie Software Utilities.
- Page 19 4. Включите компьютер, монитор и переключатель полного отключения с левой стороны монитора. Подробные инструкции см. в руководстве пользователя на компакт-диске с утилитами для монитора LaCie. Инструкции по установке козырька 1. Вставьте L-образные язычки на козырьке в соответствующие вырезы на задней...
- Page 20 Ανατρέξτε στο Εγχειρίδιο Χρήση που βρίσκεται στο CD-ROM βοηθητικών προγρα άτων οθόνη (Display Utilities) τη LaCie για ολοκληρω ένε οδηγίε . Βή ατα εγκατάσταση σκιάστρου οθόνη 1. Ανυψώστε το σκίαστρο πίσω από την οθόνη και εισάγετε τα ελάσ ατα σχή ατο...
- Page 21 3. Güç kablosunu ekrana ve duvar prizine bağlayın. 4. Bilgisayarınızın, ekranınızın gücünü ve ekranın sol tarafındaki “dinlenme anahtarını” açın. Ayrıntılı yönergeler için LaCie Display Utilities CD-ROM 'undaki Kullanım Kılavuzu'na başvurun. Kapak Kurulum Adımları 1. Ekranın arkasındaki kapağı kaldırıp L şeklindeki kanatçıkları ekranın arkasındaki yerlerine, klipsi de ekran tutamacının üstüne takın.
- Page 24 Davidsbodenstrasse 15 A 4004 Basel sales.ch@lacie.com LaCie United Kingdom and Ireland 46 Gillingham Street London, England SW1V 1HU sales.uk@lacie.com sales.ie@lacie.com LaCie Worldwide Export 17, rue Ampère 91349 Massy Cedex France sales.intl@lacie.com support.intl@lacie.com Visit www.lacie.com for more information on LaCie products.
Need help?
Do you have a question about the 526 and is the answer not in the manual?
Questions and answers