Table of Contents
Advertisement
Part No. 102139 Rev. J
and Millennia
Epicure
®
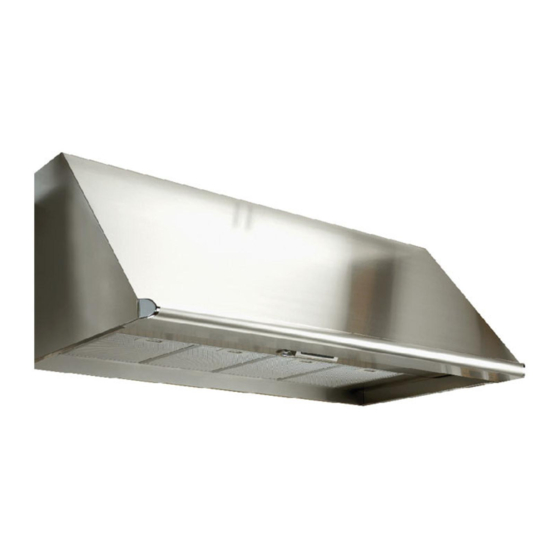
Wall Mount Range Hoods
For use with models:
EH30, EH36, EH42, EH48, EH54,
MH30, MH36 and MH48
Approved for use with All dAcor
tested in AccordAnce with the lAtest edition of Ansi/ul 507
stAndArd for electric fAns And cAn/csA-c22.2 no. 113 stAndArd
for fAns And ventilAtors.
Installation Instructions
®
®
rAnges And cooktops.
Advertisement
Chapters
Table of Contents

Subscribe to Our Youtube Channel
Related Manuals for Dacor Epicure EH3612


Summary of Contents for Dacor Epicure EH3612
- Page 1 For use with models: EH30, EH36, EH42, EH48, EH54, MH30, MH36 and MH48 ® Approved for use with All dAcor rAnges And cooktops. tested in AccordAnce with the lAtest edition of Ansi/ul 507 stAndArd for electric fAns And cAn/csA-c22.2 no. 113 stAndArd for fAns And ventilAtors.
-
Page 2: Table Of Contents
It is located inside the hood behind the filters on the back side of the chas- sis. Remove the filters to view it. All specifications subject to change without notice. dacor assumes no liability for changes to specifications. © 2008 Dacor, all rights reserved. -
Page 3: Important Safety Instructions
Hazards or unsafe practices that could result in severe • Always contact the Dacor Customer Service Team personal injury or death. about problems and conditions that you don’t under- stand. cAution Hazards or unsafe practices that could result in minor personal injury or property damage. -
Page 4: General Safety Precautions
The customer should not install, repair or replace any part of the range hood unless specifically recommended in the literature accompanying it. A qualified service technician should perform all other service. Contact the nearest Dacor authorized service representative at (800) 793-0093, or at www.Dacor.com for examination, repair or adjust- ment. -
Page 5: Product Specifications
48 lbs. (22 kg) Filters Mesh type, dishwasher safe EH3018, MH3018, Exhaust(s) 8-inch 53 lbs. (24 kg) EH3612, MH3612 Total Connect 120 Vac, 60 Hz, 9 Amp. Max. EH3618, MH3618 57 lbs. (26 kg) Load (10.0 Amp Max. surge) EH4212 55 lbs. -
Page 6: Dimensions
Product Specifications Dimensions Tolerances: +1/16”, -0 (1.6 mm, -0), unless otherwise stated. note: The exhaust duct(s) and electrical wiring can be connected from either the top or the back of the hood. Single exhaust models** Dual exhaust models* Standard 8” duct connection Standard 8”... -
Page 7: Parts List
Hood assembly with filters (size and style varies with model) • Blower mounting hardware (used only for installations requiring rear exhaust configuration • Light replacement tool • Literature • Light bulbs (quantity varies with model) • Dacor Stainless Steel Cleaner... -
Page 8: Planning The Installation
Do not ground the appliance or appliance wiring to a EH3012, EH3018, MH3012, MH3018 30” (76.2 cm) gas pipeline or to the neutral (white) power supply wire. EH3612, EH3618, MH3612, MH3618 36” (91.5 cm) • Do not install a fuse in the neutral or ground circuit. - Page 9 Planning the Installation • On dual exhaust models, the two 8” exhausts may be wArning merged into one 10” duct using Dacor transition kit AHT10. See page 16 for details. • To prevent combustion by-products, smoke or odors Calculating the Maximum Duct Run Length from entering the home and to improve efficiency, tape all duct joints securely.
-
Page 10: Preparing For Installation
Preparing for Installation Verify the Package Contents Electrical Service Installation Unpack the parts box and verify that all parts have been wArning included according to the parts list on page 5. If any item is missing or damaged, please contact the dealer immedi- The electric service to the range hood should be installed ately. -
Page 11: Installation Instructions
• Model see pAge Do not install the range hood unless the electrical service provided meets the range hood specifica- EH3012, MH3012, EH3612, MH3612, tions. EH4212 • EH4812, MH4812 Observe all governing codes and ordinances during installation. Contact your local building department EH3018, MH3018, EH3618, MH3618, for further information. -
Page 12: Rotating The Blower
Disconnect the wiring harness connector from the blower motor. While supporting the blower from below, remove the eh3012, Mh3012, eh3612, Mh3612 and four (4) nuts that hold the blower and mounting plate in eh4212 (Models that are 12 inches high place. - Page 13 Installation Instructions Insert the opening on the blower motor assembly into Tip the hood back down so that the top of the hood the hole inside the back of the hood. The connector faces up. Using existing screws, attach the cover plate on the motor must be toward the bottom of the hood.
- Page 14 Installation Instructions Tip the hood back, so that it lays on its back with the Remove and discard Remove front pointing up. the mounting plates and discard attached to both blow- Remove the filters from the under side of the hood. er motors.
- Page 15 Installation Instructions Rotating the Blower for Models: Route the wiring harness as shown below. Secure the harness to the motor assemblies using the cable clamps supplied with the hood in the positions shown. eh3018, Mh3018, eh3618, Mh3618, eh4218 Attach the wiring harness to the brace inside the hood, (Models that are 18 inches high equipped with on the right side using two (2) supplied cable ties.
- Page 16 Installation Instructions Disconnect the wiring harness connector from the Route the wiring harness as shown. Secure the har- blower motor. ness to the motor assembly with the cable clamps sup- plied with the hood in the positions shown below. While supporting the blower from below, remove the four (4) nuts that hold the blower in place.
- Page 17 Installation Instructions Rotating the Blower for Models: Disconnect both wiring harness connectors from the blower motors. While supporting each blower from below, remove the eh4818, Mh4818 and eh5418 (Models that are four (4) nuts that hold each blower in place. Remove 18 inches high equipped with two blowers.
-
Page 18: Aht10 Transition Kit Installation
On dual exhaust models, the two 8” exhausts may be Attach the wiring harness to the brace inside the hood, merged into one 10” duct using Dacor transition kit AHT10. on the right side using two (2) supplied cable ties. -
Page 19: Mounting Bracket Installation
The distance from the center line depends on the model. See the chart below. teMporArY BrAcket center line distAnce Models EH3012, EH3018, MH3012, MH3018 12 3/8” (31.4 cm) EH3612, EH3618, MH3612, MH3618 15 3/8” (39.1 cm) EH4212, EH4218 18 3/8” (46.7 cm) Reinforced EH4812, EH4818, MH4812, MH4818 21 3/8”... -
Page 20: Hanging The Range Hood
Installation Instructions Hanging the Range Hood Duct Work Installation wArning wArning Hanging the range hood requires two people. Do not During duct installation, make sure there are no attempt to lift the hood without assistance. obstructions that keep the damper flaps on the top of the hood from opening. -
Page 21: Final Electrical Installation
Installation Instructions Final Electrical Installation wArning • To avoid electric shock or fire hazard, prior to connecting the electrical wiring to the hood, make sure that power to the hood power supply line is turned off at the fuse box or circuit breaker panel. •... - Page 22 Installation Instructions wArning • Do not ground the circuit to a gas line. • Do not ground the circuit to a hot water pipe. • Water lines that are insulated must be jumped to assure continuity to ground. See below. To house circuit breaker Separate No.
-
Page 23: Verifying Proper Operation
• Repeat the above test. • If the hood still does not work, contact Dacor Distinctive Service at (877) 337-3226. Do not attempt to repair the appliance yourself. If you need service, be sure to have the model and serial numbers available when you call. -
Page 24: Wiring Diagrams
Wiring Diagrams... - Page 25 Wiring Diagrams...
- Page 26 Notes...
- Page 28 Dacor ● 600 Anton Blvd. Suite 1000 Costa Mesa, CA 92626 ● Phone: (800) 793-0093 ● Fax: (626) 403-3130 ● www.Dacor.com...
- Page 29 Remote Blower For use with models: EHR30, EHR36, EHR42, EHR48, EHR54 ® Approved for use with All dAcor rAnges And cooktops. tested in AccordAnce with the lAtest edition of Ansi/ul 507 stAndArd for electric fAns And cAn/csA-c22.2 no. 113 stAndArd for fAns And ventilAtors.
- Page 30 It is located inside the hood behind the filters on the back side of the chas- sis. Remove the filters to view it. All specifications subject to change without notice. dacor assumes no liability for changes to specifications. © 2008 Dacor, all rights reserved.
-
Page 31: Important Safety Instructions
Hazards or unsafe practices that could result in severe • Always contact the Dacor Customer Service Team personal injury or death. about problems and conditions that you don’t under- stand. cAution Hazards or unsafe practices that could result in minor personal injury or property damage. -
Page 32: General Safety Precautions
The customer should not install, repair or replace any part of the range hood unless specifically recommended in the literature accompanying it. A qualified service technician should perform all other service. Contact the nearest Dacor authorized service representative at (800) 793-0093, or at www.Dacor.com for examination, repair or adjust- ment. -
Page 33: Product Specifications
Product Specifications General Specifications Weight Specifications All Models Model weight Fan Speeds EHR3012 39 lbs. (18 kg) Filters Mesh type, dishwasher safe EHR3018, EHR3612 44 lbs. (20 kg) Exhaust(s) 8-inch EHR3618 48 lbs. (22 kg) Total Connect 120 Vac, 60 Hz, 6.5 Amp. Max. Load EHR4212 46 lbs. -
Page 34: Dimensions
Product Specifications Dimensions Tolerances: +1/16”, -0 (1.6 mm, -0), unless otherwise stated. note: The exhaust duct(s) and electrical wiring can be connected from either the top or the back of the hood. Single exhaust models** Dual exhaust models* Standard 8” duct connection Standard 8”... -
Page 35: Parts List
Parts List • Light replacement tool • Hood assembly with filters (size and style varies with model) • Literature • 2 temporary mounting brackets • Light bulbs (quantity varies with model) • Temporary mounting hardware • Dacor Stainless Steel Cleaner... -
Page 36: Planning The Installation
Planning the Installation wArning Observe all governing codes and ordinances during planning and installation. Contact your local building department for further information. Cabinet Layout iMportAnt See the diagram for minimum installed distance from wArning the hood to the cooktop surface. The minimum specified distance may be higher for the particular range or To reduce the risk of personal injury caused by reaching cooktop in use. - Page 37 • The ventilation system consists of hood and a single blower remote or single in-line blower. • A Dacor remote or in-line blower must be installed for Conduit the hood to operate properly. Only one blower shall be installed. Remote •...
-
Page 38: Preparing For Installation
Planning the Installation Duct Work Equivalent Lengths • Keep turns as far away from the hood exhaust as pos- sible, and as much space between bends as possible. eQuivAlent lengths • For best performance, use round duct instead of rect- angular, especially when elbows are required. -
Page 39: Electrical Service Installation
Preparing for Installation Electrical Service Installation Back wall wArning The electric service to the range hood should be installed only by a licensed electrician. Install a junction box in the vicinity of the hood electri- cal access holes according to local codes. Install it either behind or above the hood. -
Page 40: Installation Instructions
On dual exhaust models, the two 8” exhausts may be collar(s) must be moved to the rear before hanging the merged into one 10” duct using Dacor transition kit AHT10. hood. Install the transition before installing the hood on the wall. It connects to the hood on the top or rear, depending on the Place the hood assembly on a large flat surface. -
Page 41: Mounting Bracket Installation
Installation Instructions 12” high models with rear exhaust: Installing the AHT10 Transition: Center the transition over the duct collars while resting the top exhaust unmodified edge on the top of the hood. Fasten in place models and 18” using sheet metal screws (not included). Seal the base of high models with of the transition with duct tape. -
Page 42: Hanging The Range Hood
Installation Instructions Hanging the Range Hood Reattach the hood to the temporary mounting brackets. Lift the hood into its final position and fasten it in place. Insert the fasteners through the mounting slots in the wArning back and top of the hood into the studs, mounting blocks or anchors. - Page 43 Installation Instructions Connect the wiring to the remote/in-line blower and the power supply line from the junction box as shown. Neutral To remote/ (Red) in-line blower Ground (Blue) (Black) Neutral (White) To junction Ground (Green) (Green) Hood power terminals Connect the hood wiring to an electrical junction box on a dedicated circuit.
- Page 44 Installation Instructions To house circuit breaker Separate No. 10 (minimum) panel or fuse box copper ground wire Wire nut, Meter 3 places WHITE Fasten clamp tightly WHITE on pipe No. 4 copper GREEN wire BLACK GREEN BLACK Clamps Junction box Bare metal UL/CSA approved insulated pipe Jumper...
-
Page 45: Verifying Proper Operation
• Repeat the above test. • If the hood still does not work, contact Dacor Distinctive Service at (877) 337-3226. Do not attempt to repair the appliance yourself. If you need service, be sure to have the model and serial numbers available when you call. -
Page 46: Wiring Diagrams
Wiring Diagrams... - Page 47 Wiring Diagrams 10 9 8 7 6 5 4 3 2 1 10 9 8 7 6 5 4 3 2 1...
- Page 48 Dacor ● 600 Anton Blvd. Suite 1000 Costa Mesa, CA 92626 ● Phone: (800) 793-0093 ● Fax: (626) 403-3130 ● www.Dacor.com...
Need help?
Do you have a question about the Epicure EH3612 and is the answer not in the manual?
Questions and answers