Kurzweil PC2 - MUSICIANS GUIDE REV A Manual
Midi performance controller
Hide thumbs
Also See for PC2 - MUSICIANS GUIDE REV A:
- User manual (27 pages) ,
- Musician's manual (170 pages) ,
- Supplement manual (66 pages)
Table of Contents
Advertisement
Quick Links
Kurzweil PC2
Musician's Guide
©2000 All rights reserved. Kurzweil is a product line of Young Chang Co.; Kurzweil and PC2 are
trademarks of Young Chang Co. All other products and brand names are trademarks or registered
trademarks of their respective companies. Product features and speciÞcations are subject to change
without notice.
Part Number: 910345 Rev. A
Advertisement
Table of Contents
Troubleshooting

Related Manuals for Kurzweil PC2 - MUSICIANS GUIDE REV A


Summary of Contents for Kurzweil PC2 - MUSICIANS GUIDE REV A
- Page 1 Kurzweil PC2 Musician’s Guide ©2000 All rights reserved. Kurzweil is a product line of Young Chang Co.; Kurzweil and PC2 are trademarks of Young Chang Co. All other products and brand names are trademarks or registered trademarks of their respective companies. Product features and speciÞcations are subject to change without notice.
- Page 2 The lightning flash with the arrowhead symbol, within an equilateral triangle, is intended to alert CAUTION the user to the presence of uninsulated "dangerous voltage" within the product's RISK OF ELECTRIC SHOCK enclosure that may be of sufficient magnitude DO NOT OPEN to constitute a risk of electric shock to persons.
- Page 3 Young Chang Distributors Contact the nearest Young Chang ofÞce listed below to locate your local Young Chang/ Kurzweil representative. Young Chang America, Inc. P.O. Box 99995 Lakewood, WA 98499-0995 Tel: (253) 589-3200 Fax: (253) 984-0245 Young Chang Co. 178-55 Gajwa-Dong...
-
Page 5: Table Of Contents
Contents Young Chang Distributors ............................... iii Chapter 1 Introduction Basic PC2 Features ................................1-1 The Sound ................................. 1-1 Keyboard and Controllers ............................1-1 Effects..................................1-2 Options ..................................... 1-2 Sound ROM Cards ..............................1-2 Polyphony Expansion Board..........................1-2 Pedals..................................1-2 Ribbon Controller..............................1-2 Music Rack ................................ - Page 6 Kurzweil PC2 Musician’s Guide Contents Effects and EQ ................................3-2 Physical Controllers..............................3-3 The Front Panel................................3-3 Common Features ..............................3-4 Master Volume Slider ............................3-4 Data Entry ................................3-4 System................................. 3-4 Effects.................................. 3-5 Functions................................3-5 Sound Source ..............................3-5 Mode-Dependent Features .............................
- Page 7 Kurzweil PC2 Musician’s Guide Contents Dumping Objects .............................. 4-4 Intuitive Entry ................................4-5 Short Cuts for Data Entry ..........................4-5 Short Cuts for Navigation..........................4-6 Other Editing Functions............................4-7 Comparing ................................. 4-7 Copying and Pasting ............................4-8 More About SysEx Dumps ............................. 4-9 SysEx IDs................................
- Page 8 Kurzweil PC2 Musician’s Guide Contents Editing the Internal Setup............................. 4-27 Using the Arpeggiator ..............................4-27 Using Pressure (Aftertouch) as an Arpeggiator Controller ................4-29 Using the Arpeggiator with a Sequencer or External Controller..............4-29 Using the PC2 to Control External Slaves ......................... 4-30 Sending Bank-Select and Program-Change Messages ..................
- Page 9 Kurzweil PC2 Musician’s Guide Contents Replacing the Option Panel ........................... A-3 Powering up................................A-3 Boot Block..................................A-3 Starting the Boot Block ............................A-3 About Software Upgrades ............................. A-3 Setting Up For a Software Upgrade ........................A-4 Installing an Operating System or Setups ......................A-4 Installing a New Boot Block ..........................
- Page 10 Kurzweil PC2 Musician’s Guide Contents Appendix C PC2 Programs and Controller Assignments Factory Controller Assignments ...........................C-1 Programs and Controllers ..............................C-1 Index ..................................... I-1 Index of Parameters .............................IP-1...
-
Page 11: Chapter 1 Introduction
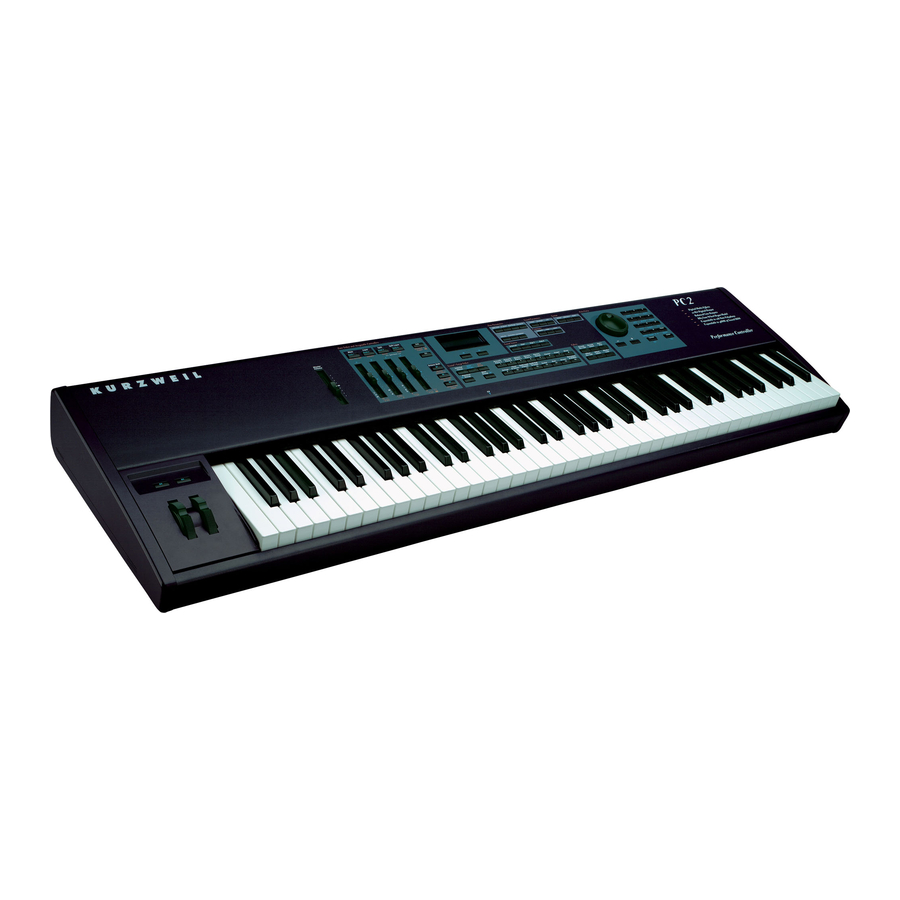
Thanks for buying your PC2 MIDI performance controller! It combines 16 megabytes of renowned Kurzweil ROM sounds with an extensive set of ßexible and easy-to-use performance and MIDI-control featuresÑall in a portable keyboard that can help you sound like a pro on stage or in the studio. -
Page 12: Effects
Pedals The PC2 has jacks for three switch pedals (for functions like sustain or program/setup changes) and two continuous pedals (for functions like volume control). Your Kurzweil dealer stocks the following optional pedals: FS-1 Standard box-shaped switch pedal... -
Page 13: Unpacking Your Pc2
Introduction Unpacking your PC2 Unpacking your PC2 Your PC2 carton should contain the following: ¥ PC2 or PC2X Performance Controller ¥ Power adapter ¥ Piano-style switch pedal ¥ Four adhesive-backed rubber feet ¥ This manual ¥ Warranty card You might want to keep the PC2 carton and packing materials for easy shipping or transport. -
Page 15: Chapter 2 Startup
Chapter 2 Startup Setup When setting up the PC2 for use it must be placed on a sturdy, level surface where both ends of the unit are supported. A conventional keyboard stand may be used if it is strong enough to support the unitÕs weight (about 35 pounds for a PC2, 50 for a PC2X). -
Page 16: Basic Connections
Caution : Use only the power supply that comes with your PC2, or a replacement purchased from an authorized Kurzweil dealer. Using a different power supply can seriously damage your PC2! Before connecting the power supply, make sure your PC2 is off (push the side of the power switch thatÕs marked with a circle). -
Page 17: Audio
Startup Basic Connections Flat side down! Figure 2-3 Proper orientation of plug Place the power supply somewhere where it will stay dry and out of the way. We recommend keeping it on the ßoor. Never cover the power supply with anything; it needs adequate ventilation to prevent overheating. -
Page 18: Midi
Plug your switch or continuous pedals into the corresponding jacks on the PC2Õs rear panel. We recommend using the Kurzweil pedals described on page 1-2, but you can use almost any switch or continuous pedal, as long as it adheres to the following speciÞcations (as most pedals... -
Page 19: Breath
This helps to prevent the hooks in the Velcro from collecting crud when you donÕt have the ribbon attached. Caution: The modular jack is designed for connection to the Kurzweil Ribbon Controller option only. DonÕt plug any other modular plugs into the Ribbon jack. -
Page 20: Digital Output
The PC2 contains a type of reloadable computer memory called Flash ROM, which makes software upgrades fast and easy. You can learn about new features from your Kurzweil dealer, or from our website (www.youngchang.com/kurzweil). See Boot Block on page A-3 for software- installation instructions. -
Page 21: Troubleshooting
Startup Powering Up 3. Select another demo, or press Cancel to exit Demo mode (alternatively, you can press 14 and 16 simultaneously). Troubleshooting No Text in Display If no messages are displayed when you turn on the power on your PC2 and no LEDs ßash, check the power adapter connections at the AC outlet and the PC2 Adapter In jack. - Page 22 Startup Powering Up No Sound from Receiving Instrument If you are trying to control another instrument using MIDI and that instrument doesnÕt respond to your PC2, check the following: ¥ A working MIDI cable should connect the PC2Õs Out or Thru/Out jack to the In jack of the other instrument ¥...
-
Page 23: In This Chapter
Chapter 3 Performance Features In This Chapter Chapter 3 shows you how to get the most out of your PC2 in performance settings. The overview introduces a few important features and concepts, while the following sections provide more detail. ¥ The Front Panel. -
Page 24: Editors
Performance Features Overview Objects Throughout this manual, weÕll occasionally mention objects, which may sound a bit technical, so weÕll explain. Object is the collective term we use to refer to any chunk of information that the PC2 stores or processes. Many of these objects are invisible to you, but youÕll be working regularly with the highest-level object types: programs, setups, and effects. -
Page 25: Physical Controllers
Performance Features The Front Panel Physical Controllers The PC2 provides a wide variety of physical controllers for modifying your sound as you play. There are two basic types: switch and continuous. Switch controllers generate MIDI messages with one of two possible values: On (127) and Off (0). Continuous controllers generate MIDI messages with values from 0 to 127. -
Page 26: Common Features
Performance Features The Front Panel The buttons and sliders on the front panel are labeled in one of three colors, which correspond roughly to their functions in the three performance modes: White Internal Voices mode Blue MIDI Setups mode Orange KB3 mode Naturally there are a few exceptions: ¥... -
Page 27: Effects
Each Internal bank contains factory programs or setups. Each User bank stores the programs or setups that you create. Exp1 and Exp2 are empty until you Þll them with programs or setups from expansion options that you can purchase from your Kurzweil dealer. Selecting Banks and Programs on MIDI Slaves When youÕre controlling other instruments from the PC2, you need a way to select programs... -
Page 28: Mode-Dependent Features
Performance Features The Front Panel Mode-Dependent Features The following features behave differently depending on which mode youÕre in. The Display (LCD) The display looks quite different in each mode, so weÕll show you examples of each. Internal Voices Mode When you turn on your PC2, the display should look like this: Bank ID Bank name Bank entry (category and program) - Page 29 Performance Features The Front Panel KB3 Mode Press the KB3 Mode button twice to enter KB3 mode; the display changes to something like this: Bank ID Program ID Program name 4:000|KB3|Template| L:888888888|CV:Chor1 Drawbar Drawbar values Chorus/Vibrato setting type (one digit for each harmonic wavelength) YouÕll Þnd KB3-mode programs in banks with IDs 4Ð7.
-
Page 30: Cursor Buttons
Performance Features The Front Panel drawbars will once again be at their preset startup values. (You can edit the startup values for programs with preset drawbars; see Changing Preset Drawbar Values on page 4-26.) A program with live drawbars starts with drawbar values that reßect the positions of the drawbar controls. -
Page 31: Zone Select And Assignable Controllers
Performance Features The Front Panel The mode-selection buttons work the same regardless of your performance mode, but the other two groups of buttons are mode-dependent, as described below: Internal Voices Mode Each bank is organized in 16 categories of 8 programs, organized by program category (pianos, organs, etc.). - Page 32 Performance Features The Front Panel The EQ button is the one feature in the Zone Select and Assignable Controllers region that does the same thing in all three performance modes. It turns the three-band equalization (EQ) on and off. The EQ settings affect the entire PC2. See page 3-14 to learn how to change the EQ settings. Button SW1 (also labeled Octave Shift) is a convenient way to ÒtransposeÓ...
- Page 33 Performance Features The Front Panel When the EQ button is on, Sliders AÐC control the values of the Low, Mid, and High parameters that you see in the display. Slider D doesnÕt do anything in this case. If the EQ button is on, press it to turn it off and return to Internal Voices mode.
- Page 34 Performance Features The Front Panel Press any zone button once to make that zone the current zone. Assuming the zone is active (itÕs active if the LED in its zone button is green), pressing its zone button once mutes the zone, turning its LED orange.
-
Page 35: Selecting Programs And Setups
Performance Features Selecting Programs and Setups Selecting Programs and Setups 1. Select a performance mode by pressing Internal Voices, MIDI Setups, or KB3 Mode in the Sound/Setup Select region (we call these mode-selection buttons). The mode youÕre in affects how the other Sound/Setup Select buttons work. When you press one of these buttons, its LED ßashes to prompt you to select a sound source. -
Page 36: Changing The Eq
Performance Features (setup IDs 129Ð144, with bank entries of A01ÐA16), and setups for the next two sets in B01ÐB16 and C01ÐC16. Then you can select the group of setups corresponding to each set with the Next Group and Previous Group buttons, with a well-planned sequence of 16 setups for the set accessible with Sound Select buttons 1Ð16. -
Page 37: Changing Effects
Performance Features Effects assume that you wonÕt normally want more than one effect to be active). You can activate the sends to both blocks, however, by pressing FX-A and FX-B at the same time. Activating or deactivating the sends to each effect block this way is a performance feature only; the sends return to their preset state as soon as you select another program or setup. -
Page 38: Wet/Dry Mix
Performance Features Effects muting, press the two buttons simultaneously again. The display brießy indicates that the muting is turned off. Wet/Dry Mix When the send to FX-A is on and the send to FX-B is off (which is the case for the majority of the factory programs and setups), the audio signal comes from the PC2Õs sound engine, and goes Þrst through FX-A, then through FX-B, then to the audio out jacks. -
Page 39: Layering And Splitting
Performance Features Layering and Splitting In Internal Voices mode, you can change the wet/dry mix for both FX-A and FX-B without going to the Wet/Dry parameters. When the send to an effect block is active, the corresponding slider (Slider A for FX-A and Slider B for FX-B) adjusts the wet/dry mix. This is a performance feature only;... -
Page 40: How Autosplit Works
Performance Features Layering and Splitting How AutoSplit Works WeÕll go through the same procedure again, explaining whatÕs going on with each step. If you want to follow along, start by pressing Internal Voices twice to return to Internal Voices mode. Program 000 Classical Grand should appear in the display. -
Page 41: Changing The Autosplit Key Without Editing
Performance Features Muting and Soloing 2. Press Yes. the display brießy shows then returns to MIDI Setups Setup|NNN|saved! mode. When you save a setup this way, the PC2 turns the AutoSplit feature off for that setup, and sets the low and high notes of each zone. See Muting and Soloing on page 3-19 to learn about how this affects playing setups. -
Page 42: Muting
Performance Features Muting and Soloing Muting You can mute any or all zones in a setup. Muting one zone has no effect on the other zones. To mute (or unmute) a zone, it must be the current zone (the bottom line of the display shows the number of the current zone, followed by the name of the program assigned to that zone). -
Page 43: Saving The Internal Setup
Performance Features Saving the Internal Setup Saving the Internal Setup If youÕve made a change to the AutoSplit Key, physical controller assignments, or other parameters, and you want to preserve those changes to affect every program in Internal Voices mode, you can save the PC2Õs current settings to the internal setup. ThereÕs more about editing and saving the internal setup on page 4-27. -
Page 45: Programming Your Pc2
Chapter 4 Programming Your PC2 Basic Editing Concepts So far weÕve explained the PC2 primarily from a performance standpoint, covering the fundamentals of selecting programs and setups, and applying real-time controls and effects. ThereÕs much more to the PC2, howeverÑyou can modify existing programs, setups, and effects in countless ways, or create completely new ones. -
Page 46: Data Entry
Programming Your PC2 Basic Editing Concepts Data Entry When you see the parameter you want to edit (or when the cursor is highlighting its value), use one of the data entry methods to change the value. As with selecting programs and setups, there are three ways to do this: Alpha Wheel The large dial in the Data Entry region of the PC2Õs front panel. -
Page 47: Other Save-Dialog Functions
Programming Your PC2 Basic Editing Concepts cursor buttons to move the cursor to a different character. Press Clear to create a space without moving the cursor. Buttons SW1ÐSW3 have special functions when naming things. SW1 inserts a blank space at the location of the cursor, moving everything after the cursor one space to the right. SW2 deletes the character at the location of the cursor, and moves everything after the cursor one space to the left. -
Page 48: Dumping Objects
Programming Your PC2 Basic Editing Concepts When you enter the Save dialog, youÕll see a prompt asking you whether you want to save or replace an object (the object type depends on which editor youÕre in). The prompt for dumping the object is at another location in the dialog, as youÕll see. -
Page 49: Intuitive Entry
Programming Your PC2 Basic Editing Concepts Reloading a Dump 1. Connect a MIDI cable from the MIDI Out port of the external device to the PC2Õs MIDI In port. 2. Initiate the dump or playback of the object Þle from your external device. You donÕt have to put the PC2 in any special mode to receive the dump. -
Page 50: Short Cuts For Navigation
Programming Your PC2 Basic Editing Concepts Setting the Key Range of a Zone 1. Press Key Range. 2. Press and hold Enter, and strike a key. This sets the low key, since the Low parameter is current when you press Key Range. 3. -
Page 51: Other Editing Functions
Programming Your PC2 Basic Editing Concepts MIDI Recv Menu If youÕre playing the PC2 from another instrument or a sequencer, youÕll use the MIDI Recv menu for enabling/disabling channels and assigning programs, as well as for adjusting volume, pan, and wet/dry settings. Intuitive entry makes it easy to move from channel to channel within the menu. -
Page 52: Copying And Pasting
Programming Your PC2 Basic Editing Concepts Copying and Pasting You can copy setup parameters (zones), controller parameters, and arpeggiator parameters into a buffer, then paste them into other setups. You can also copy effects parameters, and paste them into other setups or programs. Pasting Parameters Into a Zone 1. -
Page 53: More About Sysex Dumps
Programming Your PC2 Basic Editing Concepts 5. You have several options for pasting the copied data. Depending on what you want to do, take one of the following steps: ¥ To paste the data to the same controller in a different zone, press the appropriate zone button, then press the >... -
Page 54: The Program Editor
Programming Your PC2 The Program Editor 2. Press the Global button, then press the > button until you see Dump|all|Objects? 3. Start recording on your external device, and press Enter on the PC2. The LED in the MIDI Xmit button blinks and the display shows you the object being dumped. the PC2 indicates when itÕs Þnished dumping, at which time you can stop recording on the external device. -
Page 55: The Current Layer
Programming Your PC2 The Program Editor The Current Layer Notice the zone buttons. In the Program Editor, they represent the layers of the current program. In Program 000, there are three layers. When you enter the Program Editor, all the existing layers in a program are active (green LEDs). -
Page 56: Storing Effects
Programming Your PC2 The Setup Editor Exiting the Program Editor There are several ways to get out: ¥ Press Cancel ¥ Press Store to begin the Save dialog; when youÕve Þnished saving, the PC2 returns to Internal Voices mode, in the User bank of programs ¥... -
Page 57: The Default Setup And The Clear Setup
Programming Your PC2 The Setup Editor Before we begin with the details of setup editing, weÕll mention two useful setups that can help you keep track of your editing efforts. The Default Setup and the Clear Setup Naturally you can edit any setup you want, changing values for any of the dozens of available parameters. -
Page 58: Setting Initial Volume Levels For Different Zones
Programming Your PC2 The Setup Editor The top line indicates the current zone, as well as the current bank and program ID. Notice the minus sign after the zone number, indicating that the zone is muted. 5. Turn the Alpha Wheel to the left until you see Off in the bottom line of the display. Notice that the Zone 3 button is now unlit, indicating that the zone is off. -
Page 59: Assigning Sliders To Control Wet/Dry Mix In Different Zones
Programming Your PC2 The Setup Editor 4. Play a few notes. If you donÕt hear a difference, press Compare and play some more. Press Compare again to stop its LED from blinking. 5. Press Store to display the Save dialog. Notice that the display prompts you to replace Setup 129. -
Page 60: A Few Important Points About Entry Values
Programming Your PC2 The Setup Editor 6. Press > repeatedly until you see the Entry Value parameter. Set its value to 85. 7. Save the setup as 132 EntryFX. A Few Important Points About Entry Values Crossing the Entry Value Suppose that Slider A happens to be all the way up when you select Setup 132. -
Page 61: Multiple Controller Function
Programming Your PC2 The Setup Editor 3. Press > until you see the Exit Value parameter. 4. Set a value of 127 (wet/dry mix of 100%). 5. Save the setup, this time replacing Setup 132 without renaming it. Multiple Controller Function HereÕs your next scenario: You want to add a layer of electric piano to Setup 132, and you want Slider A to control the wet/dry mix of both the acoustic and the electric piano. -
Page 62: Offset Vs. Scale
Programming Your PC2 The Setup Editor 18. Save again, replacing Setup 133 without renaming. As you move the slider down to the midpoint, the Controller value of the wet/dry mix for the electric piano is 64, and the value for the acoustic piano is 0 (64 Ð 64). In the bottom half of the sliderÕs throw, youÕll hear chorus only on the electric piano. -
Page 63: Velocity Switching
Programming Your PC2 The Setup Editor Velocity Switching You can use your keystrike velocity (how hard you play) to change sounds. This is how program 000 Stereo Grand works: there are actually three sets of samples, one for soft, one for medium, and one for loud. -
Page 64: Transposing A Setup With A Button
Programming Your PC2 The KB3 Editor the previous technique on the highest- numbered setup in this sequence to take you back to the lowest- numbered setup in the sequence. In this same sequence of setups, you could use Switch Pedal 3 with On Ctrl set to Setup Dec (1, 4, 0, Enter) and On value of 127 to step down one setup at a time. -
Page 65: The Effects Editor
Programming Your PC2 The Effects Editor Zone 1 Zone 2 Status Zone 3 Status Corresponding Parameter Status (Volume) (Decay) Group Irrelevant Irrelevant None (all percussion effects off) Sft/Slow Sft/Fast Ld/Slow Ld/Fast The Effects Editor The Effects Editor has two functions: changing the effects associated with the current program or setup (or the entire PC2), and modifying the nature of the effects that are currently in use. -
Page 66: Entering The Effects Editor
Programming Your PC2 The Effects Editor Entering the Effects Editor You can get to the Effects Editor from any performance mode by pressing the Select button for FX-A or FX-B (in the Effects region). The display looks something like this: FXA|Select|:Voices 1|Nice|Little|Booth| In this case, weÕve entered the Effects Editor from Internal Voices mode, by pressing the Select... -
Page 67: Editing Effects Parameters
Programming Your PC2 The Effects Editor Editing Effects Parameters Most effects have four parameters that control various aspects of the effect (the special KB3 effects we mentioned above have three additional parameters that weÕll describe at the end of the following procedure). Our sound engineers determine which parameters go with which effects, but you can edit the values of any of the effects parameters. - Page 68 Programming Your PC2 The Effects Editor 1. Change the effects as desired (either assign a new effect to one or both effect blocks, or edit the parameters associated with one or both of the current effects). 2. Press Store (in the Functions region of the front panel). The Save dialog appears, looking something like this: Replace|Effects|30? Digital|E|Piano...
-
Page 69: Other Effects-Editor Functions
Programming Your PC2 Common Editing Tasks Other Effects-Editor Functions ThereÕs more to the Effects EditorÕs Save dialog than just storing the results of your editing. You can also do the following: ¥ Dump effects via MIDI System Exclusive messages to an external MIDI recording device ¥... -
Page 70: Controlling Vibrato And Tremolo With Lfos
Programming Your PC2 Common Editing Tasks In the former case (saving to a setup) you create a new setup with AutoSplit either on or off as you speciÞedÑor if you change the setup ID to that of an existing setup, you replace that setup. In the latter case (saving to Internal Voices), you save the new setting to the internal setup, thereby enabling or disabling AutoSplit for all Internal-Voices programs. -
Page 71: Editing The Internal Setup
Programming Your PC2 Using the Arpeggiator Editing the Internal Setup You can edit the internal setup and store your changes, thereby changing the zone parameters for every program. As an example, weÕll transpose the internal setup up an octave. 1. Make sure youÕre in Internal Voices mode. If youÕre not, press Internal Voices twice. 2. - Page 72 Programming Your PC2 Using the Arpeggiator Figure 4-1 shows the processing order the PC2 uses to create arpeggios from your input: Zone 1 Parameters Zone 2 Parameters Arpeggiator Note Zone Region Processing Enablers Zone 3 Parameters Zone 4 Parameters Figure 4-1 Arpeggiator Processing Sequence Many of the PC2Õs factory setups make use of the arpeggiatorÑfor example, those that include notes in the setupÕs name, like setup 001 Dance C 7.
-
Page 73: Using Pressure (Aftertouch) As An Arpeggiator Controller
Programming Your PC2 Using the Arpeggiator 4. Press > to select the Zone Enable parameter. This enables you to arpeggiate one or more setup zones, and play others normally. Several of the preset setups do this. Using Pressure (Aftertouch) as an Arpeggiator Controller In this example, weÕll use pressure to control the volume of arpeggiated notes. -
Page 74: Using The Pc2 To Control External Slaves
Programming Your PC2 Using the PC2 to Control External Slaves Using the PC2 to Control External Slaves Anything you play or transmit from the PC2 can control an external keyboard or module in addition toÑor instead ofÑthe PC2Õs internal sounds. There is really only one parameter you need to set. - Page 75 Programming Your PC2 Using the PC2 to Control External Slaves 128 x 128 = 16,384 (numbered as 0Ð16,383). Since each bank can have 128 programs in it, that means the total number of possible programs in an instrument is 2,097,152! In practice, most instruments tend to have 10 or fewer banks.
-
Page 76: Sending Program Changes Only
Programming Your PC2 Using the PC2 to Control External Slaves Another example: If the Roland required you send Controller 0 with a value of 81 and Controller 32 with a value of 2, then you would have 81 x 128 + 2 = 10,370. Again, entering 10370 for the Bank parameter will show both 81/2 and 10370. -
Page 77: Preventing Program Changes On Slaves
Programming Your PC2 Working With an External Sequencer Preventing Program Changes on Slaves This is the opposite of the previous tutorial. What if you have an external module or keyboard that you want to play from the PC2, but you donÕt want to send program changes to it? (Maybe you want to leave that module always on the same sound, or you want the ability to choose the sounds directly from the front panel of that external module or keyboard). -
Page 78: Recording To A Sequencer While In Midi Setups Mode
Programming Your PC2 Troubleshooting Name and save the setupÑyou might want to name it something Like Local Off or Seq Control. Now you have a MIDI-only setup with a single zoneÑwhich is equivalent to being in Internal Voices mode with the Local Control parameter turned off. There are several advantages to the setup method. - Page 79 Programming Your PC2 Troubleshooting shows you the MIDI channel of the message. To leave MIDIScope, just press any non-programmable button. The only limitation of MIDIScope is that it can display only one message at a time. Therefore it can be confusing if you are sending multiple channels of information at the same time. If you are testing the PC2 itself, itÕs best to mute all the zones but one so that you can see what info that zone is sending (or you could use the Solo button).
-
Page 81: Descriptions Of Parameters
Chapter 5 Descriptions of Parameters This chapter contains a description for each of the PC2Õs editing parameters. TheyÕre organized into the following sections: ¥ Program Editor Parameters ......5-1 ¥... - Page 82 Descriptions of Parameters Program Editor Parameters Keymap L >> The keymap for the left side of programs using stereo keymaps. This parameter appears as (Keymap) for programs using mono keymaps, and is inactive (you canÕt change its value). << Keymap R The keymap for the right side of programs using stereo keymaps.
-
Page 83: The Envelope Menu
Descriptions of Parameters Program Editor Parameters You can set initial values for the following MIDI Controllers: Mod Wheel (MIDI 1) MIDI 12 Breath (MIDI 2) MIDI 13 Data (MIDI 6) MIDI 29 MIDI 9 You may be wondering why you can set initial values for these MIDI Controllers and not others. ItÕs because most of the PC2Õs programs use at least one of these MIDI Controllers to do something (a common example is MIDI 1, which the Mod Wheel sends by default, and which controls vibrato or tremolo in many programs). -
Page 84: The Lfo Menu: Rotor Effects Parameters
Descriptions of Parameters Program Editor Parameters Adjusting the values of the LFO parameters modiÞes how the LFOs affect the programs that use them (not all programs make use of the LFOs). See MIDI Controllers on page B-9 to learn which programs have functioning LFOs. -
Page 85: Setup Editor Parameters
Descriptions of Parameters Setup Editor Parameters Rotor Effects High Adjust The amount of change in the rate of the high rotor when you switch the rotorÕs speed control from fast to slow or vice versa. KB3 programs use SW1 to switch rotor speed. Setup Editor Parameters There are seven menus in the Setup Editor, represented by the buttons in the Zone Parameters region of the front panel. -
Page 86: The Program Menu
Descriptions of Parameters Setup Editor Parameters information only to the PC2. If youÕre using the PC2 to control other instruments or to record to an external sequencer, use a value of MIDI or Local+MIDI. Bend Range, Semitones (BndRng ST) Sets the number of semitones of pitch bend applied by any physical controller that sends either the Pitch Up, Pitch Down, Pitch, or Rvrs Pitch MIDI Controller message, when that controller is at its maximum (sending a value of 127). - Page 87 There are two other values for Bank Mode: K2000 and K1000. These enable you to send bank- select and program-change commands to older Kurzweil instruments, which use a different system for numbering programs. The manuals for these instruments explain the numbering system thoroughly.
- Page 88 Descriptions of Parameters Setup Editor Parameters Program ID Display Format (PNumDisp) This parameter is primarily a convenience for when youÕre sending MIDI to other instruments or to a sequencer. If youÕre using the PC2 by itself, thereÕs no need to edit this parameter. Different MIDI instruments and sequencers refer to program numbers differently: some start counting at 0, and others start at 1.
-
Page 89: The Key Range Menu
Descriptions of Parameters Setup Editor Parameters The Key Range Menu Low and Hi The primary function for the Key Range menu is determining where a zone plays on the keyboard. This is controlled by the values of the Low and Hi parameters. In the default setup, all zones range from C -1 to G 9. -
Page 90: The Transpose Menu
Descriptions of Parameters Setup Editor Parameters AutoSplit Key When the value of the AutoSplit parameter is On, this parameter sets the split point for all zones in the setup, overriding each zoneÕs key range settings. Depending on the key ranges youÕve set for the zones in any particular setup, this may not be useful. - Page 91 Descriptions of Parameters Setup Editor Parameters Velocity Scale (Vel Scale) Increases or decreases the PC2Õs velocity sensitivity. The value for all zones in the default setup is 100%Ñthink of this as the normal value. Higher values increase the sensitivity; notes get louder faster than normal as you play harder.
- Page 92 Descriptions of Parameters Setup Editor Parameters Velocity Offset: +64 low velocity keystrikes produce medium MIDI velocity and greater Velocity Offset: -64 low velocity keystrikes result in MIDI velocity of 1; maximum MIDI velocity reduced Keystrike Velocity Vel Scale and Vel Offset have a very close relationship; when you change the value of one of them, youÕll often want to change the value of the other as well.
- Page 93 Descriptions of Parameters Setup Editor Parameters Velocity Curve (Vel Curve) So far weÕve been describing the velocity parameters in terms of linear velocity curvesÑthat is, the Þnal attack-velocity increases at a uniform rate as your keystrike velocity increases so that on the graph, the velocity curve appears as a straight line.
-
Page 94: The Controllers Menu
Descriptions of Parameters Setup Editor Parameters Velocity Min: 1, Max: 64 No MIDI velocity is produced when keystrike velocity is greater than 64 Velocity Min: 64, Max: 127 No MIDI velocity is produced when keystrike velocity is less than 64 Keystrike Velocity The Controllers Menu The Controllers menu contains parameters that deÞne the functions of the PC2Õs physical... -
Page 95: The Controllers Menu: Continuous Controller Parameters
Descriptions of Parameters Setup Editor Parameters The Controllers Menu: Continuous Controller Parameters There are fourteen controllers in the continuous-controller group: Wheel 1 Up Pedal 1 Wheel 1 Down Pedal 2 Wheel 2 Breath Mono Pressure (MPressure) Ribbon 1 Slider A Ribbon 2 Slider B Ribbon 3... -
Page 96: The Controllers Menu: Ribbon Controller Parameters
Descriptions of Parameters Setup Editor Parameters the message. For example, if you want to make sure that the program in Zone 1 of a setup is panned to the left whenever you select the setup, assign a physical controller in Zone 1 of that setup to send MIDI Controller 10, then set an Entry Value of 0 for that controller. -
Page 97: The Controllers Menu: Switch Controller Parameters
Descriptions of Parameters Setup Editor Parameters Ribbon Mode Affects the MIDI Controller values sent by the ribbon section for all zones. A value of Absolute means that the value of the MIDI Controller message that the ribbon section sends is tied directly to a physical location on the ribbonÑin other words, touching a particular point on the ribbon always generates the same value for the MIDI Controller message. -
Page 98: Switch-Button Priority
Descriptions of Parameters Setup Editor Parameters If the value of SwType is Toggle, the controller sends a MIDI Controller message with a programmable value (typically 127 or On) when you depress the controller (turning it on); depressing the controller again sends another programmable value (typically 0 or Off). When Buttons SW1ÐSW5 are programmed to be toggle switches, the LEDs light when you turn them on, and go out when you turn them off. -
Page 99: The Arpeggiator Menu
Descriptions of Parameters Setup Editor Parameters The Arpeggiator Menu Arpeggiator Activation (Arp Active) Enables or disables the arpeggiator for the setup. If this parameterÕs value is Off, then you wonÕt hear arpeggiation for any notes in any zone of the setup, regardless of the settings for any of the other arpeggiator parameters. - Page 100 Descriptions of Parameters Setup Editor Parameters In the next three modes, the arpeggiator latches notes only when MIDI Controller 119 (ArpLatch) sends a value of On (64 or higher). An easy way to experiment with these modes is to assign the Mod Wheel to send MIDI 119. Overplay The arpeggiator latches any notes in the arpeggiator that are being held when ArpLatch goes on, and continues playing them, even after you let them go, until ArpLatch off.
- Page 101 Descriptions of Parameters Setup Editor Parameters Latched notes play in ascending pitch order, regardless of their chronological order. Down Latched notes play in descending pitch order, regardless of their chronological order. Up/Down Latched notes play from lowest pitch to highest, then from highest pitch to lowest, repeating the cycle until you stop the arpeggiation.
- Page 102 Descriptions of Parameters Setup Editor Parameters The value for this parameter is relevant only if the value for the Clock parameter in the Global menu has a value of Internal. If the value of Clock is External, the arpeggiator follows the tempo of MIDI Clock signals (if any) received at the PC2Õs MIDI In port.
- Page 103 Descriptions of Parameters Setup Editor Parameters Limit Option (Limit Opt) Determines what the arpeggiator does when it has shifted the currently latched notes up (or down) to the shift limit. there are seven possible values: Stop Causes the Arpeggiator to stop the arpeggiation when it reaches the shift limit. Reset Causes the Arpeggiator to return to its original pitch and repeat the latched cycle of notes, transposing each cycle according to the settings for Note Shift and Shift Limit.
-
Page 104: Effects Editor Parameters
Descriptions of Parameters Effects Editor Parameters Flt Reset Adds a bit of apparent randomness to the process. Flt stands for ÒFloat,Ó and it means that when the arpeggiator reaches the shift limit, it resetsÑbut not to its original pitch as with plain Reset. Like Unipolar and Bipolar, it looks at the Þrst note that would exceed the shift limit, and calculates the interval between that note and the shift limit. - Page 105 Descriptions of Parameters Effects Editor Parameters FXA/B Select This parameter appears only when the current effect is one of the double-block KB3 effects. It selects the menu of parameters for the FX-AB block. The effect ID and name appear, enabling you to select an effect for FX-AB, or to view/edit the four FX-AB parameters by pressing >...
- Page 106 Descriptions of Parameters Effects Editor Parameters changes as well as those received via MIDI. All other programs use the current effect, but retain their own settings for wet/dry mix. FX Chg Mod is Panel In this case, the value of FX Channel is irrelevant. Program changesÑeither from the PC2 or via an external MIDI sourceÑnever change the current effect (you must change the current effect from the PX2Õs front panel).
-
Page 107: Kb3 Editor Parameters
Descriptions of Parameters KB3 Editor Parameters KB3 Editor Parameters The Timbre Menu Wheel Volume Map (WheelVolMap) The wheel volume map determines the volume level for each tone wheel. WeÕve provided several tone wheel volume maps here, based on measurements weÕve taken of different organs. All tone wheels at the same volume. -
Page 108: The Envelope Menu
Descriptions of Parameters KB3 Editor Parameters Drawbars 1–9 (Drawbar) The nine parameters correspond to the nine drawbar controls (Sliders AÐD and Mod Wheel). Each can have a value from 0 (drawbar fully in) to 8 (drawbar fully out) DrawbarSteps Affects the transition between drawbar levels for each of the drawbar controls. Smooth Levels range from 0Ð127 (but still represented as 0Ð8 in the display). -
Page 109: The Envelope Menu: Percussion Parameters
Descriptions of Parameters KB3 Editor Parameters NoteAttack Controls the attack characteristic of KB3 notes. Normal Smoothed attack. Hard Instant attack with audible click, in addition to any amount of key click speciÞed with the Keyclick and KeyclickVol parameters (you might want to set Keyclick to when you use this setting). -
Page 110: Envelope Menu: Percussion Pitch Parameters
Descriptions of Parameters System Parameters Envelope Menu: Percussion Pitch Parameters Three parameters control the pitch of the percussion effect: Low Harmonic (Low Harm) Controls which drawbar is used as the basis for the low harmonic of the percussion effect. The actual pitch obtained depends on which drawbar you use. - Page 111 The newly-selected setup becomes active as soon as you select it. Any notes being held by the PC2 (or by Kurzweil instruments receiving MIDI from the PC2) continue with their normal decays. Non-Kurzweil MIDI slaves may cut off notes as soon as the PC2Õs setup changes. Keys Up Default value.
- Page 112 Setup Select button corresponding to the ID of the new setup blinks. Any notes being held by the PC2 (or by Kurzweil instruments receiving MIDI from the PC2) continue with their normal decays. Non-Kurzweil MIDI slaves may cut off notes as soon as the PC2Õs setup changes.
- Page 113 Descriptions of Parameters System Parameters Exit Save Affects what happens when you exit an editor without saving. If the value if Never (the default), the PC2 wonÕt prompt you to save your edits when you leave an editor (by pressing one of the mode-selection buttons).
- Page 114 Descriptions of Parameters System Parameters AllNotesOff If you set this to Ignore, the PC2 will ignore the MIDI All Notes Off message. Some instruments and sequencers (notably older Roland instruments) will send this message when no notes are being held, even if the sustain pedal is still held. If you are hooked to a Roland sequencer and Þnd that the PC2 doesnÕt seem to sustain, set this parameter to Ignore and the problem will go away.
- Page 115 Descriptions of Parameters System Parameters Digital Output Width (DigOut Width) Determines the size, in bits, of the digital ÒwordsÓ that the PC2 sends to the digital outs. Choose between 16-bit, 18-bit, 20-bit, or 24-bit digital word lengths. Set this to match the input digital- word-length conÞguration of your recording or processing equipment.
-
Page 116: The Midi Recv Menu
Descriptions of Parameters System Parameters MIDIScope? Not a parameter but a prompt to run MIDIScope, a MIDI-analysis application. Monitors any event from the PC2Õs keyboard or controllers, as well as MIDI information (including SysEx messages received at the MIDI In port. Press any non-controller button to exit. The MIDI Recv Menu The MIDI Recv menu is designed to make it easy to conÞgure your PC2 as a MIDI slave, with a set of parameters for deÞning how it responds to incoming MIDI information. -
Page 117: Appendix A Maintenance And Upgrades
Maintenance and Upgrades Replacing the Battery Appendix A Maintenance and Upgrades Replacing the Battery Changes that you make to your PC2 settings are stored using a Lithium battery when the PC2 is powered off. When it is time to replace your battery, the PC2 will display the message: ÒBattery voltage is lowÓ... - Page 118 Maintenance and Upgrades Replacing the Battery Figure 5-1 Freeing battery from retaining clip 3. Insert your Þngernail, the plastic knife, or the pen cap behind and under the battery, and lift the battery out, as shown in Figure 5-2. Figure 5-2 Removing battery 4.
-
Page 119: Replacing The Option Panel
Pressing the Enter button (Yes is printed underneath) invokes the menu item in the screen. About Software Upgrades You can get software upgrades for your PC2 from KurzweilÕs FTP website (www.youngchang.com/kurzweil/html/downloads.html) or from your Kurzweil dealer. A computer (Mac or PC) with a MIDI interface and sequencer is necessary for transferring the software to your PC2 using MIDI Sysex. -
Page 120: Setting Up For A Software Upgrade
Maintenance and Upgrades Boot Block Setting Up For a Software Upgrade 1. Connect a MIDI cable from the MIDI Out of the computerÕs MIDI port or interface to the MIDI In of the PC2. 2. Launch the sequencer application. 3. Open the Þrst .MID Þle using the sequencer program. 4. -
Page 121: Installing Sound Rom Options
Maintenance and Upgrades Boot Block Installing Sound ROM Options After installing a Sound ROM option SIMM using the accompanying instructions, you will need to transfer the presets from the option ROM to the PC2Õs Flash ROM. Once the SIMM(s) has been installed and the option panel replaced, complete the following instructions: 1. -
Page 123: Appendix B Reference
Reference Specifications Appendix B Reference Specifications SpeciÞcations are subject to change without notice. Physical Specifications Dimension PC2X 10.95 cm 10.95 cm Height Depth 14 in 35.60 cm 14 in 35.60 cm 121.45 cm 137.95 cm Length Weight 35 lb 16 kg 50 lb 23 kg Electrical Specifications... -
Page 124: Environmental Speciþcations
Reference Specifications Environmental Specifications Minimum Maximum Operating temperature 40 F 104 F 40 C Storage temperature -13 F -25 C 185 F 85 C Operating humidity 95% (non-condensing) Storage humidity 95% (non-condensing) Audio Specifications Line-Level Left and Right Analog Audio Outputs Balanced outputs using two 1/4-inch stereo (tip-ring-sleeve) phone plugs and shielded twisted- Connectors pair cable or unbalanced using two 1/4-inch mono (tip-ring) phone plugs and coaxial cable... - Page 125 Reference Parameter Reference Parameter Reference Parameter Subgroup Parameter Range of Values Default Group (if any) Zones 1–4 default to MIDI Channel Off, 1–16 channels 1–4 Dest Local, MIDI, Local+MIDI Local+MIDI Bnd Rng (semitones) 0–127 MIDI Xmit (transmit) Bnd Rng (cents) 0–127 AuxBend1 Up 0—60 semitones...
- Page 126 Reference Parameter Reference Parameter Subgroup Parameter Range of Values Default Group (if any) Ribbon Sect Large, 3 Sect. Large Continuous Spring Switch Off, On controllers: Spring Ribbon Mode Absolute, Relative Relative Ribbons Parameters Ribbons have Spring Pos 0–127 three common Ribbon 1 basic parameters, As indicated in Basic Parameter Group...
- Page 127 Reference Parameter Reference Parameter Subgroup Parameter Range of Values Default Group (if any) KeyMap L Any keymap Keymap R Any keymap C -1 to G 9 Key Range C -1 to G 9 Block param 1 Varies according to Block Block Param 2 Varies according to Block Internal Voices:...
-
Page 128: Parameter Reference
Reference Parameter Reference Parameter Subgroup Parameter Range of Values Default Group (if any) Local Control Off, On Clock Internal, External Internal Transmit Clock Off, On, Seq Touch 1 Linear, 2 Light1, 3 Light2, 4 Light3, 5 Hard1, 6 Hard2, 7 Hard3 1 Linear Chg Setups Keys Up, Immed... - Page 129 Reference Parameter Reference Parameter Subgroup Parameter Range of Values Default Group (if any) WheelVolMap Equal, Bright, Mellow, Junky OrganMap Equal, Peck’s, Bob’s, Eric’s Chor/Vib Vib1, Vib2, Vib3, Chor1, Chor2, Chor3 DrawbarMode Preset, Live KB3: Timbre Drawbars 1–9 0–8 DrawbarSteps Smooth, Normal PreampResp On, Off Leakage...
-
Page 130: Pc2 Audio Signal Routing
Reference PC2 Audio Signal Routing PC2 Audio Signal Routing A Dry FX-A A to B A Wet Multi-effects B Wet FX-B Reverb B Dry Stereo / Mono Digital Analog... -
Page 131: Midi Controllers
Reference MIDI Controllers MIDI Controllers None 0 Bank MSB Bank LSB Sustain DataInc Mod Whel Port Switch DataDec Breath Sosten NRg LBS Soft NRg MSB Foot Control Legato Rg LSB Port Time Hold2 Rg MSB Data MSB Data LSB SndCtl1 Volume SndCtl2 Balance... -
Page 132: Kb3 Controllers
Reference KB3 Controllers KB3 Controllers ThereÕs a subset of the MIDI Controller numbers dedicated to controlling KB3 features. The Þrst column in the following table lists the Controller numbers that KB3 programs always respond to. KB3 programs also respond to the Controller numbers in the second column; these are the Controller numbers that the Voceª... -
Page 133: Pc2 Keymaps
Reference PC2 Keymaps PC2 Keymaps Piano f Left Clav alt Partials 1 3 Ambient Kit 2 Piano f Right Clav alt2 Partials 1 4 Electric Kit 1 Piano mf Left Clav Key Release Partials 1 6 Electric Kit 2 Piano mf Right Harpsichord Partials 1 8 Light Kit... -
Page 134: Pc2 Effects And Effects Parameters
Reference PC2 Effects and Effects Parameters PC2 Effects and Effects Parameters Reverb Effect Param1 Param2 Param3 Param4 NiceLittleBooth Rvrb Time HF Damping Size Scale Density Viewing Booth Rvrb Time HF Damping Size Scale Density Drum Booth Rvrb Time HF Damping Size Scale Density Add Ambience... -
Page 135: Delay
Reference PC2 Effects and Effects Parameters Effect Param1 Param2 Param3 Param4 My Garage Absorption Late Lvl Treb Freq Treb Gain Half Bath Rvrb Time HF Damping E DfDlyScl E DiffAmt School Stairwell Absorption HF Damping L PreDelay R PreDelay Small Hall Rvrb Time EarRef Lvl L PreDelay... -
Page 136: Flange
Reference PC2 Effects and Effects Parameters Flange Effect Param1 Param2 Param3 Param4 Big Slow Flange LFO Period LFO TempoFdbk Level L/R Phase Sweet Flange LFO Period LFO Tempo Fdbk Level L/R Phase Throaty Flange LFO Period LFO Tempo HF Damping Squeeze Flange LFO Period LFO Tempo... -
Page 137: Chorus + Reverb
Reference PC2 Effects and Effects Parameters Chorus + Reverb Effect Param1 Param2 Param3 Param4 Chorus Air Ch Rate L Ch Rate R Ch Depth LCh Depth R ChorusSmallRoom Ch Rate L Ch Rate R L Mix Rvrb R Mix Rvrb ClassicEP ChorRm Ch Rate L Ch Rate R... -
Page 138: Flange + Delay + Reverb
Reference PC2 Effects and Effects Parameters Flange + Delay + Reverb Effect Param1 Param2 Param3 Param4 FlangeDelayRoom Fl Tempo Fl Phase R Dly Tempo Rvb HFDamp SloFlangeDlyRoom Dly Tempo Dly Fdbk L Dly Fdbk R Rvb HFDamp FlangeDelayHall Dly Tempo Rvrb Time L Mix Rvrb R Mix Rvrb... -
Page 139: Distortion
Reference PC2 Effects and Effects Parameters Distortion Effect Param1 Param2 Param3 Param4 SuperShaper Shp Amoun tOut Gain None None SubtleDrumShape Low Amount Mid Amoun tHi Amoun tOut Gain 2 Band Shaper CrossOver Low Amount Hi Amount Out Gain Shaper->Reverb Shp Amount Shp Lopass Rvrb Time Rvb HFDamp... -
Page 140: Rotary Speaker
Reference PC2 Effects and Effects Parameters Rotary Speaker Effect Param1 Param2 Param3 Param4 VibChor+Rotary1 Vibr/Chor Low Rate High Rate HiResonate VibChor+Rotary2 Vibr/Chor Low Rate High Rate Roto InOut VC+Dist+Rotary1 Vibr/Chor Low Rate High Rate Dist Drive VC+Dist+Rotary2 Vibr/Chor Low Rate High Rate Dist Drive VC+Dist+Rotary3... -
Page 141: Midi Implementation Chart
Reference MIDI Implementation Chart MIDI Implementation Chart Model: Kurzweil PC2, PC2X Manufacturer: Date: 3/1/00 Young Chang Version 1.0 Digital Synthesizers Function Transmitted Recognized Remarks Default Basic Channel Changed 1 - 16 1 - 16 Default Multi* Multi* memorized Mode Messages Modes 1 &... - Page 143 PC2 Programs and Controller Assignments Factory Controller Assignments Appendix C Program Name Stereo Grand PC2 Programs and Slider A FX-A Wet/Dry Slider B FX-B Wet/Dry Slider D Vibrato Rate Controller Octave Shift Arp On/Off Assignments Enable Vibrato Ribbon Pitch Bend CCPed1 Expression FtSw1...
- Page 144 PC2 Programs and Controller Assignments Programs and Controllers Program Name ClassicalGrand 2 Program Name Rock Grand Slider A FX-A Wet/Dry Slider A FX-A Wet/Dry Slider B FX-B Wet/Dry Slider B FX-B Wet/Dry Slider D Vibrato Rate Slider D Vibrato Rate Octave Shift Octave Shift Arp On/Off...
- Page 145 PC2 Programs and Controller Assignments Programs and Controllers Program Name Ragtime Piano Program Name Classic E Piano Slider A FX-A Wet/Dry Slider A FX-A Wet/Dry Slider B FX-B Wet/Dry Slider B FX-B Wet/Dry Slider D Vibrato Rate Slider C Timbre Octave Shift Slider D Tremolo Rate...
- Page 146 PC2 Programs and Controller Assignments Programs and Controllers Program Name Hard E Pno Program Name Soft E Piano Pad Slider A FX-A Wet/Dry Slider A FX-A Wet/Dry Slider B FX-B Wet/Dry Slider B FX-B Wet/Dry Slider C Timbre Slider C LoPass Freq Cut Slider D Tremolo Rate...
- Page 147 PC2 Programs and Controller Assignments Programs and Controllers Program Name ProtoWURLY Program Name Funky Touch EP Slider A FX-A Wet/Dry Slider A FX-A Wet/Dry Slider B FX-B Wet/Dry Slider B FX-B Wet/Dry Slider C Timbre Slider C Timbre Slider D Tremolo Rate Slider D Tremolo Rate...
- Page 148 PC2 Programs and Controller Assignments Programs and Controllers Program Name Rich Digital EP Program Name Electric Grand Slider A FX-A Wet/Dry Slider A FX-A Wet/Dry Slider B FX-B Wet/Dry Slider B FX-B Wet/Dry Slider C Timbre Slider C Timbre Slider D Tremelo Rate Slider D Tremolo Rate...
- Page 149 PC2 Programs and Controller Assignments Programs and Controllers Program Name Celestial Comet Program Name Clav Classic Slider A FX-A Wet/Dry Slider A FX-A Wet/Dry Slider B FX-B Wet/Dry Slider B FX-B Wet/Dry Slider C Treble Cut Slider C Bass Level Slider D Trem/Vib Rate Slider D...
- Page 150 PC2 Programs and Controller Assignments Programs and Controllers Program Name Harpsichord Program Name Accordian Slider A FX-A Wet/Dry Slider A FX-A Wet/Dry Slider B FX-B Wet/Dry Slider B FX-B Wet/Dry Slider C Timbre Slider C Timbre Slider D Sample Start Slider D Tremelo Rate Octave Shift...
- Page 151 PC2 Programs and Controller Assignments Programs and Controllers Program Name Ballad Of 3 Bars Program Name Grungy Overdrive Slider A FX-A Wet/Dry Slider A FX-A Wet/Dry Slider B FX-B Wet/Dry Slider B FX-B Wet/Dry Slider C Perc XFade Octave Shift Slider D Bass Cut FX Vib/Chr On/Off...
- Page 152 PC2 Programs and Controller Assignments Programs and Controllers Program Name Pipe Organ Program Name Trombones Slider A FX-A Wet/Dry Slider C Timbre Slider B FX-B Wet/Dry Slider D Attack Control Slider C Layer XFade Layer Switch Slider D Layer XFade Vibrato Depth Octave Shift Mpress...
- Page 153 PC2 Programs and Controller Assignments Programs and Controllers Program Name Slow Strings Program Name Touch Strings Slider A FX-A Wet/Dry Slider A FX-A Wet/Dry Slider B FX-B Wet/Dry Slider B FX-B Wet/Dry Slider C Brightness (Cut) Slider C Timbre Slider D Attack Control Slider D Envelope Control...
- Page 154 PC2 Programs and Controller Assignments Programs and Controllers Program Name Doo><Daa Program Name Solar Lead Slider C Timbre Slider A FX-A Wet/Dry Slider D Layer XFade Slider B FX-B Wet/Dry Layer Switch Slider C LoPass Freq Vibrato Slider D LoPass Resonance Mpress Layer XFade Octave Shift...
- Page 155 PC2 Programs and Controller Assignments Programs and Controllers Program Name Slo Wood Flute Program Name Porky Bass Slider A FX-A Wet/Dry Slider A FX-A Wet/Dry Slider B FX-B Wet/Dry Slider B FX-B Wet/Dry Slider C Breath Noise Slider C LowPass Freq Slider D Chiff Noise Slider D...
- Page 156 PC2 Programs and Controller Assignments Programs and Controllers Program Name Crypt Program Name Slo Syn Orch Slider A FX-A Wet/Dry Slider A FX-A Wet/Dry Slider B FX-B Wet/Dry Slider B FX-B Wet/Dry Slider C Timbre Slider C """Chiff"" Level" Slider D Timbre Slider D Env Control...
- Page 157 PC2 Programs and Controller Assignments Programs and Controllers Program Name La Grande Jatte Program Name Rich 6 Str Gtr Slider A FX-A Wet/Dry Slider A FX-A Wet/Dry Slider B FX-B Wet/Dry Slider B FX-B Wet/Dry Slider C LoPass Freq Slider C Timbre Slider D LoPass Resonance...
- Page 158 PC2 Programs and Controller Assignments Programs and Controllers Program Name Elec 12 String Program Name Round and Wound Slider A FX-A Wet/Dry Slider A FX-A Wet/Dry Slider B FX-B Wet/Dry Slider B FX-B Wet/Dry Slider C Timbre Slider C LoPass Freq (Cut) Slider D Envelope Control Slider D...
- Page 159 PC2 Programs and Controller Assignments Programs and Controllers Program Name Tri Bass Program Name Upright Bass 2 Slider A FX-A Wet/Dry Slider A FX-A Wet/Dry Slider B FX-B Wet/Dry Slider B FX-B Wet/Dry Slider C Timbre Slider C Timbre Octave Shift Slider D Timbre (Cymbal) Layer Enable...
- Page 160 PC2 Programs and Controller Assignments Programs and Controllers Program Name Ambient Rock Kit Program Name Tripkit/Trashkit Slider A FX-A Wet/Dry Slider A FX-A Wet/Dry Slider B FX-B Wet/Dry Slider B FX-B Wet/Dry Slider C Timbre Slider C Timbre Slider D Pitch Control Slider D Pitch Control...
- Page 161 PC2 Programs and Controller Assignments Programs and Controllers Program Name Virtuoso Perc Program Name Vibes Slider A FX-A Wet/Dry Slider A FX-A Wet/Dry Slider B FX-B Wet/Dry Slider B FX-B Wet/Dry Slider C Pitch Control Slider C Tremolo Rate Slider D Shaker Rate (f1-c2) Slider D Layer Switch...
- Page 163 Kurzweil PC2 Musician’s Guide Index Index controllers, special B-9 copying and pasting 4-8 creating setups 4-13 crossfades 4-18 current layer 4-11 activating effects 3-14, 4-25 additional sounds 1-2 ADR 5-3 data entry 4-2, 4-5 Alpha Wheel 4-2 decay 5-3 alphanumeric button pad 4-2...
- Page 164 Kurzweil PC2 Musician’s Guide Index FX-B 3-14 menus 4-6 Arpeggiator 5-19 Controllers 5-14 Envelope 5-3 Global 5-30 Global menu 5-30 Key Range 5-9 global parameters 5-30 LFO 5-3 group buttons 3-9 LFO: KB3 Editor 5-28, 5-30 groups 3-9 MIDI Recv 5-36...
- Page 165 Kurzweil PC2 Musician’s Guide Index parameters: reference list B-3 selecting programs and setups 3-13 pasting 4-8 selecting zones 3-9 pedals 1-2, 2-4 sequencers 4-33, 4-34 percussion parameters 4-20, 5-29 sequencers, with arpeggiator 4-29 percussion pitch parameters 5-30 sequences 2-6 performance controls 3-9...
- Page 166 Kurzweil PC2 Musician’s Guide Index volatile memory A-1 voltage ranges B-1 volume, entry levels 4-14 wet/dry mix 3-16, 4-15 Young Chang Distributors iii zone parameters 3-8 zone selection 3-9 zone status 3-11 zones, key range 4-6...
- Page 167 Kurzweil PC2 Musician’s Guide Index of Parameters Duration (Arpeggiator) 5-22 Parentheses indicate the menu or editor containing the parameter. effect ID (Effects Editor) 5-25 Index entries in italics are not parameter names. effect name (Effects Editor) 5-25 Effects Change Mode (Effects Editor) 5-25 Effects Channel (Effects Editor) 5-25 Effects Editor parameters 5-24Ð5-26...
- Page 168 Kurzweil PC2 Musician’s Guide Keymap L >> (Timbre) 5-2 Offset (Velocity) 5-11 << Keymap R (Timbre) 5-2 On Ctrl (Controllers) 5-18 On Value (Controllers) 5-18 OrganMap (KB3: Timbre) 5-27 Output Mode (Global) 5-34 Latch Mode (Arpeggiator) 5-19 Leakage (KB3: Timbre) 5-28...
- Page 169 Kurzweil PC2 Musician’s Guide Vel Curve (Velocity) 5-13 Vel Mode (Arpeggiator) 5-22 Vel Offset (Velocity) 5-11, 5-12 Vel Scale (Velocity) 5-11, 5-12 Velocity menu 5-10 Ver (Global) 5-35 Vol (MIDI Recv) 5-36 Vol Adj (KB3: Envelope) 5-29 Volume (Timbre) 5-2...
Need help?
Do you have a question about the PC2 - MUSICIANS GUIDE REV A and is the answer not in the manual?
Questions and answers