Table of Contents
Advertisement
Available languages
Available languages
JMC812
7D D/JMC813
ODD
Installer:
Please leave this manual
with this appliance.
Consumer:
Please read and keep
this manual for future reference. Keep
sales receipt and/or cancelled check
as proof of purchase.
Model Number
Serial Number
Date of Purchase
In our continuing effort to im-
prove the quality and perfor-
mance
of our appliances,
it
may be necessary
to make
changes to the appliance with-
out revising this guide.
If you
have
questions,
write
us
(include
your
model
number
and
phone number) or call:
Maytag ServicesSM
Attn: CAIR®Center
RO. Box 2370
Cleveland, TN 37320-2370
1-800-JENNAIR (1-800-536-6247)
U.S.A. and Canada
(Mon.-Fri., 8 am-8 pm Eastern Time)
Internet: http://www.jennair.com
Contents
important Safety instructions ................................................................
2-4
Installation and Operation .....................................................................
5-6
Cooking Utensils ......................................................................................
7
Features ................................................................................................
8-9
Control Panel ..........................................................................................
10
Operating instructions .......................................................................
11-15
Fresh Vegetable Chart ............................................................................
16
Care and Cleaning .................................................................................
17
Troubleshooting ......................................................................................
18
Warranty .................................................................................................
20
Guide de Futilisateur ...............................................................................
21
Guia del Usuario ....................................................................................
41
Electric
Microwave
Keep instructions
for future
reference.
Be sure manual
stays with oven.
A/01/03
°2003 Maytag Appliances Sales Company
Part No.8112P218-60
MCS P/N 53001181
3828W5A2901
Advertisement
Table of Contents

Related Manuals for Maytag JMC8130DDS


Summary of Contents for Maytag JMC8130DDS
- Page 1 JMC812 7D D/JMC813 Installer: Please leave this manual with this appliance. Consumer: Please read and keep this manual for future reference. Keep sales receipt and/or cancelled check as proof of purchase. Contents Model Number important Safety instructions ..............Serial Number Installation and Operation ..............
-
Page 2: Safety Instructions
IMPORTANT SAFETY INSTRUCTIONS What You Need Recognize Safety Symbols, Words, Labels to Know About DA.GER Safety instructions DANGER-- Ummediate hazards which WULL resuUtin severe personal injury or Warning and Umportant Safety death. structions appearing in this manuaU are not meant to cover aH possiMe WARNU.G conditions and situations... -
Page 3: Precautions To Avoid Possible Exposure To Excessive Microwave Energy
Recognize this symbol as a SAFETY message , WARNING When using eUectricaUmicrowave, basic safety precautions shouUd be followed to reduce risk of burns, eUectric shock, fire, or injury to persons or exposure to excessive microwave energy. 1. READ all instructions before using the appliance. 9. - Page 4 IMPORTANT SAFETY INSTRUCTIONS, cont. CAUTION To avoid risk of personal injury or property damage, 6, Do not use regular cooking thermometers in oven, observe the following: Most cooking thermometers contain mercury and may cause an electrical arc, malfunction, or dam= 1, Do not deep fat fry in oven, Fat could overheat age to oven, and be hazardous to handle,...
-
Page 5: Unpacking Oven
and Operation DO NOT BLOCK for a recipe to be conservative in giv- ing cooking times, While under- AiR VENTS For safety purposes this oven must cooked food may always be cooked a be pUugged into a 15 or 20 Amp cir- bit more, overcooked food is ruined All air vents should be kept clear dur- cuit, No other eUectdcaU appliances or... - Page 6 and Operation, cont. Moisture content of foods: Since Wrapping in waxed paper or paper Testing if cooked: Because foods towek Sandwiches and many other cook so quickly in a microwave oven, the heat generated from microwaves foods containing prebaked bread it is necessary to test food frequently.
- Page 7 CookJn Utensds CAUTION To avoid risk of personal injury or property damage, do not use stoneware, aluminum foil, metal utensils, or metal trimmed utensils in the oven, M IC ROWAV E-SAFE Just read through following 5. Plastic cooking bags: These checklist.
- Page 8 Features OVEN SPECiFiCATiONS NOTE: This unit is not designed for 50 Hz or any circuit other than a 120- VOW60 Hz AC circuit, This oven is designed for built-in installation, JMC8127DD Specifications subject to change without notice, Power Source 120 VAC, 60 Hz Input Current 13 A Oven Front Pmate...
-
Page 9: Turntable Installation
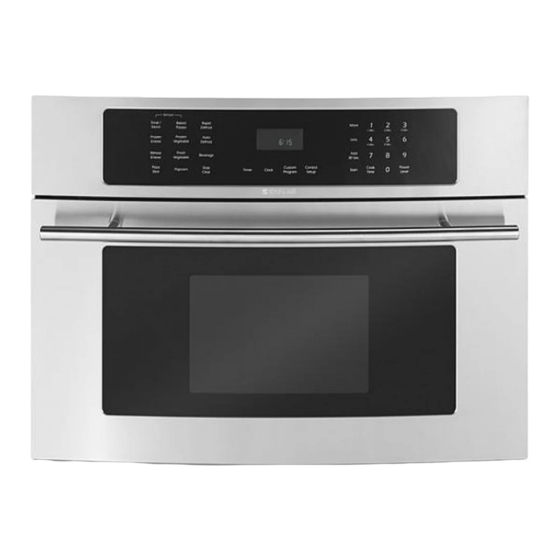
TURNTABLE BUILT-IN INSTALLATION Never place the turntable upside down. The turntable should never INSTALLATION • When installing a built-in oven, an be restricted. opening is required: 1. Place the rotating ring on the cavi- • Both turntable and rotating ring ty bottom. - Page 10 Control Panel ..I ..iI ! Soup, _aked Souce P_,tz_o f, oz_,, I:,o,_,_ En_re_ Wg_,_bIc .._7 _d_ez_ Frez_ Lm, e,, V,ge_oble T,,m_r Cloc_ C_,_om CoJ_rJ CSe_r P_pcom I'r_rom Setu_ Display window 3. Rapid Defrost (pg. 15) 10.Control Setup (pg. 13) Upper line: word...
-
Page 11: Child Lock
Operat 12°Hour CLOCK ADD 30 SEC. CUSTOM PROGRAM A time-saving pad, this simplified CUSTOM PROGRAM lets you recall control lets you quickly set and start one cooking instruction previously Oven is equipped with a 12-hour clock microwave cooking without the need placed in memory and begin cooking and a timer that can be set up to 99 to touch START. -
Page 12: Microwave Power Level Chart
Instructions (cont'd) MICROWAVE POWER LEVEL CHART COOK TiME This function allows you to cook food Power desired amount time, Levet Because many foods need slower * Boiling water, cooking (at less than HFPOWER), (HIGH) Making candy, there are 10 power ]eve] settings in o Cooking poultry pieces, fish and vegetables, addition to HFPOWER, o Cooking tender cuts of meat,... -
Page 13: Sensor Cook
2. Touch number 2. The in the display continu- 2 Min, oven will start automat- 4 Min. OUSly, Byusing theMORE or LESS keys, a ll bally. oftheCooktime,Add30 Sec.,and 2, Touch 4, Display scrolls the words LBS. TOUCH Sensor Cook programscan be NOTE: Be careful, the beverage will 1 KG TOUCH 2, adjusted to cookfoodfora longeror... -
Page 14: Cook Chart
Instructions (con£a) SENSOR COOK 5. Room temperature should exceed 95 ° E CAUTION SENSOR COOK allows you to cook 6. Oven should be plugged in at most of your favorite foods without least 5 minutes before Sensor When popping popcorn: having to sebct cooking times and Cooking. -
Page 15: Auto Defrost Guide
AUTO DEFROST 3, Enter the weight For best results, shape your ground by touching 1 and meat into the form of a doughnut 1 Mh'7. 2 Min. Three defrost sequences are preset before freezing, When defrosting, in the oven, The defrost feature pro- Display scrolls the scrape off thawed meat when the vides you with the best defrosting... - Page 16 Chart Cook time Vegetable Amount at HiGH instructions Standing (minutes) Time &rtichokes 2 medium Trim, Add 2 tsp, water and 2 tsp, lemon juice, 2-3 minutes '8 ozs, each) 4 medium 10-12 Cover, Cook stem end up, _,sparagus, 1 Ib, Wash and turn half of spears around, 2-3 minutes :resh, spears...
- Page 17 CAUTION To avoid risk of property damage, un#ug the microwave oven or disconnect power at source by removing fuse or throwing circuit breaker, Before cleaning the oven, unplug the power supply cord of the oven or open the oven door to prevent an accidental oven start.
-
Page 18: Calling For Service
,WARNING To avoid risk of severe personaU injury, eUectricaU shock or death, do not remove outer case at any time, OnUyan authorized servicer shouUd remove outer case, BEFORE CALLING FOR SERVICE Check the following list to be sure a service call is really necessary. A quick reference of this manual as well as reviewing additional information on items to check may prevent an unneeded service call. - Page 19 Notes...
- Page 20 Full Two Year Warranty For two (2) years from the date of original retail purchase, any part which fails in normal home use will be repaired or replaced free of charge when carried into an authorized servicer, Limited Parts Warranty After the second year from the date of original retail purchase...
- Page 21 JMC812 7DD/JMC813 Installateur : Remettre ce manuel au proprietaire. Consommateur : Lire le manuel et conserver comme ref6rence. Conserver la facture d'achat ou le cheque encaisse comme preuve de I'achat. Numero de modele Table des matieres Numero de serie Instructions de securit6 importantes ....... 22-24 InstaNation et utNisation ........
- Page 22 INSTRUCTIONS DE SECURITE IMPORTANTES Ce que vous devez Reconnaissez les etiquettes, phrases ou symboles savoir sur ies instruc- sur le securite tions de securit6 DA.GER Les instructionsde s¢curit6 importantes et DANGER i risques imm_diats qui RESULTERONT en de graves bHessures ou Hes avertissements paraissant darts ce m_me Hamort.
- Page 23 Reconnaissez ce symbole annonqant un message sur la SI CURITI AVERTISSEMENT Lors de I'utilisation d'appareils electriques, des precautions Voir Ies instructions pour Ie nettoyage de Ia porte dans la securit6 de base doivent _tre suivies pour reduire Ie risque de section Entretien et nettoyage a la page 38 de ce manuei.
- Page 24 INSTRUCTIONS DE SECURITE IMPORTANTES ATTENTION Pour eviter blessures ou dommages mat0riels, observer les nent du mercure, ce qui peut entrafner la formation d'un precautions suivantes : arc electrique, le mauvais fonctionnement ou encore I'endommagement du four. Ne pas faire frire _.grande friture dans le four a micro- ondes.
- Page 25 et UtiJisadon NE PAS OBSTRUER de ce manuel, on a adopt@ une philosophie plut6t conservatrice a r@gard des dur@esde OUVERTURES DE Pour Hasecurit6 des utiHsateurs, ii taut que cuisson. II est toujours possible de pour- ce four soR branche sur un drcuit de 15 A suivre la cuisson d'un mets dent la cuisson ou 20 A qui n'aHmente aucun autre appareH se r_v@le@trele99rement insuffisante, tan-...
- Page 26 et Operation (suite) ondes absorbees par les aliments a ten= Pergage : Un aliment enterme dens une Recouvrement de papier paraffin_ : Une dance & provoquer I'evaporationde I'eau coquille ou une peau ou enveloppe pellicu o teuille de papier paraffin6 retient efficace- interne, on doit leg@rement a rroser d'eau laire risque tort d'@claterou d'exploser dens merit les projections, et contribue a la reteno...
- Page 27 Ustensiles Cuisine ATTENTION Pour eviter tout risque de demmages materielsou corporels,ne pas placerdans le four des articlescomme les suivants :vaisselle ou ustensileen gres, feuilled'aluminium,ustensilemetallique ou ustensileavec garniture metallique. USTENSJLES COIVI- II suffit de noter les remarquessuivantes : rechauffage rapide des aliments qu'ils contiennent.
- Page 28 • • aracterlsuques SPI ClFICATIONS REMARQUE : Cet appareil n'est pas con£u pour une utilisation & 50 Hz ou pour un circuit autre que 120 V CA, 60 Hz. Ce four est con_u pour 6tre encastr& Les FOUR specifications sont sujettes & changement sans preavis, JMC8127DD Alimentation electrique 120 VCA, 60 Hz...
- Page 29 iNSTALLATiON O'UN iNSTALLATiON Ne jamais pHacer HepHateau tournant H'envers. La rotation du pHateau FOUR ENCASTF{E PLATEAU TOU NANT tournant doit jamais _tre restreinte. Lors Hnstallation d'un four 1. PHacer H'anneau rotatif au fond de Ha Le pHateau tournant et H'anneau cavit6.
- Page 30 ..f ..117 I ..ll4 I 4 M_n 5 M_n R_heot _Je_h ..I 7 Lnt_ee venerable ..@ Custom conrgd rl'_ ;ta_t ¢oo_ I"z_'_ Pof,,or,, s_*_p 1. Afficheur Rapid Defrost (Decongelation rapn- 10. Control Setup (Parametres de pro- de) (p.
- Page 31 Instructions CUSTOM PROGRAM 12 Hour CLOCK and ADD 30 SEC. (ADDmON (PROGRAMME TIMER (HORLOGE 30 SECONDES) Cette touche de commande rapide per- [12 HEURES] met de commander la raise en marche du La touche CUSTOM PROGRAM permet four a micro-ondes sans qu'il soit neces- le rappel d'un programme de cuisson Le tour est 6quip6 d'une horloge en for=...
- Page 32 " "1{" ° Instructions a utmsatmn (suite) UTJUSATJON DES DWERS NJVEAUX DE PUISSANCE COOK TiME (CUJSSON DU FOUR A, MJCRO-ONDES Cette tonction permet de seHectionner Niveau de Hadur_e de cuisson. Comme de nom- Pu[ssance Utilisation breux aliments ont besoin d'une cuis o son pius iente (a un niveau de puis o...
-
Page 33: Control Setup
Exempie : REB,_ARQUE : Un liquide qu'on chautte Pour augmenter ou pour 1 OFF TOUCH 2 (Son r_duire Is duree d'une operation dans certains types de recipbnt (partb o act#, touche 1 son inactit, uli_rement un recipbnt cyiindrique) peut cuisson avec capteur (ex. - Page 34 Instructions (suite) 6, HH t aut que Hefour soit branch6 depuis iNSTRUCTiONS D'UTJLb 2. Apres Hadetection de Havapeur, H'apo au moins 5 minutes avant H'utiHisation parch 6met deux signaux sonores. SATJON POUR LA CUJS- de Hafonction de cuisson contr6H6e 3. Louverture de Haporte, ou une pres- SON COMMANDE E par capteur.
-
Page 35: Auto Defrost
AUTO DEFROST CUJSSON COtVIIVIANDC:E 2. Appuyer sur 1. I'affi- 1 Min. cheur presente le PAR CAPTEUR (DI=CONGI LATION message ENTER La fonction de cuisson commandee par WEIGHT (Entrer le AUTOMATIQUE) capteur permet de commander Hacuis- poids). Trois operations de decongelation & son d'un mets favori sans devoir s6Hec- execution automatique sont program- 3. -
Page 36: Rapid Defrost
" "1" ° Instructmns a utmsatlon (suite) DECONGELATJON AUTOMATJQUE TABLEAU DE RAPID DEFROST SELECTION AJiment ProgJ'amme Cette touche commande une op6ration B_UF de d@cong61ationrapide pour 450 g (1 MEAT Boeuf hach6, steak de mnde, viande & ragoOt en cubes, steak Ib) de bceuf hache surgel6, (VIANDE) de filet, viande pour pot au feu, r6ti de c6tes, r6ti de croupe... - Page 37 " CLl1550n Temps de cuisson instructions QuantJt6 (puissanceELEVEE Periode Legumes d'attente (minutes) 2 8 3 minutes Artichauts (225 g 2 - taille moyenne Preparer. Ajouter 2 c. 8 the d'eau et 2 c. 8 the de jus de cit- 10812 [8 oz] chacun) 4 - taille moyenne ron.
- Page 38 et Entretien ATTENTION Pour 6viter dos dommages mat_rieHs, debrancher He four a micro=ondesou interrompreraHmentation au niveau du taMeau de distrb bution (enHever Hes fusiNes ou ouvrk He disjoncteur). Avantd'entreprendrele nettoyagedu four,debrancherle cordon d'alimentationou ouvrirla porte du four pour emp6cher une mise en marche accidentelle.
- Page 39 Guide de pannage AVERTISSEMENT Pour _viter choc eHectrique, graves bHessures o u accident morteH, n e jamais retirer Ha caisse de H'appare& SeuH un techniden agree est habHR_ a enHever H a caisse externe. AVANT DE CONTACTER UN SERVICE DE DI_PANNAGE Verifierla liste suivantepour s'assurer qu'un service de depannage est vraiment necessaire.Consulterce manuelet revoir les informa- tions supplementairessur les differentsarticles pour emp6cher tout appel de service qui ne serait pas necessaire.
- Page 40 Garande Garantie complete de deu× arts Durant une p6riode de deux (2) ans a compter de la date de I'achat initialau detail, toute piece qui se r@61eraitdefectueuse dans des conditions normales d'usage m6nager, sera r@ar@ ou remplac@ gratuitement, Garantb limit_e = pieces De la seconde ann@ _ la cinquieme ann@ apr_s la date de I'achat initial au d6tail, bs pieces mentionn@s ci-dessous et qui se r@61erabnt ddectueuses dans des conditions normales d'usage m@ager, seront r@ar@s ou remplac@s gratuitement (pi_ces seubment) si I'appareil se trou- ve aux EtatsoUnis ou au Canada ;le proprietaire devra payer tousles autres frais, y compris bs frais de maimd'ceuvre : (1) clavier tactile et micro-...
- Page 41 JMC812 7D D/JMC813 Instalador: Pot favor deje este manual junto con el electrodomestico. Consumidor: Por favorlea y conserveeste manual para referenciafutura. Conserveel recibo de compra y/o el cheque cancelado como comprobantede compra. Numero de Modelo Tabla de Materias Instrucciones Importantes Sobre Seguridad ....
- Page 42 INSTRUCCIONES IMPORT_ANTES DE SEGU DAD Jnformaci6n Sobm las Jn- Reconozca mos Simbomos, Advertendas y Etiquetas de Seguridad strucciones de Seguridad _, PELJGRO Las advertencias e instrucdones impor= tantes sobre seguridad que aparecen en PELIGRO -- Riesgos inmediates que CAUSARAN lesbn personal grave o mort& este manuaH no estan destinadas a a, ADWRTENCUA cubrir todas Has posiNes circunstandas y...
- Page 43 Reconozca este simbolo como un mensaje de SEGURIDAD ADVERTENCIA Cuando use aparatos eHoctricos, se deben seguir instruc = Yea las instrucciones de limpieza de la puerta en la ciones de seguridad b4sicas para reducir eHriesgo de secciOn Cuidado y Limpieza de este manual, en la quemaduras, choque eHOctrico, incendio,...
- Page 44 INSTRUCCIONES IMPORT_ANTES DE SEGU DAD ATENCION mercurio y pueden causar un arco electrico, malfun- Para evitar lesi6n personal o dahos materiales observe Io cionamiento o daho al homo, siguiente: 7. No use utensilios metalicos en el homo. 1. No ffia con grasa en el homo, La grasa puede sobreca- lentarse y ser peligrosa de manipular, 8, Nunca use papel, plastico u otros materiales com- 2, No cocine ni recaliente huevos enteros o sin romper la...
- Page 45 NO BLOQUEE LOS RESPb basa este manual es que es meier que una receta sea conservadora al dar los tiempos Para prop6sitos desegarided este homo de cocci6n= Los alimentos que no estan debe setenchufade enundrcuito d e15o bien cocidos siempre pueden cocerse un Todos los respiraderos deben set man- 20ampedos, Ning0n otto artdacto e i6ctrb poco m4s, en cambio los alimentos sobre =...
- Page 46 y Ftmclonamlenm (cont.) Contenido de humedad de los alimen- incluyen tanto las yemas y las claras de los sueito que una tapa o que Haenvoiturade huevos, las almejas y los ostiones y tos: Debido a que el calor generado de las pBstbo, permite que ios aHmentos queden muchos otros vegetalesy ffutas enteras.
- Page 47 Cocina ATENCION Para evitar el riesgo de una lesi6n personal o dafos materiales,no use en el homo utensiliosde gres, papel de aluminio,utensilios de metal o utensilioscon adornos de metal, UTENSILIOS Compruebe la lista que se incluye a contin- mente. Sin embargo, ellos no deben uaci6n.
- Page 48 Caractedsficas ESPECJFJCACJONES NOTA: Este artefacto no ha sido dise_iado para 50 Hz ni para ningun otro circuito DEL HORNO a excepci6n de un circuito de 120 voltios/60 Hz CA. Este homo ha sido dise_ado para instalaci6n encastrada. Especificaciones sujetas a cambio sin aviso previo. Arimentaci6n Erectrica 120 VAC, 60 Hz Corriente de Entrada...
- Page 49 INSTALACION DE LA o Nunca cobque Ha bandeja giratoria ai reves. No se debe nunca impedir BANDEJA GIRATORIA ei movimbnto de Habandeja girato o ria. 1. Cobque ei anHb giratorio o Cuando instala homo parte inferior de Hacavidad. encastrado se requiere cavi o o Tanto ei anHb giratorio como la ban °...
- Page 50 de Control ¢ ..I ,.,o,,_ II 7 5_u_l _ok_d I ..114 Frozen _roz_, _n_e v,g,,toS_e S_&eo_ Fsesh .._ 7 /tdr_ _mr_e Vey,,b_e Cu,tom 1. Pantaiia indicadora 10. 'Control Setup' (Programaci6n 3. 'Rapid Defrost' (Descongelaci6n Rripida) (prig. 56) los Controles) (prig.
- Page 51 Instmcciones de Ftmdonamienm 'CUSTOM PROGF{AM' 12 Hour 'CLOCK' 'ADD 30 SEC.' (Agregar 'TIMER' (Reloj de 12 30 Segundos) (Programa Personalizado) Esta tecla ahorra tiempo y Ie permite pro- Este programa le permite recuperar una Horas y Tempodzador) gramar r&pidamente y poner en marcha instrucciOn de cocci6n que ha sido pues- El homo esta equipado con un reloj de la cocci6n...
- Page 52 Instrucdones de Ftmdonamienm (cont.) 'COOK TIME' (Tiempo de TABLA DE NJVELES DE POTENCJA DE MJCROONDAS Cocd6n) Nivel de Esta funci6n le permite cocinar alimen= Potencia tos durante una cantidad de tiempo o Hervir agua. deseada. Debido a que muchos all= mentos necesitan cocci6n...
- Page 53 Ejemplo: Para calentar dos tazas de caf_ traran repetidamente cuatro modos. de 8 onzas (250 mL): (Ma.siMenos) Beverage 1. Oprima 'BEVERAGE'. 2. Oprima 1. La pantalla mues o Usando las teclas 'MORE' o 'LESS', pantalla muestra 'BEV I Min. tra las palabras 'SOUND ON todos los programas 'Cook Time', 'Add...
- Page 54 Instmcdones Ftmdonamienm (cont.) 6. El homo debe estar enchufado JNSTRUCCJONES PARA 2, Una vez que se detecta el vapor, se escucharan dos se_ales sonoras, Io menos 5 minutes antes de usar el LA COCCJON POR sistema 'Sensor Cook'. 3, Si abre la puerta o se oprime la SENSOR Categor[as: Sopa/Salsa...
- Page 55 'AUTO DEFROST' COCCJON POR 2. Optima 1, La pantalla 1 Min. muestra palabras SENSOR (Descongelacion 'ENTER WEIGHT' (Pro- La cocci6n por sensor Hepermite cocF Automa.tica) grame el Peso). Ha mayoria de sus aHmentos En el homo se han programado tres 3, Programe peso favoritos sin tenet que seHeccionar Hos...
- Page 56 Instrucdones de Fundonamiento (cont.) 'RAPID DEFROST' GUI'A DE DESCONGELACJON AUTOMATJCA (Descongelacidn Rapida) Secuenc_a Atimento Esta caracteristica ofrece descon- CARNE DE RES geHacidn rapida para 1 Hbra (450 g) de 'MEAT' Came moHida de res, biftec redondo,trocitos para estofado,fHetede Homo, came asada, aguja, bites anchos,asado de cuadrH,hamburguesas. came de res moHda congeHada, (CARNE) CORDERO...
- Page 57 de Ve Fescos Tbmpo Cantidad cocc{6n lnstrucc{ones Vegetales Tbmpo en 'HIGH' (minutos) Reposo 2 medianas 2 a 3 minutos bachofas, (8 onzas Recorte. Agregue 2 cucharaditas de agua y 2 cucharaditas 4 medianas 10a 12 [225 g] cada una) de jugo de lim6n. Tape. Cocine con los tallos hacia arriba. 2 a 3 minutos Esparragos,frescos, 1 libra (450 g)
- Page 58 y Limpieza ATENCJON Para evitar riesgos materiaHes, desenchufeeH homo de microondaso desconecte Ha energia eH6ctrica retirandoeHfusibHe o disparano do eH disyuntor. Antes de HmpiareH homo, desenchufeHo o abra Ha puerta para evitar Ha puesta en marcha accidentaH dellhomo. Pieza Desccipci6n mnterior de1 Homo , Umpie con un pa5o humedo seguido , Es importante mantener Hmpia eH&ea entre Ha puerta y Ha cavidad deHantera para asegurar que...
-
Page 59: Antes De Solicitar Servicio
Avedas ADVERTENCIA Para evitar riesgo de lesi6n personal, choque electrico o la muerte, no retire en ningun momento la caja exterior. Solamente un t_c = nico de servicio autorizado puede retirar la caja exterior. ANTES DE SOLICITAR SERVICIO Veritique la lista que se incluye a continuaci6n para veriflcar si realmente es necesario hacer una Ilamada de servicio. Una consulta rgtpida de este manual asi como una revisi6n de la informaci6n adicional sobre cada artfculo puede evitar una Ilamada de servicio innecesaria. - Page 60 Garanda Garantia Completa de Dos Afos Durante dos (2) aifiosdesdela fechade compraoriginalal pormenor, s e reparar& o reemplazara gratuitamente cualqubrpbza que falleen uso normal d el hogar, Garantia LimRada de Pbzas DespuAs de! segundoaiqodesdela fechade compraoriginalal pormenorhastael quintoaho, lassiguientespiezasque falbn duranteusonor- malen el hogarserAnreparadas o reemplazadas g ratuitamente en Ioque respectaa la piezamismay el propbtariodebe pagartodos losotros costosinchyendomanode obracuandoel artefacto est6 ubbadoen losEstadosUnidoso CanadA:(!) panelde!tecladoy microprocesador, (2) tubo magnetr6n,...
Need help?
Do you have a question about the JMC8130DDS and is the answer not in the manual?
Questions and answers