Table of Contents
Advertisement
Service
This manual is to be used by qualified appliance
technicians only. Maytag does not assume any
responsibility for property damage or personal
injury for improper service procedures done by an
unqualified person.
2001/2002
Convection
Domestic
Microwave Ovens
©2005 Maytag Services
This Base Manual covers general information
This manual includes, but is
not limited to the following:
ACM1580AB
ACM1580AC
ACM1580AS
ACM1580AW
JMC9158AAB
JMC9158AAQ
JMC9158AAS
JMC9158AAW
16026267
Replaces 16021669
June 2005
Advertisement
Table of Contents
Troubleshooting

Related Manuals for Maytag ACM1580AB


Summary of Contents for Maytag ACM1580AB
- Page 1 Service This manual is to be used by qualified appliance technicians only. Maytag does not assume any responsibility for property damage or personal injury for improper service procedures done by an unqualified person. 2001/2002 Convection Domestic This Base Manual covers general information...
-
Page 2: Important Information
(such as exposure to electrical shock) may result. CAUTION Maytag will not be responsible for any injury or property damage from improper service procedures. If performing service on your own product, assume responsibility for any personal injury or property damage which may result. -
Page 3: Table Of Contents
Convection Motor Removal ........20 Heater Element Removal ........20 Thermistor Removal ..........20 Sensor Removal ........... 20 Primary Interlock Switch Removal ....... 20 Secondary Interlock, Monitor, and Oven Lamp Switch Removal ......... 21 Noise Filter Removal ..........22 16026267 ©2005 Maytag Services... -
Page 4: Important Safety Instructions
24. DO NOT cover racks or any other part of the oven 10. DO NOT cover or block any openings on the with metal foil. Covered racks will cause appliance. overheating of the oven. SAVE THESE INSTRUCTIONS 16026267 ©2005 Maytag Services... -
Page 5: Save These Instructions
Do not controls. Never allow them to lean or swing on continue to heat after popping has stopped. oven door. Popcorn will scorch or burn. Do not leave oven unattended. SAVE THESE INSTRUCTIONS 16026267 ©2005 Maytag Services... - Page 6 Racks, utensils, and oven loosened), (3) door seals and sealing surfaces. surfaces can become hot during or after use. d. The oven should NOT be adjusted or repaired by anyone except properly qualified service personnel. SAVE THESE INSTRUCTIONS 16026267 ©2005 Maytag Services...
-
Page 7: Specifications
1500 Watts 1500 Watts Dimensions Cabinet Width " " Height " " Depth 20" 20" Oven Interior Width " " Height " " Depth " " Weight Crated 59 lbs. 59 lbs. Uncrated 52 lbs. 52 lbs. 16026267 ©2005 Maytag Services... -
Page 8: Component Specifications
Approximately 9.6 Ω @ 68 − 86°F Terminal to terminal......Damper motor Disconnect wires from terminals. Measure for resistance: Approximately 2930 Ω Terminal to terminal......Turntable motor Disconnect wires from terminals. Measure for resistance: Approximately 3480 Ω Terminal to terminal......16026267 ©2005 Maytag Services... - Page 9 Door open infinite, door closed continuity. Secondary interlock Disconnect wires from terminals. NOTE: When line fuse is blown replace Measure resistance at following monitor, primary, and secondary terminals: interlock switches. NC − COM........Door open continuity, door closed infinite. 16026267 ©2005 Maytag Services...
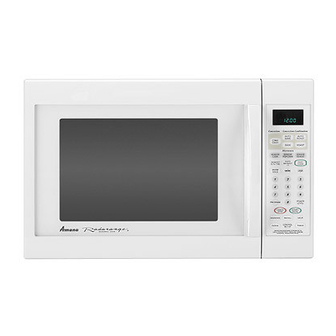
- Page 10 1 lb. Program Warm Hold Power Level More + Less - Start Cancel Stop Pause Help Reminder Recall Control Clock Timer Set-up FOR RECIPES REQUIRING STIRRING OR TO CHECK FOOD WITHOUT CANCELLING COOKING PROGRAM - PRESS START/PAUSE 16026267 ©2005 Maytag Services...
-
Page 11: Microwave Energy Leakage Test
(5 cm) spacer supplied with the probe. 5. Press the start pad or turn on the timer and with the magnetron oscillating, measure the leakage by holding the probe perpendicular to the surface being measured. 16026267 ©2005 Maytag Services... -
Page 12: Troubleshooting Procedures
1. Use plastic wrap or lid. Inconsistent intensity of Uneven cooking. 2. Stir once or twice while microwave by their cooking soup, cocoa or characteristics. milk, etc. 16026267 ©2005 Maytag Services... - Page 13 3. Display shows Still have trouble. assembly. assembly. a number or figure different from one touched. 4. Random programming when touching other pads. 5. Display is fixed at some figure and can not accept any input. 16026267 ©2005 Maytag Services...
- Page 14 NOTE : All these switches must be replaced at the same time. 2. Fuse does not No continuity. Check continuity Failed Replace blow. of thermostat. thermostat. thermostat. Continuity. Failed power Replace power Check continuity No continuity. supply cord. supply cord. of power supply cord. 16026267 ©2005 Maytag Services...
- Page 15 Normal with multimeter. Measure the Failed Replace Abnormal output power. magnetron. magnetron. NOTE: Simple test of power output-conducted by heating one liter water for one minute, if available. Minimum 47°F (8.5°C) temperature rise is normal condition. 16026267 ©2005 Maytag Services...
- Page 16 Failed P.C.B. Replace P.C.B. Output is full power Disconnect the Abnormal. assembly. assembly. when you set lower wire leads from power level. relay 2 and check continuity relay 2. (Operate the unit) 16026267 ©2005 Maytag Services...
-
Page 17: Troubleshooting Procedures
Normal Error message Thermistor open Check the Replay shows in the or short. thermistor. thermistor. display. Normal Cook on the Without Cook with Check the rack. glass tray. metal rack. metal rack. 16026267 ©2005 Maytag Services... -
Page 18: Disassembly Procedures
1. Remove door, see “Door Removal” procedure. 2. Pry chock cover off door frame assembly. 3. Remove and replace damaged piece. 4. Reassembly in reverse order. 5. Perform microwave leakage test. Printed circuit Key pad board 16026267 ©2005 Maytag Services... -
Page 19: Lamp Socket Removal
3. Slide fan guide assembly out to gain access to fan motor. 4. Disconnect wire leads from cooling fan. 5. Remove screws securing fan motor to fan guide assembly. 6. Replace and reassemble in reverse order. 16026267 ©2005 Maytag Services... -
Page 20: Convection Motor Removal
2. Remove screws at and next to terminals securing wires and element to heater box. 3. Release metal clip securing element to heater box. 4. Remove element from heater box. 5. Replace and reassemble in reverse order. 16026267 ©2005 Maytag Services... -
Page 21: Secondary Interlock, Monitor, And Oven Lamp Switch Removal
To avoid possible exposure to microwave energy leakage, the following adjustment of interlock switches should be performed only by an authorized service technician. CAUTION Microwave leakage test must always be performed when unit is serviced, for any reason. 16026267 ©2005 Maytag Services... -
Page 22: Noise Filter Removal
Noise Filter Removal 1. Remove outer case, see “Outer Case Removal” procedure. 2. Disconnect wire leads from noise filter. 3. Remove screws securing noise filter to chassis. 4. Replace and reassemble in reverse order. 16026267 ©2005 Maytag Services... -
Page 23: Series 10
Wiring Diagram and Schematic CAUTION To avoid electrical shock, personal injury, or death, disconnect power to unit and discharge capacitor before servicing, unless testing requires power. W ARNING HIGH VOLTAGE Schematic Diagram, Series 10 16026267 ©2005 Maytag Services... -
Page 24: Series 11
Wiring Diagram and Schematic WARNING To avoid electrical shock, personal injury, or death, disconnect power to unit and discharge capacitor before servicing, unless testing requires power. W ARNING HIGH VOLTAGE Schematic Diagram, Series 11 16026267 ©2005 Maytag Services... - Page 25 Appendix A A–1 16026267 ©2005 Maytag Services...
- Page 26 60 hertz circuit with the electrical rating as shown in specifications table. When the combination oven is on a circuit with other equipment, an increase in cooking times may be required and fuses can be blown. 16026267 A–2 ©2005 Maytag Services...
-
Page 27: Display And Features
3. At the end of the cooking cycle, oven stops and tones sound. Spanish HELP HELP displays feature information and helpful hints. To use the HELP feature, simply press the HELP pad, and then the feature pad you would like information about. A–3 16026267 ©2005 Maytag Services... - Page 28 MORE and LESS do not adjust cook time for the DEFROST and WARM/HOLD cooking cycles. • Press MORE or LESS pads during active cooking cycle. • For convection cooking, MORE or LESS are used as temperature selection pads. 16026267 A–4 ©2005 Maytag Services...
-
Page 29: Cooking Methods
Conduction by energy penetration outside of food to inside. within from energy. Shortened heating time from Primary Fast, high efficiency Browns foods and seals microwave energy, browning Benefit heating. in flavors. and crisping from convection. A–5 16026267 ©2005 Maytag Services... - Page 30 This finishes cooking. Normally an internal temperature Time will continue to rise approximately 5 to 10°F during standing time. Arrange individual foods, such as potatoes, in a circle and at least Spacing 1 inch apart. This helps food heat more evenly. 16026267 A–6 ©2005 Maytag Services...
-
Page 31: Stage Cooking
8. Press digit touchpad to adjust microwave energy for second stage. • For a lower microwave power, press pads 1 (for 10%) through 9 (for 90%). 0 turns off the microwave power completely. 9. Press START pad. A–7 16026267 ©2005 Maytag Services... -
Page 32: Auto Defrost
• MEAT TOUCH 1 POULTRY TOUCH 2 FISH TOUCH 3 scrolls through display. 3. Press appropriate digit touchpads. • TOUCH START scrolls through display. 4. Press START/PAUSE pad. 5. At the end of the defrost time, tones sound and oven stops. 16026267 A–8 ©2005 Maytag Services... - Page 33 4. Enter desired cooking time using digit touchpads. or paper products during a • TOUCH START scrolls through display. convection cooking cycle. 5. Touch START/PAUSE. • At the end of cooking time, tones sound and END displays. A–9 16026267 ©2005 Maytag Services...
-
Page 34: Care And Cleaning
After cleaning the control panel, touch CANCEL/STOP pad to clear any entries that might have been accidentally made while cleaning. To avoid this problem, child lock may be set prior to cleaning. 16026267 A–10 ©2005 Maytag Services...
Need help?
Do you have a question about the ACM1580AB and is the answer not in the manual?
Questions and answers