Arris SURFboard SBV2402 Manual
- User manual (35 pages) ,
- Quick start card (2 pages)
Advertisement
Getting started
Welcome to the next generation of the SURFboard® ultra-high-speed DOCSIS 3.0® internet & voice cable modem for Xfinity customers. Get ready to experience the Internet's express lane! Whether you are streaming media, downloading new software, checking your email, or talking on the telephone, the SBV2402 brings it all to you faster and more reliably. All while providing high-quality Voice over IP telephone service.
The SBV2402 provides an Ethernet connection for use with either a single computer or home/office Local Area Network (LAN). In addition, the SBV2402 provides two separate lines of telephone service.

About your new SBV2402
The SURFboard SBV2402 is DOCSIS 3.0 compliant with the following features:
- Speed: much faster than dialup or ISDN service; up to eight times faster than DOCSIS 2.0 cable modems.
- Connectivity: supports Ethernet connection.
- Flexibility: provides two lines of telephone service as well as high-speed data.
- Compatibility:
- Data services: DOCSIS 3.0 compliant and backward-compatible with DOCSIS 2.0 or 1.1; supports tiered data services (if offered by your service provider).
- Telephony services: Packet Cable™ 2.0 compliant.
In the box
Before installing your SBV2402, check that the items listed in the following table are included in the SBV2402 box. If any items are missing, please call ARRIS technical support at 1-877-466-8646 for assistance
Table 1. SBV2402 package contents

Additional items needed (not included)
The following items are needed to install your SBV2402. They are not included in the SBV2402 box and must be purchased separately, if needed.
- Coaxial cable (coax): round cable with a connector on each end.
![]()
This cable is needed if one is not already connected to a cable wall outlet. You can purchase a coax cable from any electronics retailer and many discount stores. Make sure the cable you choose has screw-on connectors on both ends. The coax cable should be long enough to reach from your SBV2402 to the nearest cable outlet.
![information]() Note: For best performance, use a high-quality RG-6 type coaxial cable and minimize or eliminate splitters between the cable jack and your SBV2402.
Note: For best performance, use a high-quality RG-6 type coaxial cable and minimize or eliminate splitters between the cable jack and your SBV2402. - Phone cable: a standard telephone cable with standard phone connectors (RJ11 type) on both ends.
![]()
Phone cables are available for purchase from any electronics retailer and many discount stores. - RF splitter (optional): provides an extra cable connection by splitting a single outlet into two outlets.
You may need a splitter if you have a TV already connected to the cable outlet that you want to use. You can buy a splitter from any electronics retailer and most discount stores. You may also need a short coax cable (with connectors) to connect the RF splitter to the cable outlet and then connect the SBV2402 and TV to the splitter.
![information]() Note: Using several splitters in a line may deteriorate the quality of your television display, telephone, and/or internet connection.
Note: Using several splitters in a line may deteriorate the quality of your television display, telephone, and/or internet connection. - Wall-mounting hardware (optional): if you want to wall-mount the SBV2402, you will need to obtain two drywall anchors or wood screws.
- Information packet: your service provider should provide a packet containing information about your home network and telephone service and how to set them up. Read this information carefully and contact your service provider if you have any questions.

 Note: For best performance, use a high-quality RG-6 type coaxial cable and minimize or eliminate splitters between the cable jack and your SBV2402.
System requirements
- High-speed Internet access account
- Web browser access: Internet Explorer, Google Chrome, Firefox, or Safari
- Compatible operating systems:
- Windows 10
- Windows 8
- Windows 8.1
- Windows 7 Service Pack 1 (SP1)
![information]() Note: Although older versions of Microsoft Windows operating systems are no longer specifically supported, they should still function with this model.
Note: Although older versions of Microsoft Windows operating systems are no longer specifically supported, they should still function with this model. - Mac OS 10.4 or later
- UNIX
- Linux
Contact information
For technical support, FAQs, product documentation, and additional ARRIS product information:
- Visit the ARRIS support website: www.arris.com/selfhelp
- Call ARRIS technical support: 1-877-466-8646
Product overview
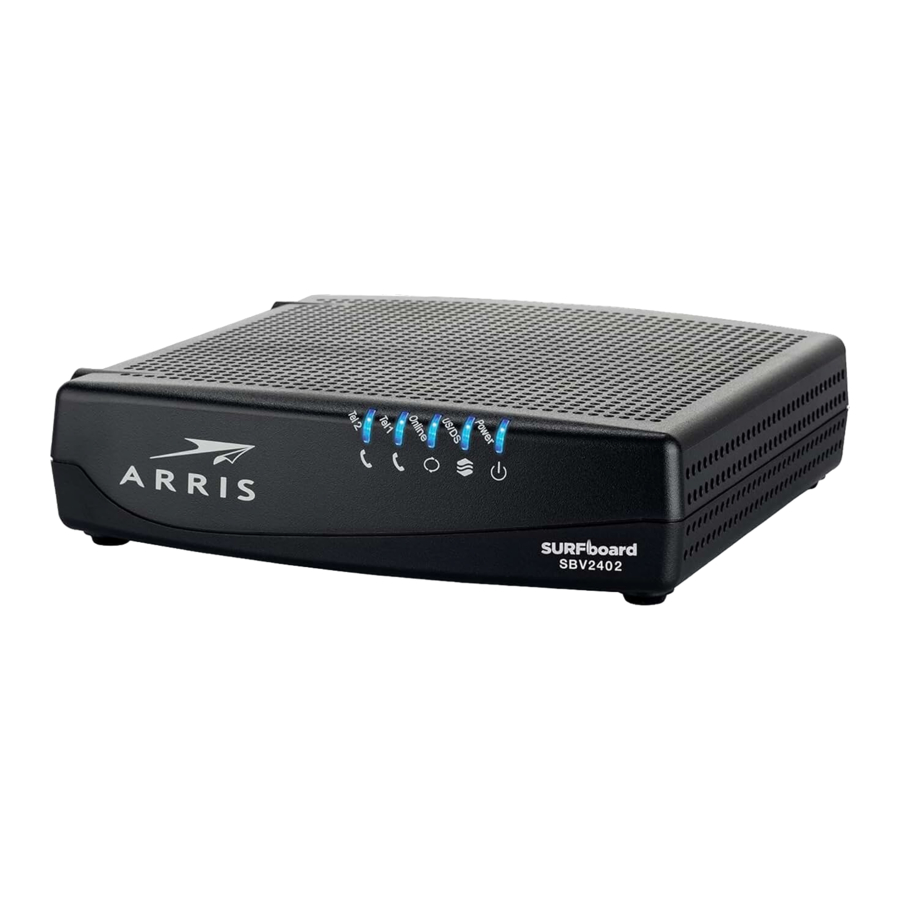
Front panel

Table 2. SBV2402 front panel LEDs
| LED icon | Description |
 | Blinking: not applicable; LED does not blink. On (solid): power is properly connected with the SBV2402 power cord. |
 | Blinking: scanning for upstream (send data) and downstream (receive data) channel connection. On (solid): upstream and downstream channels are connected. |
 | Blinking: scanning for an Internet connection. On (solid): SBV2402 is connected to your home network. |
 | Blinking: telephone line 1 is either off-hook or a call is in progress. On (solid): telephone service for line 1 is connected and activated; on-hook. |
 | Blinking: telephone line 2 is either off-hook or a call is in progress. On (solid): telephone service for line 2 is connected and activated; on-hook. |
Rear panel

Table 3. SBV2402 rear panel ports & connectors
| Port | Description |
| Reset button | Recessed button can be used to either reboot the SBV2402 or reset the SBV2402 configuration settings. The Reset button is recessed to prevent accidental resets. Reboot (or restart) the telephony modem
Reset the telephony modem configuration
|
 | Two telephony ports for RJ-11 cable connections:
|
 | One-gigabit Ethernet port for RJ-45 network cable connection:
|
 | Coaxial cable connector |
| Power port | 100 - 240 VAC Power connector To avoid any damage to the SBV2402, only use the power cord provided in the SBV2402 box. |
Telephony modem label

The telephony modem label is located on the bottom of your SBV2402. It contains the specific telephony modem information that you may need when contacting your service provider or ARRIS technical support .
To receive Internet service, contact your service provider for assistance. You may have to provide the following information listed on the telephony modem label:
- Telephony modem Model name (SBV2402)
- Telephony modem MAC address (HFC MAC)
- Telephony modem Serial number (SN)
Installing the telephony modem

This device is for indoor use only. Do not route the Ethernet cable(s) outside of the building. Exposure of the cables to lightning could create a safety hazard and damage the product.
Before starting the installation, make sure of the following:
- You have all the Additional items needed (not included) .
- You have Establish an Internet connection
- Cable, phone, and power outlets are available near the computer.
If a cable outlet is not conveniently located, your service provider can install a new one.
Choose an installation location
There are several factors to consider when choosing a location to install your SBV2402:
- Choose a location in your home where your SBV2402 and computer are preferably near existing cable, phone, and electrical wall outlets.
If a cable outlet is not conveniently located, check with your service provider to install one.
![]()
Risk of equipment damage
Only qualified installation technicians should connect your SBV2402 to house wiring. Incumbent telephone service must be physically disconnected at the outside interface box before making any connections. - Is an AC outlet available nearby? For best results, the outlet should not be switched and should be close enough to your SBV2402 that extension cords are not required.
- Is a cable jack available? For best performance, keep the number of splitters between the jack and cable drop to a minimum.
- Each splitter attenuates (reduces) the signal available to your SBV2402. Multiple splitters can slow down your Internet connection and also affect your telephone service.
- Can you easily run cables between your SBV2402 and telephones?
- If you are connecting devices to an Ethernet port, can you easily run cables between your SBV2402 and those devices?
- If you want to mount your SBV2402 on a wall, does the location provide a solid surface for a secure attachment?
For best results when mounting your SBV2402 on drywall, position it so that at least one of the screws are fastened to a stud. This should prevent your SBV2402 from possibly pulling out of the wall in the future. - If you want to install your SBV2402 on a desk, is there enough space on either side to keep the vents clear? Blocking the vents may cause your SBV2402 to overheat.
Connect the SBV2402 to your client device
Risk of injury or equipment damage
Connecting your SBV2402 to the home's existing telephone wiring should only be performed by a professional installer. Physical connections to the previous telephone provider must be removed and the wiring must be checked; there must not be any voltage. Cancellation of telephone service is not adequate. Failure to do so may result in loss of service and/or permanent damage to your SBV2402.
Before installing your SBV2402:
- Check with your service provider (or local cable company) to ensure broadband cable service is available in your area.
![information]() Note: When contacting your service provider, you may need your SBV2402 information listed on the telephony modem label on the bottom of your SBV2402 (see Telephony modem label .
Note: When contacting your service provider, you may need your SBV2402 information listed on the telephony modem label on the bottom of your SBV2402 (see Telephony modem label . - Check that you have all the items you need to install your SBV2402, see Additional items needed (not included)
- Choose a location in your home where your computer and SBV2402 are preferably near existing cable, phone, and electrical wall outlets.
If a cable outlet is not conveniently located, your service provider can install one.
![]()
Risk of equipment damage
Only qualified installation technicians should connect your SBV2402 to house wiring. Incumbent telephone service must be physically disconnected at the outside interface box before making any connections. - You have the option to mount your SBV2402 on the wall or place it on a desk, table, or any other flat surface; see Wall mount the telephony modem ) for more information.

- Check that a coaxial cable is already connected to a cable wall outlet or an RF splitter (not included).
- Connect the other end of the coaxial cable to theCable connector on the rear of your SBV2402.
Use your hand to tighten the connectors to avoid damaging them. - Connect the Ethernet cable (included) to theEthernet port on your client device.
- Connect the other end of the Ethernet cable to theEthernet port on the rear of your SBV2402.
- Connect the power cord (included) to thePower port on the rear of your SBV2402.
- Plug the other end of the power cord into an electrical wall outlet that is not controlled by a wall switch.
![information]() Note: This automatically powers ON your SBV2402.
Note: This automatically powers ON your SBV2402.
Connect your telephone
If you are migrating your current XFINITY service from an existing device, your current phone service and phone number will be transferred to your SBV2402 when the installation is finished. Please note, that if you do not currently have telephony service from Comcast, call 1-800-Xfinity (1-800-934-6489) to set up an account that includes telephony service.
- Connect a telephone cord (not included) to theTEL LINE port on your telephone.
- Connect the other end of the telephone cord to theTEL 1 port on the rear of your SBV2402.
![information]() Note: Use the Tel1 port to connect a two-line telephone. Then, contact a VoIP service provider to activate your Telephony service.
Note: Use the Tel1 port to connect a two-line telephone. Then, contact a VoIP service provider to activate your Telephony service. - Optional: For a second telephone, connect a telephone cord of a single-line telephone to the TEL 2 port on the rear of your SBV2402.
![information]() Note: For an Alarm System connection with a single telephone line, connect the Alarm Panel to the Tel2 port. If both telephone lines are providing telephony services, use an RJ-31X adapter (not included) on the Tel1 port.
Note: For an Alarm System connection with a single telephone line, connect the Alarm Panel to the Tel2 port. If both telephone lines are providing telephony services, use an RJ-31X adapter (not included) on the Tel1 port. - Check that your telephone has a dial tone.
Wall mount the SBV2402
You can either mount your SBV2402 on a wall or place it on any flat surface such as a desk or table. For wall-mounting, make sure the SBV2402 front panel indicators are facing upward (vertical) or to the side (horizontal).
Tools and materials
Make sure you have the following tools and additional items before proceeding:
- For mounting on dry wall:
- two 1/4" (6 mm) drywall anchors (not included)
- two #6 x 1.5" (38.1 mm) self-tapping panhead screws (not included)
- a drill with 1/4" (6 mm) bit (not included)
- For mounting on plywood or studs: two #6 x 1.5" (38.1 mm) self-tapping panhead wood screws (not included)
- Screw driver (flat-blade or Phillips, depending on what kind of screws you use).
- Transparent tape (not included) for temporarily securing the mounting template to the wall.
Location
Always position your SBV2402:
- Within proximity to an AC outlet. The power cord must reach the AC outlet without stretching it and without using extension cords.
- Near a cable outlet (to avoid long cable runs).
Establish an Internet connection
Although your client device may already be configured to automatically connect to the Internet, you should still perform the following connectivity test to check that your devices were installed properly and are successfully connected to your home network.
- Power ON your client device (e.g., laptop) connected to your SBV2402, if it is turned off, and then log on.
- Check the front panel LEDs on your SBV2402.
During startup, the Power and US/DS (Upstream/Downstream) LEDs will FLASH and then light up SOLID blue.
![information]() Note: If you are a current Comcast voice subscriber and purchased the SBV2402, please visit xfinity.com/activate before calling Comcast or ARRIS. If there is an issue with the activation, please call Comcast at 1-800-Xfinity (1-800-934-6489) to activate your SBV2402. Make sure you have your Comcast Xfinity account number, account phone number, and login information (your email address or user name and password).
Note: If you are a current Comcast voice subscriber and purchased the SBV2402, please visit xfinity.com/activate before calling Comcast or ARRIS. If there is an issue with the activation, please call Comcast at 1-800-Xfinity (1-800-934-6489) to activate your SBV2402. Make sure you have your Comcast Xfinity account number, account phone number, and login information (your email address or user name and password). - Note: If you are a new voice subscriber with Comcast, continue with the following steps to set up your new Xfinity telephony service account and activate your SBV2402.
- Click or type xfinity.com/activate to open the Xfinity Activation page.
- Follow the online instructions to enter your Xfinity account number and phone number.
- Enter the following information to set up your online Xfinity login account and network login information:
- XFINITY account login name
- XFINITY account password
- Network name
- Network password
- To check for Internet connectivity, open a web browser (Internet Explorer, Google Chrome, Firefox, or Safari) on your computer or laptop.
- Clickwww.surfboard.com or type a valid URL of your choice in the address bar and press Enter.
The ARRIS SURFboard website or your selected website should open. If the website fails to open, please call Comcast Customer Support at 1-855-OK-BEGIN (1-855-652-3446) to set up your Internet service or activate your SBV2402.
Using the telephony modem
This chapter describes the controls and features available on your SBV2402 and covers basic troubleshooting procedures.
Indicator lights for the SBV2402
The SBV2402 LED indicator lights can be helpful when troubleshooting.

Wiring problems
If your SBV2402 begins flashing all its lights for more than 10 seconds, this indicates a problem with the telephone wiring — the red and green wires may be shorted (touching), or there may be undesired voltage on the lines. If this pattern persists for more than 10 seconds, disconnect the telephone lines from your SBV2402, replace the telephone cable, or contact a wiring technician for assistance.
Patterns: normal operation
The following table shows light patterns during normal operation:
| Mode | Power | US/DS | Online | Tel 1 / Tel 2 |
| AC power | On | On = connected to the Internet (ultra-high speed) Flash = not connected to the Internet | On = Internet avail Off = Internet not available | On = on-hook Flash = off-hook Off = disabled |
| No AC power | Off | Off | Off | Off |
| Firmware upgrade | On | Flash | On | (normal operation) |
Patterns: startup sequence
There are two SBV2402 light patterns that display during each phase of the startup sequence:
- Telephony startup sequence
- Cable modem startup sequence
Telephony startup sequence
| Power, US/DS, Online | Telephone 1 | Telephone 2 | Description |
| Off | Off | Off | No power to modem |
| Flash | Flash | Flash | Power-on self-test |
| On | Flash | Off | Retrieving telephone network information |
| On | Off | Flash | Retrieving telephone network information |
| On | Flash | Flash | Activating telephone service |
Cable modem startup sequence
| DS/US | Online | Description |
| Flash | Off | Downstream or upstream search |
| On | Flash | Downstream and upstream found; retrieving setup information from service provider |
| On | On | Ready for service |
Using the telephony modem web manager
The SBV2402 web manager is available to view and monitor your SBV2402 operational status and network configuration settings.
SBV2402 web manager menu links
The SBV2402 main menu links and related submenu option links are displayed along the top of the SBV2402 web manager screen. Click on the main menu link to view any of the other available screens.
View the SBV2402 network connection status
Use the SBV2402 web manager to view and monitor the network configuration settings and operational status of your SBV2402. To open the SBV2402 web manager:
- Open a web browser (such as Internet Explorer, Google Chrome, Firefox, or Safari) on the client device connected to your SBV2402.
- Type 192.168.100.1 in the address bar and then pressEnter to open the SBV2402 web manager. The Status screen opens.
Status screen
The Status screen shows the current status of the upstream and downstream channels for your SBV2402, including the MAC addresses for various ports.

HW/FW versions screen
The HW/FW versions screen includes release and model information for the SBV2402 hardware and firmware. This information includes the serial number for your SBV2402.

Event log screen
The Event Log screen includes a list of events that were detected by your SBV2402, including the date and time of the event, event ID, and event level.

Registration status (CM state)
The Registration Status screen shows the current operating status of your SBV2402 with regards to DOCSIS and telephony connections.

Troubleshooting
Solutions
- The SBV2402 is plugged in, but the power light is off
- I cannot access the Internet
- I cannot access the Internet (Ethernet)
- I can get on the Internet, but everything is slow
- I don't have a dial tone when I pick up the phone
- Contact ARRIS consumer support
The SBV2402 is plugged in, but the power light is off
- Check all power connections. Is the power cord plugged in firmly at both ends?
- If you plugged the power cord into a power strip, make sure the strip is switched on.
- Try to plug the power cord into a different outlet. If the outlet is controlled by a wall switch, make sure the switch is on.
- Finally, check the fuse or circuit breaker panel.
I cannot access the internet
The first time you power up your SBV2402 may take over 30 minutes to establish a connection, especially if there are many people online. Always leave your SBV2402 plugged into an AC power outlet and connected to the cable system.
Check the front panel lights:
- The Power and Online lights should be on.
- The Link light should either be on or blinking.
- If the Power light blinks for more than 30 minutes, call your service provider for assistance.
Check your cable connections. Connectors should be tight. The coax cable should not be pinched, kinked, or bent sharply—any of these can cause a break or short in the cable (you may have to replace the cable). If you have one or more splitters between your SBV2402 and a CATV outlet, remove the splitters and connect your SBV2402 directly to the outlet.
Proceed to the Ethernet solution, if necessary.
I cannot access the internet (Ethernet)
If you are using a hub, is the hub turned on?
Are you using the right type of Ethernet cable? Use the supplied cable for direct connection to a computer; use a cross-over cable for connection to a hub.
Press the Reset button on the back of the SBV2402.
I can get on the internet, but everything is slow
If the website you are visiting is very popular, that site may be having trouble servicing all the requests. If other sites download quickly, wait for a few minutes and try again. Usage during peak hours may also affect the connection speed. Also, other communications on the LAN may slow down the connection.
I do not have a dial tone when I pick up the phone
For telephone service to be functional on your SBV2402, the service must have been purchased from your service provider and configured on your SBV2402. The following steps should help in identifying the source of the problem:
- Is the Power LED lit?
- If not, check to make sure your SBV2402 is plugged into an electrical wall outlet and the outlet has power. Use only the external AC power adapter (if provided) and power cord included with the device.
- If the LED is lit, proceed with the next step.
- Is the Online LED lit?
- If not, check the coax cable connection between the SBV2402 and the wall. Ensure they are connected tightly. If they are and you do not have a dial tone, contact your service provider.
- If the Online LED is lit, go to the next step.
- Is the Telephone (Tel 1 or Tel 2) LED lit?
- If not, phone service has not been set up on that telephone line. Contact your service provider.
- If it is blinking, there is a phone off hook somewhere in the house. Find the phone and hang it up.
- If it is lit, proceed with the next step.
- Is the phone plugged directly into your SBV2402?
- Make sure the phone is plugged into theTel 1 port for line 1 or the Tel 2 port for line 2 on the back of your SBV2402.
- If the phone is connected, try connecting a different phone.
Make sure the new phone is a working phone. - If a known working phone is used and you still do not have a dial tone, try a different phone cable. If a new phone and cable do not restore the dial tone, call your service provider for assistance.
- Is the SBV2402 plugged into a wall outlet?
- If so, unplug the phone connector at the back of your SBV2402 and plug in a known working phone. If you now have dial tone, the problem is with the house wiring. Contact your service provider or a qualified wiring technician to correct the house wiring. If you still do not have dial tone, contact your service provider.
Contact ARRIS consumer support
For technical support, FAQs, product documentation, and additional ARRIS product information:
- Visit the ARRIS Support website: www.arris.com/selfhelp
- Call: 1-877-466-8646
- Email: ARRIS technical support
- SBV2402 product information: shop.surfboard.com/categories/xfinity-subscribers.html
Safety and regulatory information
Read all safety and regulatory information before installing your telephony modem and setting up your home network connection. This ARRIS telephony modem complies with the applicable requirements for performance, construction, labeling, and information when used as outlined below:
Important safety instructions
This ARRIS telephony modem complies with the applicable requirements for performance, construction, labeling, and information when used as outlined below:
- Potential equipment damage Potential loss of service
Connecting the telephony modem to existing telephone wiring should only be performed by a professional installer. Physical connections to the previous telephone provider must be removed and the wiring must be checked; there must not be any voltages.
Cancellation of telephone service is not adequate. Failure to do so may result in loss of service and/or permanent damage to the telephony modem. - Risk of shock
Mains voltages inside this unit. No user serviceable parts inside. Refer service to qualified personnel only! - Risk of explosion
The telephony modem is designed to be connected directly to a telephone.- Connecting the to the home's existing telephone wiring should only be performed by a professional installer.
- Do not use product near water (i.e., wet basement, bathtub, sink or near a swimming pool, etc.), to avoid risk of electrocution.
- Do not use the telephone to report a gas leak near the leak.
- The product shall be cleaned using only a damp, lint-free, cloth. No solvents or cleaning agents shall be used.
- Do not use spray cleaners or aerosols on the device.
- Avoid using and/or connecting the equipment during an electrical storm, to avoid risk of electrocution.
- Do not locate the equipment within 6 feet (1.9 m) of a flame or ignition source (i.e. heat registers, space heaters, fireplaces, etc.).
- Use only the AC power adapter (if provided) and power cord included with the equipment.
- Equipment should be installed near the power outlet and should be easily accessible.
- The shield of the coaxial cable must be connected to earth (grounded) at the entrance to the building in accordance with applicable national electrical installation codes. In the U.S., this is required by NFPA 70 (National Electrical Code) Article 820. In the European Union and in certain other countries, CATV installation equipotential bonding requirements are specified in IEC 60728-11,Cable networks for television signals, sound signals and interactive services, Part 11: Safety. This equipment is intended to be installed in accordance with the requirements of IEC 60728-11 for safe operation.
- If the equipment is to be installed in an area serviced by an IT power line network, as is found in many areas of Norway, special attention should be given that the installation is in accordance with IEC 60728-11, in particular Annex B and Figure B.4.
- In areas of high surge events or poor grounding situations and areas prone to lightning strikes, additional surge protection may be required (i.e. PF11VNT3 from American Power Conversion) on the AC, RF, Ethernet and Phone lines.
- When the telephony modem is connected to a local computer through Ethernet cables, the computer must be properly grounded to the building/residence AC ground network. All plug-in cards within the computer must be properly installed and grounded to the computer frame per the manufacturer's specifications.
- Ensure proper ventilation. Position the telephony modem so that air flows freely around it and the ventilation holes on the unit are not blocked.
- Do not mount the telephony modem on surfaces that are sensitive to heat and/or which may be damaged by the heat generated by the telephony modem, its power supply, or other accessories.
SAVE THESE INSTRUCTIONS
Documents / Resources
References
SURFboard Community | Community
![xfinity.com]() Xfinity Activation
Xfinity ActivationARRIS SURFboard
XFINITY Voice Modems - SURFboard Store
Download manual
Here you can download full pdf version of manual, it may contain additional safety instructions, warranty information, FCC rules, etc.
Advertisement


Need help?
Do you have a question about the SURFboard SBV2402 and is the answer not in the manual?
Questions and answers