Advertisement
Quick Links
Med-Fit
Premier TENS & EMS
Pain Relief - TENS Machine - Muscle Stimulation.
Alivio del dolor - Máquina TENS - Estimulación muscular.
Schmerzlinderung - TENS Machine - Muskelstimulation.
Soulagement de la douleur - Machine TENS - Stimulation musculaire.
EM6300A
med
fit
Patient Instructions & User Manual
Instrucciones para el paciente y manual del usuario
Patientenanweisungen & Benutzerhandbuch
Instructions pour le patient et manuel d'utilisation
Tel: 0161 429 7330
email sales@med-fit.co.uk
2460
Advertisement

Related Manuals for Med-Fit Premier EMS


Summary of Contents for Med-Fit Premier EMS
- Page 1 Med-Fit Premier TENS & EMS Pain Relief - TENS Machine - Muscle Stimulation. Alivio del dolor - Máquina TENS - Estimulación muscular. Schmerzlinderung - TENS Machine - Muskelstimulation. Soulagement de la douleur - Machine TENS - Stimulation musculaire. EM6300A 2460 Patient Instructions &...
- Page 2 Contents WHAT’S IN THE BOX ............3 CONTROLS AND FUNCTIONS .......... 4 STEP BY STEP GUIDE .............5 CHARGING INSTRUCTIONS ..........7 WARNINGS AND CAUTIONS ..........8 MALFUNCTIONS ..............8 SAFETY-TECHNICAL CONTROLS ........9 CONFORMITY TO SAFETY STANDARDS ....... 10 TENS PROGRAMMES P1 - P12 ........11 MANUAL ADJUSTMENTS FOR TENS ......
- Page 3 What’s in the box? MODE 1. TENS unit 2. USB charging lead 3. User manual 4. AC adaptor. 5. Patient leads. 6. 16 5x5 self-adhesive electrodes.
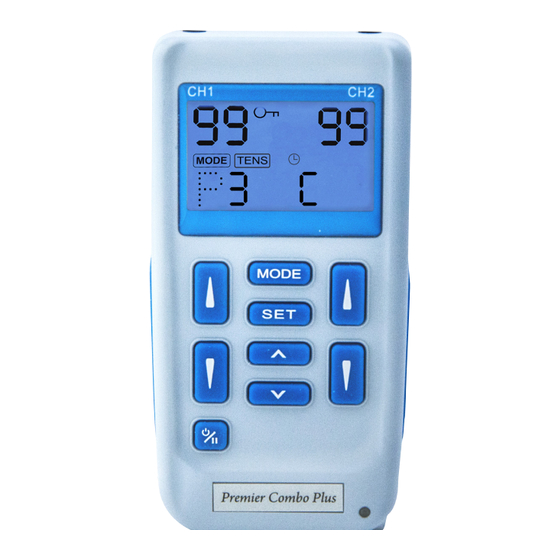
- Page 4 Controls and Functions 1. Left channel socket. 2. Right channel socket. 3. Red key lock button. - Pressing the Red Key Lock Button locks all parameters including the intensity level. This is ideal once you have set the device which removes accidental movement of the setting.
- Page 5 Step by Step Guide Step 1 Before using your premier TENS for the first time, please fully charge the battery see page 7. Step 2 Press the button to switch on the TENS. This is located at the bottom left hand corner of the TENS device. Please push and hold down the button for 2 seconds to turn the unit on.
- Page 6 Step by Step Guide Step 8 Connect one of the TENS lead cables supplied to the top of your TENS machine. As shown in Fig1. Now connect the other end of the TENS cable to the self-adhesive electrodes supplied. As shown in Fig2. Next place the self-adhesive electrodes on to the painful site or as recommended by your healthcare professional.
- Page 7 Connect the USB cable to the AC adaptor or USB port as shown in figure 1. Now connect the USB cable directly into the USB socket, which is located on the right hand side of your Premier TENS. A red indicating light will be seen in the bottom right hand corner of your TENS device.
- Page 8 Warnings and Precautions Please Note: It is imperative that patients read and understand the warnings and precautions before using this device. Do not allow your machine or electrodes to be used by anyone else, as they are designed for single patient use only.
- Page 9 Warnings 1. The long term effects of chronic electrical stimulation are unknown. 2. Stimulation should not be applied over the carotid sinus nerves, particularly in patients with a known sensitivity to the carotid sinus reflex. 3. Stimulation should not be applied over the neck or mouth. Severe spasm of the laryngeal and pharyngeal muscles may occur and the contractions may be strong enough to close the airway or cause difficulty in breathing.
- Page 10 Cautions 1. Safety of powered muscle stimulators for use during pregnancy has not been established. 2. Caution should be used for patients with suspected or diagnosed heart problems. 3. Caution should be used in the presence of the following: a. When there is a tendency to haemorrhage following acute trauma or fracture;...
- Page 11 TENS Programmes P1-P12 - 12 Clinically validated TENS programmes for drug-free pain relief. All programmes run on a continuous time indicated by the letter [C] on your display. Programme 1 Conventional TENS Ideal for your first TENS treatment, for both acute, chronic and long-term use.
- Page 12 TENS Programmes Programme 7 Migraine/Headaches Reduced pulse width ideal for treating nerve rich areas. Suitable Conditions: Tension Type Headache, Facial Pain, Neck Pain, Postherpetic Neuralgia. Programme 8 Cervical (Neck) Pain Cervical pain relief due to poor ergonomic work positions. Programme 9 Epicondylitis - (Elbow) Pain relief for epicondylitis resulting from repetitive gripping of objects.
- Page 13 Manual Adjustment for TENS 1. Power On/Off/Pause Button The power of unit can be turned on by pressing the On/Off/Pause button. You may start to adjust the settings when the liquid crystal display is on. Press and hold for 2 seconds to switch off. To pause stimulation press the button once.
- Page 14 Manual Adjustment for TENS 6. Intensity Increase Control MODE There are 99 steps of intensity adjustment control. Press the button until the desired intensity level is reached. 7. Intensity Decrease Control There are 99 steps of intensity adjustment control. Press the button until the desired intensity level is reached. 8.
- Page 15 Manual Adjustment for TENS d. Set Pulse Rate Pulse rate is adjustable from 2Hz to 150 Hz . Press “SET” control to enter this menu, then press “ ” or “ ” to adjust the setting. Unless otherwise instructed, set the pulse rate l to the 70-120 Hz range.
- Page 16 Manual Adjustment for EMS 10. Steps to Set a EMS Program The settings can be adjusted according to the following steps. a. Turn on the Power b. Select a Mode Select a mode by pressing the “Mode” control. The mode you selected will show up on the top of liquid crystal display.
- Page 17 Manual Adjustment for EMS e. Set Off Time The Off Time controls the length of relaxation. By pressing the “SET” control, the relaxation time can be adjusted. Both channels’ stimulation is cycled on and off by the contraction and relaxation settings.
- Page 18 Manual Adjustment for EMS h. Set Timer The treatment time is adjustable between 5 - 60 minutes and Continue(C). Press “SET” control to enter this menu, then press “ ” or “ ” to adjust the setting. The liquid crystal will show the balance treatment time after the stimulation is started.
- Page 19 Helpful Tips Once you have familiarised yourself with the controls and features of your TENS device, it is important to place the TENS electrodes in a position which gives the most pain relief. This may take 3 or 4 attempts to find the most suitable position, for maximum pain relief. If you are using two electrodes, place the electrodes directly onto the painful area at a position where you feel the pain starts and where it finishes.
- Page 20 EMS Programmes These 12 individual electronic muscle stimulator (E.M.S) programmes P11 - P24 have been clinically proven for the treatment of: 1. Muscle Re-Education 2. Muscle Training 3. Muscle Strengthening 4. Muscle Toning & Massage Please refer to the electrode placement charts provided for electrode placement guidelines.
- Page 21 Technical Specification Graphic Symbols: Degree of Electrical Protection BF Timer Increment Decrement Consult instructions for use Manufacturer Serial number Lock Low battery Pause DC current (DC Power source) Comply with MDD 93/42/EEC requirement as amended by 2007/47/EC. Notified body det norske veritas (DNV) Power The label attached to the back of the device contains important information...
- Page 22 Technical Specification TENS Programmes specification P1 - P12: No Programme Frequency Pulse Width 1. Conventional TENS 80Hz 180μs Ideal for first applications of TENS 2. Burst TENS 180μs Most effective for radiating pain 3. Modulated TENS 80Hz 70-180μs Pain relief with a massage effect 4.
- Page 23 Technical Specification EMS Programmes specification P13 - P24: No Programme SYN/ALT Rate Width Ramp On Time Off Time Timer 13 ACL repair/joint protection back muscle SYNCHRONOUS 35 Hz 300 μs 3 sec 8 sec 24 sec 20 min 14 Spasm small muscle SYNCHRONOUS 80 Hz 300 μs...
- Page 24 Technical Specification The Technical Specification Details of EM6300A are as follows: MECHANISM TECHNICAL DESCRIPTION 1. Channel Dual, isolated between channels. 2. Pulse Amplitude Adjustable, 0-100 mA peak into 500 ohm load each channel. 3. Wave Form Asymmetrical Bi-Phasic Square Pulse. 4.
- Page 25 EMC Information IMPORTANT INFORMATION REGARDING ELECTRO MAGNETIC COMPATIBILITY (EMC) This product needs special precautions regarding EMC and needs to be installed and put into service according to the EMC information provided, and this unit can be affected by portable and mobile RF communications equipment. 1)* Do not use a mobile phone or other devices that emit electromagnetic fields, near the unit.
- Page 26 EMC Information Guidance and manufacture’s declaration – electromagnetic immunity The DEVICE is intended for use in the electromagnetic environment specified below. The customer or the user of DEVICE should assure that it is used in such an environment. Immunity test IEC 60601 Compliance Electromagnetic environment test level level...
- Page 27 This manual is valid for the Med-Fit TENS and Muscle Sitmulation Devices. This user manual is published by Med-Fit UK Ltd. Med-Fit UK Ltd reserves the right to improve and amend it at any time without prior notice. Amendments will however be published in a new edition of this manual.
Need help?
Do you have a question about the Premier EMS and is the answer not in the manual?
Questions and answers