
Subscribe to Our Youtube Channel
Related Manuals for Med-Fit EM6100A


Summary of Contents for Med-Fit EM6100A
- Page 1 Med-Fit Pain Relief Premier TENS Stimulator TENS Machine EM6100A Patient Instruction & User Manual Tel: 0161 429 7330 email: sales@med-fit.co.uk...
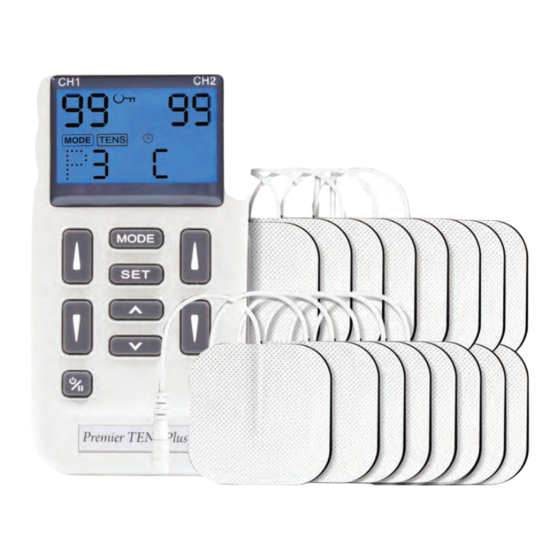
- Page 2 1 x Charger and USB Cable 4 x Packs of Self-Adhesive Electrodes ( 4 electrodes per pack) 1 x Pair of Patient Cables 1 x User Manual Med-Fit UK Ltd. Unit 8 Martel Court S. Park Business Park Hamilton Road Stockport SK1 2AF.
-
Page 3: Table Of Contents
Contents CONTROLS AND FUNCTIONS STEP BY STEP GUIDE CHARGING INSTRUCTIONS WARNINGS AND CAUTIONS GENERAL DESCRIPTION INTRODUCTION TO TENS WHICH PROGRAMME SHOULD I USE HOW HIGH SHOULD I TURN THE INTENSITY THE PREMIER PLUS TENS PROGRAMMES P1 - P12 MANUAL ADJUSTMENTS HELPFUL TIPS TENS ELECTRODE PLACEMENT WARRANTY... -
Page 4: Controls And Functions
CONTROLS AND FUNCTIONS Left channel socket Right channel socket Intensity display for channel 1 and 2 Red key lock button Charging port Mode display for both Timer Indicator programmes and The time can only be adjusted manual mode in manual mode, time is set to continuous on all programmes Mode button select programme mode or... -
Page 5: Step By Step Guide
STEP BY STEP GUIDE Before using your premier TENS for the first time, please fully charge the battery see page 7. Press the button to switch on the TENS. This is located at the bottom left hand corner of the TENS device. Please push and hold down the button for 2 seconds to turn the unit on. - Page 6 STEP BY STEP GUIDE Fig1 Connect one of the TENS lead cables supplied to the top of your TENS machine. As shown in Fig1. CH1 = Channel 1 Now connect the other end of the TENS cable to the CH2 = Channel 2 self-adhesive electrodes supplied.
-
Page 7: Charging Instructions
CHARGING INSTRUCTIONS Important information The USB charging cable connects to the TENS charging port as shown in fig 1 (Please ensure you connect the cable the right way round). fig1 Charging Port The lead When the battery has 10% fits one charge, a low battery indicator will appear on the way round... -
Page 8: Warnings And Cautions
WARNINGS & PRECAUTIONS PLEASE NOTE: Patients must read and understand the warnings and precautions before using this device. Do not allow your machine or electrodes to be used by anyone else, as they are designed for single patient use only. It is recommended that proper medical advice on the use of TENS is sought from a Qualified Practitioner (Physiotherapist, Doctor or Nurse) before use, to ensure safe and effective treatment. - Page 9 WARNINGS 1. The long term effects of chronic electrical stimulation are unknown. 2. Stimulation should not be applied over the carotid sinus nerves, particularly in patients with a known sensitivity to the carotid sinus reflex. 3. Stimulation should not be applied over the neck or mouth. Severe spasm of the laryngeal and pharyngeal muscles may occur and the contractions may be strong enough to close the airway or cause difficulty in breathing.
-
Page 10: General Description
GENERAL DESCRIPTION The EM6100A Digital TENS is a battery operated pulse generator that sends electrical impulses electrodes to the body. The TENS unit uses mild, safe electrical signals to help control pain and delivers the electrical signal to the body through a connection of a lead wire and self adhesive conductive electrode. - Page 11 INTRODUCTION TO TENS How to use your TENS? It is useful for you to have a pain assessment before you start TENS. This will identify what kind of pain you have and exactly where it is. If you have numb areas on your skin, for example, these will need to be avoided as TENS needs an intact nerve pathway to work.
-
Page 12: Which Programme Should I Use
WHICH PROGRAMME SHOULD I USE? We always recommend you start with programme 1, as already mentioned in your step- by-step guide. The premier TENS has 12 programmes P1 to P12, Each programme has been shown to reduce and block pain in a wide range of conditions. It is very difficult to know which programme is best for you. - Page 13 MED-FIT PREMIER TENS PROGRAMMES P1-P12 - 12 Clinically validated TENS programmes for drug-free pain relief. (All programmes run on a continuous time indicated by the letter [C] on your display. Programme 1 Conventional TENS Ideal for your first TENS treatment, for both acute, chronic and long-term use.
- Page 14 MED-FIT PREMIER TENS PROGRAMMES Programme 4 Knee Pain This programme is ideal for treating knee injuries both acute and chronic including osteoarthritis rheumatoid arthritis and joint pain. for examples of electrode placement please refer to pages 23 and 24. Programme 5 Shoulder Pain Treating shoulder pain relief from heavy or repetitive lifting, arthritis, and tendinopathy.
- Page 15 MED-FIT PREMIER TENS PROGRAMMES Programme 8 Cervical (Neck) Pain Cervical pain relief due to poor ergonomic work positions. Please see the electrode placement page 21 for more details. Programme 9 Epicondylitis - (Elbow) Pain relief for epicondylitis resulting from repetitive gripping and objects. Please see the electrode placement page 20 for more details.
-
Page 16: Manual Adjustments
ADJUSTING THE CONTROLS USING THE MANUAL ADJUSTMENT 1. Power On/Off/Pause Button The power of unit can be turned on by pressing the On/Off/Pause button. You may start to adjust the settings when the liquid crystal display is on. Press and hold for 2 seconds to switch off. - Page 17 ADJUSTING THE CONTROLS USING THE MANUAL ADJUSTMENT 3. Set Control S E T By pressing the "Set" control you select the setting you intend to adjust. The value is set by pressing the "Increment" or "Decrement" controls when the "Set" value is flashing.
- Page 18 ADJUSTING THE CONTROLS USING THE MANUAL ADJUSTMENT 9. Steps to Set a TENS Program The settings can be adjusted according to the following steps. a. Turn on the Power b. Select a Mode Select a mode by pressing the "Mode" control. The mode you selected will show up on the top of liquid crystal display.
- Page 19 ADJUSTING THE CONTROLS USING THE MANUAL ADJUSTMENT d. Set Pulse Rate Pulse rate is adjustable from 2Hz to 150 Hz . Press "SET" control to enter this menu, then press “ ” or “ ” to adjust the setting. Unless otherwise instructed, set the pulse rate l to the 70-120 Hz range.
-
Page 20: Helpful Tips
HELPFUL TIPS FOR SUCCESSFUL TENS TREATMENT Once you have familiarised yourself with the controls and features of your TENS device, it is important to place the TENS electrodes in a position which gives the most pain relief. This may take 3 or 4 attempts to find the most suitable position, for maximum pain relief. -
Page 21: Tens Electrode Placement
EXAMPLES OF ELECTRODE PLACEMENT Here are three examples of electrode placement for knee pain. For best results, we recommend you try all variations as shown. TENS using one channel vertical pad TENS using one channel horizontal pad placement placement Red squares represents placement of electrode Channel 1 Blue squares represents Placement of electrode Channel 2... - Page 22 TENS ELECTRODE PLACEMENT Frozen Shoulder Shoulder Pain Suggested Programmes Suggested Programmes P1, P5, P12 P1, P5, P12 Primary Placement Primary Placement Alternative Placement Degenerative Arthritis: Chronic Hip Pain Cervical and Lumbar Suggested Programmes Suggested Programmes P1, P3, P8, P11 P1, P11, P12 Primary Placement Primary Placement Alternative Placement...
- Page 23 TENS ELECTRODE PLACEMENT Lower Back Pain Hip Neuralgia Suggested Programmes Suggested Programmes P1, P3 P12,P11 Primary Placement Primary Placement Phantom Limb, Lower Extremity Sciatica Suggested Programmes Suggested Programmes P1, P2, P3 Primary Placement Primary Placement Alternative Placement www.tensmachineuk.com Telephone: 0161 429 7330...
- Page 24 TENS ELECTRODE PLACEMENT Low Extremity Pain Wrist Pain Suggested Programmes Suggested Programmes P6, P12 P1, P12 Primary Placement Primary Placement Alternative Placement Primary Placement Alternative Placement Degenerative Arthritis - Carpal Tunnel Syndrome Knee Pain Suggested Programmes Suggested Programmes P4, P12 Primary Placement Alternative Placement Elbow &...
- Page 25 TENS ELECTRODE PLACEMENT Lower Leg Pain Knee Pain - Post-Op Suggested Programmes Suggested Programmes P4, P6, P12 P4, P6, P12 Primary Placement Primary Placement Alternative Placement Alternative Placement Cervical Placement Chronic Cervical Strain Suggested Programmes Suggested Programmes Primary Placement Primary Placement Alternative Placement Alternative Placement www.tensmachineuk.com...
-
Page 26: Warranty
Limited of Liabilities and Disclaimer of Warranties Med-Fit UK Ltd sole obligation in the case of any breach of its warranties set forth in the paragraph above, shall be, at Med-Fit UK Ltd option, to repair or replace the Product without charge to Purchaser or to refund the purchase price of the Product. -
Page 27: Electrode Instructions
ELECTRODE INSTRUCTIONS Turn Stimulator OFF before applying or removing electrodes Application 1. Skin site must be very clean and dry. Dirty, flaky or oily skin will prevent electrodes from adhering to the skin. If necessary, trim excess hair with scissors. If skin is oily wipe down with an alcohol or electrode skin prep prior to application. - Page 28 SAFETY-TECHNICAL CONTROLS For safety reasons, review the following checklist before using your EM6100A Digital TENS. 1. Check the device for external damage. - deformation of the housing. - damaged or defective output sockets. 3. Check the usability of accessories. - patient cable undamaged - electrodes undamaged.
- Page 29 GRAPHIC SYMBOLS Degree of Electrical Protection BF Timer Increment Decrement Consult instructions for use Manufacturer Serial number Lock Low battery Pause DC current (DC Power source) Comply with MDD 93/42/EEC requirement as amended by 2007/47/EC. Notify body det norske veritas (DNV) Power The label attached to the back of device contains important information about this device model, supply...
- Page 30 The Premier Plus TENS Programmes P1-P12 PROGRAMME FREQUENCY PULSE WIDTH Conventional TENS - Ideal for first applications of TENS 80Hz 180 s for both acute and long term pain CONDITIONS Neck, Shoulder, Elbow Pain, Rheumatic Pain, Lumbago, Hip Pain, Osteoarthritic Pain in the knee Burst TENS - Most effective for radiating pain if arms 180 s and legs and deep muscular pain...
-
Page 31: Technical Specification
TECHNICAL SPECIFICATIONS The technical specification details of EM6100A are as follows: MECHANISM TECHNICAL DESCRIPTION Channel Dual, isolated between channels Pulse Amplitude Adjustable, 0-100 mA peak into 500 ohm load each channel. Wave Form Asymmetrical Bi-Phasic Square Pulse Voltage 0 to 50V (Load: 500 ohm) -
Page 32: Emc Information
This product needs special precautions regarding EMC and needs to be installed and put into service according to the EMC information provided, and this unit can be affected by portable and mobile RF communications equipment. 1)* Do not use a mobile phone or other devices that emit electromagnetic fields, near the unit. - Page 33 Guidance and manufacture’s declaration – electromagnetic immunity The DEVICE is intended for use in the electromagnetic environment specified below. The customer or the user of DEVICE should assure that it is used in such an environment. Immunity test IEC 60601 Compliance level Electromagnetic environment test level...
- Page 34 Guidance and manufacture’s declaration – electromagnetic immunity The DEVICE is intended for use in the electromagnetic environment specified below. The customer or the user of DEVICE should assure that it is used in such an environment. Immunity test IEC 60601 Compliance Electromagnetic environment test level level - guidance...
- Page 35 Recommended separation distances between portable and mobile RF communications equipment and the DEVICE . The DEVICE is intended for use in an electromagnetic environment in which radiated RF disturbances are controlled. The customer or the user of the DEVICE can help prevent electromagnetic interference by maintaining a minimum distance between portable and mobile RF communications equipment (transmitters) and the DEVICE as recommended below, according to the maximum output power of the communications equipment.
- Page 36 0161 429 7330 0161 427 0215 Tel: Fax: www.tensmachineuk.com...
Need help?
Do you have a question about the EM6100A and is the answer not in the manual?
Questions and answers