Table of Contents
Advertisement
Quick Links
Owners Manual
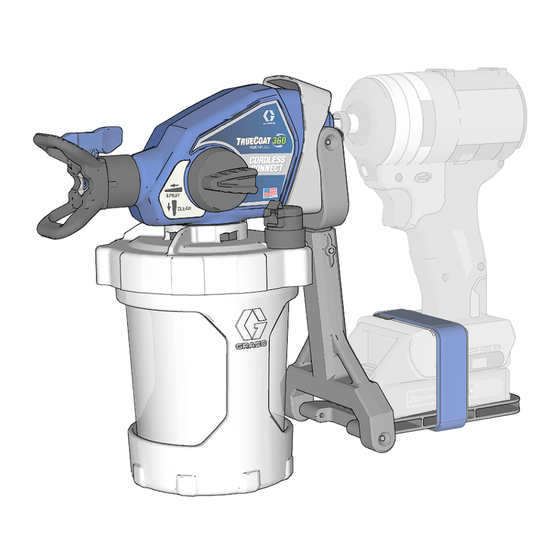
TrueCoat 360 TrueAirless
Cordless Connect
Project Series Paint Sprayers
Project Series Paint Sprayers
Important Safety Instructions
Read all warnings and instructions in this manual, your drill or driver manual and on
the unit before using the equipment. Be familiar with the control and proper usage of
the equipment. Save these instructions.
Important Medical Information
Read the medical alert card provided with the sprayer. It contains injection injury
treatment information for a doctor. Keep it with you when operating the equipment.
For portable spray applications of water-based architectural paints and coatings only.
For Household Use Only. Not approved for use in explosive atmospheres or hazardous
(classified) locations.
3A9402B
EN
Advertisement
Table of Contents

Related Manuals for Graco 26D360


Summary of Contents for Graco 26D360
- Page 1 Owners Manual TrueCoat 360 TrueAirless 3A9402B Cordless Connect Project Series Paint Sprayers Project Series Paint Sprayers Important Safety Instructions Read all warnings and instructions in this manual, your drill or driver manual and on the unit before using the equipment. Be familiar with the control and proper usage of the equipment.
-
Page 2: Models
Models Models Maximum Working Recommended Model Name Pressure Drill/Driver Voltage 26D360 (US) CAN360 (CAN) 2000 psi TrueCoat 360™ TRUEAIRLESS ® 18-24V Cordless Connect 26D361 13.8 MPa, 138 bar) (Europe) 26D362 (US) 3A9402B... -
Page 3: Important User Information
Important User Information Important User Information This sprayer is designed to provide superior spray performance with water-based architectural paints and coatings. This user information is intended to help you understand the types of materials that can be used with your sprayer. Please read the information on the material container label to determine if it can be used with your sprayer. -
Page 4: Table Of Contents
Technical Specifications ......32 Graco Standard Warranty ......34... -
Page 5: Safety Symbols
Safety Symbols Safety Symbols The following safety symbols appear throughout this manual and on warning labels. Read the table below to understand what each symbol means. Symbol Meaning Symbol Meaning Do Not Use Flammable Equipment Misuse Hazard Materials Consult Doctor Fire and Explosion Hazard Follow Pressure Relief Skin Injection Hazard... -
Page 6: General Warnings
Check parts for signs of damage. Replace any damaged parts. • This system is capable of producing 2000 psi (138 bar, 13.8 MPa). Use Graco parts or accessories that are rated a minimum of 2000 psi (138 bar, 13.8 MPa). - Page 7 General Warnings WARNING EQUIPMENT MISUSE HAZARD Misuse can cause death or serious injury. • Always wear appropriate gloves, eye protection, and a respirator or mask when painting. • Do not operate or spray near children. Keep children away from equipment at all times.
-
Page 8: Know Your Sprayer
Know Your Sprayer Know Your Sprayer Driver Strap Spray Tip Driver Support Arm Spray Tip Guard Driver Support Foot Prime Knob Detail Cup and Lid (sold separately) VacuValve Strainer’s Air Tube Cup Lid Strainer FlexLiner Funnel Cup Support Driver Drive-Shaft Trigger Pump Filter 3A9402B... -
Page 9: Know Your Controls
Know Your Controls Know Your Controls Prime Knob The Prime Knob directs fluid to either the cup or the Spray Tip. When priming, it is used to purge air from the pump. Your sprayer will not spray with air in the pump. Turn Prime Knob down to PRIME position when priming the sprayer or to relieve system pressure. -
Page 10: Driver Installation
Driver Installation Driver Installation Driver Selection Your sprayer is compatible with cordless Drill Secure Driver to Driver Support Foot Drivers and Impact Drivers. with Driver Strap. • Drill Drivers are best for slower applications with more control. Always run Drill Drivers in the ‘drill’ setting. •... - Page 11 Driver Installation Connect chuck of Driver to Drive-Shaft Secure Driver to Driver Support Foot of sprayer. with Driver Strap. Place Driver onto Driver Support Foot. You may need to extend Driver Support NOTE: Gravity Feed Orientation is ideal for Arm to fit your Driver. use with the Detail Cup, which is sold separately.
-
Page 12: Setup
Setup Setup Pressure Relief Procedure Cup Fill Follow the Pressure Relief Procedure whenever you see this symbol. Use only water-based materials to prevent serious injury from fire and explosion. This sprayer builds up an internal Insert one FlexLiner into the Cup pressure of 2000 psi (138 bar, 13.8 MPa) Support. - Page 13 Setup Firmly tighten the Cup Lid onto the Cup The Strainer’s Air Tube will prevent paint Support to ensure an airtight seal. from overfilling the cup. Fill the cup as follows: NOTE: To ensure an airtight seal, the gasket inside the Cup Lid is lubricated by the factory. Watching the Funnel (not the cup), If lubrication has washed away, apply Seal slowly pour paint into the Funnel.
- Page 14 Setup Lift up the Strainer and look to verify you can see crossbars in the bottom of the Funnel. If not, the cup is overfilled. Pour excess paint back into the paint can. Crossbars Remove the Funnel and Strainer from the cup and hook on edge of paint can.
-
Page 15: Startup
Startup Startup Install the cup onto the sprayer as Prime the pump as follows: follows: Verify Prime Knob is pointed down Verify Pump Filter is installed and to PRIME position. clean. Open the VacuValve cap and gently squeeze the FlexLiner until no more air bubbles appear in the VacuValve. - Page 16 Startup Continue to squeeze the FlexLiner Turn Prime Knob forward to SPRAY while pulling the Trigger for 10 position. Verify Spray Tip is forward in seconds. the SPRAY position. Point the sprayer into a waste pail and pull the Trigger for 5 seconds to spray out storage fluid.
-
Page 17: Spraying
Spraying Spraying Spray Tip Orientation Use only water-based materials to prevent serious injury from fire and To avoid serious injury from skin injection, explosion. do not put your hand in front of the Spray Tip or Tip Guard. Pointing the Spray Tip at a piece of scrap cardboard, pull the Trigger to test the spray pattern. -
Page 18: Spray Pattern Quality
Spraying Spray Pattern Quality • Flex wrist to keep sprayer pointed straight. Fanning sprayer to direct spray at angle causes uneven finish. A good spray pattern is evenly distributed without voids or runs. Adjust sprayer Speed NOTE: How fast you move the sprayer will Control (if available), hand speed, and distance affect spray application. -
Page 19: Reversible Spray Tips
Spraying Reversible Spray Tips Spray Tip Removal Four spray tips are available for use with this sprayer. See material container for spray tip recommendations. To avoid serious injury from skin injection, Blue Spray Tips are for spraying paint. do not put your hand in front of the Spray •... -
Page 20: Spray Tip Installation
Spraying Spray Tip Installation Clear Tip Clogs Align Spray Tip locking tab with the locking tab slot in the Spray Tip Guard. Push the Spray Tip all the way into the To avoid serious injury from skin injection, Spray Tip Guard. do not put your hand in front of the Spray Rotate the Spray Tip to the SPRAY Tip or Tip Guard. -
Page 21: Cup Refills
Spraying Cup Refills Pause in Spraying Turn Prime Knob down to PRIME Paint will dry quickly and cause clogs in the position to relieve system pressure. sprayer. Follow these steps whenever you pause spraying for 5 minutes to 2 hours. Remove cup assembly from sprayer. -
Page 22: Cleanup
Cleanup Cleanup Cleaning Sprayer Cleaning your sprayer properly and after every spray job is of the utmost importance! Use only water-based materials to Proper care and maintenance will make your prevent serious injury from fire and paint sprayer last and work for you trouble explosion. - Page 23 Cleanup To circulate clean water, fill clean cup Turn the Spray Tip to the SPRAY assembly half-full of clean water and position and trigger into a waste reattach to sprayer. pail for 15 seconds. Verify the Prime Knob is pointed down to the PRIME position.
-
Page 24: Storage
Storage Storage With the sprayer upside down, pour approximately 2 oz. (60 ml) Pump Armor NOTICE into pump opening. Failure to store sprayer with Pump Armor will result in operational problems the next time you spray. Always fill the sprayer with Pump Armor after cleaning. Water left in the sprayer will corrode and damage the pump. -
Page 25: Recycling And Disposal
Recycling and Disposal Recycling and Disposal End of Product Life • At the end of the product’s useful life, Remove motors, batteries, circuit dismantle and recycle it in a responsible boards, LCDs (liquid crystal displays), manner. and other electronic components. Recycle according to applicable •... -
Page 26: Troubleshooting
Troubleshooting Troubleshooting Check everything in this Troubleshooting Table before you bring the sprayer to an authorized service center. Sprayer Diagnostics Problem Cause Solution Sprayer makes sound Spray Tip is clogged See Clear Tip Clogs, page 20. but no material is Sprayer is not primed Repeat Start Up procedure to sprayed when Trigger is... - Page 27 Troubleshooting Problem Cause Solution Sprayer sprays with poor Spray Tip is partially clogged See Clear Tip Clogs, page 20. results Spray Tip is not in correct position See Spray Tip Installation, page 20. Incorrect Spray Tip for application Install a different size Spray Tip. of material See Reversible Spray Tips, page 19.
- Page 28 Troubleshooting Spray Pattern Diagnostics Problem Cause Solution Spray pattern is pulsating: Operator is moving too Slow speed of movement. fast while spraying Spray Tip is clogged See Clear Tip Clogs, page 20. Material is difficult to On models with Speed Control, atomize increase speed until desired pattern is achieved.
- Page 29 Troubleshooting Problem Cause Solution Spray pattern “spits” at the end or Excess material has Clean Spray Tip and Spray Tip beginning: accumulated on Spray Tip Guard. Clear Spray Tip. See and Spray Tip Guard, or Clear Tip Clogs, page 20. Spray Tip is partially plugged Spray Tip is not fully...
-
Page 30: Replacement Parts
Replacement Parts Replacement Parts 3A9402B... -
Page 31: Parts List
Replacement Parts Parts List Sprayer Order Ref. Description Part No. Part No. 16Y425 O-ring 18A886 Filter, pump, paint 18F209 Filter, pump, stain 2001524 Driver strap 18F520 Kit tips, paint includes filter (CAN models order CANP20) 18F519 Kit tips, stain Includes filter (CAN models order CANS19) 2004275 Kit, prime valve 2004277... -
Page 32: Technical Specifications
Technical Specifications Technical Specifications TrueCoat 360 Cordless Connect U.S. Metric Max Working Pressure 2000 psi 13.8 MPa, 138 bar Weight 2.5 lb 1.13 kg Dimensions: Length 12.50 in. 31.75 cm Width 5.25 in. 13.34 cm Height 9.75 in. 24.77 cm Storage Temperature Range ◆❖... - Page 33 Notes Notes 3A9402B...
-
Page 34: Graco Standard Warranty
With the exception of any special, extended, or limited warranty published by Graco, Graco will, for a period of twelve months from the date of sale, repair or replace any part of the equipment determined by Graco to be defective. This warranty applies only when the equipment is installed, operated and maintained in accordance with Graco’s written recommendations. - Page 35 Graco Standard Warranty Graco Information For the latest information about Graco products, visit www.graco.com. For patent information, see www.graco.com/patents. TO PLACE AN ORDER, contact your Graco distributor or call 1-800-690-2894 to identify the nearest distributor. 3A9402B...
- Page 36 All written and visual data contained in this document reflects the latest product information available at the time of publication. Graco reserves the right to make changes at any time without notice. Original instructions. This manual contains English. MM 3A9402...
Need help?
Do you have a question about the 26D360 and is the answer not in the manual?
Questions and answers