Advertisement
Quick Links
Lo-Carbon
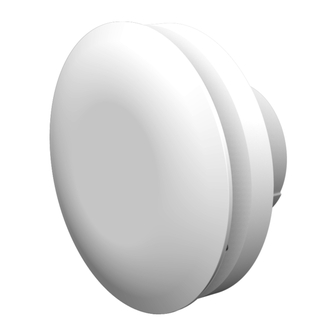
NBR dMEV C
CONTINUOUS EXTRACT FILTERLESS FAN
Installation and Wiring Instructions
220-240V~50Hz
PLEASE READ INSTRUCTIONS IN CONJUNCTION WITH ILLUSTRATIONS.
PLEASE SAVE THESE INSTRUCTIONS.
Original English Instructions.
Stock Ref. N°
498095 - NBR dMEV C 100
498096 - NBR dMEV C 100 HT
498097 - NBR dMEV C 125
498098 - NBR dMEV C 125 HT
IPX5
Advertisement

Summary of Contents for Vent-Axia NBR dMEV C 125
- Page 1 Lo-Carbon NBR dMEV C CONTINUOUS EXTRACT FILTERLESS FAN Installation and Wiring Instructions Stock Ref. N° 498095 - NBR dMEV C 100 498096 - NBR dMEV C 100 HT 498097 - NBR dMEV C 125 498098 - NBR dMEV C 125 HT 220-240V~50Hz PLEASE READ INSTRUCTIONS IN CONJUNCTION WITH ILLUSTRATIONS.
-
Page 2: Safety And Guidance Notes
C. Ensure that the mains supply (Voltage, Frequency, and Phase) complies with the rating label. D. The Fan should only be used in conjunction with the appropriate Vent-Axia products. E. The fan should only be used in conjunction with fixed wiring. - Page 3 use of the appliance by a person responsible for their safety. J. Young children should be supervised to ensure that they do not play with the appliance. DESCRIPTION The NBR C fan is a continuously running extract fan for kitchens, utility rooms, bathrooms and toilets.
-
Page 4: Exterior Wall Mounting
A. INSTALLATION PANEL/CEILING/ INTERIOR WALL MOUNTING Cut a 107mm diameter hole for 100mm fans or a 130mm hole for 125mm fans. Note: The 100mm and 125mm fans have outer product diameters of 190mm and 220mm respectively, when positioning the fan, please provide at least 10cm between any adjacent walls or ceilings and the fan. - Page 5 B. WIRING. WARNING: THE FAN AND ANCILLARY CONTROL EQUIPMENT MUST BE ISOLATED FROM THE POWER SUPPLY DURING INSTALLATION OR MAINTENANCE. IMPORTANT • The cross - sectional area of supply cord used should be ranged from 0.75 -1.5mm • This is a fixed wired product; flexible cord must not be used. •...
- Page 6 Speed Selection The fan speed is only adjustable within the first 5 minutes of mains power. The trickle flow rate can be quickly adjusted via the dial as shown – either with the inner grille on or off (see below images). The 10-100% scale relates to a flow rate of between 5-24l/s and 5-26l/s for the 100mm and 125mm models respectively.
-
Page 7: Servicing And Maintenance
*To enable comfort mode: 1. Power cycle the fan. Wait 30 seconds. 2. Switch LS on and off 5 times within 20 seconds (leaving a minimum of 1 second between each consecutive toggle). 3. Comfort mode is now enabled. 4. The Comfort mode setting persists between power cycles. To disable, repeat instructions 1 and 2. - Page 8 Fig.1 Continuous trickle (no manual boost). (The fan is internally fused) 220-240V ~ 50Hz Switched Spur Fig.2 Continuous boost with no trickle facility. (The fan is internally fused) 220-240V ~ 50Hz Switched Spur Fit Link wire Between L & LS...
- Page 9 1. Rotate grille counter-clockwise 2. Remove tile cover 3. Loosen 3 grille screws (do not fully remove) 4. Pull the inner grille forward off the fan Wiring terminals (220-240VAC ~ 50Hz) Mounting fixing Mounting fixing Rear cable entry Speed Adjustment Side cable entry Dial (cut plastic side...
- Page 10 Quick Setup 1) Ensure fan is isolated from mains. Trickle 2) Set the installation type – wall or ducted Speed Dial (SW1) 3) Set trickle flow rate – Dial as shown in the table below. SW1 / SW2 Humidity models: The humidity sensor is fully automatic and does not require setting.
- Page 11 PRODUCT FICHE For Residential Ventilation Units (Complying Commission Delegated Regulation (EU) No 1254/2014) Name: Vent-Axia Vent-Axia Vent-Axia Vent-Axia NBR DMEV C 100 - NBR DMEV C 100 HT - NBR DMEV C 125 - NBR DMEV C 125 HT - Model ID (Stock Ref.) :...
- Page 12 Vent-Axia guarantees this product for 7 years from date of purchase against faulty material or workmanship. In the event of any part being found to be defective, the product will be repaired, or at the Company’s option replaced, without charge, provided that the product:- •...


Need help?
Do you have a question about the NBR dMEV C 125 and is the answer not in the manual?
Questions and answers