Advertisement
Quick Links
Centrif Duo &
Centrif Duo Plus
Installation and Wiring Instructions
220-240V~50Hz
PLEASE READ INSTRUCTIONS IN CONJUNCTION WITH ILLUSTRATIONS. PLEASE SAVE THESE
INSTRUCTIONS.
Centrif Duo Plus
Stock Ref. N°
Centrif Duo P 25 61 20C
Centrif Duo T 25 62 20C
Centrif Duo DP 25 63 20C
Centrif Duo HTP 25 64 20C
Centrif Duo Plus P 43 16 13A
Centrif Duo Plus T 43 16 14A
Centrif Duo Plus DP 43 16 15A
Centrif Duo
Centrif Duo Plus HTP 43 16 16A
IPX4
Advertisement

Related Manuals for Vent-Axia Centrif Duo Series


Summary of Contents for Vent-Axia Centrif Duo Series
- Page 1 Centrif Duo & Centrif Duo Plus Installation and Wiring Instructions Stock Ref. N° Centrif Duo P 25 61 20C Centrif Duo T 25 62 20C Centrif Duo DP 25 63 20C Centrif Duo HTP 25 64 20C Centrif Duo Plus P 43 16 13A Centrif Duo Plus T 43 16 14A Centrif Duo Plus DP 43 16 15A Centrif Duo...
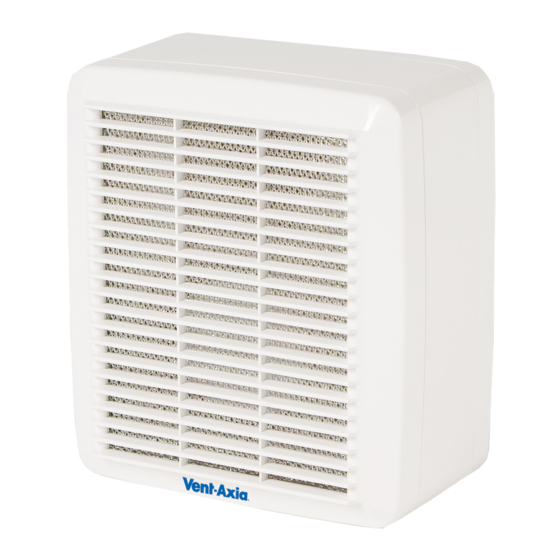
- Page 2 Centrif Duo and Centrif Duo Plus Features Surface mountable ● ● ● ● Flush mountable with accessory kit (available ● ● ● ● separately) Washable filter (available separately for ● ● ● ● Centrif Duo Plus) Pullcord ● ● ● Trickle speed ●...
-
Page 3: Safety And Guidance Notes
C. Ensure that the mains supply (voltage, frequency, and phase) complies with the rating label. D. The fan should only be used in conjunction with the appropriate Vent-Axia products. E. It is recommended that the connection to the fan connector terminals is made with flexible cable. - Page 4 SURFACE MOUNTING (PANEL/CEILING) Remove the Front Cover Assembly by slackening the two screws by two turns (fig.2.) Lift the front assembly away from the bottom edge first, then the top edge. Cut a ∅105mm hole, then suitable screw holes in the panel, ensuring that there is sufficient space for the product to be installed and that the filter (sold separately for the Centrif Duo Plus) can be removed for maintenance.
-
Page 5: Operation
removed for maintenance. IMPORTANT: Be careful to avoid joists and hidden pipes or cables. Remove the Back Box pieces by removing the four screws (fig 5). Replace it with the Frame from the Flush Mount Kit. Pass each of the long Panel Clip Screws (fig.6) supplied in the kit fully through the flange of the Chassis and screw in to the four Panel Clips allowing enough space between the clip and the flange for the thickness of the panel (so that the clips can spring open behind the panel). -
Page 6: Servicing And Maintenance
For the P models only: iii. Link terminals 1 and 3 for Utility boost speed. Link terminals 1 and 4 for Kitchen boost speed. IMPORTANT: Do not link across terminals 1 and 2. 3. TIMER ADJUSTMENT (T and HTP models only) The overrun time period is factory set to about 15 minutes. - Page 7 The fan has sealed for life bearings, which do not require lubrication. Fig.1. Backdraught shutter assembly. Flaps vertical. Spigot. Fig.2. Centrif Duo Plus Centrif Duo Cover Assembly. Cover Screws. Retaining edge for optional filter (Centrif Duo Plus only). Insert flat bladed screwdriver in here and pull Filter out to remove it.
- Page 8 Centrif Duo Plus shown Fig.3. Terminal Block Cover. Spigot. Cover Assembly. Chassis Assembly. Impeller. Centrif Duo Plus Optional Filter. (The Centrif Duo models have a metal mesh filter clipped on to the rear of the cover. It can be removed easily and washed too.) Fig.4.
- Page 9 Fig.5. Frame from optional Flush Mount Kit. 4 screws Back Box. Fig.6. Panel Clip Screw (4 off). Panel Clip (4 off). Chassis.
- Page 10 Fig 7. Setup Terminals See page 5 Section B. Set Up. Timer adjustment Humidity adjustment HTP model shown. PCBs may vary in look.
- Page 11 Fig 8. Siting of the fan.
- Page 12 Other accessories, like pullcords, PIR sensors or humidistats, can be fitted in line with the mains live connection (L) in order to turn the fan or off. For details of the warranty and returns procedure please refer to www.vent-axia.com or write to Vent-Axia Ltd, Fleming Way, Crawley, RH10 9YX Head Office: Fleming Way, Crawley, West Sussex, RH10 9YX.
Need help?
Do you have a question about the Centrif Duo Series and is the answer not in the manual?
Questions and answers