Table of Contents
Advertisement
Quick Links
Download this manual
See also:
Manual
Advertisement
Table of Contents

Related Manuals for Victorinox ST 4000


Summary of Contents for Victorinox ST 4000
- Page 1 ST 4000 Analog/Digital Chronograph ........2 Specifications ................. 42 Battery ....................44...
-
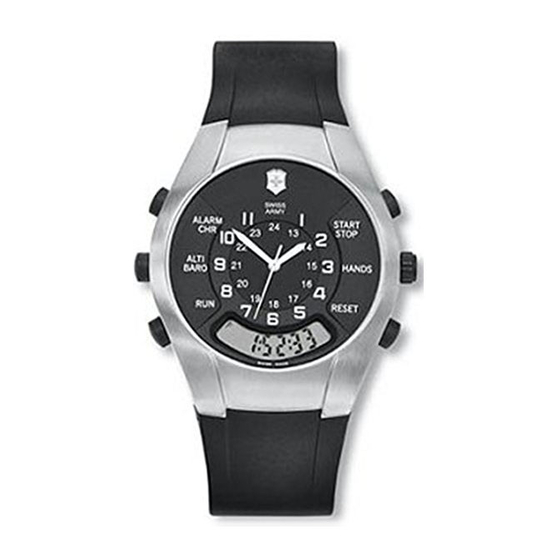
Page 2: Digital Display Controls
ST 4000 SETTING THE ANALOG TIME (HANDS) A. Pull out the crown and turn it until the desired time. B. Push back the crown to its normal position. Function Buttons Setup Buttons Note: Never operate when the watch is wet. - Page 3 FUNCTION FLOW 1. Pressing the Clock Button A. Displays the Clock (first press) B. Displays the Calendar (second press) C. Displays the Alarm (third press) D. Displays the Stopwatch (fourth press) 2. Pressing the Altimeter Button A. Displays the Altimeter (first press) B.
- Page 4 SETUP Pressing the Start/Stop Button Pressing the Adjust Button 1. Adjusts the blinking digit (if an arrow at the left of 1. Enters the setup mode of the function displayed. the display is toggling, it adjusts in the arrow 2. Moves from one setup step to the next and exits setup after com- direction).
-
Page 5: Setup Step-By-Step
SETUP STEP-BY-STEP SETUP STEP-BY-STEP Clock Setup Clock Setup (con’t.) Step 1 Clock Function. Step 5 Advance minutes. Press the Clock Button to display the Clock. Press the Start/Stop Button to advance the minutes. Step 2 Hours Blink. Step 6 Seconds Blink. Press the Adjust Button –... - Page 6 SETUP STEP-BY-STEP SETUP STEP-BY-STEP Calendar Setup Calendar Setup (con’t.) Step 1 Calendar Function. Step 5 Advance days. Press the Clock Button to display the Calendar. Press the Start/Stop Button to advance the days. Step 6 Year blinks. Step 2 Months Blink. Press the Adjust Button –...
- Page 7 SETUP STEP-BY-STEP SETUP STEP-BY-STEP Activating the Alarm and Setting Alarm Time Activating the Alarm and Setting Alarm Time (con’t.) Step 1 Alarm Function. Step 5 Advance Hours. Press the Clock Button to display the Alarm. Press the Start/Stop Button to advance the hour. Step 6 Blink Minutes.
- Page 8 SETUP STEP-BY-STEP SETUP STEP-BY-STEP Selecting the Clock and Calendar Formats Selecting the Clock and Calendar Formats (con’t.) Step 1 Clock Function. Step 5 Calendar Function. Press the Clock Button to display the Clock. Press the Clock Button to display the Calendar. Step 2 Selection Mode.
- Page 9 You remove the offset by adjusting the altitude. Altitude. The ST 4000 shows altitude below or above sea level from -4,000 feet to +30,000 feet in 5-foot increments. When to Adjust Altitude. Adjust the altitude when you want precise altitude readings, such as before hiking or climbing, or when you How the Altimeter Works.
-
Page 10: Altimeter And Barometer Details
Direct sunlight can also cause the ST 4000 to give high readings. known altitude of a landmark. The ST 4000 can be adjusted so that For accurate readings, remove the watch from your wrist and place it displays the same altitude as the landmark. -
Page 11: Adjusting The Altimeter And Barometer
ADJUSTING THE ALTIMETER AND BAROMETER ADJUSTING THE ALTIMETER AND BAROMETER (Con’t.) Adjust at a known altitude when you want precise altitude readings or when you want to update the sea level barometer. Effect on Sea Level Barometer. Step 1 Altimeter Function. Press the Altimeter When you adjust the altitude the sea level barometer is set at the Button to display the Altimeter. - Page 12 SETTING THE BAROMETER SETTING THE BAROMETER Barometer & Altimeter Adjust from a Weather Report Barometer & Altimeter Adjust from a Weather Report (con’t.) Updating the barometer from a broadcast or airport weather report will adjust the altitude concurrently. Step 4 Exit. At the correct sea level barometer press the Adjust Button to exit.
- Page 13 ALTIMETER FORMATS ALTIMETER FORMATS Selecting the Altimeter Formats Selecting the Altimeter Formats (con’t.) Step 2. In the Altimeter select “f” (feet) or “m” (meters). Hold the Adjust Button 1 second – the unit symbol will blink. In the Barometer select “Hg” (inches of mercury) Step 3.
- Page 14 Setting the Barometer-Altimeter Synchronization Setting the Barometer-Altimeter Synchronization (con’t.) Synchronization is set at the factory. You can resynchronize after a year or two if, after altitude adjustment, the ST 4000 barometer is Step 4. repeatedly and significantly different from the sea level barometer Press the Start/Stop Button to move the Barometer given by a current, local weather report.
-
Page 15: Stopwatch Operation
STOPWATCH OPERATION create splits this way until the total number of splits in memory is 32. Press the Start/Stop Button to stop the Stopwatch. Press the Stop- Starting, Stopping, and Resetting. Start and stop the Stopwatch by watch Button to view the splits you have created in memory. pressing the Start/Stop Button. - Page 16 STOPWATCH STOPWATCH Example 1: Time Recorded and Recalled Example 1 : Time Recorded and Recalled (con’t.) Step 1. Step 5. Press the Stopwatch Function Button to display Press the Stopwatch Function Button to enter the Stopwatch. Stopwatch Memory. The display will toggle between split number and split time.
- Page 17 STOPWATCH Example 2: Recording and Reviewing a Split Group (con’t.) Example 2: Recording and Reviewing a Split Group Step 3. Four Laps on a Quarter-Mile Running Track Press the Start/Stop Button to stop the Stopwatch at the end of the 4th lap. Step 1.
- Page 18 Example 2: Recording and Reviewing a Split Group (con’t.) Example 2: Recording and Reviewing a Split Group (con’t.) Step 6. Step 8. Press the Function Button. The next split (lap 2) is Press the Function Button. The next split (lap 4) is displayed along with its split number (02).
- Page 19 1%. Runs The ST 4000 records a run after a climb of more than 150 feet is fol- lowed by a 150-foot descent. Skiers can record their runs for a day. The run counter is also useful in air sports for counting thermals...
- Page 20 USING THE SPORT FUNCTIONS IN HIKING AND CLIMBING Step 3 Step 4 Example: Recording vertical ascent and maximum altitude on a Reset Maximum Altitude. After completing your hike, hike. turn the accu. Step 1 Step 2 At the trailhead reset Start the Vertical Vertical Ascent.
- Page 21 USING THE SPORT FUNCTIONS IN SKIING Step 3 Step 4 Example: Recording vertical descent and runs during a day of Reset the Run Counter. When you finish skiing, turn skiing. the accumulator off. Step 1 Step 2 At the lift reset Start the Vertical Vertical Descent.
- Page 22 ST 4000 SPECIFICATIONS Clock/Calendar Time of Day: 12 or 24 hour format; to 1 second Altimeter Alarm: To one minute Current Altitude: –4,000 to 30,000 feet in 5 foot increments –1,330 to 10,000 meters in 1 meter increments Date: Month/day/year (US) format...
- Page 23 Substituting interchangeable batteries is not recommended. Battery change should be performed by a qualified technician who should also check the condition of the gaskets and the O-ring at the same time. Battery is not covered by the warranty. ST 4000 BATTERY: CR2032Lithium, approximately 4 year life.
Need help?
Do you have a question about the ST 4000 and is the answer not in the manual?
Questions and answers