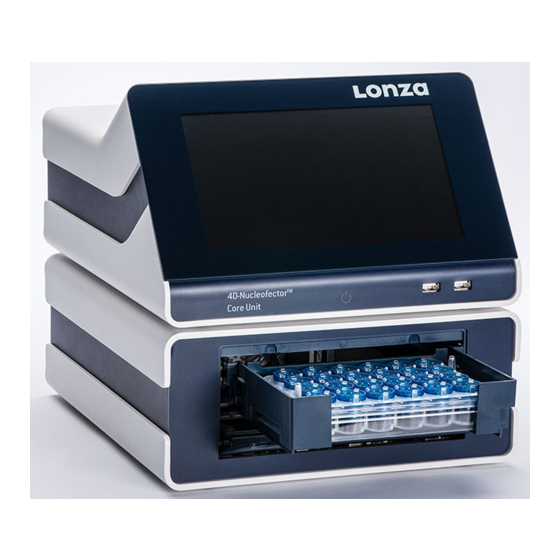
Summarization of Contents
Nucleofector Technology
How it works
Explains the two unique components of the Nucleofector® System and Nucleofector® Kits.
Transfection of any cell
Highlights the method's suitability for difficult-to-transfect cell types and adherent/suspension cells.
Transfection of any substrate
Describes the flexibility in transfecting various substrates like DNA vectors, RNA duplexes, and peptides.
Operating Instructions
2.1 Restrictions
Outlines medical use restrictions and license statements for the Nucleofector® Technology.
2.2 Maintenance
Details minimal maintenance requirements for reliable operation, including cleaning and fuse replacement.
2.3 Safety instructions – please read carefully
Provides crucial safety information regarding electric shock risks and proper system usage.
2.4 Waste disposal
Instructs on proper disposal methods for cuvettes, pipettes, and Nucleofector® Solutions.
2.5 4D-Nucleofector® System components
Explains the modular system and lists its components and model variants.
2.6 Set-up instructions
Guides on unpacking, stacking, connecting units, and powering on the system.
2.7 General use instructions
Provides an overview of the system's operating software and general usage.
2.7.1 Turning on the 4D-Nucleofector® System
Details the procedure for powering on the system and navigating the initial interface.
2.7.2 Operating software
Explains the touch screen interface and basic features of the operating software.
2.7.3 Turning off the 4D-Nucleofector® System
Describes the correct procedure for shutting down the system to prevent damage.
2.8 General instructions for running a Nucleofection® Experiment
Provides general steps for performing a Nucleofection® Experiment.
2.8.1 Overview
Outlines the general workflow for performing a Nucleofection® Experiment.
2.8.2 Unit and vessel selection
Guides on selecting the appropriate unit and vessel type from the main screen.
2.8.3 Experiment parameters - overview
Explains how to define experiment parameters like sample type, cell type code, pulse code, and solution.
2.8.4 Using a predefined experiment
Details how to load and use pre-installed or user-saved experiments.
2.9 4D-Nucleofector® X Unit
Covers the operation and features specific to the X Unit.
2.9.1 Defining a new experiment
Guides on creating a new experiment for the X Unit, including naming and parameter setup.
2.9.2 Loading samples
Explains how to properly load 16-well strips or 100 µL vessels into the X Unit.
2.9.3 Running the experiment
Details the steps to start and monitor an experiment on the X Unit.
2.10 4D-Nucleofector® Y Unit
Details the operation of the Y Unit for adherent cell transfection.
2.10.1 Defining a new experiment
Guides on setting up a new experiment for the Y Unit.
2.10.2 Loading samples
Explains how to load the 24-well dipping electrode array into the Y Unit.
2.10.3 Running the experiment
Details how to run an experiment using the Y Unit.
2.11 4D-Nucleofector® 96-well Unit
Covers the operation of the 96-well Unit for high-throughput reactions.
2.11.1 Defining a new experiment
Guides on setting up a new experiment for the 96-well Unit.
2.11.2 Loading samples
Explains how to load the 96-well Nucleocuvette® Plate into the sample tray.
2.11.3 Running the experiment
Details how to run an experiment using the 96-well Unit.
2.12 4D-Nucleofector® LV Unit
Introduces the LV Unit for large volume transfection.
2.12.1 Using the 1 mL Nucleocuvette® Cartridge (Fixed volume)
Guides on using the fixed volume 1 mL Nucleocuvette® Cartridge.
2.12.1.1 Defining a new experiment
Guides on setting up a new experiment for the 1 mL Nucleocuvette® Cartridge.
2.12.1.2 Loading Samples
Explains how to fill and insert the 1 mL Nucleocuvette® Cartridge.
2.12.1.3 Running the experiment
Details how to run an experiment using the 1 mL Nucleocuvette® Cartridge.
2.12.2 Using the LV Nucleocuvette® Cartridge (Scalable volume)
Guides on using the scalable LV Nucleocuvette® Cartridge for large volumes.
2.12.2.1 Defining a new experiment
Guides on setting up a new experiment for the scalable LV Nucleocuvette® Cartridge.
2.12.2.2 Mounting an LV Nucleocuvette® Cartridge
Details the procedure for mounting the LV Nucleocuvette® Cartridge.
2.12.2.3 Loading Samples
Explains how to prepare and load samples for the LV Unit.
2.12.2.4 Running the experiment
Details the steps to run an experiment using the LV Unit.
2.13 Additional settings and options
Explains how to manage settings, experiments, and custom programs.
2.13.1 Settings menu on the right
Guides on accessing and using the system's settings menu.
2.13.1.1 System settings
Details how to adjust system parameters like time, date, brightness, and volume.
2.13.1.2 Cleaning the Nucleofection® Vessel Tray (X, Y, or 96-well Unit)
Provides instructions for removing and cleaning the Nucleofection® Vessel tray.
2.13.2 Left menu
Explains how to navigate and use the left-side menu options.
2.13.2.1 Experiments
Details how to view, import, export, and manage stored experiments.
2.13.2.2 Results
Explains how to view, manage, and export experiment result files.
2.13.2.3 Custom Cell Type Codes
Guides on adding and managing custom Cell Type Codes for experiments.
2.13.2 Lonza programs
Instructions for uploading and managing Lonza program files.
2.13.4 Firmware update
Details the procedure for updating the system's firmware via USB.
Troubleshooting
3.1 Suboptimal Transfection Results
Provides troubleshooting guidelines for common issues like low survival rate and low efficiency.
3.2 Rescue of Samples (X and Y Unit)
Describes how to rescue samples from X or Y units during system malfunction.
Error Codes of the 4D-Nucleofector® System
4.1 Color Coding of Wells
Explains the meaning of different well colors used in experiment results.
4.2 Error Codes
Provides information on accessing error codes and recommended handling procedures.
4.3 Arc Discharge Correction
Explains arc discharge phenomena and how the system handles them.


Need help?
Do you have a question about the AAF-1003B and is the answer not in the manual?
Questions and answers