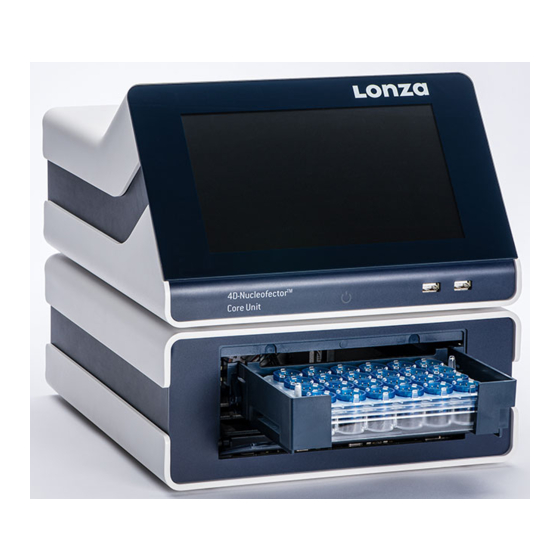
Lonza Cultek 4D-Nucleofector Hardware Manual

Lonza Cultek 4D-Nucleofector Hardware Manual

Hide thumbs Also See for Cultek 4D-Nucleofector:
Table of Contents

Advertisement

4D-Nucleofector
Hardware
Manual
Your guide to setup and usage of the
4D-Nucleofector® System
For research use only
®

Advertisement

Table of Contents
loading

Summary of Contents for Lonza Cultek 4D-Nucleofector

  • Page 1 ® 4D-Nucleofector Hardware Manual Your guide to setup and usage of the 4D-Nucleofector® System For research use only...
  • Page 2 The purchase of the 4D-Nucleofector® System conveys to the buyer the non-transferable right to use the system as well as Lonza’s proprietary Nucleofector® Technology for research conducted by the buyer (whether the buyer is an academic or for-profit entity). For further details about the license please refer to chapter 5.
  • Page 3: Table Of Contents

    E xperiments 2.13.2.1 Waste disposal 2.13.2.2 Results 4D-Nucleofector® System components 2.13.2.3 Custom Cell Type Codes Set-up instructions 2.13.2 Lonza programs General use instructions 2.13.4 Firmware update 2.7.1 Turning on the 4D-Nucleofector® System 2.7.2 Operating software Troubleshooting 2.7.3 Turning off the 4D-Nucleofector® System...
  • Page 4: Nucleofector Technology

    Transfection of any cell transformed transfection. Nucleofection® Technology has proven to be With over 325 protocols optimized by Lonza’s R&D Team for cell a reliable and reproducible easy-to-use technology, suited to a wide lines and primary cells and more than 750 entries in the online Cell variety of applications.
  • Page 5: Moving Transfection Into The Fourth Dimension

    The 4D-Nucleofector® System Moving transfection into the fourth dimension Scientific Support Teams At Lonza, we believe that listening to our customers is the best way to develop innovative products that meet your needs. In line Europe with this customer-oriented spirit, the 4D-Nucleofector® System...
  • Page 6: Operating Instructions

    Lonza. Purchasers are granted a non-exclusive, non-transferable license for a limited use of Lonza’s Nucleofector® Technology and related software for research and development purposes, the terms of which are disclosed in detail in chapter 5. Certain commercial application is allowed under Lonza’s license for for-profit-entities, as set forth in the license.
  • Page 7: Consignes De Sécurité - À Lire Attentivement

    Set up the system in such a way that easy removal of the power cord • Lonza disclaims all warranties and shall in no event be liable for any is possible at any time. kind of damages caused by or arising out of any operation or use in violation with the above safety and handling instructions.
  • Page 8: Waste Disposal

    Lonza Cologne décline toute garantie et ne pourra en aucun cas être • Prendre des précautions contre les chocs et les vibrations lors des tenue responsable de tout type de dommages causés par ou résultant...
  • Page 9: Nucleofector® System Components

    9. Lonza interface inlet port of last functional unit 10. Lonza interface cable connected to outlet and inlet port 11. Lonza interface outlet port of functional unit 12. Lonza outlet port of last functional unit with termination plug 4D-Nucleofector® Hardware Manual | 9...
  • Page 10: Set-Up Instructions

    Settings menus • Date and date format (select date and different formats to display) (https://knowledge.lonza.com). • Time and time format (setting time and switching between 24 h and am/pm display) NOTE: All screenshots shown in this section refer to software •...
  • Page 11: Turning Off The 4D-Nucleofector® System

    Define new experiment (chapter 2.8.4) (chapters 2.9, 2.10, 2.11 or 2.12) Saved user experiment Lonza template Modify Use as is Prepare sample according to cell-type specific Optimized Protocol Figure 2.5: System settings screen (A) dropdown menu after tapping on the gear icon.
  • Page 12: Experiment Parameters - Overview

    Using the “Cell Type Code” option, a “Pulse Code” (e.g. FI-115) can be extended by the user with customized cell-type codes (e.g., after a cell line optimization; 2.12.3). Lonza defined programs are highlighted in blue while custom program codes will be highlighted in black. Solution In case the recommended Nucleofector®...
  • Page 13: Using A Predefined Experiment

    A predefined experiment can either be a ready-to-use template 4. In case you want to modify the settings of a predefined experiment, pre-installed by Lonza (for X, Y, and 96-well Unit only) or a previous click on the well(s) you want to change and adapt the settings experiment that was saved by the user.
  • Page 14: Nucleofector® X Unit

    2.9 4D-Nucleofector® X Unit Figure 2.14: Experiment naming (X Unit; example: 16-well Nucleocuvette® Strips); This screen will only appear if you did not check “Experiment autonaming” in the settings menu (Table 2.2) 2.9.1 Defining a new experiment Following vessel type selection (see chapter 2.8.2) you can now either select a predefined experiment (see chapter 2.8.4) or define an experiment from the beginning.
  • Page 15 Press the field “Cell Type Code” to choose predefined Nucleofection® Conditions from a cell type list (Figure 2.15, B). A list with all available Cell Type Codes (defined by Lonza or custom) will appear. Select the code that shall be used by scrolling through the menu or start typing in the search field (Figure 2.15, C).
  • Page 16: Loading Samples

    (Figure 2.17, D). For the 100 µL Nucleocuvette® Vessel, the cuvettes should be mounted such that the label Lonza on the lid is readable and the opening clip is at the front (Figure 2.17, G, H).
  • Page 17: Nucleofector® Y Unit

    Conditions from a cell type list (Figure 2.15, B). A list with all the settings menu, the experiment name is automatically generated available Cell Type Codes (defined by Lonza or custom) will appear. with date and time stamp (see chapter 2.8.4). (You can change the...
  • Page 18: Loading Samples

    4. Enter pulse code 2.10.3 Running the experiment 1. After loading the samples press “Start” to run the experiment If required, modify pulse code by pressing the pulse code field. A keyboard will appear, enabling you to change settings. Press the 2.
  • Page 19: Nucleofector® 96-Well Unit

    2.11 4D-Nucleofector® 96-well Unit The 4D-Nucleofector® 96-well Unit is designed to simultaneously run up to 96 Nucleofection® Reactions with cell numbers ranging from 2 x 10 to 1 x 10 cells per reaction. Figure 2.25: Experiment definition (96-well Unit, plate view (A) and strip view(B)) 1.
  • Page 20 2. Choose your sample type You can pick the regular sample for samples which contain substrate and will be pulsed. You can pick “No DNA” for samples not containing any substrate (pulse control). You can pick “No Pulse” for samples with substrate not being subjected to an electrical pulse (no-pulse control) 3.
  • Page 21: Loading Samples

    2.11.2 Loading samples Selecting a well will display further information of the result. Tapping the Load the 96-well Nucleocuvette® Plate (Figure 2.24) into the sample “Details” button will open a description for this well, including details tray (Figure 2.28) about the setup and result. Figure 2.28: 96-well Unit sample tray.
  • Page 22: Nucleofector® Lv Unit

    2.12 4D-Nucleofector® LV Unit Components of the LV Nucleocuvette® Cartridge (Figure 2.31, B, C) The 4D-Nucleofector® LV Unit can handle two types of vessels, the fixed 1. Cartridge volume 1 mL Nucleocuvette® Cartridge for cell numbers up to 1x10 2. Venting tube with 0.2 µM sterile filter cells and the scalable LV Nucleocuvette®...
  • Page 23: Using The 1 Ml Nucleocuvette® Cartridge (Fixed Volume)

    2.12.1 Using the 1 mL Nucleocuvette® Cartridge (Fixed volume) 2.12.1.1 Defining a new experiment Following vessel type selection (see chapter 2.8.2) you can now either select a predefined experiment (see chapter 2.8.4) or define an experiment from the beginning. If you want to create a new experiment, tap in the field “Experiment name”...
  • Page 24: Loading Samples

    2.12.1.2 Loading Samples 1. Fill the 1 mL Nucleocuvette® Cartridge with the sample. For filling hold cartridge in a slight angle as shown in figure 2.35 (A). The sterile filter on the rear side should be at the top, the injection port should be at the bottom (upon pipetting cartridge will be filled from bottom to top).
  • Page 25: Using The Lv Nucleocuvette® Cartridge (Scalable Volume)

    Step 5: Connect the input LV Reservoirs to LV Nucleocuvette® Cartridge (see 2.12.2.3) Step 6: Verify volume settings and execute experiment (see 2.12.2.3) NOTE: In case you use bags and not Lonza LV Reservoirs for sample input and/or collection, please contact Lonza Scientific Support for maximum tube volumes.
  • Page 26: Defining A New Experiment

    2.12.2.1 Defining a new experiment processing until the end of liquid according to volume entry Following vessel type selection (see chapter 2.8.2) you can now is reached or if multiple errors occur that point to missing either select a predefined experiment (see chapter 2.8.4) or define an liquid.
  • Page 27 3. If you started defining your experiment setup already (see 2.12.2.1), the software can support you in inserting the tubes into the pinch valves by automatic opening of the valves. On the right side of the experiment screen you can select “Yes” if you want to insert the tubes of the LV Nucleocuvette®...
  • Page 28: Loading Samples

    Figure 2.37: (F) insertion into the T connector holder and liquid sensors.* 7. Insert the two larger diameter tubes into the black holders (figure2.37, F, right). Ensure the tubes are inserted completely into the black holders. The lower holder comprises a light sensor for Figure 2.37: (H) Reservoir filled with medium and mounted into a 4D Nucleofector®...
  • Page 29 6. Optional - when feeding substrate separately - lower tube 1. Cartridge inserted in slot inserted into lower pump. Flap closed. 2. Short venting tube with filter attached to the male Luer connector 7. Holder for cell suspension reservoir placed on a magnetic on the front plate stirring platform (stirring speed to approx.
  • Page 30: Running The Experiment

    2.12.2.4 Running the experiment 1. Verify again that the volumes you have entered before (see 2.12.2.1, step 5) correctly reflects the volumes you have prepared. If not, adapt volumes again. 2. Upon pressing “Next” a summary of the defined settings will be displayed.
  • Page 31: Additional Settings And Options

    2.13 Additional settings and options 2.13.1.1 System settings • Current time: Set or change the time by tapping on this field. This chapter explains how to change settings like date and time and how • Time format: Switch between 24 h or AM/PM format to organize and manage your stored experiments, results and custom •...
  • Page 32: Left Menu

    2.13.2 Left menu 2.13.2.2 Results Activate the left menu by tapping on the accordion icon on the left side This menu will display a list of result files and allows you to manage of the screen (Figure 2.4). them. Result files are listed in chronological order with latest results at the top.
  • Page 33: Lonza Programs

    Custom program codes will not be overwritten in case an updated program definition file is installed (see chapter 2.13.3). NOTE: More comprehensive firmware updates may not be possible via USB upload and require return of the system to Lonza. 4D-Nucleofector® Hardware Manual | 33...
  • Page 34: Troubleshooting

    DNA used for Nucleofection® Experiments should be of high purity. We strongly recommend endotoxin-free preparation of the DNA. Do not use procedures involving phenol /chloroform treatment. If the problem cannot be resolved, please call Lonza’s Scientific Support Team Europe Phone: + 49 221 99199 400 E-mail: scientific.support.eu@lonza.com...
  • Page 35: Rescue Of Samples (X And Y Unit)

    Remove the Nucleocuvette® Vessels and rescue your cells. • Remove the terminator cap or cable connection to next unit (Figure • Contact your Lonza representative to solve potential technical issue. 3.1, C/E) • Insert screw driver supplied with the 4D-Nucleofector® System in the lower hole of the plug receptacle (Figure 3.1, D for Model variant B,...
  • Page 36: Error Codes Of The 4D-Nucleofector ® System

    (OK) and segments where an error occurred. Following thresholds were www.lonza.com/nucleofection-error-codes empirically defined by Lonza: If a problem cannot be resolved, please call Lonza’s Scientific Support Team. Europe Phone: + 49 221 99199 400 E-mail: scientific.support.eu@lonza.com...
  • Page 37: Arc Discharge Correction

    Purchased Device is complete. to such tools. Lonza does not warrant either that the use of the License does not “Commercial Purposes”, as used herein, means the sale, license, infringe third parties’ rights or does not cause damages to third parties.
  • Page 38 INCIDENTAL, PUNITIVE, OR CONSEQUENTIAL DAMAGES, HOWEVER CAUSED, damage resulting from the use of the Purchased Device or Licensed ON ANY THEORY OF LIABILITY AND WHETHER OR NOT LONZA HAS BEEN Process in Buyer’s operations or in combination with other substances, ADVISED OF THE POSSIBIL- ITY OF SUCH DAMAGES, ARISING UNDER ANY materials or products.
  • Page 39: Technical Specifications

    5.7 kg (12.5 lb) 96-well Unit: 4.7 kg (10.4 lb) Hersteller / supplier / manufacture Lonza Cologne GmbH Nattermannallee 1 D-50829 Cologne, Germany Herstellungsdatum / date of manufacture / The manufacturing year is encoded by the second and third digit date de production number of the serial number, e.g., serial number x16xxxxx was manufac-...
  • Page 40 U.S. and / or other countries. All trademarks belong to Lonza, registered in USA, EU or CH or to third party owners and used only for informational purposes. The infor- mation contained herein is believed to be correct and corresponds to the latest state of scientific and technical knowledge. However, no warranty is made, either expressed or implied, regarding its accuracy or the results to be obtained from the use of such information and no warranty is expressed or implied concerning the use of these products.

Table of Contents