Table of Contents
Advertisement
Quick Links
Advertisement
Table of Contents

Related Manuals for VDO CONTISYS OBD - V3.0


Summary of Contents for VDO CONTISYS OBD - V3.0
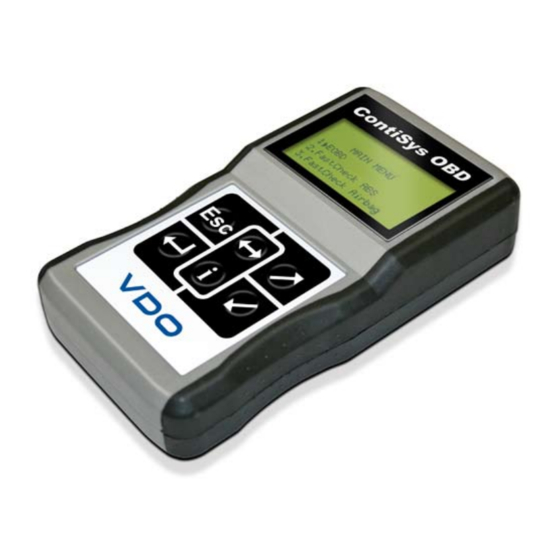
- Page 1 ContiSys OBD Instruction Manual 02/2010 (3.0) - EN...
-
Page 3: Table Of Contents
Contents Introduction Overview..............3 Kit contents ............... 6 Display screen ............8 Keypad ..............8 Connection ..............9 Safety precautions ........... 10 Communication problems ........10 EOBD Application What is EOBD?............11 Identifying compliant vehicles ........12 Diagnostic Trouble Codes........13 Interpreting EOBD fault codes........ - Page 4 Appendix A: Glossary Glossary of terms ............. 96 Appendix B: Cables Cable identification ..........100 Appendix C: Manufacturer Compatibility EOBD Application ........... 106 FastCheck Applications .......... 106 Appendix D: Manual service reset Service Reminder Indicator (SRI)......107 Alfa Romeo............. 107 Audi................
-
Page 5: Introduction
Introduction Introduction Overview Nearly every new road vehicle, and many older vehicles, have multiple control modules that monitor and control different aspects of the vehicle (e.g. Engine, Transmission, Body, Suspension, etc.). The ContiSys OBD service tool has been specifically designed to connect to, and communicate with, a number of these control modules and allow the user to extract information (e.g. - Page 6 Introduction FastCheck EPB • FastCheck EPB (Electronic Parking Brake) allows you to read and clear any fault codes stored by the selected system, and in addition can be used during brake operation checks or brake pad replacement. FastCheck SAS • FastCheck SAS (Steering Angle Sensor) allows you to read and clear any fault codes stored by the selected system, and in addition can be used to calibrate the steering angle sensor.
- Page 7 Introduction Call Costs The cost of calls to the ContiSys telephone hotline is dependent on your telephone service provider. The cost can vary between 0.0 (Euro Cent) pence (Euro) per minute to 0.40 Pence (Euro cent) per minute from landlines, depending on where you are calling from.
-
Page 8: Kit Contents
Introduction Kit contents ContiSys OBD - Kit 1 12 CON0016 ContiSys OBD kit 1. Service tool 2. EOBD cable 3. Carry case 4. CD ROM containing the Operating Instructions 5. EOBD pin-switchable cable 6. EU power supply 7. USB software update cable... - Page 9 Introduction ContiSys OBD Professional - Kit CON0098 ContiSys OBD Professional kit 1. Service tool 2. Multiplexer cable 3. Carry case 4. CD ROM containing the Operating Instructions 5. EU power supply 6. USB software update cable...
-
Page 10: Display Screen
Introduction Display screen The service tool screen is a backlit LCD capable of displaying four rows of text containing up to twenty characters. Keypad CON0018 The service tool is operated via the 6-button keypad. The table below details the keypad buttons and their functionality. Function Select a menu option, Continue or Yes. -
Page 11: Connection
Introduction Connection CON0014 The service tool has a 15-way connector through which it can communicate to the vehicle via various interface cables. Connection to the specific system is via either the vehicle's EOBD (J1962) diagnostic socket or by a system specific connector. Refer to the 'Vehicle Application List' to determine the correct cable. -
Page 12: Safety Precautions
Introduction Safety precautions The following guidelines are intended to ensure the safety of the operator whilst preventing damage to the electrical and electronic components fitted to the vehicle. Equipment - prior to commencing any test procedure on the vehicle, ensure that the service tool, its harnesses and connectors are in good condition. -
Page 13: Eobd Application
EOBD Application EOBD Application What is EOBD? The American Environmental Protection Agency and the European government have set targets for reducing the levels of pollution produced by passenger and commercial vehicles. In order to ensure that these targets can be met, manufacturers are required to build new vehicles which meet increasingly stiff emissions standards. -
Page 14: Identifying Compliant Vehicles
EOBD Application Identifying compliant vehicles All petrol engine vehicles manufactured since 2000 should be EOBD compliant. Some manufacturers began incorporating On-Board Diagnostic systems as early as 1994, however not all are 100% compliant. All diesel engine vehicles are expected to have support from 2004. -
Page 15: Diagnostic Trouble Codes
EOBD Application Diagnostic Trouble Codes Diagnostic Trouble Codes (DTCs) are divided into mandatory and voluntary codes. Mandatory codes are allocated by the ISO (International Standards Organisation) / SAE (Society of Automotive Engineers). Voluntary codes are allocated by various vehicle manufacturers and are manufacturer specific and in some instances, vehicle specific. -
Page 16: Interpreting Eobd Fault Codes
EOBD Application Interpreting EOBD fault codes Use the following rules to determine the basic meaning of an EOBD fault code. Powertrain Body Chassis Network The first character indicates which area of the vehicle the code applies to. Standard (SAE) code Manufacturer's own code The second character specifies the type of code: Fuel and air metering... -
Page 17: Using Eobd Application
EOBD Application Using EOBD application Connection and basic operation 1. Connect the Multiplexer cable (A2C59512985) or the EOBD (J1962) cable (A2C59512072) to the service tool and secure the fixing screws. 2. Ensure the vehicle's ignition switch is in the '0' position. CON0019 J1962 Diagnostic socket 3. - Page 18 EOBD Application 6. If the vehicle system is not EOBD compliant or there is a connection problem, the “Please Wait" screen will be replaced with help screens. If communication with the On-Board Diagnostics is successful, then the display will report that the service tool is checking the vehicle's System Readiness tests. Note: The vehicles ignition MUST be on for successful communication with the vehicle control modules.
-
Page 19: Menu Options
EOBD Application Menu options Not all vehicle control modules will support all of the options available from the menu. If an option is not supported the service tool will display either “Not supported” or “Not available”. This is a limitation of the software on the vehicle control modules and NOT a fault with the service tool. - Page 20 EOBD Application O2 Sensor Tests EOBD has an optional mode for monitoring the oxygen sensor test results depending on the method used by the vehicle manufacturer to comply with the requirement for oxygen sensor monitoring. If the manufacturer does use this mode not all tests need to be supported.
- Page 21 EOBD Application System Readiness When the ignition is turned on the vehicles control modules perform a number of tests on the system (System Readiness tests). If the conditions are not correct for the controller to perform the test e.g. if the engine is too cold, "Not Ready" status will be reported.
-
Page 22: Fastcheck
FastCheck FastCheck Introduction The 'FastCheck' applications allow the service tool to communicate with other system control modules on the vehicle. Connection to the specific system is via either the vehicle's EOBD (J1962) diagnostic socket or by a system specific connector. Refer to the 'Vehicle Application List' to determine the correct cable. -
Page 23: Safety Instructions
FastCheck Safety instructions WARNING: General safety • All operations must be carried out in a well ventilated area away from open flame and heat sources. • Ensure the vehicle is stationary and the handbrake (parking brake) is applied before carrying out any maintenance/diagnostic work. WARNING: Air conditioning safety •... - Page 24 FastCheck WARNING: Electronic Parking Brake (EPB) safety • Ensure that you are fully familiar with the braking system and its operation before commencing any work. • The EPB control system may be required to be deactivated before carrying out any maintenance/diagnostic work on the brake system. This can be done from the service tool menu.
-
Page 25: Fastcheck Abs
FastCheck FastCheck ABS Important information Mercedes vehicles with Sensotronic Brake Control • Ensure that you are fully familiar with the braking system and its operation before commencing any work. • The Sensotronic Brake Control system must be deactivated before carrying out any maintenance/diagnostic work on the brake system. - Page 26 FastCheck CON0017 If using the EOBD (J1962) pin-switchable cable (A2C59512073), ensure the settings on the switch box correspond to the settings listed for the vehicle and system being tested. WARNING: Incorrect settings on the switch box may cause irreparable damage to the vehicle's electrical system.
- Page 27 FastCheck Read DTCs Clear DTCs Select the required menu option using the keys and press to confirm. The service tool will attempt to establish communication with the vehicle system. If communication is unsuccessful, refer to ‘Communication problems’, page Read DTCs If any DTC codes are present in the system, a screen will be displayed informing you how many codes were found.
-
Page 28: Fastcheck Airbag
FastCheck FastCheck Airbag Connection Using the Vehicle Application List on the CD-ROM, identify the required interface cable for the vehicle system to be tested. Connect the cable to the service tool and secure the fixing screws. CON0017 If using the EOBD (J1962) pin-switchable cable (A2C59512073), ensure the settings on the switch box correspond to the settings listed for the vehicle and system being tested. - Page 29 FastCheck • Volvo S80 (99-06) • Volvo XC90 (02-06) Ensure the vehicle's ignition is OFF. Connect the service tool to the required vehicle connector, refer to ‘Diagnostic connector locations’, page 79, for further information. Power for the service tool is provided by the vehicle connector. Once connected, the service tool will perform an internal self test and then the screen will display the version of the current software before displaying the main menu.
- Page 30 FastCheck This indicates that the text can be scrolled using the keys to view the rest of the description. To view the next DTC (if more than 1 was found), scroll to the end of the text and press key. To return to the menu, scroll to the end of the text and press the key.
- Page 31 FastCheck Ford Galaxy (2006 -), Mondeo (2007-), S-Max (2006-), Transit (2006-) Crash Reset This option is necessary on vehicles where airbags have been deployed following a crash. The routine clears the crash flag in the Body Control Module to enable normal operation after repair of the vehicle and installation of a new airbag.
- Page 32 FastCheck Method 2 - Airbag MIL stays ON: After an airbag has been locked the Airbag Malfunction Indicator on the dash panel display will remain on, when the airbag is unlocked the MIL will switch off. Method 3 - Airbag MIL flashes for several seconds when turning the ignition on: After an airbag has been locked the Airbag Malfunction Indicator on the dash panel display will flash for several seconds when the ignition is turned on, when the airbag is unlocked the MIL will switch off.
-
Page 33: Fastcheck Climate
FastCheck FastCheck Climate Connection Using the Vehicle Application List on the CD-ROM, identify the required interface cable for the vehicle system to be tested. Connect the cable to the service tool and secure the fixing screws. CON0017 If using the EOBD (J1962) pin-switchable cable (A2C59512073), ensure the settings on the switch box correspond to the settings listed for the vehicle and system being tested. - Page 34 FastCheck • Volvo S80 (99-06) • Volvo XC90 (02-06) • Volvo S70 (99-00) • Volvo C70 Convertible/Coupe (99-05) Ensure the vehicle's ignition is OFF. Connect the service tool to the required vehicle connector, refer to ‘Diagnostic connector locations’, page 79, for further information. Power for the service tool is provided by the vehicle connector.
- Page 35 FastCheck The fault number is displayed first, followed by the DTC code. If the description text is too long to fit on the display, '[...]' appears in the bottom right corner of the screen. This indicates that the text can be scrolled using the keys to view the rest of the description.
-
Page 36: Fastcheck Epb
FastCheck FastCheck EPB Connection Using the Vehicle Application List, identify the required interface cable for the vehicle system to be tested. Connect the cable to the service tool and secure the fixing screws. CON0017 If using the EOBD (J1962) pin-switchable cable (A2C59512073), ensure the settings on the switch box correspond to the settings listed for the vehicle and system being tested. - Page 37 FastCheck Dependent upon the vehicle manufacturer and model different menu options will then be available. Function such as read and Clear DTCs will be available along with service functions. BMW vehicles Note: To switch the ignition ON for vehicles fitted with a start/stop button, insert the remote key-fob fully into the ignition slot then press the start/stop button once (without any foot pedals depressed).
- Page 38 FastCheck Ford – Electronic Parking Brake (EPB) system Two Electronic Parking Brake systems are currently supported on the service tool: Ford Focus C-Max 2003 - present: There are two test functions available under the calibration section of the EPB menu these are described below.
- Page 39 FastCheck Ford Galaxy (2006-), Mondeo (2007-), S-Max (2006-): There are three options in the PBM/EPB function menu which can be used to access various functions: Service Brakes There are three functions available under the ‘Service Brakes’ menu option: Enter Maintenance Mode This function is used to put the system into a state that enables work to be carried out by the technician.
- Page 40 FastCheck Assembly Check This function is used to check the operation of the parking brake system after any work has been completed on the system. Pre-Test conditions: • The vehicle must be stationary • The vehicle must be on level ground •...
- Page 41 FastCheck Pre-Test conditions: • The operator must NOT be inside the vehicle • The vehicle must be stationary • The vehicle must be on level ground • Ensure the vehicle is not subject to any vibration (closing boot, bonnet, etc.) •...
- Page 42 FastCheck Clutch Replacement (manual transmission): 1. After a new clutch has been installed perform the ‘Clear Clutch Engagement Point’ function. 2. The vehicle will then learn the new clutch engagement point as the vehicle is driven. Parking Brake Module Replacement: 1.
- Page 43 FastCheck Land Rover - Electronic Parking Brake (EPB) System Discovery III (L319) (2005 - 2009), Range Rover Sport (L320) (2005 - 2009), Range Rover (L322) (2006 - 2009): There are four functions available under the PBM/EPB ‘Service Brakes’ menu: Unjam Electronic Parking Brake This procedure should be used if one of the Parking Brake cables becomes detached or breaks whilst the vehicle is being driven.
- Page 44 FastCheck Pre-Test conditions: • The vehicle must be stationary. • The ignition must be on (position II). • An approved battery charger must be connected to ensure consistent power supply. Note: To remove the parking brake from Mounting Position; switch the parking brake switch on and off twice.
- Page 45 FastCheck MANUAL FUNCTIONS The following can be performed manually without the scan tool: Disable Parking Brake for Rear Brake Disc Change This procedure is necessary before carrying out work on the rear brake discs. When performed correctly the brake callipers are wound back by the control module: Manual Routine: •...
- Page 46 FastCheck Note: The electronic parking brake 'Service Bedding-in Procedure mode' will be active for the remainder of the ignition cycle, or until the vehicle speed exceeds 31 mph (50 km/h). If the procedure needs to be re-entered, the entry actions must be repeated.
- Page 47 FastCheck EPB for Audi A4/A5/A6 & VW Passat/Tiguan Select the required option from the Maintenance menu either 'Replace Pads' or 'Service Brakes' then follow described sequence. Brake pad replacement/service sequence The EPB system must be deactivated and completely released and the ignition must be on.
- Page 48 FastCheck Replace the brake pads Make a note of the new pad thickness (3-14mm) it is required for the next stage. The brake pads can now be replaced following the manufacturer’s instructions. Pad thickness The brake pad thickness must now be entered by selecting Pad Thickness from the Replace Pads menu.
- Page 49 FastCheck Volvo - Electronic Parking Brake (EPB) System Volvo S80 (2007 -), V70 (2008 -), XC60 (2009-), XC70 (2008 -) There are three options in the PBM/EPB function menu which can be used to access various functions: There are three functions available under the ‘Service Brakes’ menu option: Enter Service Mode This function is used to put the system into a state that enables work to be carried out by the technician.
- Page 50 FastCheck • The vehicle must be secured with wheel locks. Three internal tests are performed, each will report the status. If any of these tests fail to perform the Read DTCs function to detect the possible fault with the system. This function takes 25 seconds to complete.
-
Page 51: Fastcheck Sas
FastCheck FastCheck SAS Connection Using the Vehicle Application List on the CD-ROM, identify the required interface cable for the vehicle system to be tested. Connect the cable to the service tool and secure the fixing screws. Note: If the vehicle being tested is a BMW with a 20 pin connector and an EOBD (J1962) connector, you must only use the 20 pin connector. - Page 52 FastCheck MAIN MENU EOBD FastCheck ABS FastCheck Airbag FastCheck Climate FastCheck EPB FastCheck SAS FastCheck Service FastCheck TPMS User Menu Use the keys to select the 'FastCheck SAS' application and press confirm the selection. To return to the previous menu, press the key.
- Page 53 FastCheck bottom right corner of the screen. This indicates that the text can be scrolled using the keys to view the rest of the description. To view the next DTC (if more than 1 was found), scroll to the end of the text and press key.
- Page 54 FastCheck Ford vehicles Steering angle sensor calibration Ka II (2008 -): On these vehicles there may be a steering angle sensor calibration routine available on both the ABS/TC/ESP control module and the Power Steering control module. If this is the case the technician should always perform the routine via the Power Steering control module.
-
Page 55: Fastcheck Service
FastCheck FastCheck Service Connection Using the Vehicle Application List on the CD-ROM, identify the required interface cable for the vehicle system to be tested. Connect the cable to the service tool and secure the fixing screws. Note: If the vehicle being tested is a BMW fitted with both a 20 pin connector and an EOBD (J1962) connector, you must only use the 20 pin connector. - Page 56 FastCheck Use the keys to select the 'FastCheck Service' application and press to confirm the selection. To return to the previous menu, press the key. Turn the vehicle's ignition ON. Use the keys to select the vehicle manufacturer and press to confirm the selection.
- Page 57 Alfa Romeo vehicles- Mannesman VDO Dashboard (147 and GT - UK only) For Alfa Romeo vehicles with the Mannesman VDO Dashboard (147 and GT) there is a problem with the Dashboard which causes the 'Number of miles to Service' value to be set to zero when a Service Reset is performed using the service tool.
- Page 58 FastCheck BMW/MINI vehicles Note: To switch the ignition ON for vehicles fitted with a start/stop button, insert the remote key-fob fully into the ignition slot then press the start/stop button once (without any foot pedals depressed). Manufacturer Option 1 Option 2 Service options Digital reset Oil reset...
- Page 59 FastCheck The following table displays possible service options together with the control module used to reset each option. Service option Control module Engine oil Engine (DME/DDE) Particulate filter Engine (DDE) Diesel additive Engine (DDE) Engine (DDE) Front brake pads Dynamic stability control (DSC) Rear brake pads Dynamic stability control (DSC) Micro filter...
- Page 60 FastCheck The estimated distance too or the next service date. The service counter. Note: The vehicle inspection and exhaust emission inspection only display the date of the next service. The service option list is displayed in priority order, with the most urgent first. To reset an option scroll to the required option using the keys.
- Page 61 FastCheck A final confirmation of the new data entered is displayed. Press the key to store the new information. To cancel the correction and return to the service option list press the key. Note: The maximum reset value will be the current value of the selected service option.
- Page 62 FastCheck Applicable vehicles: • BMW 1 series (E81/E87) • BMW 3 series (E90/E91/E92/E93) • BMW 5 series (E60/E61) • BMW 6 series (E63/E64) • BMW 7 series (E65) • BMW X5 (E70) • BMW X6 (E71) Note: The Multiplexer cable (A2C59512985) or the CAN converter (A2C59512664) harness must be used.
- Page 63 FastCheck GM vehicles Service interval reset CAN vehicles - (Astra-H, Corsa-D, Signum, Vectra-C and Zafira-B) For these vehicles the Multiplexer cable (A2C59512985) or the CAN converter cable (A2C59512664) must be used for Service interval reset. This function should be used after a vehicle has been serviced. The vehicle is programmed with the number of miles and days until the next service and the Service indicator light is turned off.
- Page 64 FastCheck 2. ECO service, ECO service flex - For most core European countries the Operator can set the vehicle to either 'ECO Service' (the standard GM service plan which used standard GM values for miles and days until next service) or 'ECO Service Flex' (the values for miles and days until next service are dynamically set by the vehicle’s onboard computers, which monitor how the vehicle is being driven and set the Service Intervals accordingly).
- Page 65 FastCheck Long-Life oil reset CAN Vehicles - (Vectra-C and Signum) For these vehicles the Multiplexer cable (A2C59512985), the EOBD (J1962) cable (A2C59512072) or the CAN converter cable (A2C59512664) can be used for Long- Life Oil Reset. Note: The engine must NOT be running when performing this procedure. This function must be used when an engine oil change has been performed on the vehicle.
- Page 66 FastCheck Mercedes vehicles There are two different types of servicing for Mercedes, Assyst Plus and Flexible Service System. The service type will automatically be determined from the vehicle. Assyst Plus: Note: Any DTCs (Diagnostic trouble codes) present on the Assyst Plus control module may lead to incorrect servicing information and services to be preformed incorrectly.
- Page 67 FastCheck Service Status This function displays the current service status information. Use the keys to scroll through the status information. Press the to exit and return to the Assyst Plus menu. Note: It can take some time for the control unit to update the service status information after a change in state (e.g.
- Page 68 FastCheck Note: Undo is only possible if there is an existing service held within the service memory and the selected service options are applicable to the latest service. Flexible Service System: Select Service Reset and press to confirm the selection. To return to a previous menu, press the key.
- Page 69 FastCheck VAG (Volkswagen and Audi) vehicle Manufacturer Option 1 Option 2 Option 3 Option 4 Option 5 Adaptation - Refer to Variable Service Reset section Service Service Long Life Oil Service Reset N/A Reset Reset Set Oil Type Diesel V6 TDI Petrol Non Long Life Oil...
- Page 70 FastCheck Variable Service Reset (VAG) For some VAG (Audi and VW) vehicles manufactured since 2000, the variable service reset option must be used. Refer to the Vehicle Application List. WARNING: Changing the baseline / learn values of any channel could have adverse effects on engine performance and running.
-
Page 71: Service Reset Adaption Channels And Values
FastCheck Service reset adaption channels and values Model Adaption Adaption channel reset Audi 100 00015 1991 on Service 1 (distance) 00030 Service 1 (time) 00036 Service 2 00073 Audi A8 15000 1994 - 1995 Service 1 (distance) 30000 Service 1 (time) 00365 Service 2 00730... - Page 72 FastCheck Model Adaption Adaption channel reset Lupo 00150 1999 on 00300 00360 Audi A4 00015 1995 - 1998 Service 1 (distance) 00030 Service 1 (time) 00036 Service 2 00073 Audi A4 Oil + Service 00000 1998 on 00010 Service 00001 Audi A3 Oil + Service 00000...
- Page 73 FastCheck...
-
Page 74: Fastcheck Tpms
FastCheck FastCheck TPMS The TPMS (Tyre Pressure Monitoring System) function can be used to re-program tyre valves on vehicles fitted with TPMS valves, refer to the coverage in the table below: Manufacturer Vehicle - Type 1 Vehicle - Type 2 Citroen C5 II Peugeot... - Page 75 FastCheck Follow the on screen instructions which indicate the order the wheels are to be programmed in. The spare wheel is included along with the other wheels, but if this option is not supported by the vehicle, a message will appear after a few seconds to indicate this.
- Page 76 FastCheck Renault (Type 1) This feature allows the user to read and clear faults, view live data, test the TPMS display lights and reprogram the unit via the Command Menu. The Command Menu features are: 1. Program tyre valves - This allows the user to program 1 valve or 4 valves by a.
- Page 77 FastCheck TPMS Trouble shooting If a valve appears to not respond when stimulated with a TPMS Valve Activator Tool, check the following: • The tyre valve is a TPMS valve. • The TPMS activator tool is not pointing directly at the valve stem. The valve stem is metal and will prevent a good RF signal.
- Page 78 FastCheck For vehicles with an iDrive (BMW 5 Series (E60/E61), BMW 7 Series (E65/E66/ E67/E68)): • On iDrive open the menu. • Select ‘Vehicle Settings’. • Select ‘FTM’. • Start the Engine but do NOT start driving. • Select ‘Set Tyre Pressure’. •...
- Page 79 FastCheck For BMW X3 (E83), BMW X5 (E53): • Start the engine but do NOT start driving. • Hold down the button (shown in the diagram below) for approximately 5 seconds, or until the RPA Warning Lamp glows yellow. OM1345 •...
- Page 80 FastCheck When the RPA Warning Lamp is on but the colour is yellow this indicates that the RPA system has failed or is malfunctioning. In this case the system must be diagnosed using a the scan function of the service tool. The RPA reset process is as follows: •...
-
Page 81: Diagnostic Connector Locations
FastCheck Diagnostic connector locations Alfa Romeo J1962 Under the driver’s side dashboard or in the fuse box. CON0019 3-pin Airbag/ABS • Engine compartment – normally centre: 145, 146, 155, GTV/ Spider CON0029 • Engine compartment – normally right: 145, 146, 155, 164, GTV/Spider •... - Page 82 FastCheck 20-pin Engine compartment. round connector J1962 If the vehicle is fitted with a J1962 diagnostic connector, this can usually be located in the driver's footwell behind a cover. CON0019 Note: If the BMW vehicle under test has both the round (20 pin) diagnostic connector and the J1962 (16 pin) connector, the...
- Page 83 FastCheck Citroen J1962 Saxo: - Under dashboard - passenger side. AX (1997), Berlingo: - Under dashboard - driver's side CON0019 C3, C6, C8, Xsara, Picasso, Xantia, Evasion: - Fascia fuse box. C5: - Glove box. C1: - To left of steering column.
- Page 84 FastCheck Fiat J1962 Driver’s side dashboard or in the fuse box with the exception of the Palio/RST where it is in the centre console, under the handbrake. CON0019 3-pin Airbag/ABS • Under dashboard – driver’s side/ passenger glove box: Barchetta, Bravo- Brava, Coupe, Doblo, CON0029 Ducato, Idea, Marea,...
- Page 85 FastCheck GM Vauxhall/ J1962 Corsa C, Astra G, Astra Opel H, Meriva, Vectra B, Zafira A, Zafira B: - Below cover - front of handbrake. Agila, Tigra, Speedster/ CON0019 VX220, Sintra, Vivaro: - Below dashboard - driver’s side. Astra F, Corsa B, Omega B: - Fuse box - passenger compartment.
- Page 86 FastCheck Mercedes 38-pin Engine compartment - Benz round usually along bulkhead, connector but the precise location may vary. Note: For those vehicles which have both the round 38-pin connector and the OBD II connector: • The round 38-pin connector should always be used to retrieve data via the Mercedes application.
- Page 87 FastCheck Mercedes 16-pin Engine compartment - OBD-1 connector usually on the bulkhead block adjacent to the fusebox. 9 10 11 12 13 14 15 16 MG Rover J1962 The diagnostic connector is located in one of three positions: • Behind the 'A' post lower trim panel in the driver’s footwell.
- Page 88 FastCheck Peugeot J1962 106 (1997 on): - Under dashboard - passenger side. 206, 306, 806, Partner (1997 on): - Under dashboard - driver's CON0019 side. 307 (to 2004), 406 (1997 to 2000), 807: - Fascia fuse box. 107: - To left of steering column.
- Page 89 FastCheck Saab J1962 Driver's footwell, under the steering column. CON0019 Seat J1962 Alhambra: - Centre console/ Footwell - Passenger. Arosa: - Fascia - Driver side. Ibiza, Cordoba: - Centre CON0019 console - Driver side. Toledo: - Centre console. Skoda J1962 Favourit, Felicia (1.3), Forman: - Under bonnet - Suspension turret -...
- Page 90 FastCheck 2-pin Engine compartment ISO 9141 relay box. J1962 Bora: - Centre console. Corrado, Passat: - Dashboard - Centre. Golf, Vento: - Dashboard - Centre (remove ashtray). CON0019 Lupo: - Centre console, Storage compartment or Front ashtray. Polo: - Dashboard - RH. Sharan: - Under gear lever cover.
-
Page 91: User Menu
User Menu User Menu Overview USER MENU OBD DTC Lookup Language Menu Tester Setup Self Test Software Version Security CAN Converter iMux Harness Use the keys to select the required function and press to confirm the selection. Note: Press to return to the Main Menu. OBD DTC Lookup This option is used to look up a description of a known DTC. - Page 92 User Menu Tester Setup The tester setup allows you to change the live data units, change the way live data is displayed and adjust the contrast of the screen. 1. Select 'Live Data Units' from the Tester Setup menu. LIVE DATA UNITS Metric Units Imperial Units American Units...
-
Page 93: Security
User Menu 2. Press to confirm selection. 3. Follow on-screen instructions to carry out specified test. 4. Press the key as appropriate, to return to the Self Test Menu. Software Version 1. Once selected, the ContiSys OBD version number appears on the screen before displaying a list all software modules, including version numbers, currently loaded onto the service tool. -
Page 94: Can Converter (Firmware Update)
User Menu 6. Restart the ContiSys OBD either by disconnecting and reconnecting the power supply or by pressing the outer 4 buttons on the handset at the same time. Note: button displays on-screen instructions. The button may be used to cancel the operation and the original key will be retained. -
Page 95: Imux Harness (Firmware Update)
User Menu iMUX Harness (Firmware update) The iMux harness option allows you to check and update the multiplexer cable (A2C59512985) firmware. IMUX HARNESS Get FW Version Update FW Version Note: The multiplexer cable (A2C59512985) must be connected to service tool before this user menu option can be used. -
Page 96: General Information
General information General information Cleaning To maintain the condition and serviceability of the service tool, it is advisable to follow the cleaning procedures below: WARNING: Do not use solvents such as petroleum based cleaning agents, acetone, petrol, trichlorethylene etc. These types of harsh solvent may seriously damage the plastic casing. -
Page 97: Specification
General information Specification ContiSys OBD complies with ISO/DIS 15031 Part 4 as an EOBD service tool. Voltage requirements - 8.0 volts to 16.0 volts DC Current requirement - 750mA max. Display - 20 characters by 4 lines LCD with LED back light Operating Temperature range - 0°C to 50°C Declaration of Conformity The ContiSys OBD is CE marked and complies with the following directives:... -
Page 98: Appendix A: Glossary
Appendix A: Glossary Glossary Glossary of terms Term Description J1962 The SAE standard that defines the 16-pin connector used for EOBD anti-lock brake system air conditioning air cleaner secondary air injection automatic transmission or transaxle accelerator pedal battery positive voltage BARO barometric pressure charge air cooler... - Page 99 Appendix A: Glossary EEPROM electrically erasable programmable read only memory early fuel evaporation exhaust gas re-circulation EGRT EGR temperature electronic ignition engine modification EOBD European On-Board Diagnostics EPROM erasable programmable read only memory EVAP evaporative emission system fan control FEEPROM flash electrically erasable programmable read only memory flexible fuel fuel pump...
- Page 100 Appendix A: Glossary KOEO key on, engine off KOER key on, engine running knock sensor knock sensor module long term fuel trim mass airflow sensor manifold absolute pressure sensor mixture control manifold differential pressure multi-port fuel injection malfunction indicator lamp miles per hour manifold surface temperature manifold vacuum zone...
- Page 101 Appendix A: Glossary supercharger bypass sensing diagnostic mode sequential fuel injection service reminder indicator system readiness test short term fuel trim throttle body throttle body injection turbocharger torque converter clutch transmission or transaxle control module throttle fluid pressure throttle position throttle position sensor thermal vacuum valve three way catalyst...
-
Page 102: Appendix B: Cables
Appendix B: Cables Cables Cable identification ContiSys OBD - Cables CON0020 A2C59512072 - EOBD connecting cable 1 12 CON0021 A2C59512073 - EOBD multiplex cable CON0097 A2C59512076 - Updater cable... - Page 103 Appendix B: Cables ContiSys OBD professional - Cables CON0099 A2C5951985 - Multiplexer cable CON0100 A2C59513377 - Updater dongle...
- Page 104 Appendix B: Cables Optional cables CON0022 A2C59512060 – VAG OBD cable CON0023 A2C59512061 – PSA OBD cable CON0077 A2C59512065 – Mercedes sprinter cable...
- Page 105 Appendix B: Cables CON0078 A2C59512066 – Mercedes OBD cable CON0024 A2C59512067 – BMW OBD cable CON0025 A2C59512069 - Fiat/Alfa/Lancia OBD cable...
- Page 106 Appendix B: Cables Optional cables - ContiSys OBD only CON0026 A2C59512070 - Fiat/Alfa/Lancia LS CAN cable CON0027 A2C59512664 - Fast CAN cable...
- Page 107 Appendix B: Cables Cable part number cross reference table Description VDO Part No. ATE Long Part ATE Short Part No. ContiSys OBD kit A2C59512059 03.9301-2000.4 782000 ContiSys OBD Professional kit A2C59513375 03.9301-2002.4 782002 Accessories - ContiSys OBD and OBD Professional...
-
Page 108: Appendix C: Manufacturer Compatibility
Appendix C: Manufacturer Compatibility Manufacturer Compatibility EOBD Application The service tool can communicate with any EOBD compliant vehicle fitted with a J1962 diagnostic socket. The following should be used as a guide. • All petrol engine vehicles manufactured since 2000. •... -
Page 109: Appendix D: Manual Service Reset
Appendix D: Manual service reset Manual service reset Service Reminder Indicator (SRI) On some older vehicles it is not possible to reset the SRI by using the service tool. The manufacturers of these vehicles generally have bespoke service reset tools specifically for this task. -
Page 110: Audi
Appendix D: Manual service reset Audi Audi A4 and A6 (1995 - 1999) UNLEADED FUEL ONLY 18.8°F PRN 432 CON0035 1. With the ignition switch in the OFF position, press and hold button A whilst turning the key to the ON position. 2. -
Page 111: Bmw
Appendix D: Manual service reset BMW 3 Series (E46), BMW 7 Series (E38), BMW 5 Series (E39) and BMW X5 (E53) BMW X3 (E83) and BMW Z4 (E85) CON0073 Button A arrowed in illustrations The Service Interval Display (SIA) can be reset using the reset button for the trip distance recorder on the instrument cluster Note: The distance-based inspection can only be reset if approximately 10 litres of fuel... -
Page 112: Citroen
Appendix D: Manual service reset do include time-based inspection then the time-based inspection status will be shown. 7. The display will now indicate the remaining time to service. If the remaining time is displayed with 'rSt' then the service interval can be reset. 8. - Page 113 Appendix D: Manual service reset Berlingo 2002 onwards km/h CON0049 1. Switch ignition OFF. 2. Press and hold button A. 3. Switch ignition ON. 4. Keep button depressed for 10 seconds. The display will now read '0' and the spanner icon will extinguish. CON0042 1.
- Page 114 Appendix D: Manual service reset CON0045 1. Switch ignition OFF. 2. Press and hold button A. 3. Switch ignition ON. 4. Keep button depressed for 10 seconds. The display will now read '0' and the spanner icon will extinguish. STOP + / - CON0047 1.
- Page 115 Appendix D: Manual service reset Dispatch/Jumpy CON0046 1. Switch ignition OFF. 2. Press and hold button A. 3. Switch ignition ON. 4. Keep button depressed for 10 seconds. The display will now read '0' and the spanner icon will extinguish. Relay II/Jumper II (2002 onwards) rpm x 100 CON0050...
- Page 116 Appendix D: Manual service reset Saxo CON0041 1. Switch ignition OFF. 2. Press and hold button A. 3. Switch ignition ON. 4. Keep button depressed for 10 seconds. The display will now read '0' and the spanner icon will extinguish. Synergie/Evasion CON0046 1.
- Page 117 Appendix D: Manual service reset Xantia CON0076 1. Switch ignition OFF. 2. Press and hold button A. 3. Switch ignition ON. 4. Keep button depressed. The spanner icon and the service interval will illuminate for 5 seconds, then extinguish. Xsara (1997 - 2000) CON0043 1.
- Page 118 Appendix D: Manual service reset Xsara (2000 onwards) CON0043 1. Switch ignition OFF. 2. Press and hold button A. 3. Switch ignition ON. 4. Keep button depressed for 10 seconds. The display will now read '0' and the spanner icon will extinguish. Xsara Picasso CON0044 1.
-
Page 119: Fiat
Appendix D: Manual service reset Fiat (1994 - 2000) CON0069 1. Turn the ignition key to OFF. 2. Press button A and keep it pressed. 3. Turn the ignition key to ON. 4. Keep button A pressed for about 10 seconds. 5. -
Page 120: Ford
Appendix D: Manual service reset Ford Transit (2000) To turn out the Service light (spanner symbol) perform the following steps: 1. Turn the ignition key to OFF. 2. Hold down the brake pedal and the accelerator pedal. 3. Turn the ignition key to ON, while still holding the two pedals down. 4. -
Page 121: Gm Vauxhall/Opel
Appendix D: Manual service reset GM Vauxhall/Opel Omega-B, Vectra-B 1999 onwards CON0072 1. Switch ignition OFF. 2. Press and hold button A. 3. Switch ignition ON. 4. Keep button depressed until three dashes are displayed '---'. 5. Switch ignition OFF to check the service request has been cleared. -
Page 122: Lancia
Appendix D: Manual service reset Lancia (1994 - 2000) CON0069 1. Turn the ignition key to OFF. 2. Press button A and keep it pressed. 3. Turn the ignition key to ON. 4. Keep button A pressed for about 10 seconds. 5. -
Page 123: Land Rover
Appendix D: Manual service reset Land Rover Range Rover III 2002 onwards (all except Japan and NAS) CON0071 1. Switch ignition OFF. 2. Press and hold button A. 3. Keep button depressed and switch the ignition to position I. 4. Keep button depressed for 5 seconds, until the 'SIA RESET' appears. 5. -
Page 124: Mercedes
Appendix D: Manual service reset Mercedes Mercedes (1998 - 2007) With the Flexible Service System and multi-function steering wheel controls 1. Switch ignition ON. 2. Use buttons to scroll through the multi-function display until the trip odometer and main odometer readings are displayed, or in the case of a separate main odometer display, scroll until the exterior temperature is displayed. -
Page 125: Peugeot
Appendix D: Manual service reset Peugeot CON0051 1. Switch ignition OFF. 2. Press and hold button A. 3. Switch ignition ON. 4. Keep button depressed for 10 seconds. The display will now read '0' and the spanner icon will extinguish. km/h CON0052 1. - Page 126 Appendix D: Manual service reset CON0053 1. Switch ignition OFF. 2. Press and hold button A. 3. Switch ignition ON. 4. Keep button depressed for 10 seconds. The display will now read '0' and the spanner icon will extinguish. STOP km/h CON0054 1.
- Page 127 Appendix D: Manual service reset km/h CON0055 1. Switch ignition OFF. 2. Press and hold button A. 3. Switch ignition ON. 4. Keep button depressed for 10 seconds. The display will now read '0' and the spanner icon will extinguish. km/h CON0056 1.
- Page 128 Appendix D: Manual service reset CON0057 1. Switch ignition OFF. 2. Press and hold button A. 3. Switch ignition ON. 4. Keep button depressed for 10 seconds. The display will now read '0' and the spanner icon will extinguish. STOP + / - CON0058 1.
- Page 129 Appendix D: Manual service reset Boxer II 2002 onwards rpm x 100 CON0061 1. Switch ignition OFF. 2. Press and hold button A. 3. Switch ignition ON. 4. Keep button depressed for 10 seconds. The display will now read '0' and the spanner icon will extinguish. Expert CON0057 1.
- Page 130 Appendix D: Manual service reset Partner 1999 - 2002 km/h CON0059 1. Switch ignition OFF. 2. Press and hold button A. 3. Switch ignition ON. 4. Keep button depressed for 10 seconds. The display will now read '0' and the spanner icon will extinguish. Partner 2002 onwards km/h CON0060...
-
Page 131: Renault
Appendix D: Manual service reset Renault Oil level km/h CON0062 The lamp illustrated is an oil level low warning indicator and not a service interval indicator. When the engine oil is at the correct level, this lamp will automatically extinguish. Malfunction Indicator Lamp (MIL) km/h SERV... - Page 132 Appendix D: Manual service reset Clio III (models with trip computer; 2006 onwards) Scenic II (models with trip computer; 2003 onwards) CON0074 1. Switch ignition ON. 2. Press and release display reset button A or B on the tip of the wiper lever until the 'Distance Before Next' service information is displayed.
- Page 133 Appendix D: Manual service reset Laguna II (2001 onwards) CON0066 1. Switch ignition ON. 2. Repeatedly press reset button A until spanner icon flashes and the distance remaining until the next service appears in the odometer display. 3. Press and hold button B until the display has flashed 8 times. 4.
- Page 134 Appendix D: Manual service reset Safrane CON0068 1. Press and hold button A. 2. Switch ignition ON. 3. Continue to depress the button until the spanner icon stops flashing and remains illuminated. The indicator will show the appropriate service interval (e.g. 6000 miles/10000 km).
-
Page 135: Smart
Appendix D: Manual service reset Smart Roadster Service Type Symbol Service A One Spanner Displayed Service B Two Spanners Displayed CON0070 1. Turn the ignition ON and within 4 seconds select the service interval display by pressing button A on the top of the instrument cluster (repeatedly until the service interval is displayed). -
Page 136: Volkswagen
Appendix D: Manual service reset Volkswagen Cabrio, Golf III, GTi, Jetta III (1993 - 1995) and Jetta (1996) One of four service codes may be displayed on instrument panel according to distance travelled. Each service code displayed determines the type or level of maintenance required. -
Page 137: Volvo
Appendix D: Manual service reset Volvo Volvo 240 (1986 - 1989) km/h SER- PARKING BRAKE VICE CON0038 Reach behind the instrument panel and push the lever located between the tachometer and the speedometer. Volvo 240 (1990 - 1993) km/h 005000 CON0039 1. - Page 138 Appendix D: Manual service reset Volvo 740 (1986 - 1988) 005000 km/h ser- vice CON0037 Reach behind the instrument panel and push the button located to the left of the speedometer. Volvo 740 (1989 - 1992) km/h 005000 CON0039 1. Remove the plug from the face of the instrument panel between the clock and the speedometer.
- Page 139 Appendix D: Manual service reset Volvo 760 (1986 - 1990) km/h 005000 CON0039 1. Remove the plug from the face of the instrument panel between the clock and the speedometer. 2. Insert a thin-bladed tool into the cavity and press the reset button. Volvo 780 (1988 - 1990) 005000 km/h...
- Page 140 Appendix D: Manual service reset Volvo 850 (1993 - 1995) fitted with the Yazaki instrument panel Note: This instrument panel has the odometer located above the speedometer needle. km/h 005000 CON0039 1. Remove the plug from the face of the instrument panel between the clock and the speedometer.
- Page 141 Appendix D: Manual service reset Volvo 850 (1993 - 1995) fitted with the VDO instrument panel Note: This instrument panel has the odometer located below the speedometer needle. 1. With the ignition switch in the ON position and the engine not running.
- Page 142 Appendix D: Manual service reset Volvo 940 (1991 - 1995) km/h 005000 CON0039 1. Remove the plug from the face of the instrument panel between the clock and the speedometer. 2. Insert a thin-bladed tool into the cavity and press the reset button. Volvo 960 (1991 - 1995) km/h 005000...
Need help?
Do you have a question about the CONTISYS OBD - V3.0 and is the answer not in the manual?
Questions and answers