Advertisement
Quick Links
WARRANTY
DO NOT RETURN YOUR PRODUCT TO THE STORE. PLEASE CONTACT
BABY TREND® FOR REPLACEMENT PARTS, SERVICE AND REPAIR.
The Baby Trend® warranty covers workmanship defects within 1 year of purchase. Any
product which has been subjected to misuse, abuse, abnormal use, excessive wear and
tear, improper assembly, negligence, environmental exposure, alteration or accident, or has
had its serial number altered or removed invalidates all claims against the manufacturer. Any
damage to property during installation is the sole responsibility of the end user.
Customer Service Department can be contacted at 1 (800) 328-7363 Monday through Friday
between 8:00 a.m. and 4:30 p.m. (PST). Return Authorizations are required prior to returning
product(s) to Baby Trend®. Please visit http://babytrend.com/pages/limited-warranty
for complete warranty details.
GARANTIA
NO DEVUELVA SU PRODUCTO A LA TIENDA. POR FAVOR CONTACTE A
BABY TREND® PARA PIEZAS DE REPUESTO, SERVICIO Y REPARACION.
La garantía de Baby Trend® cubre defectos de fábrica por 1 año después de la compra.
Cualquier producto que haya sido sometido a uso inadecuado, abuso, uso anormal,
desgaste excesivo, montaje incorrecto, negligencia, exposición ambiental, alteración o
accidente, o cuyo número de serie haya sido alterado o removido, anula todos los reclamos
contra el fabricante. Cualquier daño a la propiedad durante la instalación es la exclusiva
responsabilidad del usuario final. El Departamento de Servicio al Cliente está disponible
llamando al 1 (800) 328-7363, de lunes a viernes de 8:00 a. m. a 4:30 p. m. (PST). Se
requiere una Autorización de Devolución antes de poder devolver el o los productos a
Baby Trend®. Visite http://babytrend.com/pages/limited-warranty
para conocer todos los detalles de la garantía.
Baby Trend, Inc.
13048 Valley Blvd.
Fontana CA 92335
1-800-328-7363
(8:00am ~ 4:30pm PST)
www.babytrend.com
Read all instructions BEFORE assembly and USE of product.
KEEP INSTRUCTIONS FOR FUTURE USE.
Lea todas las instrucciones ANTES de armar y USAR el producto.
CONSERVE LAS INSTRUCCIONES PARA USO FUTURO.
PY86XXXC
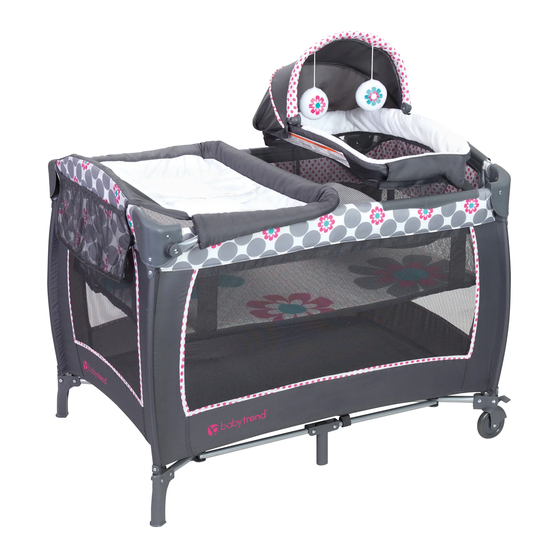
Lil' Snooze™ Deluxe II Nursery Center Playard
Instruction Manual
Manual de Instrucciones
*Toys may vary
*Los juguetes pueden variar
PY86xxxC_2L_030122.3_CL
Advertisement

Related Manuals for BABYTREND Lil' Snooze Deluxe II Nursery Center Playard


Summary of Contents for BABYTREND Lil' Snooze Deluxe II Nursery Center Playard
- Page 1 Customer Service Department can be contacted at 1 (800) 328-7363 Monday through Friday between 8:00 a.m. and 4:30 p.m. (PST). Return Authorizations are required prior to returning product(s) to Baby Trend®. Please visit http://babytrend.com/pages/limited-warranty for complete warranty details. GARANTIA NO DEVUELVA SU PRODUCTO A LA TIENDA.
- Page 2 WARNING WARNING Playard Warnings WARNING: STRANGULATION HAZARD WARNING: WARNING: NEVER LEAVE INFANT IN PRODUCT WITH Failure to follow the instructions SIDES DOWN. Infant may roll into space between pad could result in serious injury or death. Make sure and loose mesh side causing suffocation. latches are secure.
- Page 3 WARNING ADVERTENCIA • ALWAYS ensure that the playard, changing table, and Advertencia del Corralito napper are safe by checking regularly, before placing the ADVERTENCIA: La inobservancia de las child in it, that every part is properly secured in place. advertencias e instrucciones podría causar lesiones •...
- Page 4 ADVERTENCIA ADVERTENCIA • NUNCA use bolsas de plástico para transporte u ADVERTENCIA: Vea el piso del parque otras envolturas plásticas para cubrir el colchón no para bebés y las barras laterales para mensajes de diseñadas o comercializadas para ese fin. Pueden advertencia.
- Page 5 PARTS PIEZAS ASSEMBLY MONTAJE Check the parts to make sure you have all the parts for this model before IMPORTANT ! To ensure safe operation of your product, assembling the playard. please follow these instructions carefully. Please keep these Revise la lista de piezas para asegurarse de que tiene todas las piezas para este instructions for future reference.
- Page 6 ASSEMBLY MONTAJE ASSEMBLY MONTAJE TO ASSEMBLE PLAYARD 2) • Top rails must be fully erected before lowering center. Pull up one rail at a time, hold one hand ARMADO DEL CORRALITO on each side of the rail and pull up sharply, do not pull from the middle where the center latch release is located, make sure both tubes latch in place and each rail is rigid (Fig.
- Page 7 ASSEMBLY MONTAJE ASSEMBLY MONTAJE 4) • Place the Mattress on the floor of 3) • Once all four (4) top rails are locked in place, push down on the center handle (Fig. 3a). The the Playard with the padded side center mechanism automatically locks facing up (Fig.
- Page 8 ASSEMBLY MONTAJE ASSEMBLY MONTAJE FOLDING PLAYARD 8) • Locate the rail latch release in the center and bottom side of each rail. Squeeze the CÓMO PLEGAR EL CORRALITO Center latch lever with two hands until the rail releases Sujetador central the two tubes (Fig.
- Page 9 ASSEMBLY MONTAJE WARNING 9) • Gather four (4) corners and center all together ACCESSORIES tightly (Fig. 9). Wrap Mattress around Playard Full-Size Bassinet & Cradles Warnings: frame with padded side facing inward. WARNING: • Junte las cuatro (4) esquinas y el centro Failure to follow these warnings and con firmeza (Fig.
- Page 10 WARNING ADVERTENCIA • The playard, including side rails, must be fully erected prior ACCESSORIOS to use. Make sure each latch is secure. Advertencias de moisés y la cuna de tamaño completo : • NEVER leave the bassinet in place when child is in playard. ADVERTENCIA: •...
- Page 11 ADVERTENCIA ASSEMBLY MONTAJE totalmente erguidos antes de usar. Asegúrese de que las TO ASSEMBLE THE FULL-SIZE BASSINET trabas estén firmes. CÓMO ARMAR LA CUNA DE TAMAÑO COMPLETO • NUNCA deje la cuna armada cuando el niño esté dentro del corralito. •...
- Page 12 ASSEMBLY MONTAJE WARNING • Position the Bassinet over and ACCESSORIES down into the fully assembled Changing Table: Playard. Secure in place by pushing down firmly on each plastic support clip until all are WARNING FALL HAZARD: Children have snapped into place (Fig. 12). suffered serious injuries after falling from changing •...
- Page 13 ADVERTENCIA ASSEMBLY MONTAJE ACCESSORIOS TO ASSEMBLE CHANGING TABLE ARMADO DEL ORGANIZADOR PARA PADRES El Cambiador: ADVERTENCIA- PELIGRO DE CAÍDA: Los niños han sufrido lesiones graves como consecuencia de haberse caído de mesas para cambiar bebés. Las caídas pueden ocurrir rápidamente. 2 Long Curved Bars 2 Short Bar with Connector Knobs 1 Changing Table...
- Page 14 ASSEMBLY MONTAJE ASSEMBLY MONTAJE • Connect the two (2) Short Bars to • Flip Changing Table over onto Playard each end of the Long Curved Bar (Fig. 15c). (Fig. 14c). Make sure that the knobs • Snap the two (2) buttons on the flap down are both facing down and the same direction on each end (Fig.
- Page 15 ASSEMBLY MONTAJE ASSEMBLY MONTAJE 17) • Flip the changing table into its upper TO USE THE CHANGING TABLE RESTRAINT SYSTEM position (Fig. 17). PARA USAR EL SISTEMA DE RESTRICCIÓN DEL CAMBIADOR • Lanzar la mesa cambiadora en la posicion de arriba (Fig. 17). 19) •...
- Page 16 ASSEMBLY MONTAJE ASSEMBLY MONTAJE TO REMOVE THE CHANGING TABLE SIDE POCKET ORGANIZER PARA RETIRAR EL CAMBIADOR ORGANIZADOR DE BOLSILLOS LATERALES WARNING: Do not place hot liquids or more 20) • Flip Changing Table to the outside of the Playard. Unsnap fabric flap of the than 2 pounds in the Side Pocket Organizer.
- Page 17 WARNING ADVERTENCIA WARNING ADVERTENCIA • NEVER place extra padding under or beside infant when ACCESSORIES trapped between product and adjacent surfaces. Napper and Inclined Sleepers: • ONLY use in playard when it is securely attached. WARNING: • NEVER use napper in different product. If a sheet is used with the pad, •...
- Page 18 ASSEMBLY MONTAJE WARNING ADVERTENCIA • Pesa más de 12 libras (5,44 kg) (aproximadamente de 3 ATTENTION: Playard and Full-size bassinet must be fully assembled and securely locked before installing or using the napper or inclined sleeper feature meses) o supera las 22 pulgadas (55.88 cm) de alto, lo (See To Assemble Playard and Full-size bassinet sections).
- Page 19 ASSEMBLY MONTAJE ASSEMBLY MONTAJE • Pull the top napper fabric flap down and • Insert and slide the left napper make sure the flap is secured (Fig. 23b). frame bar into the left sleeve of the napper frabric (Fig. 22b). Make sure the bar is curved upwards •...
- Page 20 ASSEMBLY MONTAJE WARNING 25) • To attach the napper in the playard, slide ACCESSORIES the napper into the bassinet. Push the Warnings for Toy Accessories including Toy bar/Mobile napper into the playard until it locks Canopy with toys (Fig. 25). NOTE: DO NOT use napper on playard without the bassinet (See To Assemble WARNING:...
- Page 21 ADVERTENCIA ASSEMBLY MONTAJE ACCESSORIOS TO ASSEMBLE CANOPY CÓMO MONTAR LA CUBIERTA Advertencias Accesorios de juguete, incluyendo Barra de juguetes /Móvil / Cubierta con juguetes: Canopy ADVERTENCIA: 27) • Push down on the ends of the toy bar Cubierta to secure it onto the top of the napper •...
- Page 22 MAINTENANCE MANTENIMIENTO MAINTENANCE AND CLEANING INSTRUCTIONS: Use only household mild soap and warm water. DO NOT USE BLEACH. DO NOT MACHINE WASH. INSTRUCCIONES DE LIMPIEZA Y MANTENIMIENTO: Utilice sólo jabón suave y agua tibia. NO USE BLANQUEADOR. ® BABY TREND CUSTOMER SERVICE NO LAVE A MÁQUINA.
Need help?
Do you have a question about the Lil' Snooze Deluxe II Nursery Center Playard and is the answer not in the manual?
Questions and answers