
Related Manuals for Westinghouse WLE525WB


Summary of Contents for Westinghouse WLE525WB
- Page 1 USER MANUAL 540MM UPRIGHT COOKERS WLE522WA, WLE525WA, WLE527WA, WLE533WA WLE535WA, WLE537WA, WLE547WA, WLG503WB WLE535WB, WLE525WB, WLG505WB, WLG517WB...
-
Page 2: Table Of Contents
CONGRATULATIONS CONTENTS Congratulations and thank you for choosing our Westinghouse Important safety instructions �������������������������������������������������������������������3 upright cooker� We are sure you will find your new appliance Installation ���������������������������������������������������������������������������������������������������������5 a pleasure to use and a great asset to your cooking� Before Operating for the first time ��������������������������������������������������������������������� 13 you use the appliance, we recommend that you read through Installing oven accessories ������������������������������������������������������������������������6... -
Page 3: Important Safety Instructions
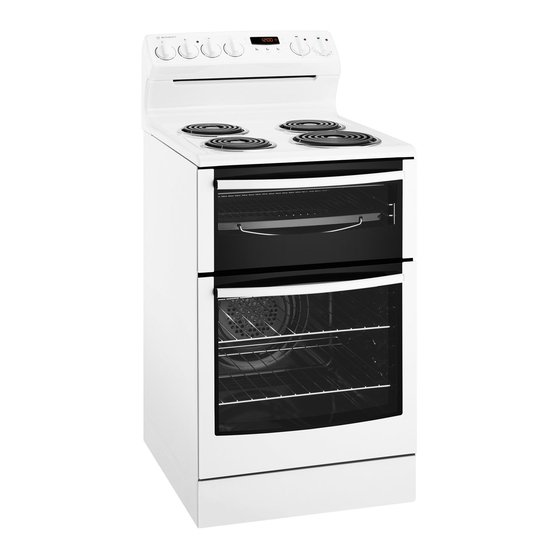
Products must be used, installed and operated in accordance with this manual. Placing thick portions of food under grill can be a fire You may not be able to claim on the Westinghouse hazard� manufacturer’s warranty in the event that your product DO NOT cover the grill dish insert with foil�... - Page 4 GENERAL APPLIANCE DESCRIPTION Do not store items on the cooking surface, to avoid a fire� Unattended cooking on a hob with fat or oil can be dangerous and may result in a fire� Electric Separate Grill Oven depicted� Control panel Removable spill tray (radiant hotplate models only)
-
Page 5: Operating For The First Time
INSTALLATION Location Stabilising bolt This appliance must not be placed on a base� This appliance must not be installed behind a decorative door� The appliance has been designed to fit a 550mm gap in kitchen cabinetry or have free space on either side� Ensure the top of the hotplate is at least 10mm higher than the level of the Stability benchtop�... -
Page 6: Installing Oven Accessories
INSTALLATION Replacing the oven light WARNING WARNING Ensure the appliance is switched off at power supply (not just the control knobs) before replacing the light globe to avoid possibility of electric shock. Turn oven light glass anti-clockwise to remove it for globe replacement A special high temperature resistant globe should be used�... -
Page 7: Using The Gas Cooker
Removing the oven door 4� Lift the door slightly and evenly while continuing to slowly close the door� (to be done by qualified personnel only) 1� With door fully open, rotate the two stirrups to its rest position� Stirrup 5� Remove the door by lowering gently and pull away from the frame of the oven�... - Page 8 installation INSTALLATION Replacing the oven door (to be done by qualified personnel only) 1� Hold door with both hands� Procedure to assemble the door 2� Locate both hinges into the frame slots at the Procedure to assemble the door (to be done by qualified personnel only). to be done by personnel only) same time�...
-
Page 9: Using The Electric Cooker
Service fuse location – Models with power point only WARNING IMPORTANT This product is fitted with a power outlet at each end of the Before you cook in your new oven it is important that the control panel� The outlets are protected by a replaceable 15 protective oils used in the manufacture of the product be amp fuse located at the rear of the product�... - Page 10 INSTALLATION Gas requirements The burner crowns, burner caps and trivets can be fitted to the hob� This appliance must be installed by an authorised person, The regulator or test point fitting installation is described in the according to all codes and regulations of: front of the manual with UNPACKING�...
-
Page 11: Button Programmable Clock
Wiring connection for gas cooker Operation on universal LPG/propane To allow for disconnection of the appliance after installation, 1� The appliance inlet fitting provided MUST be orientated the plug must be accessible after installation� so that the pressure nipple is accessible� If the supply cord is damaged, it must be replaced by the 2�... -
Page 12: General Hints And Tips
INSTALLATION Checking the gas supply Testing Burner Performance 1� Check the manometer zero point is correct� • Observe the flame appearance on each burner when set to max� If it is smaller or larger than expected, then the 2� Connect the manometer to the cooker pressure test point� injector size needs checking (refer to table)�... -
Page 13: Cleaning The Cooker
OPERATING FOR THE FIRST TIME Choosing utensils for electric hotplates Refer to the diagram below� GOOD (recessed base) (convex base) (undersize) (oversize) (moisture on hotplate) (no utensil) (recessed base) (convex base) (undersize) (oversize) (moisture on hotplate) (no utensil) Before operating first time... - Page 14 INSTALLING OVEN ACCESSORIES Fitting the grill dish supports FITTING OVEN SHELVES • Insert the rear hook into the rear hole� 1� Ensure shelf orientation is correct (refer to diagram below)� • Align the front peg to the front hole and push in firmly� 2�...
- Page 15 USING THE GAS COOKER Gas oven features and descriptions Gas oven conventional baking WLG503WBNG/WLG503WBLP The heat comes from the bottom oven burner� The temperature at the centre of the oven is the same temperature set on the control knob� When oven is used on this mode, shelf position is important, (refer to ‘Oven Guide’)�...
-
Page 16: Getting To Know Your Oven
USING THE GAS COOKER Gas hotplate turn anticlockwise to ‘HI’ position� The flame sensor must warm-up in order for the flame to stay alight� Ensure burner caps, crowns and trivets are properly assembled� The knob may be released once the flame is established, and For wok ONLY use the trivet and burner dedicated for turned further anticlockwise to reduce the flame height as desired�... -
Page 17: Oven Guide
USING THE ELECTRIC COOKER ELECTRIC OVEN FEATURES AND DESCRIPTIONS 1� Radiant/Solid/Ceramic Hotplate Control Knob – sets hotplate temperature� Grill in Oven Models 2� Hotplate Indicator Light – comes on when a hotplate WLE522WA control knob is operated� 3� Grill/Oven Function Control Knob – sets grill or oven function�... -
Page 18: Trouble Shooting
USING THE ELECTRIC COOKER Radiant hotplates Electric oven conventional baking The high-speed radiant hotplates heat rapidly from a cold Heat comes from two elements, one above and one below start� This saves power� the food� The bottom element is hidden below the floor of the oven�... - Page 19 3 BUTTON PROGRAMMABLE CLOCK 3� Press MODE button until the end time ‘indicator’ Your oven is equipped with a 3 button timer that has begins flashing� the following features: 4� Enter the time of day you want to finish cooking by •...
-
Page 20: Installation
GENERAL HINTS AND TIPS Fan Forced WARNING CAUTION • Make sure shelves are evenly spaced� • When baking more than one dish in fan forced oven, place Using the grill dishes centrally on shelves rather than several dishes on one shelf�... -
Page 21: Replacing The Oven Light
CLEANING THE COOKER Ceramic hotplates Ovens and hotplates are made from steel and enamel� Do not use abrasives and harsh scourers as they may scratch Remove all spilt food with a razor blade scraper while the the surface� hotplate is still warm – NOT HOT� •... - Page 22 GENERAL HINTS AND TIPS Cleaning the oven door • To remove the top trim, press the ribbed release clips at Cool air circulates through the door to lower the surface each end and lift top trim away from the door� temperature on the outside of the oven door�...
-
Page 23: Service Fuse
Re-Assembling the oven door inner glass • Replace the top trim ensuring the clips snap back into position� • Fully open the door, rotate the stirrups back to their original position and close the door� • When replacing the door inner glass, make sure the black dot is positioned as shown in the image (where applicable)�... - Page 24 GETTING TO KNOW YOUR OVEN Getting to know your new oven with this simple Method: ‘Test Cake’ 1� Butter base and sides of two, 20cm straight-sided round or square cake pans� Then line the base with grease proof When baking, it is normal to experience some slight variation paper or baking paper�...
- Page 25 OVEN GUIDE The following is intended as a guide� Cooking variation is natural and to be expected� You should experiment with times, temperatures and recipes to obtain the best results to your own taste� Get to know your oven before making a service call� Where the gas models vary from the electric models, details for gas cooking is shown in brackets�...
- Page 26 TROUBLE SHOOTING PROBLEM CAUSES WHAT TO DO Uneven cooking Incorrect shelf position Select shelf that puts food in centre of oven Oven tray too large Try other trays or dishes Trays not in centre Put trays in centre Air flow in oven uneven Rotate food during cooking Grill tray affecting thermostat Remove grill tray from oven on bake modes...
- Page 27 TROUBLE SHOOTING If you have a problem with your appliance check the following before you ring the service line� PROBLEM WHAT TO DO Operational problems Check the electricity is turned on Check your fuses� If the fuse continues to blow, call the Service Centre i�e�...
- Page 28 NOTES NOTES...
- Page 29 NOTES NOTES...
- Page 30 NOTES NOTES...
-
Page 31: Warranty
(c) ‘ASC’ means Electrolux’s authorised serviced centres; the Appliance; (d) ‘Westinghouse’ is the brand controlled by Electrolux Home Products In addition, Electrolux is not liable under this warranty if: Pty Ltd of 163 O’Riordan Street, Mascot NSW 2020, ABN 51 004... - Page 32 Top Service encompasses the after sales service provided by The Electrolux Group to consumers including delivery, home service and spare parts� and WESTINGHOUSE are trademarks of Westinghouse Electric Corporation� Used under license� All Rights Reserved� P/No: A03786002 Rev: D ECN No�:115057 ©...
Need help?
Do you have a question about the WLE525WB and is the answer not in the manual?
Questions and answers