Advertisement
Table of Contents
- 1 Table of Contents
- 2 Important Safety Instructions
- 3 Understanding the Cooker
- 4 Installation
- 5 Controls
- 6 Using the Hotplates
- 7 Understanding the Functions
- 8 Cooking Guide for Ovens
- 9 Get to Know Your Oven
- 10 Handling Baking & Grilling Problems
- 11 Operating the 3 Button Programmable Clock
- 12 Operating the 120 Minute Mechanical Ringer Timer
- 13 Cleaning and Caring for the Cooker
- 14 Cleaning and Caring for the Oven
- 15 Problem Solving
- 16 Warranty
- Download this manual
USER MANUAL
Enjoy peace of mind.
Register your appliance today.
Stay updated on better living services, safety notices and
shop for accessories.
1. Open the camera app on your smartphone and
point at the QR code to scan
Product Registration QR code is located on the
front of your appliance or inside the door rim*.
2. Tap the notification or link to open the registration form
3. Complete your details and enjoy peace of mind
*Exact location of QR code may vary depending on oven model
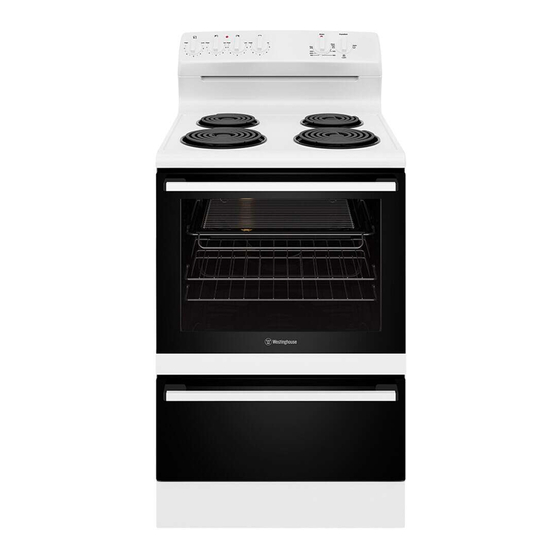
60CM UPRIGHT COOKER
WLE620WC, WLE624WC, WLE622WC,
WLE625WC, WLE642WC, WLE645WC
Advertisement
Table of Contents

Subscribe to Our Youtube Channel
Related Manuals for Westinghouse WLE620WC


Summary of Contents for Westinghouse WLE620WC
- Page 1 2. Tap the notification or link to open the registration form 3. Complete your details and enjoy peace of mind *Exact location of QR code may vary depending on oven model 60CM UPRIGHT COOKER WLE620WC, WLE624WC, WLE622WC, WLE625WC, WLE642WC, WLE645WC...
-
Page 2: Table Of Contents
To avoid a fire, ensure that grill trays and fittings are • An authorised person must install this appliance. You may not be able to claim on the Westinghouse economical and ecological use of the appliance always inserted into the appliance in accordance with (Certificate of Compliance to be retained). -
Page 3: Important Safety Instructions
IMPORTANT SAFETY INSTRUCTIONS UNDERSTANDING THE COOKER • Ensure that all specified vents, openings and Separate grill models airspaces are not blocked. WLE622WC, WLE642WC • In order to avoid accidental tipping of the appliance (for example, by a child climbing onto the open oven door), the anti-tilt bracket must be installed. -
Page 4: Understanding The Cooker
UNDERSTANDING THE COOKER INSTALLATION Grill in oven models WLE620WC, WLE624WC, Hard wiring detail WARNING WLE625WC, WLE645WC This appliance must be installed by an authorised person Remove terminal cover plate from rear panel in compliance with local municipal building codes and any of appliance. -
Page 5: Installation
INSTALLATION Step 1: Positioning The appliance must not be installed in a corner. It must be installed at least 100mm from the side wall. CAUTION IMPORTANT Choose the most practical bracket mounting option for your cooker. The anti-tilt bracket can be floor mounted or 100mm Setting the time 5mm clearance min. - Page 6 INSTALLATION INSTALLATION Removing the oven door Lift the door slightly and evenly while continuing to Replacing the oven door Open door fully and rotate stirrups away from you, slowly close the door. and back to their original position. (To be done by qualified personnel only) (To be done by qualified personnel only) With door fully open, rotate the two stirrups Hold door with both hands.
-
Page 7: Controls
INSTALLATION CONTROLS Fitting the grill dish supports The grill dish with wire insert can be used in any of the WLE620WC two upper height positions (shelf positions 4 and 5) • Insert the rear hook into the rear hole. between the runners. - Page 8 WLE622WC WLE625WC Hotplate Control Knobs Function Switch Hotplate Control Knobs Grill Temperature Control Knob Adjusts temperature of hotplate. Can be rotated in Sets oven functions (all functions include oven light) either direction. Adjusts temperature of hotplate. Can be rotated in Sets grilling temperature for separate grill.
-
Page 9: Using The Hotplates
CONTROLS USING THE HOTPLATES WLE642WC Hotplate indicator lamp GOOD (recessed base) (convex base) (undersize) Hot Surface Warning Light Hotplate Control Knobs Grill Temperature Control Knob Radiant Hotplates (oversize) (moisture on hotplate) (no utensil) Adjusts temperature of hotplate. Can be rotated in Sets grilling temperature for separate grill. -
Page 10: Understanding The Functions
UNDERSTANDING THE FUNCTIONS Fan Bake Grilling (Separate) CAUTION WARNING Do not line the bottom of the oven with foil or place Always turn your grill off immediately after use, as fat left anything on bottom surface of oven liner as trapped heat there may catch fire. -
Page 11: Cooking Guide For Ovens
UNDERSTANDING THE FUNCTIONS COOKING GUIDE FOR OVENS General Purpose Socket Outlets (If fitted) The socket outlet may be used for general applications. A 15A fuse mounted in the rear of the appliance protects the socket outlet. RAPID FOOD BAKE FAN BAKE BASE HEAT GRILL FAN GRILL MAXI GRILL... -
Page 12: Get To Know Your Oven
GET TO KNOW YOUR OVEN HANDLING BAKING & GRILLING PROBLEMS Get to know your new oven with this Method: ‘Simple Test Cake’ PROBLEM CAUSES REMEDIES Butter base and sides of two, 20cm straight-sided round or square cake pans. Then line the base with Uneven cooking •... -
Page 13: Operating The 3 Button Programmable Clock
OPERATING THE 3 BUTTON PROGRAMMABLE CLOCK OPERATING THE 120 MINUTE MECHANICAL RINGER TIMER (Where supplied) (WHERE SUPPLIED) Setting the cooking duration To check or cancel settings Operating your 120 minute ringer timer IMPORTANT • Select the desired oven function and temperature. •... -
Page 14: Cleaning And Caring For The Cooker
CLEANING AND CARING FOR THE COOKER CLEANING AND CARING FOR THE OVEN Removing the Oven Shelves Releasing grill element WARNING Slide the oven shelves towards you until they reach the Rotating latch models - rotate latch 180° and the grill Always make sure that the appliance is turned off before front stop. - Page 15 CLEANING AND CARING FOR THE OVEN Cleaning the oven door • To remove the top trim, press the ribbed release clips Re-assembling the oven door inner glass at each end and lift top trim away from the door. Cool air circulates through the door to lower the surface •...
-
Page 16: Problem Solving
(ix) failure to comply with any additional instructions supplied with (c) ‘ASC’ means Electrolux’s authorised serviced centres; the Appliance; (d) ‘Westinghouse’ is the brand controlled by Electrolux Home Products Data Plate In addition, Electrolux is not liable under this warranty if: Pty Ltd of 163 O’Riordan Street, Mascot NSW 2020, ABN 51 004... - Page 17 0800 225 088 email: customercare@electrolux.co.nz web: westinghouse.co.nz and WESTINGHOUSE are trademarks of Westinghouse Electric Corporation. Used under license by Electrolux Home Products Pty Ltd. All Rights Reserved. A21384402 Rev A © 2021 Electrolux Home Products Pty Ltd. ABN 51 004 762 341...
Need help?
Do you have a question about the WLE620WC and is the answer not in the manual?
Questions and answers