LG LCE30845 - 30in Induction Cooktop Service Manual
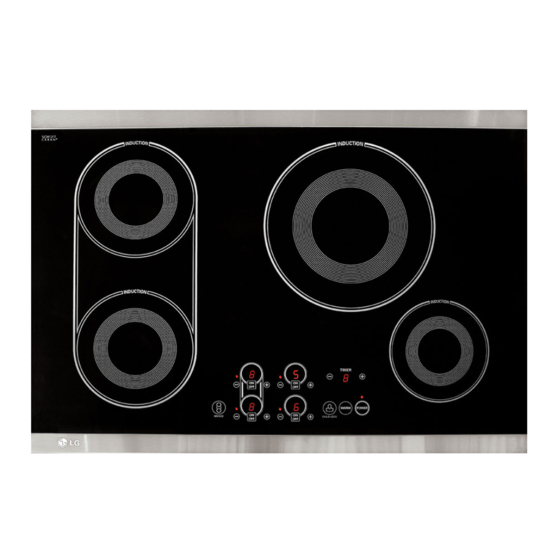
Ceramic glass induction cooktop
Hide thumbs
Also See for LCE30845 - 30in Induction Cooktop:
- Manual (114 pages) ,
- Owner's manual (31 pages) ,
- Specifications (2 pages)
Table of Contents

Related Manuals for LG LCE30845 - 30in Induction Cooktop


Summary of Contents for LG LCE30845 - 30in Induction Cooktop
- Page 1 Internal Use Only Website: http://biz.lgservice.com Ceramic Glass Induction Cooktop SERVICE MANUAL MODEL: LCE30845 CAUTION BEFORE SERVICING THE UNIT, READ THE SAFETY PRECAUTIONS IN THIS MANUAL. September, 2007 P/NO : MFL41578001 Printed in Korea...
-
Page 2: Safety Precautions
SAFETY PRECAUTIONS • Repairs of the appliance should be carried out by a licensed technician only. Incorrect repairs may result in dangerous situations. If you need repairs, contact an LG Service Center or your dealer. • If the power cord is defective, it must be replaced by a qualified service agent with a UL listed range cord. - Page 3 WARNING: Never use your appliance for warming or heating a room. LGE Internal Use Only - 3 - Copyright © 2007 LG Electronics. Inc. All right reserved. Only for training and service purposes...
- Page 4 • If your appliance malfunctions or fractures, switch off all cooking zones, and contact Service Center. Copyright © 2007 LG Electronics. Inc. All right reserved. - 4 - LGE Internal Use Only...
- Page 5 • Do not place any object on or near the control keypad area in order to prevent accidental activation of the cooktop controls. LGE Internal Use Only - 5 - Copyright © 2007 LG Electronics. Inc. All right reserved. Only for training and service purposes...
- Page 6 • For safety reasons, do not clean the appliance with a steam jet or high-pressure cleaner. • Clean the cooktop in accordance with the maintenance and cleaning instructions in this manual. Copyright © 2007 LG Electronics. Inc. All right reserved. - 6 - LGE Internal Use Only Only for training and service purposes...
- Page 7 To do this, have a qualified person disconnect the appliance from the house circuitry. READ AND FOLLOW THIS SAFETY INFORMATION CAREFULLY. SAVE THESE INSTRUCTIONS LGE Internal Use Only - 7 - Copyright © 2007 LG Electronics. Inc. All right reserved. Only for training and service purposes...
-
Page 8: Table Of Contents
REPLACEMENT PARTS LIST - - - - - - - - - - - - - - - - - - - - - - - - - - - - - - - - - - - - - - - - - - - - - - - - - - - - - - - - - - - - - - - - - - - - - - - - - - - - - - - - - - - - - - - - - - - - - - - 48 Copyright © 2007 LG Electronics. Inc. All right reserved. -
Page 9: Specifications
(518 mm) (D) Shipping Weight About 52.3lb(23.7kg) * The rated power consumption may vary according to pan size and type. LGE Internal Use Only - 9 - Copyright © 2007 LG Electronics. Inc. All right reserved. Only for training and service purposes... -
Page 10: Installation Instructions
Be sure the bottle of cleaner and conditioner packed in the literature bag is left where the user can find it easily. It is important that the ceramic-glass cooktop be pretreated before use. See CARE AND CLEANING. Copyright © 2007 LG Electronics. Inc. All right reserved. - 10 - LGE Internal Use Only... -
Page 11: Preparing The Installation Location
Allow 2 (5 cm) space below the armored cable opening to clear the electric cable and allow space for installation of the junction box on the wall at the back of the cooktop. LGE Internal Use Only - 11 - Copyright © 2007 LG Electronics. Inc. All right reserved. Only for training and service purposes... -
Page 12: Dimensions And Clearances
5” (12.7 cm) beyond the face of the cabinets. Copyright © 2007 LG Electronics. Inc. All right reserved. - 12 - LGE Internal Use Only... - Page 13 Then make the electrical connection as follows. LGE Internal Use Only - 13 - Copyright © 2007 LG Electronics. Inc. All right reserved. Only for training and service purposes...
- Page 14 (white) wire is prohibited, you must use a 4-wire power supply cable. Failure to heed this warning may result in electrocution or other serious personal injury. Copyright © 2007 LG Electronics. Inc. All right reserved. - 14 - LGE Internal Use Only...
-
Page 15: Cooktop Installation
LGE Internal Use Only - 15 - Copyright © 2007 LG Electronics. Inc. All right reserved. Only for training and service purposes... -
Page 16: Final Check
CAUTION: Do not touch cooktop glass or Cooking Zones. They may be hot enough to cause burns. Copyright © 2007 LG Electronics. Inc. All right reserved. - 16 - LGE Internal Use Only... -
Page 17: Induction
If you are not sure if a pot or pan is suitable for use with your induction cooktop, you can find out with a few simple tests: LGE Internal Use Only - 17 - Copyright © 2007 LG Electronics. Inc. All right reserved. Only for training and service purposes... - Page 18 • Dirty cooking zones and cookware use more electricity. • Whenever possible, always have the lid firmly placed on the pots and pans so that they are completely covered. Copyright © 2007 LG Electronics. Inc. All right reserved. - 18 - LGE Internal Use Only...
-
Page 19: Selecting Cookware
LGE Internal Use Only - 19 - Copyright © 2007 LG Electronics. Inc. All right reserved. Only for training and service purposes... -
Page 20: Cleaning And Care
NOTE: Scratches or dark marks on the ceramic-glass surface caused by a pan base with sharp edges cannot be removed. However, they do not impair the function of the cooktop. Copyright © 2007 LG Electronics. Inc. All right reserved. - 20 - LGE Internal Use Only... -
Page 21: Description Of The Feature
2400W (Boost) Electronic touch controls Ceramic Cooktop: LG’s new induction cooktop features a ceramic cooktop surface that remains cooler than conventional ceramic cooktops, regardless of whether it is ON or OFF. CAUTION: Burn Hazard: The Cooking Zones may appear cool when turned ON and after they have been turned OFF. -
Page 22: The Key Features Of Hob Appliance
Hot Surface Indicator: After use, an will appear in the Cooking Zone power level display until the cooking surface has cooled down. Copyright © 2007 LG Electronics. Inc. All right reserved. - 22 - LGE Internal Use Only Only for training and service purposes... -
Page 23: Operating Instructions
ON/OFF pad, the power level must be selected within 5 seconds with the pad. Otherwise, the Cooking Zone will turn off for safety reasons. LGE Internal Use Only - 23 - Copyright © 2007 LG Electronics. Inc. All right reserved. Only for training and service purposes... - Page 24 Avoid touching the burner when this indicator is shown. Although the cooktop is OFF, the will stay lit until the cooktop has cooled down. Copyright © 2007 LG Electronics. Inc. All right reserved. - 24 - LGE Internal Use Only...
- Page 25 To turn off the WARM function and return to normal power levels, touch the pad and will be displayed. LGE Internal Use Only - 25 - Copyright © 2007 LG Electronics. Inc. All right reserved. Only for training and service purposes...
- Page 26 Off setting. NOTE: These settings are recommended guidelines for cooking. You may need to adjust the power level for the type of food and pan. Copyright © 2007 LG Electronics. Inc. All right reserved. - 26 - LGE Internal Use Only...
-
Page 27: Using The Bridge Cooking Zones
OR Touch and hold the pad until appears in the display. The timer display will turn off. LGE Internal Use Only - 27 - Copyright © 2007 LG Electronics. Inc. All right reserved. Only for training and service purposes... - Page 28 The power level displayed may be different from the actual power level at the high temperature range. To prevent the cooktop from overheating, the power level is controlled automatically. Copyright © 2007 LG Electronics. Inc. All right reserved. - 28 -...
-
Page 29: Electric Circuit Drawing
ELECTRIC CIRCUIT DRAWING LGE Internal Use Only - 29 - Copyright © 2007 LG Electronics. Inc. All right reserved. Only for training and service purposes... -
Page 30: Disassembly The Cooktop
2 hooks front and back side. The hook should be inserted initially when the HOB is assembled Copyright © 2007 LG Electronics. Inc. All right reserved. - 30 - LGE Internal Use Only Only for training and service purposes... -
Page 31: Burner Assembly
3. Lift the front side of burner assembly and pull out burner assembly. 4. Both left and right burner assembly can be disassembled with the same way. LGE Internal Use Only - 31 - Copyright © 2007 LG Electronics. Inc. All right reserved. Only for training and service purposes... - Page 32 Controller assembly 1. Disconnect the three of the connects. 2. Loose earth wire of left and right side. Copyright © 2007 LG Electronics. Inc. All right reserved. - 32 - LGE Internal Use Only Only for training and service purposes...
- Page 33 IH module assembly. 5. Both left and right IH module assembly can be disassembled with the same way. LGE Internal Use Only - 33 - Copyright © 2007 LG Electronics. Inc. All right reserved. Only for training and service purposes...
- Page 34 DISASSEMBLY Power harness assembly 1. Loose the two screws in terminal block. 2. Take out the harness assembly. Copyright © 2007 LG Electronics. Inc. All right reserved. - 34 - LGE Internal Use Only Only for training and service purposes...
- Page 35 2. Loose the earth screw on the bottom plate 3. Loose the ring of conduit bracket with a hand to remove the power cord assembly. LGE Internal Use Only - 35 - Copyright © 2007 LG Electronics. Inc. All right reserved. Only for training and service purposes...
- Page 36 3. Take out the black insulator 4. Loose the three screws around working coil base. Copyright © 2007 LG Electronics. Inc. All right reserved. - 36 - LGE Internal Use Only Only for training and service purposes...
- Page 37 5. Push the working coil base forward and lift the front of that. (this working coil base is hooked onto aluminum plate. LGE Internal Use Only - 37 - Copyright © 2007 LG Electronics. Inc. All right reserved. Only for training and service purposes...
- Page 38 2. Take out the key PCB hooked by key supporter. 3. It is separate as key PCB and key supporter. Copyright © 2007 LG Electronics. Inc. All right reserved. - 38 - LGE Internal Use Only...
- Page 39 It can be fixed without that.) 4. Lift the side of PCB under the cut place as below. LGE Internal Use Only - 39 - Copyright © 2007 LG Electronics. Inc. All right reserved. Only for training and service purposes...
- Page 40 2. Loose two screws on the side of IH module as below. 3. Pick up with a long nose and get rid of two terminals. Remove two connectors as well. Copyright © 2007 LG Electronics. Inc. All right reserved. - 40 - LGE Internal Use Only...
- Page 41 4. Loose the four screws that fix the PCB to base. 5. Heatsink Sensor wire is hooked. Unhook the wire before taking out the Induction board. LGE Internal Use Only - 41 - Copyright © 2007 LG Electronics. Inc. All right reserved. Only for training and service purposes...
- Page 42 IH module assembly (fan) 1. Unhook the fan wire. 2. Loose the two screws that fix the fan. Copyright © 2007 LG Electronics. Inc. All right reserved. - 42 - LGE Internal Use Only Only for training and service purposes...
-
Page 43: Trouble Shooting
Correct the power Cord connection * When the overvoltage is inputed, the overvoltage protection circuit turns of the power. LGE Internal Use Only - 43 - Copyright © 2007 LG Electronics. Inc. All right reserved. Only for training and service purposes... - Page 44 Rear Left No feedback CN01 (Rear Module) Rear Right Top thermistor CN03 (Rear Module) Rear Right No feedback CN01 (Rear Module) Copyright © 2007 LG Electronics. Inc. All right reserved. - 44 - LGE Internal Use Only Only for training and service purposes...
- Page 45 Check the Installation state especially 5 mm Gap of Fig.5 Induction * Improper working Check unwanted thing is on the control part of control LGE Internal Use Only - 45 - Copyright © 2007 LG Electronics. Inc. All right reserved. Only for training and service purposes...
-
Page 46: Exploded View
EXPLODED VIEW (I) MODEL: LCE30845 33463A 35311L 35311R 24781A 24781L 568771 24781R 64970A 36640B 34810Q WTT028 WTT024 63303A 56411A Copyright © 2007 LG Electronics. Inc. All right reserved. LGE Internal Use Only - 46 - Only for training and service purposes... - Page 47 268776 34810Q 63302A 95306A 64974A WTT028 WTT024 56411A 34810Q 34810Q WTT024 WSZ220 34810D 34810D WTT024 WMP023 WMP023 WTT024 LGE Internal Use Only Copyright © 2007 LG Electronics. Inc. All right reserved. - 47 - Only for training and service purposes...
Need help?
Do you have a question about the LCE30845 - 30in Induction Cooktop and is the answer not in the manual?
Questions and answers