Table of Contents
Advertisement
Quick Links
E3091-3
Revised 01/21/20
REV. D
INSTALLATION & OPERATIONS INSTRUCTIONS
REFRIGERATED SSRC & ESSRC MODELS
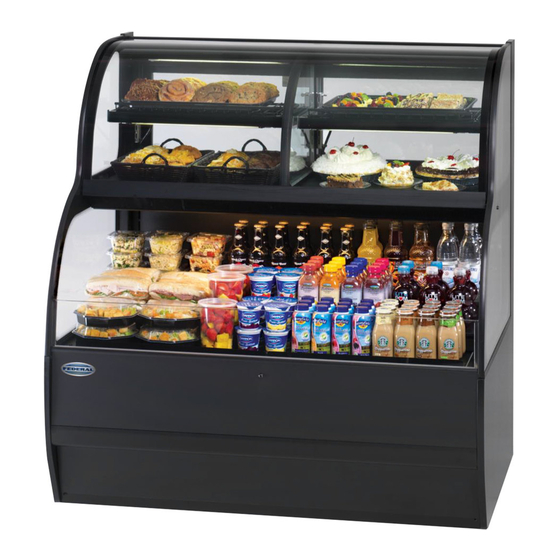
SSRC
KEEP THIS MANUAL FOR FUTURE REFERENCE
Engineering and technical data are subject to change without notice.
FEDERAL INDUSTRIES
Toll Free 1(800) 356-4206
215 FEDERAL AVE
WI Phone (608) 424-3331
- 1 -
ESSRC
Belleville, WI 53508
Fax: (608) 424-3234
Advertisement
Table of Contents

Related Manuals for Federal SSRC3652 120V


Summary of Contents for Federal SSRC3652 120V
- Page 1 ESSRC SSRC KEEP THIS MANUAL FOR FUTURE REFERENCE Engineering and technical data are subject to change without notice. FEDERAL INDUSTRIES 215 FEDERAL AVE Belleville, WI 53508 Toll Free 1(800) 356-4206 WI Phone (608) 424-3331 Fax: (608) 424-3234 - 1 -...
-
Page 2: Table Of Contents
CONTENTS INTRODUCTION ............................... 4 WARNING LABELS & SAFETY INSTRUCTIONS ..................... 5 PRE-INSTALLATION PROCEDURES ........................6 Inspection For Shipping Damage........................6 GENERAL ELECTRICAL & GROUNDING ......................6 Permanent Connected ............................ 6 Cord Connected (Option)..........................6 Electrical Information ............................. 7 INSTALLATION INSTRUCTIONS ......................... 8 Locating The Display Case .......................... - Page 3 CLEANING INSTRUCTIONS ........................... 27-31 Daily Cleaning .............................. 27 Weekly Cleaning ............................28 Weekly Top Section Interior Cleaning ....................28-29 Weekly Bottom Section Interior Cleaning ....................30 Weekly Exterior Cleaning ..........................31 SERVICE INFORMATION ..........................32-33 Special Service Situations ..........................32 Pre-Service Checklist ............................
-
Page 4: Introduction
INTRODUCTION Thank you for purchasing a Federal Industries display case. This manual contains important instructions for installing and servicing the Refrigerated Self-Service Merchandisers. A repair parts list and wiring diagram are also included in the manual. Read all documents carefully before installing or servicing your case. -
Page 5: Warning Labels & Safety Instructions
The warning and safety labels shown throughout this manual are placed on your Federal Industries case at the factory. Follow all warning label instructions. If any warning or safety labels become lost or damaged, call our customer service department at 1(800) 356-4206 for replacements. -
Page 6: Pre-Installation Procedures
PRE-INSTALLATION PROCEDURES Inspection for Shipping Damage You are responsible for filing all freight claims with the delivering truck line. Inspect all cartons and crates for damage as soon as they arrive. If damage is noted to shipping crates, cartons, or if a shortage is found, note this on the bill of lading (all copies) prior to signing. -
Page 7: Electrical Information
Electrical Information. PERMANENTLY CONNECTED SELF CONTAINED REMOTE MODEL VOLTAGE TOTAL AMPS MAX FUSE SIZE VOLTAGE MAX FUSE SIZE SSRC2452 120/60/1 11.3 120/60/1 SSRC3652 120/60/1 14.3 120/60/1 SSRC5052/ 230/60/1 120/60/1 ERSSC5052 SSRC5952/ 230/60/1 14.5 120/60/1 ERSSC5952 SSRC7752/ 230/60/1 14.5 120/60/1 ERSSC7752 CORD CONNECTED OPTIONAL SELF CONTAINED MODEL... -
Page 8: Installation Instructions
INSTALLATION INSTRUCTIONS Locating Display Case The case should be located where it is not subjected to the direct rays of the sun, heating ducts, grills, radiator, or ceiling fans, nor should it be located near open doors or main door entrances. Also, avoid locations where there are excessive air movement or air disturbances. -
Page 9: Refrigeration
REFRIGERATION Self-Contained Models (E3091-3 EXCEL) The self-contained models are shipped from the factory with a completely operational 404A refrigeration system and require no modifications or adjustments upon installation. Case must be installed as per the installation section of this manual to provide proper condensing air cooling. The dual pressure control is used as a safety device and is factory set. -
Page 10: Remote Refrigeration Instruction
Remote Refrigeration Operation The remote models are designed to use R449 refrigerant and shipped from the factory with the evaporator coil, expansion valve, drier filter, sight glass and refrigerant solenoid valve. A thermostat senses evaporator temperature and opens and closes the refrigerant solenoid valve. The solenoid valve closes and shuts off the refrigeration flow to the unit and initiates a pump down cycle. -
Page 11: Shelving Installation & Removal
SHELVING INSTALLATION & REMOVAL Shelf Bracket & Supports Installation TOP SECTION SHELF SHELF STANDARD REAR SHELF SUPPORT RETAINING SCREW REAR SHELF SUPPORT OPTIONAL BOTTOM SECTION SHELF SHELF LIGHT CORD RETAINER CLIP REAR SHELF SUPPORT SHELF LIGHT ASSEMBLY SHELF STANDARD SHELF BRACKET 1. -
Page 12: Wire Shelves Installation
5. Remove the cap from the appropriate female light sockets. IMPORTANT: Grip each side of cap firmly and wiggle and pull cap straight out of socket. Do not roll cap during removal. Incorrect removal of cap may cause damage to electrical connection. 6. -
Page 13: Glass Shelves Installation (Option)
Glass Shelves Installation TOP SECTION GLASS SHELF PRODUCT STOP PLACE BACK SIDE OF GLASS PRODUCT STOP GLASS SHELF SHELF RETAINER CLIP INTO SLOT GLASS SHELF IN OF REAR SHELF SUPPORT RETAINER CLIP SHELF STANDARD RETAINING SCREW SHELF STANDARD REAR SHELF OPTIONAL BOTTOM SUPPORT SECTION GLASS SHELF... -
Page 14: Rear Doors
REAR DOORS TOP SECTION REAR SLIDING DOORS REMOVAL UPPER TRACK 1. LIFT UP DOOR 2 SWING BOTTOM OUT LOWER TRACK 1. Starting with the outer door, lift the door upward until the bottom edge of door clears the lower track and then swing the bottom of the door outward and down out of upper track. 2. -
Page 15: Top Section Rear Swinging Doors Removal
TOP SECTION REAR SWINGING DOOR REMOVAL 1. ROTATE DOOR TO LOCKED OPEN POSITION 3. REMOVE SCREWS 2. REMOVE SCREW 1. Open the door. Continue to rotate the door past the 90º position until you feel it lock in the open position. -
Page 16: Bottom Section Rear Doors Removal (Option)
BOTTOM SECTION REAR DOORS REMOVAL (OPTIONAL) INNER DOOR UPPER TRACK INNER DOOR LOWER TRACK INNER DOOR CATCH SLOT 1. LIFT UP DOOR 2 SWING BOTTOM OUT 1. LIFT UP DOOR OUTER DOOR UPPER TRACK OUTSIDE DOOR SET 2 SWING BOTTOM OUT OUTER DOOR LOWER TRACK INNER DOOR CATCH 1. -
Page 17: Night Curtain (Ssrc Option)
NIGHT CURTAIN (SSRC OPTION) NIGHT CURTAIN SNAP NIGHT CURTAIN STRAP NIGHT CURTAIN HOLDER BRACKETS SNAP FRONT PANEL Opening: 1. Grasp the night curtain strap and lift the rolled night curtain out of the night curtain holder brackets. Pull the night curtain across the top of case and down the front. 2. -
Page 18: Security Night Cover (Ssrc Option)
SECURITY NIGHT COVER (SSRC OPTION) Removal: 1. Unlock the lock handles and turn handles to the vertical position to disengage from lock handle catches. 2. Grasp the front grab handles and lift the cover straight up and out of the case opening. Installation: 1. -
Page 19: Operating Instructions
OPERATING INSTRUCTIONS NOTICE: This refrigerated display case is designed to operate in a maximum environment of 80 DEG. F and 55% relative humidity. Exceeding these limits will cause poor case performance and sweating of glass panels Controls TEMPERATURE CONTROL POWER SWITCH LIGHT SWITCH Power Switch The unit has a power switch that turns off power to the entire unit, including the condensate evaporator... -
Page 20: Button And Display Overview
Button and Display overview ALARM INDICATOR COMPRESSOR RUN POWER TO CONTROL ON/OFF INDICATOR AND SET POINT UP ADJUST SET POINT ADJUST MODE DEFROST MODE INDICATOR MANUAL DEFROST AND DIGITAL DISPLAY SET POINT DOWN ADJUST Button Overview Press and hold this button for three seconds to turn system on (if off) or off (if on). Also used to adjust set point when in set point adjust mode Press to enter set point adjust mode, confirm set point changes, and mute alarms. -
Page 21: Entering Manual Defrost Mode
Entering Manual Defrost Mode In order to initiate a manual, defrost press and hold the button approx. three seconds. The control will read “dEF” while the button is being held. The defrost is initiated when the defrost mode indicator illuminates on the display. -
Page 22: Electronic Control Operation
ELECTRONIC CONTROL OPERATION This unit is equipped with an electronic temperature control. The control parameters are set at the factory and cannot be manually changed in the field. The pre set control parameters are listed on the chart in the Settings Chart below. -
Page 23: Control Parameters
CONTROL PARAMETERS Table 2 - Control Parameters Parameter Description Control Setpoint → Compressor Cut in [°F] 39.0 Compressor Cut out [°F] 36.0 34.7 33.5 32.2 31.0 29.7 28.5 27.2 26.0 Compressor Min On Time 10 min Compressor Min Off Time 3 min Compressor Max Run Time 90 min... -
Page 24: Top Section Refrigeration Louver Control
Top Section Refrigeration Louver Control AIR CONTROL ADJUSTMENT LOUVER CLOSED POSITION KNOB AIR CONTROL ADJUSTMENT KNOB IN LOUVER OPEN POSITION AIR CONTROL LOUVER ASSEMBLY AIR CONTROL ADJUSTMENT KNOB OUT The top section of this unit can be changed from a refrigerated section to a non-refrigerated section by opening or closing the louver. -
Page 25: Maintenance
MAINTENANCE Top Light Bulb Replacement, Fluorescent 12/1/19 1. To remove bulb from top light housing, grip the bulb receptacle end caps at each end of bulb. Pull the bulb receptacle end caps straight outward away from unit. 2. The bulb is inside a clear shatterproof tube with a white plastic end cap on each end. Be careful not to allow the bulb to slide out of the shatterproof tube. -
Page 26: Periodic Maintenance
PERIODIC MAINTENANCE Cleaning Condenser Coil (All Self Contained Refrigerated Models) NOTICE: Condenser coil must be cleaned a minimum of twice per month to insure proper refrigeration performance and prevent compressor failure. In some environments, it may be necessary to clean more frequently. FAILURE TO CLEAN CONDENSER COIL WILL VOID COMPRESSOR WARRANTY. -
Page 27: Cleaning Instructions
CLEANING INSTRUCTIONS Daily Cleaning The case should be cleaned thoroughly, as described in the weekly cleaning section, before it is used for the first time. NOTICE: Avoid splashing or soaking any electrical components with water to prevent electrical damage to the case. NOTICE: Shut off lights and power switches and remove all product from case. -
Page 28: Weekly Cleaning
Weekly Cleaning This procedure is recommended on a weekly basis. It may need to be performed more often if necessary to maintain a clean, sanitary case. The case should be cleaned to this procedure before using the first time. NOTICE: Avoid splashing or soaking any electrical components with water to prevent electrical damage to the case. -
Page 29: Weekly Bottom Section Interior Cleaning
1. Remove both upper rear sliding doors as described in the “Door Removal” section of this manual. A 24” case will not require door removal. 2. Clean all foreign material from inner and outer rear door tracks and clean both sides of the doors using warm soapy water and a brush. - Page 30 DISPLAY DECK PLASTIC AIR DEFLECTOR FAN SHROUD ASSEMBLY HONEYCOMB AIR DIFFUSER FAN SHROUD ASSEMBLY RETAINER LATCH ESSRC 1. If supplied with lower rear door option remove both inner & outer rear doors as described in the “Door Removal” section of this manual. 2.
-
Page 31: Weekly Exterior Cleaning
9. Remove the honeycomb air diffuser(s) from upper air duct track. Loosen thumb screws on Retainer located behind diffuser. Retainer will drop down allowing diffuser to be pulled out of case. HONEYCOMB AIR DIFFUSER RETAINER THUMB SCREW HONEYCOMB THUMB SCREW RETAINER AIR DIFFUSER 10. -
Page 32: Service Information
(HFC’s) from being released into the atmosphere. If moisture or liquid is observed around or under a Federal Industries case, an immediate investigation should be made by qualified personnel to determine the source of the moisture or liquid. -
Page 33: Pre-Service Checklist
Pre-Service Checklist You may avoid the cost and inconvenience of an unnecessary service call by first reviewing this checklist of frequently encountered situations that can cause unsatisfactory case performance. CAUTION: Before servicing case turn off power at the main breaker of fuse box. -
Page 34: Sale & Disposal
SALE & DISPOSAL Owner Responsibility If you sell or give away your Federal Industries case, you must make sure that all safety labels and the Installation-Service Manual are included with it. If you need replacement labels or manuals, Federal Industries will provide them free of charge. Contact the customer service department at Federal Industries at (800) 356-4206. -
Page 35: Wiring Diagrams
MAIN WIRING DIAGRAMS SELF CONTAINED SSRC2452 W/ FLUORESCENT LIGHTS - 35 -... -
Page 36: Self-Contained Ssrc3652 & Essrc3652 W/ Fluorescent Lights
SELF CONTAINED SSRC3652 & ESSRC3652 W/ FLUORESCENT LIGHTS SELF CONTAINED SSRC5052, SSRC5952, SSRC7752, ESSRC5052, ESSRC5952 & ESSRC 7752 W/ FLUORESCENT LIGHTS - 36 -... -
Page 37: Self-Contained Ssrc2452 W/ Led Lights (Mfg'd After 12/1/19)
SELF CONTAINED SSRC2452 W/ LED LIGHTS (MFG’D AFTER 12/1/19) - 37 -... -
Page 38: Self-Contained Ssrc3652 & Essrc3652 W/ Led Lights (Mfg'd After 12/1/19)
SELF CONTAINED SSRC3652 & ESSRC3652 W/ LED LIGHTS (MFG’D AFTER 12/1/19 DEFROST PROBE CAREL OPTIONAL CONTROL 120/60/1 NOTE PROBE TEMP PROBE CORD & PLUG WIRING R or RB POWER ALTERNATE BLK or SM SWITCH CONTROL PLUG (RANCO) PLUG CEILING R or RB SEE CAREL WIRING BLK or SM PLUGS... -
Page 39: Remote Ssrc2452, Ssrc3652 W/ Fluorescent Lights
REMOTE SSRC2452, SSRC3652 W/ FLUORESCENT LIGHTS REMOTE SSRC5052, SSRC5952, SSRC7752 W/ FLUORESCENT LIGHTS - 39 -... -
Page 40: Remote Ssrc5052/5952/7752 W/ Led Lights (Mfg'd After 12/1/19)
(MFG’D AFTER 12/1/19) REMOTE:SSRC5052,SSRC5952,SSRC7752 W/LED LIGHTS SSR ALL MODELS PRESS. TRANS. REMOTE TEMP SENSOR 91-21061 1/20/20 SEPARATE POWER SUPPLY OPTIONAL COLOR CODE RIBBON TEMP 1 TEMP 2 CORD & PLUG BLK = BLACK W = WHITE TEMP 3 CABLE RSV-Blue Empty B = BLUE Y = YELLOW... -
Page 41: Replacement Parts - Ssrc
REPLACEMENT PARTS – SSRC E3091-3.EXCEL SSRC2452 SSRC3652 SSRC7752 SSRC5052 240V SSRC5952 240V REFRIGERATION 120V 120V 240V 30-18049 30-18052 30-18645 Compressor (SC) 30-20696 30-18645 Condensing Unit (SC) 30-20584 30-17726 30-20512 30-18215 30-18215 Evaporator Coil 33-20580 33-13356 33-13357 33-13358 33-13359 32-19420 32-19419 32-19416 Filter Drier 32-12626... - Page 42 PANELS & GLASS (AFTER FEB 2012) SSRC2452 SSRC3652 SSRC5052 SSRC5952 SSRC7752 50-18195-2 Front Glass 50-18195-5 50-18195-1 50-18195-3 50-18195-4 81-18196-1 81-18196-3 Front Glass Clamp 81-18196-5 81-18196-2 81-18196-4 Gas Cylinder 81-19639 81-11522 81-11046 81-11047 81-11047 Glass End Clear 50-19349 Glass End Reflective Left(Optional) 50-19349-L Glass End Reflective Right(Optional) 50-19349-R...
-
Page 43: Replacement Parts - Essrc
REPLACEMENT PARTS – ESSRC E3091-3.EXCEL REFRIGERATION ESSRC5052 240V ESSRC5952 240V ESSRC7752 240V 30-18052 Compressor (SC) 30-18645 30-18645 Condensing Unit (SC) 30-20512 30-18215 30-18215 Evaporator Coil 33-13357 33-13358 33-13359 32-18244 32-18245 Filter Drier 32-12626 Site Glass 32-54010 Evaporator Fan Motor (SC) 41-17811 Evaporator Fan Blade 72-17355... - Page 44 PANELS & GLASS ESSRC5058 ESSRC5958 ESSRC7758 51-19107-5 Front Glass 51-19107-6 51-19107-7 Top Glass 51-19106-5 51-19106-6 51-19106-7 End Panel Ass'y Left (Black) 68-19146-L End Panel Ass'y Right (Black) 68-19146-R SHELVING ESSRC5058 ESSRC5958 ESSRC7758 63-18213-11 Shelf Top Wire Black (Top Section) 63-18213-10 63-18213-9 Shelf Wire Black (Optional)(Btm Section) 63-18213-5...
- Page 45 California Residents Only. WARNING This product can expose you to chemicals including chromium which is known to the State of California to cause cancer and birth defects or other reproductive harm. For more information go to www.P65Warnings.ca.gov - 45 -...
- Page 46 APP’D CHANGE RECORD DATE ECN# REVISED PARTS LIST 5/10/19 ADDED DUAL PRESSURE CONTROL INFO 8/6/19 3506 ADDED EEV WIRING DIAGRAMS 1/21/20 - 46 -...
Need help?
Do you have a question about the SSRC3652 120V and is the answer not in the manual?
Questions and answers