Table of Contents
Advertisement
Repair
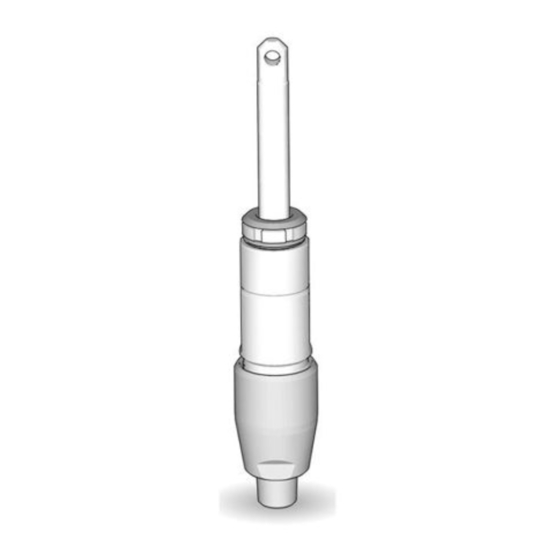
Field Lazer
Displacement Pump
For use with water-based materials
3300 psi (22.7 MPa, 227 bar) Maximum Working Pressure
Model 246426
Series A
Model 17M873
Series B
Important Safety Instructions
Read all warnings and instructions in this manual, related
striping manuals and on the equipment. Be familiar with the
controls and the proper usage of the equipment.
Save these instructions.
S100
™
3A5053B
EN
ti31046a
Advertisement
Table of Contents

Related Manuals for Graco 17M873


Summary of Contents for Graco 17M873
- Page 1 Repair Field Lazer S100 ™ 3A5053B Displacement Pump For use with water-based materials 3300 psi (22.7 MPa, 227 bar) Maximum Working Pressure Model 246426 Series A Model 17M873 Series B Important Safety Instructions Read all warnings and instructions in this manual, related striping manuals and on the equipment.
-
Page 2: Table Of Contents
Pressure Relief Procedure ....4 Graco Standard Warranty ....12 Pump Repair Kits . -
Page 3: Warnings
Warnings Warnings The following warnings are for the setup, use, grounding, maintenance, and repair of this equipment. The exclamation point symbol alerts you to a general warning and the hazard symbols refer to procedure-specific risks. When these symbols appear in the body of this manual or on warning labels, refer back to these Warnings. Product-specific hazard symbols and warnings not covered in this section may appear throughout the body of this manual where applicable. -
Page 4: Service
Service Service Pressure Relief Procedure guard retaining nut or hose end coupling to relieve pressure gradually, then loosen completely. Clear hose or tip obstruction. Follow the Pressure Relief Procedure whenever you see this symbol. Pump Repair Kits Pump Repair Kit 17M779 17M873 287064... -
Page 5: Disassemble
Service Disassemble 1. Remove seal (201), packing nut (202) and o-ring (228). ti23115c 4. Tap piston rod out of cylinder with a hammer or flip over and tap piston rod out against a bench. ti31047a 2. Unscrew intake valve from cylinder. ti31048a 3. -
Page 6: Assemble
Service 5. Unscrew piston valve from piston rod. Clean and 7. Remove throat packings and glands from cylinder. inspect parts. The piston has a special thread lock- Discard throat packings and glands. ing/sealing patch. Do not remove the patch. The patch allows four disassembly/assembly procedures before it is necessary to apply medium strength threadlocker to the threads. - Page 7 Service 2. Install ball (206) in piston rod. If threadlocker is 4. Soak all leather packings in SAE 30W oil for one applied to piston valve threads, make sure that none hour minimum prior to assembly. Place male gland gets on ball. (204) in cylinder.
- Page 8 Service 6. Grease piston packings. 9. Reassemble intake valve with new o-ring (227), seat (212) and ball (214). Seat may be flipped over and used on other side. Clean seat thoroughly. ti31057a 7. Grease top inch or two of piston rod that will go through the cylinder throat packings.
-
Page 9: Cross-Section Reference
Service Cross-Section Reference 11. Torque packing nut (202) to 75 ± 5 in.-lb (8.5 ± .5 N•m). 12. Remove throat seal (201) when pump packings begin to leak after extended use. Then tighten pack- ing nut down until leakage stops or lessens. This allows approximately 100 gallons of additional oper- ation before a repacking is required. -
Page 10: Parts - Pump 246426, 17M873
Parts - Pump 246426, 17M873 Parts - Pump 246426, 17M873 Ref. Part Description Qty. 201* 180656 SEAL, throat 193047 NUT, packing 203* 192710 V-PACKING, throat, V-Max, UHMWPE, blue 204* 176754 GLAND, male, throat 24X749 CYLINDER, pump 206* 105444 BALL, set,0.3125 in. 207* 17V093 PACKING, o-ring... -
Page 11: Technical Data
Technical Data Technical Data U.S. Metric Maximum Working Pressure 3300 psi 227 bar, 22.7 MPa Fluid Inlet Size 1/2 npt(f) 1/2 npt(f) Fluid Outlet Size 1/4 npt(f) 1/4 npt(f) stainless steel, PTFE, leather, polyurethane, zinc-plated carbon steel, Wetted Parts tungsten carbide, chrome plating, UHMWPE, acetal, polyethylene, nylon, 3A5053B... -
Page 12: Graco Standard Warranty
With the exception of any special, extended, or limited warranty published by Graco, Graco will, for a period of twelve months from the date of sale, repair or replace any part of the equipment determined by Graco to be defective.
Need help?
Do you have a question about the 17M873 and is the answer not in the manual?
Questions and answers