Advertisement
Quick Links
INSTALLATION MANUAL
EN
INSTALLATIONSANLEITUNG
DE
MANUEL D'INSTALLATION
FR
INSTALLATIE-INSTRUCTIES
NL
MANUAL DE INSTALACIÓN
ES
LIVRO DE INSTRUÇÕES PARA INSTALAÇÃO
PT
LIBRETTO DI INSTALLAZIONE
IT
INSTALLATIONSHANDBOK
SV
INSTALLASJONSVEILEDNING
NO
ASENNUSOHJEET
FI
INSTALLATIONSVEJLEDNING
DA
РУКОВОДСТВО ПО УСТАНОВКЕ
RU
PAIGALDUSJUHEND
ET
UZSTĀDĪŠANAS ROKASGRĀMATA
LV
ĮRENGIMO VADOVAS
LT
ІНСТРУКЦІЯ ЗІ ВСТАНОВЛЕННЯ
UK
ÜZEMBE HELYEZÉSI ÚTMUTATÓ
HU
NÁVOD K MONTÁŽI
CZ
INŠTALAČNÁ PRÍRUČKA
SK
MANUAL DE INSTALARE
RO
INSTRUKCJA INSTALACJI
PL
KNJIŽICE S UPUTAMA
HR
NAVODILO ZA NAMESTITEV
SI
ΟΔΗΓΊΕΣ ΕΓΚΑΤΆΣΤΑΣΗΣ
GR
KURULUM KILAVUZU
TR
РЪКОВОДСТВО ЗА МОНТАЖ
BG
ОРНАТУ НҰСҚАУЛЫҒЫ
KK
УПАТСТВО ЗА МОНТАЖА
MK
UDHËZUES PËR INSTALIMIN
AL
УПУТСТВО ЗА ИНСТАЛИРАЊЕ
SR
التركيب
كتيب
AR
Advertisement

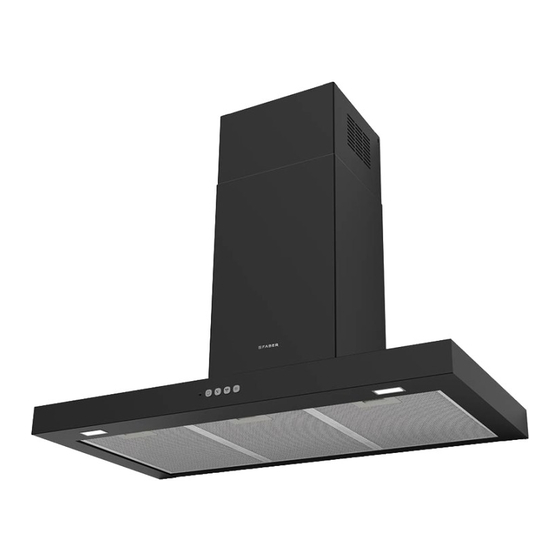
Related Manuals for Faber STILO COMFORT X A60


Summarization of Contents
General Safety Information
English Safety Warning
Before installation, read the safety information in the User Manual.
German Safety Warning
Read safety information in the User Manual before installation.
French Safety Warning
Read safety information in the User Manual before installation.
Dutch Safety Warning
Read safety information in the User Manual before installation.
Spanish Safety Warning
Read safety information in the User Manual before installation.
Portuguese Safety Warning
Read safety information in the User Manual before installation.
Italian Safety Warning
Read safety information in the User Manual before installation.
Swedish Safety Warning
Read safety information in the User Manual before installation.
Norwegian Safety Warning
Read safety information in the User Manual before installation.
Finnish Safety Warning
Read safety information in the User Manual before installation.
Danish Safety Warning
Read safety information in the User Manual before installation.
Russian Safety Warning
Read safety information in the User Manual before installation.
Estonian Safety Warning
Read safety information in the User Manual before installation.
Latvian Safety Warning
Read safety information in the User Manual before installation.
Lithuanian Safety Warning
Read safety information in the User Manual before installation.
Greek Safety Warning
Read safety information in the User Manual before installation.
Turkish Safety Warning
Read safety information in the User Manual before installation.
Bulgarian Safety Warning
Read safety information in the User Manual before installation.
Kazakh Safety Warning
Read safety information in the User Manual before installation.
Macedonian Safety Warning
Read safety information in the User Manual before installation.
Albanian Safety Warning
Read safety information in the User Manual before installation.
Serbian Safety Warning
Read safety information in the User Manual before installation.
Arabic Safety Warning
Read safety information in the User Manual before installation.
Installation Steps
Mounting the Main Unit
Attach the main body of the appliance according to the provided illustration.
Connecting Flexible Ducting
Connect the flexible ducting to the appliance as shown in the diagram.
Securing Component
Fasten a specific component using the indicated method.
Fastening Ducting
Secure the ducting using the appropriate fastening technique.
Drilling Installation Holes
Drill the necessary holes for installation using an 8mm drill bit.
Connecting Ducting Options
Connect either Ø 120 mm or Ø 150 mm ducting using specified parts.
Attaching Ducting with Brackets
Use parts M and L to secure the flexible ducting.
Attaching Outer Casing
Slide and secure the outer casing (N1) in place.
Securing the Casing
Use part Q to fasten the casing.
Attaching Inner Casing
Attach the inner casing (N2) as shown.
Lowering the Casing
Adjust and secure the casing height using part R.
Installing Filter Module
Install the filter module (O2) using parts M and L.
Securing Filter Module
Ensure the filter module is securely attached using part L.
Connecting Ø 150 mm Ducting
Connect the Ø 150 mm ducting to the appliance.
Connecting Ducting to Casing
Connect the ducting to the casing (N1) ensuring proper alignment.
Securing Casing with Screws
Use part Q to secure the casing.
Attaching Outer Casing (N2)
Attach the outer casing (N2) to the main unit.
Securing Outer Casing
Use part R to secure the outer casing.
Attaching Filter (W)
Install the filter unit (W) by lifting it into place.
Installing Filter Grid (P)
Place the filter grid (P) and secure it with part R.
Installing Filter (W) Again
Insert the filter unit (W) into the appliance.
Finalizing Installation (Lever Z)
Engage the lever (Z) to lock the casing in position.
Finalizing Installation (Lever Z)
Engage the lever (Z) to secure the final assembly.
Final Assembly Check
Confirm the installation is complete and secure.
Need help?
Do you have a question about the STILO COMFORT X A60 and is the answer not in the manual?
Questions and answers