Table of Contents
Advertisement
Advertisement
Table of Contents

Related Manuals for GAS GAS PAMPERA 450 - 2007


Summary of Contents for GAS GAS PAMPERA 450 - 2007
- Page 1 PAMPERA 450-07...
-
Page 3: Foreword
GAS GAS thanks you for the trust you have placed in us. By choosing a new PAMPERA 450 2007 you have become part of the great GAS GAS family and, as a user of the number one manufacturer of off-road motorbikes, you deserve to receive the best treatment we can offer you both in our post-sales relations and in the explanations we offer in this manual. -
Page 4: Important Notice
Read this Manual carefully. This manual covers aspects that will contribute to your security and to that of others, as well as guaranteeing a correct conservation and maintenance of this GAS GAS motorcycle you have just acquired. TO PROTECT THE FUTURE OF YOUR SPORT, MAKE SURE... -
Page 5: Table Of Contents
CONTENTS Foreword..................3 Chain....................26 Important notice ................4 Tension adjustment ................ 27 Table of contents ................5 Handlebars ..................29 General information ................ 6 Brakes..................... 29 Component locations ..............8 Steering ..................31 Side stand ..................10 Steering lock ................... 32 Petrol .................... -
Page 6: General Information
GENERAL INFORMATION ENGINE Motor 4 stroke, single-cylinder DOHC 4 valves, liquid cooled Displacement in cubic centimetres 443 cc Bore and stroke 95 x 62.5 mm Spark plug CR8 E o U24ESR-N Fuel supply Carburetor Ignition Digital CDI TRANSMISIÓN Transmission type 6 speed Clutch type Oil bath, multi-disk hydraulic action... - Page 7 Suspension Front ø'bf 45mm telescopic fork. Rear Progressive system with single shock absorber Suspension stroke Front 202 mm Rear 220 mm Front suspension oil SAE 7.5 Front fork oil level 200 mm (compressed, without spring) BRAKES Type Front / rear Disk brakes, pump and simple / double callipers.
-
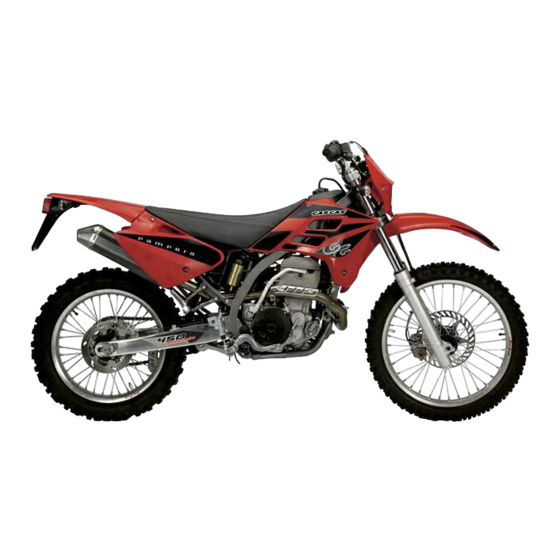
Page 8: Component Locations
LOCATION OF COMPONENTS GAS GAS PAMPERA 450 1- Clutch handle 2- Engine start button 3- Fuel tank cap 4- Front brake fluid tank 5- Front brake handle 6- Throttle control... - Page 9 7- Front suspension 16- Rear shock absorber 8- Radiator 17- Chain guide 9- Fuel tank 18- Chain 10- Air filter 19- Silencer 11- Seat 20- Rear shock absorber gas tank 12- Front brake disk 21- Tie rod and rocker suspension 13- Front brake callipers 22- Rear brake pedal 14- Rear brake fluid tank...
-
Page 10: Side Stand
PETROL To unfold side stand (A), open to vertical position. The GAS GAS PAMPERA 450 has a four stroke engine and requires 98 octane, unleaded petrol. The stand returns to its original position with the aid of the spring (B). -
Page 11: Serial Number And The Qualification Approval Plate
RECOMMENDED FUEL SERIAL NUMBER Use lead-free petrol with an octane rating equal to or higher than Printed on the steering tube. Indicates the frame number with which that shown in the table. the motorcycle is registered. Qualification approval plate OCTANE RATING METHOD MINIMUM OCTANE RATING The motorcycle is fitted with its own corresponding qualification... -
Page 12: Starting And Stopping The Engine
STARTING THE ENGINE Stopping the engine - Ensure that the motorcycle is in neutral. - Change gear to neutral. - Rotate the starter key clockwise (“ON” (A) position), in this way - Then release the throttle completely and rotate the ignition key the electric circuits are active and the engine can start. -
Page 13: Starting When The Engine Is Cold
STARTING WHEN THE ENGINE IS COLD SHIFTING GEARS The cold start function is responsible for aiding the engine start if it The transmission is a 6 speed, return shift type meaning that to go is cold. back to first gear from a higher gear, you must shift back through the gears one by one. -
Page 14: Stopping The Motorcycle
NOTE STOPPING THE MOTORCYCLE The slow speed necessary during the break-in period may cause For maximum deceleration, release the throttle (A) and apply both dirt to build up on the spark plug. If inspection of the spark plug shows this to be the case, replace the standard spark plug with front and rear brakes. -
Page 15: Maintenance Chart
MAINTENANCE CHART Article Period Period Period First 5 hours Every 30 hours Every 60 hours Air filter Inspect each time that the motorcycle has run or when necessary *Exhaust connectors and bolts *Valve tolerances Spark plug Fuel pipes *Change every 4 years Engine oil and filter oil *Engine oil pipes Coolant... -
Page 16: Battery
BATTERY 3. Disconnect the terminals ensuring that they do not enter into contact with metal parts then extract the battery. This battery is maintenance free and checking the fluid level is not required. It is advisable to check the charge of the battery periodically WARNING To remove the battery, follow these steps: Hydrogen gas produced by the battery may explode if exposed to... -
Page 17: Cooling System
- Recommended charge time = 5 - 8 hours. CAUTION Using a high-pressure water source could damage the radiator fins - The product (charge current) X (charge duration) must be and render them ineffective. within the range:. 0.5 – 0.8 Cn Do not obstruct or deviate the radiator air intake by installing non- approved accessories. - Page 18 Coolant Level CAUTION Use of incorrect coolant solutions will cause severe engine and - Situate the motorcycle so that it is perpendicular to the ground. cooling system damage. - Remove the radiator cap in two stages. First turn the cap anti-clock Use coolant containing corrosion inhibitors made specifically for wise and wait for a few seconds.
- Page 19 NOTE Changing the coolant Check the level when the engine is cold. - The coolant should be changed periodically to ensure long engine life.. - Wait for the engine to cool completely. - Situate the motorcycle so that it is perpendicular to the ground. - Remove the radiator cap.
-
Page 20: Spark Plug
-Inspection of the coolant. If white cotton-like patches appear in the the outer electrode. If the spark plug electrodes are oxidised, damaged liquid then this means that the aluminium elements of the cooling or the insulation is broken then replace the plug. system are corroded. - Page 21 Incorrect fitting of the spark plug or using an incorrect heat grade could causes serious engine damage that is not covered by the guarantee. Always use spark plugs recommended by GAS GAS. Consult the dealers or a qualified mechanic to know which spark plug is better for your bike.
- Page 22 7. Remove the cap from the spark plug. 6. Move the fuel tank to one side to access the spark plug cap. It is not necessary to disconnect the fuel line. NOTE A cap protects the spark plug. Keep this clean and dry. WARNING Fuel may be spilled when removing the tube from the tap.
-
Page 23: Air Filter
AIR FILTER - Extract bolt D and move it to one side of the terminal strip. - Extract the retention rod B and remove the air filter from its housing. An obstructed air filter restricts the air intake of the engine, increasing the fuel consumption and reducing the engine power, causing the destruction of the spark plug. -
Page 24: Accelerator Cable
THROTTLE CABLE - Clean the filter in a bath filled with filter cleaning fluid using a - Check that the throttle grip turns smoothly - Check that the throttle grip has 2-3 mm of play. soft brush. - If the play is incorrect, loosen the locknut on the upper end of the throttle cable, and turn the adjuster to obtain the correct amount of play. -
Page 25: Clutch
CLUTCH THE EXHAUST SYSTEM Proper clutch lever play is 2-3 mm. The exhaust and the silencer reduce noise and carry the gasses away from the driver. When there is too much play, first try to adjust the level of the clutch lever. -
Page 26: Chain
Changing the silencer packing WARNING A chain that breaks or jumps off the sprockets could snag on the - Remove the 6 cover rivets (A). engine sprocket or lock the rear wheel, severely damaging the - Extract the silencer cover (B). motorcycle and causing it to go out of control. -
Page 27: Tension Adjustment
In addition to checking the slack, rotate the rear wheel to inspect NOTE the drive chain and sprockets for damaged rollers, loose pins and Wheel alignment can also be checked using the straightedge or string method. links, unevenly or excessively worn and damaged teeth. WARNING Tension adjustment Misalignment of the wheel will result in abnormal wear and may... - Page 28 NOTE Chain Guide Slide For maximum resistance and safety, a genuine part must be used for replacement. Visually inspect the upper and lower part of the chain slider on the To minimise the risk of the principal connection coming loose, swing arm.
-
Page 29: Handlebars
Oil the sides of the rollers to enable oil to better penetrate inside. Tighten the bolts, first the front bolts and then the rear bolts to a Wipe off any excess oil. torque of 25 Nm. If the handlebar is correctly installed, there will be a minimal gap at the front and rear of the clamp after tightening (A). - Page 30 Play in front brake lever Adjust brake lever to a comfortable position. To adjust, loosen the nut under the rubber protection (B). Tighten after adjustment. Ensure that the brake responds correctly. (A). Brake pedal. (B). 10 mm of play. WARNING (A).
-
Page 31: Steering
If the thickness of either pad is less than 1 mm, replace both pads in the calliper as a set. Pad replacement should be done by an authorized GAS GAS dealer. STEERING The steering should always be kept adjusted so that the handlebar... -
Page 32: Steering Lock
To check the adjustment of the steering, raise the motorcycle off the - Install the upper suspension plate (D). ground, by placing a support underneath the chassis. Push the - Tighten the steering stem nut (B), the washers and bolts on the handlebar lightly to either side;... -
Page 33: Front Fork
CAUTION Never leave the key in the lock. If the steering is turned to the left with the key in the lock then this will be severely damaged. FRONT FORKS The front fork should always be adjusted for the rider's weight and track conditions. - Page 34 Standard level of oil CAUTION The front fork left and right tubes must be at the same level and aligned with the plate. Adjusting the oil level - Using the stand under the frame, stabilize the motorcycle upright. - Take out the handlebar bolts and take out the handlebars. - Remove the suspension caps from the rods.
-
Page 35: Rear Suspension
(1). Height of suspension pipe. ADJUST SUSPENSION HEIGHT The suspension height must be adjusted according to the height of the suspension tube (1) to 10 mm, with this exiting the upper flange. Suspension tube height: 10 mm REAR SUSPENSION The rear suspension is made up of a shock absorber, swing arm, tie rods and rocker arm. - Page 36 Spring adjustment Suspension spring - Remove the seat and the side covers. The standard spring is a 5.4. The length of the preloaded spring with - Loosen the bolt of the air filter conduit clamp. the shock in rest position is 258 mm. - Remove the silencer.
-
Page 37: Wheels
(A). Llave tensador radios WARNING Improper removal of the spring from the rear shock absorber body may cause the spring and associated parts to be ejected at high velocity. Always wear eye and face protection. Removal and installation of spring should be performed by an official distributor. -
Page 38: Cleaning
Cleaning 3- After cleaning - Remove the plastic bags and clean the air filter intake. 1- Preparation for cleaning - Lubricate the locations listed in the lubrication section. - Start the engine and let it heat for 5 minutes. Before cleaning the motorcycle must be prepared so that water does - Check the brakes before driving the bike. -
Page 39: Tightening Nuts And Bolts
Tighten bolts and nuts Every day before using the bike, rapidly ensure that all bolts and nuts are tightened. Also make certain that all of the other fastenings are in place and in good condition. 1- Front and rear wheels 9- Front axle bolt 17- Rear axle bolt 26- Rear brake pedal bolt... -
Page 40: Table Of Tightening Torques
TIGHTENING TORQUE TABLE Tighten all of the bolts and nuts using the correct spanners. If not correctly tightened then motorcycle damage or even an accident could occur. PART NAME Engine drain plug Kick pedal bolt Kick pedal nut Shift pedal bolt Spark plug Water pump cover drain plug Calliper mounting bolts... -
Page 41: Lubrication
LUBRICATION Lubricate the points shown here, with either motor oil or regular grease, periodically or whenever the vehicle is wet, and especially after using a high-pressure spray washer. Before lubricating each part, clean off any rusty spots with rust remover and wipe off any grease, oil, dirt, or grime. -
Page 42: Engine Oil
Chain lubrication Lubricate the chain after wet terrain or when the chain looks dry. A 20W-50 high viscosity oil rather than low viscosity oil is better because it will stay a long time in chain providing lubrication. 15W-40 15W-50 Put oil on the sides of the chain rollers (A) so that it penetrates into ENGINE OIL these;... - Page 43 (B), taking care to always keep the motorcycle horizontal. WARNING Genuine GAS GAS spare parts should always be used. If the filter is fitted incorrectly, the engine oil will not flow, resulting in poor running of the engine.
- Page 44 The engine may be damaged if the oil is not used properly or the 6. Position the filter cover and bolt it down, without surpassing the specifications recommended by GAS GAS MOTOS are not followed. recommended torque value. Use the type of oil specified in the section on Petrol and Oil recommendations.
-
Page 45: Suspension Adjustment
TUNING THE SUSPENSION - When the oil level is raised: The spring effect becomes more progressive, and the front fork No area of machine adjustment is more critical than proper suspension action feels 'harder' in the later stage of travel, near the bottom of tuning;... - Page 46 Changing poor settings Rear shock absorber symptoms Listed below are some symptoms of improper suspension settings - Too hard and the most adequate means of correcting them. Rigid suspension. . Hard spring. The proper settings can be achieved by applying the information in .
- Page 47 Experience Front and rear compatibility Learner driver: softer spring with more rebound damping. Use this procedure to determine if the suspension is balanced Expert: Hard spring. reasonably well: Situate the motorcycle so that it is perpendicular to the ground. While standing next to the machine, pull on the front brake and place one foot on the brake firmly.
- Page 48 Front fork doesn’t respond to small potholes in wide turns Adjustments according to bottoming conditions - Front fork hard: (rear shock absorber). 1. Reduce the oil level 10 mm. 2. Use a soft spring. - Bottoms at low speed: Increase spring preload to maximum. Rear tire won't "hook up"...
-
Page 49: In Competition
Special care according to track conditions AVAILABILITY OF SPARE PARTS Your Gas Gas dealer will provide any information you may require 1. In dry, dusty conditions (such as volcanic ash or fine powdery about spare parts. dust) special care must be given to keep the air cleaner element clean. -
Page 50: Storage
STORAGE (2) Maintenance notice for after riding in rain on muddy course When the motorcycle is to be stored for any length of time, it should be prepared for storage as follows: 1. Apply grease to swing arm pivot and rear suspension system. Clean the entire vehicle thoroughly. -
Page 51: Multifunction Instructions
GAS GAS MULTIFUNCTION INSTRUCTIONS Panel description The multifunction apparatus, which is waterproof, has 4-8 LED 1. RESET button indicators on both sides of a central indicator screen 2. 2nd row of indicators This central indicator screen, made of liquid crystal and with 3. - Page 52 Technical characteristics FUNCTIONS Symbol TECHNICAL CHARACTERISTICS INCREMENTS PRECISION Bar Tachometer 500 – 11,000 rpm 500 rpm Digital Tachometer 100 – 19,900 rpm 100 rpm Gear change indicator 100 – 19,900 rpm 100 rpm Maximum Tachometer Value 100 – 19,900 rpm 100 rpm ±...
- Page 53 Functions ODO: Mileometer RPM: Bar It shows the total mileage accumulated by the vehicle. The data is Tachometer with bar graph The bar graph of the tachometer displays stored in the memory, even when the device is not running. up to 11,000 rpm. RT: Time of use controller RPM: Digital Tachometer It calculates the total time in use since the last RESET operation.
- Page 54 Operation of the buttons MODE BUTTON 1. Press the MODE button to switch from one function screen to another when the speed sensor detects no signal. 2. Press the MODE button to switch from one partial screen to another when the speed sensor detects a signal.
- Page 55 Multifunction and wheel circumference adjustment The configuration operations include the 112/24 hour clock, the gear change according to rpm indicator, the number of engine revolutions by signal, the wheel circumference and the units of measurement. The configuration must be carried out step by step. The computer will return automatically to the main screen if no button is pressed in any adjustment screen for 75 seconds.
- Page 56 10. When cXXXX appears on screen, the c stands for circumference and is followed by four digits by default; the flashing digit is the one to be changed. 11. Press the RESET button to increase the value of the flashing digit one by one; press the MODE button for 2 seconds to confirm the digit change and pass on to the following digit.
-
Page 57: Fault Diagnosis
FAULT DIAGNOSIS NOTE This is not an exhaustive list, it is meant simply as a rough guide to assist troubleshooting for some of the more common difficulties. FAULT CAUSE SOLUTION The starter motor does not work - The fuse for the starter relay is blown. - Remove the number plate on the left hand side and the air filter cover then change the starter motor fuse. - Page 58 FAULT CAUSE SOLUTION Engine rotates but does not start - The CDI pin connector, generator or coil - Clean the petrol tank ventilation. oxidised or in poor condition. - Petrol /air mixture incorrect. The engine starts but does not - Air supply incorrect. - Close the starter.
- Page 59 FAULT CAUSE SOLUTION - Engine oil level is too high. - Correct the level of engine oil. Drain oil as necessary from High oil consumption the engine. - The quality or viscosity of the oil is - Empty the engine oil and fill with oil of the recommended insufficient.
- Page 60 FAULT CAUSE SOLUTION Gears don’t engage - The spring of the selector is broken. - Replace the down selector mechanism spring. - Cylinder change if broken. - Replace the gear drum. - Gear ratchet spring broken. - Replace the ratchet spring of the selector. Gears jump - Gear change fork damaged in the gears.
- Page 61 FAULT CAUSE SOLUTION Shock absorption too hard - Rear shock absorber maladjusted. - Adjust the rear shock. - Front forks twisted. - Change front fork. Go to a specialist workshop. Shock absorption too soft - Front forks low oil. - Add oil to the forks as required. - Front fork oil viscosity too low.
- Page 62 FAULT CAUSE SOLUTION Motorcycle pulls to one side - Chassis twisted. - Change the chassis. Go to a specialist workshop. - Steering incorrectly adjusted. - Adjust the steering. Go to a specialist workshop. - Steering shaft bent. - Change steering shaft. Go to a specialist workshop. - Front forks twisted.
-
Page 63: Guarantee Manual
Warranty terms of the manufacturer GASGAS Motos, S.A. The company GAS GAS MOTOS, S.A. (hereafter referred to as “GG”), with this present document guarantees the consumer, the purchaser of a vehicle manufactured by GG, that both the materials and the manufacturing are free of defects in accordance with the highest standards of quality. - Page 64 Obligation of the purchaser GG will have the right to reject any claims under Warranty in the event that: a) The purchaser has failed to submit the vehicle to any of the inspections and/or maintenance work required in the Users’ Manual, or has exceeded the date set for such inspections or maintenance work.
- Page 65 f) Any acoustic or aesthetic phenomenon that does not significantly affect the condition or use of the motorcycle (for example, small or hidden imperfections, noise or vibrations that are normal in use, etc.) g) Phenomena that are the result of the ageing of the vehicle (for example, discolouring of painted or metallic coated surfaces). Various 1.- GG shall have the prerogative to decide, at its own discretion, whether to repair or replace defective parts.
- Page 66 Notes Notas...
Need help?
Do you have a question about the PAMPERA 450 - 2007 and is the answer not in the manual?
Questions and answers