
Related Manuals for Sonnen eco 20


Summarization of Contents
About this manual
Target audience
Defines the intended readers of the manual for installation and operation.
Symbols used
Explains warning symbols, important information icons, and electrical symbols.
Terminology
Defines terms used in the manual, referring to the storage system as 'sonnen eco Gen 3.1'.
Safety
Intended use
Outlines the proper and intended uses of the sonnen eco Gen 3.1 storage system.
Prohibited uses
Lists actions that are forbidden to prevent danger or damage to the system.
General warnings
Provides crucial warnings about potential hazards, like battery damage from deep discharge.
General safety instructions
Details essential safety practices for installation, maintenance, and compliance with regulations.
Fire-related instructions
CAUTION: Risk of injury from escaping electrolyte
Warns about risks from escaping electrolyte and lists potential effects and consequences.
WARNING: Risk of burns!
Alerts to burn risks when working on the system and lists precautions.
Dimensions
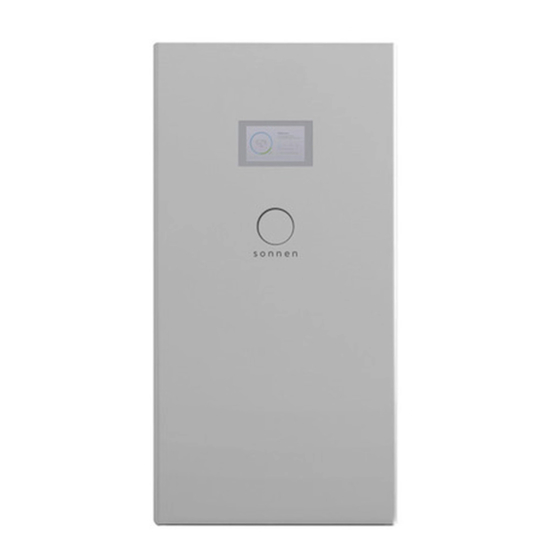
Key components
Identifies major parts of the sonnen eco Gen 3.1 system, like Hub board and Inverter.
Storage and transport
Storing the system
Details environmental conditions and precautions for storing the storage system and battery modules.
Transporting the system
Outlines requirements and procedures for safely transporting battery modules as hazardous materials.
Inspecting the battery modules
CAUTION: Risk of injury using damaged battery modules!
Warns about hazards from damaged battery modules and provides contact info for service.
Adjusting the temperature after transport
Provides instructions for preventing condensation damage after transporting the system in cold temperatures.
Moving the storage system
Gives crucial safety warnings and guidelines for lifting and moving the heavy storage system.
Installation
Tools needed
Lists essential tools required for the installation process of the storage system.
Installation basic steps
Provides a step-by-step overview of the installation procedure.
Choosing a mounting location
Guides on selecting an appropriate location based on environmental and safety requirements.
Clearance requirements
Specifies necessary clearances around the unit for ventilation and maintenance.
Inspecting the storage system
Mounting the storage system
Details safety precautions and steps for securely mounting the storage system.
Install the mounting cleat
Instructions for installing the wall mounting cleat for the storage system cabinet.
Place the leveling mat
Guidance on placing a leveling mat to ensure a stable base for the storage unit.
Cabinet Mounting Steps
Mount the cabinet on the cleat
Steps for positioning and securing the cabinet onto the installed mounting cleat.
Open the door
Instructions on how to unlock and open the cabinet door using the provided keys.
Remove the dead front
Describes how to remove the dead front panel to access electrical connections.
Connecting the cabinets to each other
Details how to connect main and battery extension cabinets for eco 15-20 models.
Connecting cabinets electrically
Remove bottom cover of main cabinet
Steps to remove the bottom cover of the main cabinet for electrical connections.
Install edge protectors
Instructions for installing edge protectors on cabinet openings for safety.
Grounding and Conduits
Connect flat band grounding strap
How to connect the flat band grounding strap to the cabinets for safety.
Place conduits
Guidance on placing conduits for wiring and refers to cable size table.
Access Panel Removal
Remove access panel
Instructions on removing the access panel for working on battery module connections.
Electrical connections
WARNING: Risk of burns!
Safety warnings related to handling the storage system, including PPE and removing jewelry.
DANGER: Danger to life by electric shock!
Critical warning about the risk of electric shock from improper electrical connections.
WARNING: Risk of fire or damage to equipment
Warning about improper sub-panel wiring and potential fire hazards.
Installing battery modules
Battery Module Safety Warnings
Combines warnings for burns and short circuit damage during installation.
Battery Module Preparation and Placement
Covers unpacking, labeling, and installing battery modules in the cabinet.
Battery Module Arrangement and Securing
Battery module configurations
Illustrates different battery module arrangements based on the specific eco model.
Securing battery modules
Instructions for securing battery modules using thumb screws and mounting brackets.
Bus Bar and Set Screw Installation
Insert set screws
Details how to insert set screws into battery terminals, with safety warnings.
Install horizontal bus bars
Instructions for installing 2- and 3-battery bus bar arrangements.
Bus Bar Configurations and Jumper Cables
4 battery bus bar configuration
Instructions for installing 4-battery bus bar configurations and terminal spacers.
Connect power jumper cables
Steps for connecting power jumper cables between battery modules, with safety notes.
Homerun Cables and BMS Communication
Connect power homerun cables
Instructions for connecting homerun cables to battery modules and terminal spacers.
Install flange nuts
Steps for installing and torquing flange nuts onto set screws, with fire hazard warning.
Connect BMS communication cables
Details identifying communication ports and daisy-chaining modules.
BMS Communication Daisy-Chain
Link-IN to Link-OUT daisy-chain
Instructions for daisy-chaining battery modules using Link-IN and Link-OUT ports.
Check wiring
Guidance on verifying DC connections and ensuring battery modules are correctly installed.
Test for neutral loops
Procedure to test for neutral loops in AC wiring to prevent damage.
Digital interface
Internet portal
Explains how to connect to sonnen servers via web portal/app for control and monitoring.
Establish connection to the Internet
Steps to connect the system to the internet via Ethernet and router configuration.
Required open ports for storage system
Lists TCP/UDP ports needed for internet connectivity and services.
Portal Overview
Portal overview screen
Describes the four icons on the portal's left pane for system status and data.
Status view
Explains the status view display, showing power flow, production, consumption, and charge.
History view
History view
Visualizes PV production, consumption, battery charge/discharge, and state of charge.
History view overlays
Explains how to toggle overlays on graphs for detailed analysis of system data.
History view week view
Demonstrates viewing historical data in a week-long graph format.
Detailed History Analysis
Specific data history
How to use the cursor to view specific data points on the history graphs.
Typical history graph
Dissects a typical graph showing PV, loads, and battery behavior throughout a day.
Typical history graph values
Explains specific values shown in the history graph, correlating them with system events.
Direct access to the storage unit
Identify storage unit
Navigates to the sonnen portal to identify and configure the storage unit.
Log into the storage unit
Instructions for logging into the storage unit's interface using provided credentials.
Storage unit dashboard
Overview of the dashboard displaying energy flow, production, consumption, and battery status.
Commissioning Assistant Steps
Identify and Log in to Storage System
Locates and accesses the storage unit's interface for setup.
Install System Updates
Guides on installing necessary system updates for optimal performance.
Set Installation Location and Verify Date/Time
Configures location, time zone, and verifies date for accurate system operation.
PV System and Generator Configuration
Enter PV system information
Inputs maximum PV system power in watts for accurate energy management.
Enter Generator Autostart information
Configures generator start/stop parameters based on state of charge.
Enter Time of Use settings
Configures time-of-use billing parameters for cost optimization.
Micro-grid and Meter Configuration
Configure Micro-grid wake-up times
Sets times for the system to attempt charging during grid outages.
Configure meters
Guides on configuring production and consumption meters for system monitoring.
Owner and Installer Information
Provide information about owner
Enters owner's contact and address details for system registration.
Provide information about installer
Enters installer's details and confirms installation correctness.
Select Operating Mode
Allows selection of the desired operating mode (Manual, Backup, Self-consumption, Time of Use).
Backup Buffer and System Checks
Set back-up buffer
Adjusts the battery reserve capacity for backup power during outages.
Verify CT configuration
Checks current transformer configuration using a multimeter.
System check
A comprehensive protocol to verify all aspects of the storage system's operation.
Terminal block map for installation and service
Grid AC
Diagram showing terminal block layout for Grid AC connections, including fuses and L1/L2.
Microgrid AC/Grid N
Diagram illustrating terminal block for Microgrid AC/Grid N connections.
Appendix 2. Glossary
Backup mode (or off-grid mode)
Operation mode providing power from battery modules when utility grid is unavailable.
Deep discharge
Bringing battery charge to a low level that damages the battery, requiring weeks or months.
Feed-In
The amount of excess PV passed through the storage system to the utility grid.
Glossary Terms
Protected loads panel
Panel for important appliances, isolated from the main panel to prevent feedback.
Self-consumption
Using solar power for appliances instead of grid power.
Storage system
The sonnen eco Gen 3.1, combining inverter, battery modules, and algorithms.
Need help?
Do you have a question about the eco 20 and is the answer not in the manual?
Questions and answers