Table of Contents
Advertisement
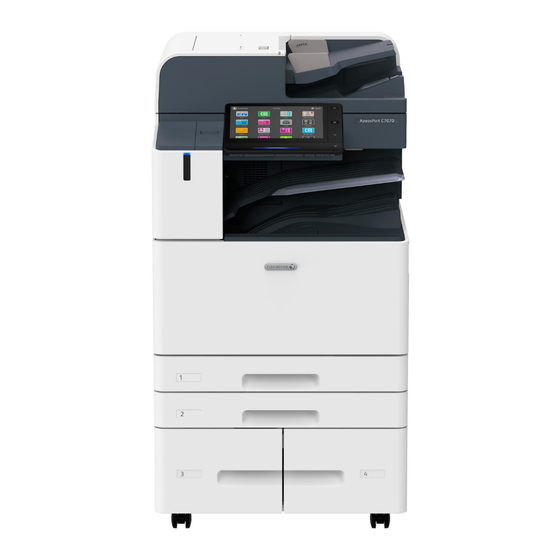
ApeosPort
Reference Guide
Main Unit
A guide describing the basic operations, maintenance, troubleshooting and precautions for use of the main unit.
This manual may not be edited, modified or copied in whole or in part without the written consent of the publisher.
Parts of this manual are subject to change without prior notice.
The screen shots and the illustrations in this manual are used as examples. They may differ from yours depending on the model, the
software, or the OS.
®
Edition 4, September 2020 / ME9028E1-1
©Fuji Xerox Co., Ltd. All rights reserved.
4570/3570
Advertisement
Table of Contents

Related Manuals for Fuji Xerox ApeosPort 3570


Summary of Contents for Fuji Xerox ApeosPort 3570
- Page 1 The screen shots and the illustrations in this manual are used as examples. They may differ from yours depending on the model, the software, or the OS. Edition 4, September 2020 / ME9028E1-1 ©Fuji Xerox Co., Ltd. All rights reserved.
-
Page 2: Before Using The Machine
Reference Guide - Main Unit Before Using the Machine Device Components Print Area Paper Device Components Front view Tandem Tray module model Component Function Duplex Automatic Document Feeder Load documents here. Document Cover Holds a document in place. Document Glass Load a document here. - Page 3 i Before Using the Machine Left Side and Rear View Component Function Telephone line connectors Use “TEL” to call when using the telephone or handset (optional). Use “LINE 1” for calls using a handset connected to the TEL jack. Upper Left Cover Open this cover to clear paper jams.
- Page 4 Reference Guide - Main Unit Inside Component Function Toner Cartridges Contains toner. Waste Toner Container Collects waste toner. (R5) Conveyance Box Remove this box when replacing a drum cartridge. Fusing Unit (R8) Fuses toner on paper. Do not touch this unit as it is extremely hot.
-
Page 5: Control Panel
i Before Using the Machine Control Panel Refer For Control Panel, refer to the Reference Guide - Operations. Fax Module Model Component Function Power button The power switches on. Note When “Please wait...” is displayed, the machine is warming up. The ... -
Page 6: Guaranteed Print Area
Reference Guide - Main Unit Print Area A3 size (297 x 420 mm) 420 mm Lead edge 4 mm Trail edge 2 mm 414 mm 4.1 mm 4.1 mm 411.8 mm Left edge 2 mm 4.1 mm Extended printable area = Guaranteed print area 297 mm Standard printable area 293 mm... -
Page 7: Extended Printable Area
i Before Using the Machine Extended Printable Area Changing the printable area settings enables you to print over a margin (4.1 mm) for the standard printable area. A3 or smaller Area excluding an image loss area along all four edges of the paper. Larger than A3 Copying 297 x 432 mm max. -
Page 8: Recommended Paper
Reference Guide - Main Unit Paper Recommended Paper Standard paper Image processing to the Paper name Paper type setting for paper tray Paper weight paper type Plain Plain (A) 64 g/m V-Paper Plain Plain (A) 64 g/m To use paper other than the above, contact our customer support center or sales agency. Recycled paper Paper Paper type setting for... -
Page 9: Handling Paper
i Before Using the Machine Handling paper Do not use collected pieces of paper. Do not use wrinkled or folded paper. Do not load paper of different sizes or types in the same tray. Before loading paper into the tray, fan a stack of paper well to prevent paper jams and double-feeding ... -
Page 10: Paper And Other Media
Reference Guide - Main Unit Basic Operations of the Machine p.10 Paper and Other Media p.15 Original Documents p.17 Outputting Paper Paper and Other Media After loading paper, configure the paper tray settings on the Home screen. Important Do not place paper or other objects in the reserved space of the tray. Doing so can result in a paper jam ... -
Page 11: Loading Special Paper
ii Basic Operations of the Machine When loading paper whose size is JIS B4 or larger, pinch the knob and lift the paper rear end guide, and set the guide into the hole for the indicated size. Pinch the two guide clips, and adjust to the correct paper size. - Page 12 Reference Guide - Main Unit Pull out Paper Tray 1 until it stops. Slightly lift the front side of Paper Tray 1 and remove Paper Tray 1. Push in the Envelope Tray. On the Home screen, login to the Administrator Mode. Select [Device] >...
-
Page 13: Bypass Tray
ii Basic Operations of the Machine Pull out the paper tray until it stops. When paper is already loaded in the tray, take out the paper. Pinch the guide clip, and adjust to the correct paper size. Fan a stack of paper, face the print surface up, and then load the paper with edges aligned according to the direction of the arrow. - Page 14 Reference Guide - Main Unit Fan a stack of paper, face the print surface down, and insert the paper gently along the paper guide until it stops. Important Do not set documents above the maximum fill line. It may cause paper jams or machine malfunction. Adjust the paper guide to the correct paper size.
-
Page 15: Original Documents
ii Basic Operations of the Machine Original Documents Document Feeder Loadable document B1-PC Document size Width 125 to 297 mm Length 85 to 432 mm Document weight Single side printing 38 to 128 g/m Double side printing 50 to 128 g/m Maximum number of sheets 130 sheets (P paper) Note... -
Page 16: Document Glass
Reference Guide - Main Unit Document Glass Loadable document Document size Width Up to 297 mm Length Up to 432 mm Open the document cover, and wipe off any dirt from the document glass. Load the document face down with the document aligned with the upper left corner of the document glass. -
Page 17: Outputting Paper
ii Basic Operations of the Machine Outputting Paper Print Surface The print surface refers to the surface printed on in single-sided printing (the first page in double-sided print- ing). Trays other than Side Tray: Face-down Side Tray: Face-up Note Paper cannot be output upside down. Single-sided printing Double-sided printing Paper size... - Page 18 Reference Guide - Main Unit Offset Note Offset on the Extra Center Tray is optional. Offset cannot be performed on the Side Tray. The paper is output with offset stacking for easy separation. Use the printer driver to set the offset of outputs. Paper size Width 128 to 297 mm...
-
Page 19: Maintenance
Consumables recommended by Fuji Xerox are manufactured under the standards suitable for this machine. Using consumables not recommended by Fuji Xerox may affect print quality or performance provided by the product. Use consumables that Fuji Xerox recommends for this machine. -
Page 20: Toner Cartridge
Reference Guide - Main Unit Toner Cartridge Note When replacing toner cartridges, keep the machine power switched on. When replacing a toner cartridge, toner may spill and soil the floor. We recommend laying a piece of paper or a sheet on the floor beforehand. Confirm that the machine is not operating, and open the front cover. -
Page 21: Waste Toner Container
iii Maintenance Waste Toner Container The toner remaining in the drum after copying (or printing) is collected in the waste toner container. Note Do not take out or shake the waste toner container before it is filled up. Accurate detection can become no longer possible, and the toner may be spilled from the Waste Toner Container. -
Page 22: Drum Cartridge
Reference Guide - Main Unit Drum Cartridge Customers with total service contract agreement Contact our customer support center or sales agency. Customers with spot maintenance contract agreement Replace the drum cartridge according to the steps described below. Note A trouble with image quality results if the drum cartridge is placed under a direct sunlight or intense fluores- cent light, or if the drum surface is touched and scratched. - Page 23 iii Maintenance Place your hand under the drum cartridge, and slowly pull out the drum cartridge. Take the new drum cartridge out of the box, place the used drum cartridge into the supplied plastic bag, and put it away into the box. Without removing the protective cover, slowly push in the new drum cartridge until a clicking sound is heard.
- Page 24 Reference Guide - Main Unit Stamp Replacement Kit Open the document cover, and grip the lever to open the Side 2 scanner. Stick the supplied pin into the old stamp kit and pull it out of the machine. Insert a new stamp kit. Close the Side 2 scanner, then close the document cover.
-
Page 25: Led Printhead
iii Maintenance Cleaning Main Unit When wiping the main unit with a wet cloth, use a soft, moistened and tightly-squeezed cloth. The main unit may break down if the moisture remains on it. Do not use chemicals such as benzine or thinner. Doing so may damage the paint or coating on plastic ... - Page 26 Reference Guide - Main Unit Scanner Document cover, document glass, film, scanner glass Wipe off any dirt with the supplied cloth about once a month. When stains cannot be removed easily, wipe them lightly with the soft cloth slightly moistened with a thin neutral detergent solution. Open the document cover, and grip the lever to open the Side 2 scanner.
- Page 27 iii Maintenance Document Feeder rollers Clean the Document Feeder rollers about once a month. Pull up the front handle of the left cover of the Docu- ment Feeder, and open the left cover until it stops. While turning the rollers, wipe them with a soft cloth slightly moistened with water.
-
Page 28: Problem Solving
Reference Guide - Main Unit Problem Solving p.28 Troubleshooting p.39 Paper Jams Troubleshooting If you have an EP-BB MFD management service contract, the machine automatically sends an inspection or repair request to our Customer Support Center as needed. A service representative visits you in response to the notification as required. -
Page 29: Image Quality Trouble
iv Problem Solving Image Quality Trouble Symptom Cause/Remedy Output is too light The paper is damp. Replace the paper. (faded or unclear). The paper is not appropriate for the machine. Load appropriate paper. A drum cartridge or the fusing unit is damaged or has deteriorated. Depending on its condition, the drum cartridge or fusing unit may need replace- ment. - Page 30 Reference Guide - Main Unit Symptom Cause/Remedy The whole page is printed black. A drum cartridge is damaged or has deteriorated. Depending on its condition, the drum cartridge may need replacement. Contact our customer support center or sales agency. There may be something wrong with the high-voltage power supply. Contact our cus- tomer support center or sales agency.
- Page 31 iv Problem Solving Symptom Cause/Remedy Text is smeared. The paper is not appropriate for the machine. Load appropriate paper. The paper is damp. Replace the paper. Text is garbled. The machine is set to substitute TrueType fonts with the printer fonts. Printed output is not the same as Set the printing method of TrueType fonts to [Always Use TrueType Fonts] under the original data displayed on...
-
Page 32: Trouble During Copying
Reference Guide - Main Unit Symptom Cause/Remedy The machine does not If the paper guides are not positioned correctly, the machine may not correctly detect the size correctly select a paper of the paper loaded. Adjust the paper guides to the correct positions. tray. -
Page 33: Trouble During Printing
iv Problem Solving Symptom Cause/Remedy The image is not cop- Clean the document cover or document glass. ied to the desired size. If the document is highly transparent, such as transparencies, place a white sheet of paper on top of the document when scanning. Load the document correctly. -
Page 34: Trouble During Faxing
Reference Guide - Main Unit Trouble during Faxing Symptom Cause/Remedy A Transmission Report Check the “Transmission Results” in the Transmission Report - Job Undelivered and take an - Job Undelivered is appropriate action. If an error code is displayed, refer to the “Error Code Search” on the support output. - Page 35 iv Problem Solving Symptom Cause/Remedy When a reception password has been set, the machine accepts only data or polling fax sent with the correct reception password in F code. The machine is in manual receiving mode. Cancel the manual reception, or set the fax receiving mode to automatic receiving.
- Page 36 Reference Guide - Main Unit Symptom Cause/Remedy Unable to communi- Register the correct VoIP gateway on the machine. cate (IP fax (SIP) via Confirm with your network administrator whether the VoIP gateway is working properly. VoIP gateway). Confirm with your network administrator whether the VoIP gateway settings are correct. The destination G3 fax machine is not working properly.
-
Page 37: Trouble During Scanning
iv Problem Solving Symptom Cause/Remedy Although the Box An unregistered confidential box is selected on the Box Selector feature. Select a registered Selector feature is set, confidential box. the received docu- ment is printed, and cannot be stored in the confidential box selected by the received document. - Page 38 Reference Guide - Main Unit Symptom Cause/Remedy Unable to send data over the Specify the server correctly. network. Specify the storage location correctly. When SMB is selected, correctly specify the shared name. When SMB (UNC Format) is selected, specify the save destination correctly. The login name is not entered correctly.
-
Page 39: Paper Jams
iv Problem Solving Paper Jams If paper is jammed, the machine stops and an alarm sounds. A message also appears on the touch panel dis- play. Follow the instructions displayed to remove the jammed paper. Gently remove the paper being careful not to tear it. If paper is torn while it is being removed from the machine, remove all the torn pieces making sure that none remain inside the machine. - Page 40 Reference Guide - Main Unit Fusing Unit (1) Pull the lever [A1]. (2) Remove the jammed paper. (3) Return the lever [A1] to the original position. Center Tray Exit (1) Pull the lever [A2]. (2) While holding the lever [A2], remove the jammed paper. (3) Return the lever [A2] to the original position.
- Page 41 iv Problem Solving (2) Pull the lever [A3]. (3) While holding the lever [A3], remove the jammed paper. (4) Return the lever [A3] to the original position. Close the upper left cover. Inside Lower Left Cover While lifting up the release lever, open the lower left cover.
- Page 42 Reference Guide - Main Unit Standard Trays Pull out the paper tray where the paper jam occurred until it stops. Remove the jammed paper. Push in the paper tray. Tandem Trays Pull out the paper tray where the paper jam occurred until it stops.
-
Page 43: Duplex Automatic Document Feeder
iv Problem Solving Open the cover and remove the jammed paper. Close the cover and push in the paper tray. Bypass Tray Remove the jammed paper. Duplex Automatic Document Feeder B1-PC Pull up the front handle of the cover and open the cover until it stops. - Page 44 Reference Guide - Main Unit If you cannot find the document, open the document cover, grip the lever to open the Side 2 scanner, and then remove the document. Close the Side 2 scanner, then close the document cover. Lift the document feeder tray and remove the docu- ment.
-
Page 45: Specifications
Note The specifications are not intended to guarantee the image quality performance and feeding performance of all papers. Use of Fuji Xerox brand paper is recommended. To use other paper, contact our customer sup- port center or sales agency. Refer For specifications of optional units, refer to the chapter of the concerned unit in the Reference Guide - Optional Units. -
Page 46: Print Function
Reference Guide - Main Unit Item Specification Power supply Power supply AC 100 V ± 10 %, 15 A, 50/60 Hz common Maximum power consumption Maximum power con- 1.5 kW sumption Standby Mode 60 W Low Power Mode 45 W Sleep Mode 0.5 W Note... -
Page 47: Scan Function
v Appendix Item Specification Built-in fonts Standard 2 Japanese fonts (Heisei Mincho W3, Heisei Kaku Gothic W5), 19 Western fonts ® ® ™ Optional Adobe PostScript Heisei 3 font version : 3 Japanese fonts (Heisei Mincho W3, Heisei Kaku Gothic W5,Heisei Maru Gothic W4), 136 Western fonts Morisawa 2 font version : 2 Japanese fonts (Ryumin L-KL, Gothic BBB Medium), 136 Western fonts... -
Page 48: Fax Function
Reference Guide - Main Unit Item Specification E-mail transmis- Supported protocol TCP/IP(SMTP) sion Output format Same as the PC storage Fax Function Basic function Item Specification Document size Maximum: A3, 11 x 17”, long document (maximum: 600 mm) Recording paper size Maximum: A3, 11 x 17”, Minimum: A5 Transmission time 2 seconds or more but below 3 seconds... -
Page 49: Envelope Tray
(Single-pass duplex scanning: Monochrome 154 sheets/minute, Color 154 sheets/ minute) Note The values above apply when a Fuji Xerox standard document (A4) is saved in the confidential box at 200 dpi. When the Quiet Mode is disabled, the scanning speed of a mono- ... -
Page 50: Safety Notes
Reference Guide - Main Unit Safety Notes Location of Warning and Caution Labels Finisher B -50-... - Page 51 v Appendix Symbols Marked on the Machine Caution, Danger, Do not use envelopes Do not throw a toner Warning with windows cartridge into fire Caution. Hot Do not use postcards Do not throw a waste toner container into fire Watch your fingers Do not use folded, “...
Need help?
Do you have a question about the ApeosPort 3570 and is the answer not in the manual?
Questions and answers