
Related Manuals for Alcatel-Lucent Enterprise OpenTouch 8158s


Summary of Contents for Alcatel-Lucent Enterprise OpenTouch 8158s
- Page 1 8168s WLAN Handset 8158s WLAN Handset OpenTouch™ Suite for MLE OXO Connect User Manual 8AL90391ENAAed01 – 06/2020...
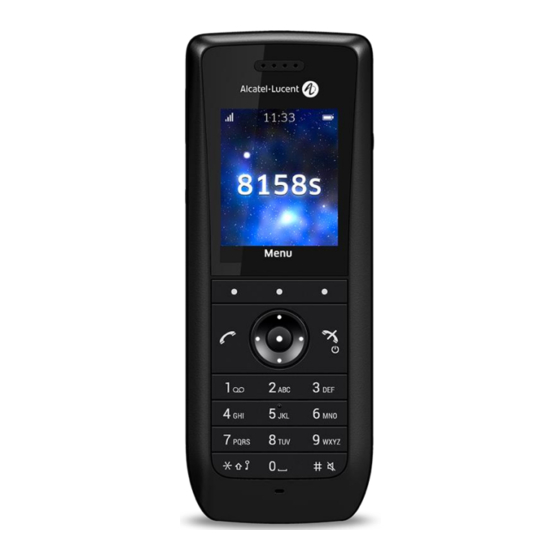
- Page 2 Getting to know your telephone - Phone description This document describes the functions offered by the 8168s WLAN Handset and 8158s WLAN Handset. Some functions depend on the PBX/Call manager and protocol (SIP) versions, and your system may not support all functions described in this document. This document describes features when the device is connected to an OmniPCX Enterprise system (OXE) or OXO Connect (OXO) or SIP third party (SIP) system.
-
Page 3: Table Of Contents
Getting to know your telephone - Phone description Getting to know your telephone Phone description Status icons Local menu icon 1.3.1 Common menu 1.3.2 Additional menu in SIP mode Call icons Main screen Accessing and navigating the phone local menu Alpha-numeric keyboard 1.7.1 Numeric keypad. - Page 4 Getting to know your telephone - Phone description 3.2.8 Missed calls 3.2.9 Consulting text messages 3.2.10 Sending a written message to an internal contact 3.2.11 Send a voice message copy 3.2.12 Sending a recorded message to a number or a distribution list 3.2.13 Broadcasting a message on the loudspeakers of a station group* 3.2.14...
- Page 5 Getting to know your telephone - Phone description 4.2.3 Microphone switched off during calls (mute) 4.2.4 Activating/deactivating the loudspeaker (8168s Wlan Handset) 4.2.5 Making a second call during a conversation 4.2.6 Receiving a second call 4.2.7 Switching between two calls (Broker call) 4.2.8 Transferring a call 4.2.9...
- Page 6 Getting to know your telephone - Phone description 5.4.5 Define navigation key 5.4.6 Define multifunction button 5.4.7 Services (8168s Wlan Handset) 5.4.8 Profiles 5.4.9 Define time and date format 5.4.10 Set time and date manually 5.4.11 Configure your phone during charging List of accessories Belt clip Cover for belt clip...
-
Page 7: Getting To Know Your Telephone
Getting to know your telephone - Phone description 1 Getting to know your telephone 1.1 Phone description • Profile button (1) (2) : adjusting audio functions (short press). • Multifunction button : used as a shortcut to functions with long- or double-press modes. - Page 8 Getting to know your telephone - Phone description • Access the phone local menu. • Confirm. • Navigate. • Left, right, up and down keys are used to define shortcuts • Move the cursor into a text. • Softkeys: access various functions according to the configuration and the status of the handset.
-
Page 9: Status Icons
Getting to know your telephone - Status icons 1.2 Status icons The status icons are displayed on the welcome screen and indicate the status of the telephone. Depending on your phone, some status icons are never displayed. Some icons depend on the system the handset is connected to. -
Page 10: Local Menu Icon
Getting to know your telephone - Local menu icon 1.3 Local menu icon The MENU is accessible from the welcome screen by pressing the OK key. It provides access to all local functions available on your phone. All icons are described in their unselected state. 1.3.1 Common menu Connections (system, Bluetooth®, headset): Access the connection settings (Bluetooth®... -
Page 11: Main Screen
Getting to know your telephone - Main screen 1.5 Main screen The screen is an example and depends on the connected system. Time, date and status bar This area shows icons that give the user information about signal strength, battery status, sound off, missed calls, new messages/voicemail, key lock, phone lock, headset connection, Bluetooth connection/Bluetooth headset connection, and the current date and time. -
Page 12: Alpha-Numeric Keyboard
Getting to know your telephone - Alpha-numeric keyboard 1.7 Alpha-numeric keyboard Your phone is equipped with alphanumeric keyboard. 1.7.1 Numeric keypad. • A short press on a key enters the digits 0–9 and the characters * and #. • A long press on 0 enters the character + (used, for example, to enter an international number), if the hotkey function on key 0 is deactivated. -
Page 13: Getting Started
Getting started - Unboxing 2 Getting started In order to have a fully operational handset, make sure that you have the following items: battery, AC/DC adapter, and power supply. 2.1 Unboxing Handset Cover of the belt clip Safety and regulatory Belt clip instructions Battery... -
Page 14: Charging Your Telephone Battery
Getting started - Charging your telephone battery While maintaining the battery Before inserting the battery module in position, slip the lock module into the phone, make Place the battery in its to the locked position. sure that its lock is in the compartment. -
Page 15: Switching On Your Telephone
Getting started - Switching on your telephone 2.4 Switching on your telephone • Press the switch on/off key (long press). • Your telephone is switched on. The handset vibrates and the display lights up. If the display fails to light up or the battery icon is flashing, recharge the battery. -
Page 16: Using Your Telephone
Using your telephone - OmniPCX Enterprise 3 Using your telephone Features depend on the connected system. Contact your administrator to find out which system your phone is connected to: • OmniPCX Enterprise (OXE). • OXO Connect (OXO). • SIP System (SIP). 3.1 OmniPCX Enterprise This section describes how to use your telephone connected to OmniPCX Enterprise. -
Page 17: Making Calls By Name (Company Directory)
Using your telephone - OmniPCX Enterprise 3.1.3 Making calls by name (company directory) Long press on the # key. Press the OK key or softkey. or OK Enter the first letters of your contact's name. Select the search mode (by last name, initials or last name-first name). Press the OK key to validate your choice. -
Page 18: Consulting Your Voice Mailbox
Using your telephone - OmniPCX Enterprise 3.1.7 Consulting your voice mailbox When you have received a message, the message icon is displayed on the welcome screen. → Menu The number of new messages is displayed. → Messaging Voice mail Enter your personal code. Display number of new and old messages. -
Page 19: Consulting Text Messages
Using your telephone - OmniPCX Enterprise 3.1.9 Consulting text messages When you have received a message, the message icon is displayed on the welcome screen. → Menu → Messaging The number of new messages is displayed. text message To consult the messages. or OK Consultation of first unread message. -
Page 20: Send A Voice Message Copy
Using your telephone - OmniPCX Enterprise 3.1.11 Send a voice message copy → Menu → Messaging Access the voice mail. Voice mail Enter your personal code. Display number of new and old messages. → Menu Review Available messages are listed. Select message to copy by consecutive presses. -
Page 21: Forwarding Calls To Another Number (Immediate Forward)
Using your telephone - OmniPCX Enterprise 3.1.13 Forwarding calls to another number (immediate forward) The number can be your home, mobile, voice mailbox or an internal extension (operator, etc.). Access the forwarding configuration. → Menu Forward Display the forwarding status (active/inactive). →... -
Page 22: Remote Call Forwarding
Using your telephone - OmniPCX Enterprise 3.1.16 Remote call forwarding* You want to forward your calls from another set. Access the forwarding configuration. → Menu Forward Display the forwarding status (active/inactive). → Menu Other → Remote Select the menu: Remote forward. forward Dial the number receiving the forwarded call. -
Page 23: Locking Your Telephone
Using your telephone - OmniPCX Enterprise • Predefined messages Predefined Predefined messages are listed. message Select the message to be sent. Send message. or OK • Message to complete Msg to complete Messages to complete are listed. Select the message to complete. Complete the message. -
Page 24: Answering The General Bell
Using your telephone - OmniPCX Enterprise Unlocking the keypad: Short press on the * key (in idle state). Confirm. 3.1.21 Answering the general bell* When the operator is absent, outside calls to the operator are indicated by a general bell. To answer: →... -
Page 25: Calling A Contact On His/Her Loudspeaker
Using your telephone - OmniPCX Enterprise • Return into your group: → Menu Settings Open settings. → My services → Consultation → Misc. services Select the menu: Enter hunting group Enter hunting group Enter your group number. Belonging to a group does not affect the management of direct calls. A specific telephone within a group can always be called by using its own number. -
Page 26: Push To Talk (Ptt)
Using your telephone - OmniPCX Enterprise 3.1.27 Push To Talk (PTT)* This feature is available only for the following device: 8168s Wlan Handset. The Push-to-talk (PTT) feature allows your phone to operate in PTT group broadcast mode as well as in standard phone mode. -
Page 27: Oxo Connect
Using your telephone - OXO Connect 3.2 OXO Connect This section describes how to use your telephone connected to OXO Connect. Some features are subject to programming and are marked by an asterisk (*). If necessary, contact the administrator of the system. 3.2.1 Making a call Use one of the following: Dial directly the number for your call. -
Page 28: Calling From Your Personal Directory
Using your telephone - OXO Connect 3.2.4 Calling from your personal directory Menu Open the system menu by selecting the softkey. Indiv. Rep. Access to personal directory. Select contact from the list, or enter name or number in the search field. Press the OK key to validate your choice. -
Page 29: Missed Calls
Using your telephone - OXO Connect 3.2.8 Missed calls When you have a missed call, the message icon is displayed on the welcome screen. You are notified of a missed call by a text message 'call not answered'. To view information about the missed call, open the text message (number, date, hour...). -
Page 30: Send A Voice Message Copy
Using your telephone - OXO Connect Press the OK key or softkey. or OK if selected message has to be completed: • Complete the message. • Apply. Send message. or OK • Personal message New Msg Enter creation mode. Create a temporary personal message (alphabetic keypad). Send message. -
Page 31: Sending A Recorded Message To A Number Or A Distribution List
Using your telephone - OXO Connect Use one of the following: → Menu Record Record a comment. Send message Send message. To record a comment: → Menu Record Recording in progress. Use one of the following: Stop End of recording. Pause Pausing in the recording. -
Page 32: Broadcasting A Message On The Loudspeakers Of A Station Group
Using your telephone - OXO Connect 3.2.13 Broadcasting a message on the loudspeakers of a station group* A message not requiring an answer can be broadcasted on the loudspeakers within your broadcast group: Enter the number of broadcast group. Speak, you have 20 seconds. The message will only be broadcast on terminals not in use and which have a loudspeaker. -
Page 33: Diverting Calls To Your Voice Mailbox
Using your telephone - OXO Connect 3.2.17 Diverting calls to your voice mailbox → Menu Forward Access the forwarding configuration. → Immediate Diverting calls to your voice mailbox. VMail Confirm. or OK 3.2.18 Activating/deactivating the personal assistant As well as leaving a message in the voice mailbox, the personal assistant directs the caller to an internal number, an outside number, a mobile or the switchboard. -
Page 34: Locking Your Telephone
Using your telephone - OXO Connect 3.2.23 Locking your telephone • Lock your phone → Menu Lock Select the menu: Lock. Enter your personal password. Your phone is locked. If the phone is locked, you cannot make an external call. If you try to make an external call, you will be asked to enter your personnal password •... -
Page 35: Call Pickup
Using your telephone - OXO Connect 3.2.26 Call pickup* You hear a telephone ringing in an office where no-one can answer. If authorised, you can answer the call on your own telephone. → → Menu Pickup Select the menu: Set. Number of telephone ringing. -
Page 36: Sip Mode
Using your telephone - SIP mode 3.3 SIP mode This section describes how to use your telephone connected to SIP server. Contact your installer for more information about compatible SIP servers. 3.3.1 Contact card A contact card can be opened from your local directory. Open the contacts menu. - Page 37 Using your telephone - SIP mode 3.3.2.2 Create a new contact in your local directory Open the contacts menu. → Add contact Select the menu: Add contact. Select the menu: New. Select the menu: Add. Name Enter the name of the contact. Validate.
-
Page 38: Access To The Company Directory
Using your telephone - SIP mode 3.3.2.6 Delete a contact in a directory Open the contacts menu. → Delete contact All contacts are listed. Select the contact to delete. Delete Delete the selected contact. Confirm the deletion. 3.3.3 Access to the company directory Open the contacts menu. - Page 39 Using your telephone - SIP mode Actions are available from the call log: Call Call the selected contact. More Access more features. Time of call Display information about the call. Edit number Modify the number. Save number Add the contact in your local directory. Send message Send message to the contact.
-
Page 40: Messaging Portal (8168S Wlan Handset)
Using your telephone - SIP mode 3.3.5 Messaging portal (8168s Wlan Handset) The messaging portal allows you to access and manage features such as voice messages, text messaging, or missed calls. 3.3.5.1 Message list The last 30 received messages are stored in a list. Time and date information is included in the message. Time and date information is included in the message. - Page 41 Using your telephone - SIP mode Forward a message Select the message to send. View Read the message. → More Forward If needed, write an additional text. Send Select the local menu: Send. Enter the number of the terminal to receive the message. Send Send the message.
- Page 42 Using your telephone - SIP mode 3.3.5.4 Send new text messages Predefined messages (templates) can be stored in your handset contact your administrator for more information. Accessing the messaging portal. → Write new Enter creation mode. message Use one of the following: Write your message.
-
Page 43: Making A Call
Using your telephone - SIP mode 3.3.6 Making a call Dial. Use one of the following: Press the 'take the call' key. Make the call with the active device: handset if unhooked, headset if connected, otherwise in hands-free mode. Press the OK key to start the call. Make the call with the active device: handset if unhooked, headset if connected, otherwise in hands-free mode. -
Page 44: Calling A Contact Using The Search By Name Feature
Using your telephone - SIP mode 3.3.9 Calling a contact using the search by name feature Open the contacts menu. → Call contact All contacts are listed. The local and company directories appear in the same list. A contact from the company directory is marked by the following icon: . -
Page 45: Answer An Incoming Call
Using your telephone - SIP mode 3.3.12 Answer an incoming call A ring signal, a vibrating alert, or both can indicate an incoming call. The ring signal and vibration can be disabled. The handset number or name of the caller is displayed. The name is displayed if the caller's handset number is stored in the local phonebook. -
Page 46: Consulting Your Voice Mailbox
Using your telephone - SIP mode Locking features on your terminal (System lock) The handset can be locked to prevent unauthorized access. If this function is activated, a PIN code has to be entered to switch on the handset, answer an incoming call, and so on. The default phone lock code (0000) can be changed to any 4–8–digit personalized code. - Page 47 Using your telephone - SIP mode 3.3.17.3 Accept or reject the PTT invitation You receive a PTT invitation as a message. Use one of the following: Accept the PTT invitation. Call Reject the PTT invitation. Close Depending on the configuration, the handset may accept the invitation automatically. If the user declines the PTT invitation, they can rejoin the PTT Group later on.
-
Page 48: During A Conversation
During a conversation - OmniPCX Enterprise 4 During a conversation 4.1 OmniPCX Enterprise This section describes features during a conversation when connected to OmniPCX Enterprise. Some features are subject to programming and are marked by an asterisk (*). If necessary, contact the administrator of the system. -
Page 49: Making A Second Call During A Conversation
During a conversation - OmniPCX Enterprise 4.1.5 Making a second call during a conversation During a conversation. Use one of the following: Dial directly the number for your call. Long press on the # key. Call the second contact using the dial by name feature. →... -
Page 50: Three-Way Conference With Internal And/Or External Contacts (Conference)
During a conversation - OmniPCX Enterprise 4.1.8.2 To transfer your call to another number During a conversation. Call the destination of the transfer by dialing the number or using the dial by name feature or selecting a contact in your local directory or call log (see chapter: Making a second call during a conversation). -
Page 51: Placing An Outside Call On Hold (Parking)
During a conversation - OmniPCX Enterprise 4.1.11 Placing an outside call on hold (parking)* This feature depends on the system configuration. If necessary, contact your administrator. You can place an outside call on hold and recover the call on another telephone: During a conversation. -
Page 52: Oxo Connect
During a conversation - OXO Connect 4.2 OXO Connect This section describes features during a conversation when connected to OXO Connect. Some features are subject to programming and are marked by an asterisk (*). If necessary, contact the administrator of the system. -
Page 53: Making A Second Call During A Conversation
During a conversation - OXO Connect 4.2.5 Making a second call during a conversation During a conversation. Use one of the following: Dial directly the number for your call. Long press on the # key. Call the second contact using the dial by name feature. →... -
Page 54: Transferring A Call
During a conversation - OXO Connect 4.2.8 Transferring a call 4.2.8.1 To transfer a call to another contact on hold During a conversation, a second call is on hold. Select the current call in conversation: → Menu Transfer The two calls are connected. 4.2.8.2 To transfer your call to another number During a conversation. -
Page 55: Placing An Outside Call On Hold (Parking)
During a conversation - OXO Connect 4.2.11 Placing an outside call on hold (parking)* This feature depends on the system configuration. If necessary, contact your administrator. You can place an outside call on hold and recover the call on another telephone: During a conversation. -
Page 56: Sip Mode
During a conversation - SIP mode 4.3 SIP mode This section describes features during a conversation when connected to an SIP Server. Contact your installer for more information about compatible SIP servers. 4.3.1 Adjust audio volume during a call Use the volume up and down keys to increase or decrease the audio volume of the conversation (8 steps). 4.3.2 Placing a call on hold During a conversation, you wish to place the call on hold and recover it later, on the same telephone. -
Page 57: Make A Second Call
During a conversation - SIP mode 4.3.6 Make a second call → More New call Select the menu: call. Select The first call is put on hold. Use one of the following: Enter the number. Access to the personal or company directory. Use one of the following: Press the 'take the call' key. -
Page 58: Transferring A Call
During a conversation - SIP mode 4.3.10 Transferring a call 4.3.10.1 To transfer a call to another contact on hold During a conversation, a second call is on hold. Select the call on hold by using the left-right navigation keys: →... -
Page 59: Activate/Deactivate Voice Frequency
During a conversation - SIP mode 4.3.12 Activate/deactivate voice frequency This feature depends on the system configuration. If necessary, contact your administrator. During a call, you sometimes have to send DTMF signals, for example, for a voice message service, an automatic switchboard or when remotely consulting an answering machine: During a conversation. -
Page 60: Programming Your Telephone
Programming your telephone - Common to all systems 5 Programming your telephone 5.1 Common to all systems 5.1.1 Device information Open the local settings menu. → The following information is displayed: • Software. • Hardware. • WLAN info. Device info •... -
Page 61: Activate/Deactivate The Warning Tones
Programming your telephone - Common to all systems 5.1.6 Activate/deactivate the Warning tones The warning tones inform the user of an abnormal operation (out of range, system activated or halted, etc.). To deactivate these tones: Open the local settings menu. →... -
Page 62: Omnipcx Enterprise
Programming your telephone - OmniPCX Enterprise 5.2 OmniPCX Enterprise This section describes how to program your telephone connected to OmniPCX Enterprise. Some features are subject to programming and are marked by an asterisk (*). If necessary, contact the administrator of the system. -
Page 63: Adjusting The Audio Functions
Programming your telephone - OmniPCX Enterprise Your password must have 4 to 6 digits. A weak personal code with identical digits (0000, 1111, 000000, etc.) or a simple sequence of digits (0123, 012345, 1234, 123456, etc.) will be rejected by the system. 5.2.5 Adjusting the audio functions Use the profiles defined in the handset to best suit your environment. -
Page 64: Selecting System Language
Programming your telephone - OmniPCX Enterprise To modify the key sound: • Click: pressing a key makes a click. • → Tone: pressing a key makes a tone. Key sound Edit • Silent: no sound. Validate your choice. Select Back to the previous screen. Back 5.2.5.2 Create a new profile (8168s Wlan Handset) Use one of the following:... -
Page 65: Programming Your Personal Directory
Programming your telephone - OmniPCX Enterprise 5.2.7 Programming your personal directory 5.2.7.1 Program a non-programmed entry in the personal phone book → Menu Personal Access to personal directory. directory Select a non-programmed entry in the personal phone book. Confirm. To program a number: Speed dial Select the menu: Speed... -
Page 66: Programming An Appointment Reminder
Programming your telephone - OmniPCX Enterprise 5.2.8 Programming an appointment reminder You can set the time of a temporary reminder (one within 24 hours) or a permanent reminder (every day at the same time). At the programmed time, your telephone rings: Use one of the following: Stop ringing. -
Page 67: Oxo Connect
Programming your telephone - OXO Connect 5.3 OXO Connect This section describes how to program your telephone connected to OXO Connect. Some features are subject to programming and are marked by an asterisk (*). If necessary, contact the administrator of the system. -
Page 68: Adjusting The Audio Functions
Programming your telephone - OXO Connect 5.3.4 Adjusting the audio functions Use the profiles defined in the handset to best suit your environment. A profile allows you to quickly adjust the volume and melody of the ringer, the vibrate mode, and the sound of the keys. You can create your own profiles depending on the model of the handset. -
Page 69: Selecting System Language
Programming your telephone - OXO Connect 5.3.4.2 Create a new profile (8168s Wlan Handset) Use one of the following: Use the multi-function button. Open the profile menu. → Enter creation mode. Add new Enter the profile name. Save the profile. Save Define the following parameters: →... -
Page 70: Programming Your Personal Directory
Programming your telephone - OXO Connect 5.3.6 Programming your personal directory → Menu Indiv. rep. Access to personal directory. Select an entry in the phone book. Confirm. → Menu Modify Enter creation mode. Enter the name. Apply. Enter the number. Apply. -
Page 71: Configure Your Phone During Charging
Programming your telephone - OXO Connect 5.3.8 Configure your phone during charging The behavior of the handset when placed in the charger can be configured. Open the connection menu. → Select the local menu: charger. In charger Use one of the following: No other action apart from charging the handset. -
Page 72: Sip Mode
Programming your telephone - SIP mode 5.4 SIP mode This section describes how to program your telephone connected to an SIP Server. Contact your installer for more information about compatible SIP servers. 5.4.1 Adjusting the audio functions 5.4.1.1 Adjust the ringer volume Open the local settings menu. -
Page 73: Define Softkeys
Programming your telephone - SIP mode 5.4.3 Define softkeys Softkeys are the keys placed under the screen. Press the softkey to perform the predefined function. Access shortcuts menu. → Soft keys Open softkey settings. Left Middle Select the softkey to program. Right Select Enter the name of the softkey. -
Page 74: Define Multifunction Button
Programming your telephone - SIP mode If activated, a confirmation is requested before executing the function Control question (Deactivated by default). → Select To return to the previous page: Back. Save 5.4.6 Define multifunction button The multifunction button can be defined with two different functions: a long press activates one function, and a double press activates another function. -
Page 75: Profiles
Programming your telephone - SIP mode 5.4.7.3 Delete services Access services menu. → Mark a service by pressing up and down on the navigation key. → More Delete Select the local menu: Delete. Mark Delete by pressing down on the navigation key. →... -
Page 76: Define Time And Date Format
Programming your telephone - SIP mode Edit → More setting Modify the profile by using available option: Edit, add setting, Import setting, → More Import Remove setting. setting → More Remove setting 5.4.9 Define time and date format Open the local settings menu. →... -
Page 77: List Of Accessories
List of accessories - Belt clip 6 List of accessories 6.1 Belt clip When you purchase your phone, it is equipped with a belt clip on the back. You can remove this belt clip and replace it with a specific cover. The cover is provided with the handset. -
Page 78: Vertical Pouch
List of accessories - Vertical pouch 6.5 Vertical pouch Your phone can also be carried in a protective case with swivel clip. It is recommended to use the protective case if your telephone is to be used in an industrial environment (presence of dust, filings, vapors of diverse origins or its at the risk of being dropped). -
Page 79: Battery Rack Charger
List of accessories - Chargers 6.6.3 Battery rack charger Use the rack charger to dock and charge up to 6 batteries at the same time (3BN78426AA). 6.6.4 Power supply Desktop chargers must be connected with the following power supplies provided by the manufacturer: •... -
Page 80: Place Or Remove The Battery In The Telephone
List of accessories - Headphone / external microphone 6.6.6 Place or remove the battery in the telephone Place the battery on the telephone While maintaining the battery Before inserting the battery module in position, slip the lock module into the phone, make Place the battery in its to the locked position. -
Page 81: Cleaning And Disinfecting Your Telephone
List of accessories - Cleaning and disinfecting your telephone 6.8 Cleaning and disinfecting your telephone This chapter provides guidelines for cleaning or disinfecting Alcatel-Lucent Enterprise terminals to protect products and optimize performance. The final result will depend on each user’s personal procedures, for which ALE cannot be held responsible. -
Page 82: Technical Specifications
Technical specifications - Cleaning and disinfecting your telephone 7 Technical specifications 8168s 8158s 137 mm (5.39 in.) 137 mm (5.39 in.) Height 52 mm (2.04 in.) 52 mm (2.04 in.) Width 21 mm (0.82 in.) 21 mm (0.82 in.) Depth 135 g (4.8 oz) 135 g (4.8 oz) Weight without clip... -
Page 83: Ordering Information
Ordering information - Cleaning and disinfecting your telephone 8 Ordering information This list is not exhaustive and may change at any moment. 8158S WLAN HANDSET 3BN78421AA 8168S WLAN HANDSET 3BN78422AA 81x8 DESKTOP CHARGER EUROPE 3BN78403AA 81x8 DESKTOP CHARGER US-UK-AUS 3BN78403AB 3BN78403AC 81x8 DESKTOP CHARGER W/O SUPPLY 81x8 RACK CHARGER... -
Page 84: Declaration Of Compliance
Declaration of compliance - Cleaning and disinfecting your telephone 9 Declaration of compliance EUROPE This equipment is in compliance with the essential requirements and other relevant provisions of 2014/53/EU (RED) and RoHS directives 2011/65/EU and 2015/863 (RoHS). Declaration of Conformity may be obtained from: ALE International 32 avenue Kléber –... - Page 85 Declaration of compliance - Cleaning and disinfecting your telephone Restrictions for Wireless LANs (EU/EFTA and USA/Canada) Frequency band (GHz) and channel Max power level (EIRP) Indoor ONLY Indoor and outdoor 2.400–2.4835, Ch 1–13 100 mW 5.150–5.350*, Ch 36–64 200 mW 5.470–5.725*, Ch 100–140 1000 mW...
-
Page 86: Quick Guide
• Quick guide (1) (2) Phone description Long press in idle state: access to the company directory • Mute key (in idle state): turn on/off audible signals. • Short press during incoming call (ringing): switch off ringer • Long press in conversation: activate/deactivate the mute feature •... - Page 87 Status icons → Access the general settings of the phone (key sound, Menu Personal Calling from your personal economy mode, charger warning). directory The status icons are displayed on the welcome screen and directory (PersSpDial). → indicate the status of the telephone. Menu Indiv.
Need help?
Do you have a question about the OpenTouch 8158s and is the answer not in the manual?
Questions and answers