Table of Contents
Advertisement
Advertisement
Table of Contents

Related Manuals for Alcatel-Lucent Enterprise 8214


Summary of Contents for Alcatel-Lucent Enterprise 8214
- Page 1 8214 DECT Handset SIP User manual 8AL91453ENAA ed01...
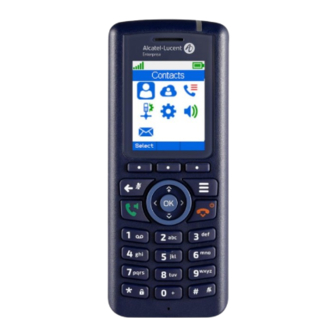
- Page 2 Introduction Introduction This document describes the services offered by the 8214 DECT Handset when connected to an Alcatel-Lucent Enterprise Rainbow Hub or RingCentral MVP via an Alcatel-Lucent Enterprise 8328 SIP-DECT single base station or 8368 Multi Cell base station. The Alcatel-Lucent Enterprise 8214 DECT Handset is a compact handset that provides business communication features.
- Page 3 Introduction Power supplies: • A. DECT Handset Desktop charger PSU Europe (3BN67335AA) TenPao (Model S005AYV0500100) – efficiency level VI (rating I/P:AC 100-240V, 0.2A; O/P: DC 5V, 1A). B. DECT Handset Desktop charger PSU WW (3BN67336AA) TenPao (Model S008ACM0500100 with UK,US,AUS plugs) – efficiency level VI (rating I/P:AC 100-240V, 0.3A;...
-
Page 4: Table Of Contents
Introduction Getting to know your telephone Phone description MENU icons Call icons Status icons Accessing the MENU and navigating Getting started Unboxing First start-up Charging your telephone battery Switching on your telephone Switching off your telephone Alphanumeric keypad Using your telephone Call log Making a call Calling from your personal directory... - Page 5 Introduction Power supply Presentation of the battery pack Headphone / external microphone Cleaning and disinfecting your telephone Ordering information Declaration of compliance Quick guide 8AL91453ENAA ed01...
-
Page 6: Getting To Know Your Telephone
Getting to know your telephone 1 Getting to know your telephone Phone description Answer the call. • Make a call. • Access the call log. • Activate/deactivate the loudspeaker during a • conversation. Hang up. • Long press (in idle mode): switch on the phone / •... -
Page 7: Menu Icons
Getting to know your telephone Some LED behaviors depend on the handset configuration (see • chapter: LED management). Define the LED color to indicate a missed call or a new voice message, to warn of a low battery or to activate the LED when the handset is on the charger. -
Page 8: Call Icons
Getting to know your telephone Call icons Making a call/Receiving a call. Call is ended. Loudspeaker on (in conversation). Mute the audio (in conversation). Mute on when loudspeaker is active (in conversation). Call on hold (in conversation). Status icons The status icons are displayed on the welcome screen and indicate the status of the telephone. Battery charge level ( >... -
Page 9: Accessing The Menu And Navigating
Getting to know your telephone Accessing the MENU and navigating Access the menu. Press the Access menu key. Select a function in the MENU. Use the navigator keys and press the OK key to select a function. Select a context menu by pressing the corresponding key You can move horizontally along the various icons within the... -
Page 10: Getting Started
Getting started 2 Getting started Unboxing 8214 DECT Handset. • The safety and regulatory A single charger. • instructions to be read The battery. • carefully. The battery cover. • Your handset is provided with a single charger. Dual chargers are sold separately. -
Page 11: Charging Your Telephone Battery
Getting started Charging your telephone battery 2.3.1 Charging the battery on a single charger Put your phone on its support. Plug the USB cable into a 5V socket (AC/DC adaptor, computer, …). The AC/DC adaptor is not provided with the set. Please contact your provider for a recommended AC/DC adaptator. -
Page 12: Switching Off Your Telephone
Getting started Switching off your telephone Press the switch on/off key (long press). • Confirm: Yes. • Your telephone is switched off. • Alphanumeric keypad Your handset is fitted with an alphanumeric keypad. Enter alphabetic characters in a text area: the number pad keys have letters that you can •... -
Page 13: Using Your Telephone
Using your telephone 3 Using your telephone 3.1 Call log Quick access: Access MENU. • Call log • All calls. • Answered calls. • Dialed calls. • Missed calls. • 3.1.1 Manage the call log Select an entry. • Call •... -
Page 14: Making A Call
Using your telephone More • o View details Display the log details. o Save contact If the contact is not in your local directory, you can save them as a new local contact. Append to contact Add the number to an existing local contact. Send message Not available in SIP mode. -
Page 15: Calling Your Caller By Name (Company Directory)
Using your telephone Calling your caller by name (company directory) This feature is available if a company directory is configured in your system. Quick access: Access MENU. • Central directory • Use one of the following: • o Press a key to display the first names (in alphabetical order) corresponding to the first letter of that key. -
Page 16: Calling Using Speed Dial Key
Using your telephone 3.5 Calling using speed dial key First, you have to define the speed dial key. See chapter: Programming your personal directory. If you have defined a speed dial key (number 2 to 9), long press on the speed- •... -
Page 17: Placing A Call On Hold (Hold)
Using your telephone Placing a call on hold (hold) During a conversation, you wish to place the call on hold and recover it later, on the same telephone. The call is placed on hold. • Resume the call on hold. •... -
Page 18: Switching Between Two Calls (Broker Call)
Using your telephone 3.11 Switching between two calls (Broker call) You are in communication with the first caller and the second is on hold. You can switch between the two calls. switching between two calls (Broker call). • 3.12 Transferring a call You want to transfer the call to another contact. -
Page 19: Forward Your Call To Another Number
Using your telephone 3.14 Forward your call to another number This feature depends on the system configuration. Access MENU. • Settings • Call Forward • Select one of the following conditions: • Forward Unconditionally: forward all incoming calls to another number immediately. -
Page 20: Sending Dtmf Signals
Using your telephone 3.16 Sending DTMF signals During a conversation you sometimes have to send DTMF signals, such as with a voice server, an automated attendant or a remotely consulted answering machine. Enter DTMF code. • 3.17 Locking your telephone This feature locks the keypad. - Page 21 Using your telephone 3.17.3 Activate or deactivate the PIN code to unlock the phone By default, no PIN code is requested when you unlock the phone. Access MENU. • Settings • Security • Phone lock • Enter the PIN Code (default code: 0000). •...
-
Page 22: Programming Your Personal Directory
Using your telephone 3.18 Programming your personal directory Your directory can contain up to 50 numbers. 3.18.1 Add new contact Quick access: Access MENU. • Contacts • More (or press the ‘OK’ key). • Add contact • Name: • Enter the name (24 characters maximum). •... - Page 23 Using your telephone 3.18.2 Add a contact from the call log Quick access: Access MENU. • Call log • Select an entry. • More (or press the ‘OK’ key). • Save contact • Add information about your contact. • Modify the name (optional). •...
- Page 24 Using your telephone 3.18.3 Modify a contact Quick access: Access MENU. • Contacts • Select the record to be modified. • Edit • Select the record to be modified. • Modify the name (optional). • Press the 'OK' key to apply (or Save). •...
- Page 25 Using your telephone 3.18.4 Deleting a contact Quick access: Access MENU. • Contacts • Select the contact to delete. • More (or press the ‘OK’ key). • Delete contact • • Confirm the deletion. To delete all contacts, select: Delete all cont. 3.18.5 Add the contact to a speed dial key You can program up to 8 speed dial keys.
- Page 26 Using your telephone 3.18.6 Clearing a speed dial key Quick access: Access MENU. • Contacts • More (or press the ‘OK’ key). • Speed dial • Select the speed dial key you wish to clear. • Delete • • Confirm the deletion. 8AL91453ENAA ed01 26/42...
-
Page 27: Customizing And Adjusting Your Telephone
Using your telephone 3.19 Customizing and adjusting your telephone 3.19.1 Choosing your melody Access MENU. • Audio settings • Use one of the following: • Ring melody: define the ringtone for an incoming call. Ring normal msg: define the sound for a normal incoming text message. Ring urgent msg: define the sound for an urgent incoming text message. - Page 28 Using your telephone 3.19.4 Other features Access MENU. • Audio settings • Silent • Activate or deactivate ringer. Ring volume • Adjusting the ringer volume. Ring melody • Define the ringtone for an incoming call. Ring normal msg. • Define the sound for a normal incoming text message. Ring urgent msg.
-
Page 29: Consulting Your Voice Mailbox
Using your telephone Line • Display the extension number. Reset settings • Reset the setting and go back to the default settings. Status • Find out the software version of your phone. Auto answer • Define how to answer an incoming call: by pressing on the off-hook key or any key, OR by automatically answering the call with the earpiece or in hands-free mode (Normal, key, Automatic). -
Page 30: Messaging Portal
Using your telephone 3.21 Messaging portal Access MENU. • Messaging • Inbox • Consulting text messages. Drafts • Sending a text message to an internal contact. Sent messages • Display sent messages. Settings • Access to messaging settings. 3.21.1 Consulting text messages Access MENU. - Page 31 Using your telephone 3.21.2 Sending a text message to an internal contact Messages can either be normal or urgent priority. A notification will show your contact that the message is urgent until it is read. Access MENU. • Messaging • Drafts •...
- Page 32 Using your telephone Send a message saved as draft Access MENU. • Messaging • Drafts • Select the message to send. • Complete the message. • o Symbol: enter symbol. : use this key to delete the last entered character. Send (or press the ‘OK’...
- Page 33 Using your telephone 3.21.3 Delete a text message Access MENU. • Messaging • Inbox • Access to the mailbox. Select the message to delete. • More (or press the ‘OK’ key). • Delete message • • Confirm the deletion. To delete all messages, select: Delete all msg.
-
Page 34: Led Management
Using your telephone 3.22 LED management You can manage LED behaviors. Access MENU. • Settings • LED signal • Define the behavior of the green, orange or red LED: • o Off: LEDs are disabled. Missed call: flashing when there is a new missed call. Voice message: flashing when a new voice message is received. -
Page 35: Registering The Telephone
Registering the telephone 4 Registering the telephone Easy registration Your handset is not registered on any system if the following text is displayed: Auto install?. If the handset is already registered on another system, you will have to deregister it before re- registering on your system. -
Page 36: Registering Your Telephone Using The Connectivity Menu
Registering the telephone Registering your telephone using the connectivity menu If the handset is already registered on another system, you will have to deregister it before re- registering on your system. The base station should be ready to register a new handset. Access MENU. -
Page 37: Deregister
Registering the telephone Deregister Access MENU. • Connectivity • Deregister • Enter the PIN Code (default code: 0000). • Apply (Ok). • Delete registration? • (No: to cancel). • Apply (Ok). • Return to idle. • 8AL91453ENAA ed01 37/42... -
Page 38: Accessories
Accessories 5 Accessories Belt clip cover The belt clip cover is used in place of the belt clip. The package contains 10 belt clip covers and 20 screws (3BN67376AA - sold separately). Spare swivel clip package The swivel clip can be used in place of the belt clip. It allows for quick detachment/attachment of the handset from the belt. -
Page 39: Vertical Pouch
Accessories Vertical pouch Your phone can also be carried in a protective case with swivel clip. It is recommended to use the protective case if your telephone is to be used in an industrial environment (presence of dust, filings, vapors of diverse origins or its at the risk of being dropped). -
Page 40: Power Supply
Accessories 5.5.1 How to dock your phone on the desk support Put your phone on its support. Plug the USB cable into a 5V socket (AC/DC adaptor, computer, …). The AC/DC adaptor is not provided with the set. Please contact your provider for a recommended AC/DC adaptator. -
Page 41: Presentation Of The Battery Pack
Accessories 5.6.2 Power supply for the rack charger Use the dedicated power supply. Read 'operating conditions' section at the beginning of this manual. Presentation of the battery pack 5.7.1 Autonomy of your telephone On standby in the radio coverage zone. Up to 100 hours when screensaver is activated. -
Page 42: Headphone / External Microphone
Accessories 5.7.4 Place or remove the battery in the telephone If the belt clip is installed, you must lift it up and maintain it in this position during the battery installation or replacement. Lift up the cover. To remove the battery: Lift the battery out of the compartment. -
Page 43: Cleaning And Disinfecting Your Telephone
Accessories Cleaning and disinfecting your telephone Refer to document: “How to clean and disinfect Alcatel-Lucent Enterprise terminals”. Wear gloves when cleaning products. Do not use harsh chemicals such as bleach, peroxide, acetone, ethyl acid, methyl chloride, ammonia, or multi-purpose cleaners to clean plastic, metal, rubber, or screen surfaces. -
Page 44: Ordering Information
Ordering information 6 Ordering information This list is not exhaustive and may change at any moment. 8214 DECT Handset 3BN67392AA 82x4 DECT Handset desktop charger 3BN67371AA 82x4 DECT Handset dual desktop charger 3BN67372AA 82x4 DECT Handsets Rack Charger 3BN67382AA 82x4 DECT Handset belt clip... -
Page 45: Declaration Of Compliance
Declaration of compliance 7 Declaration of compliance This equipment uses DECT frequency range that depends on country: 1880 - 1900 MHz in Europe, 1920 - 1930 MHz in US/Canada, 1910 - 1930 MHz in LATAM, 1910 - 1920 MHz in Brazil. the equivalent isotropically radiated power at the antenna is less than 110 mW or 250 mW (it depends on the country). - Page 46 Declaration of compliance Exposure to Radio Frequency Signals This device has been designed and manufactured not to exceed the SAR (Specific Absorption Rate) radio frequency power transmission limits established by the different countries concerned. For Europe/Australia: the SAR value measured is equal to 0.05 W/kg (head SAR) / 0.05 W/kg (body SAR) (the globally accepted maximum limit being 2 W/kg over 10 g).
-
Page 47: Quick Guide
Quick gu ide Some LED behaviors depend on the handset Answer the call. • • configuration (see chapter: LED management). Define the • Make a call. LED color to indicate a missed call or a new voice Access the call log. •... - Page 48 Features Do not disturb activated. Answered incoming calls. New voice message Send the call. New text message(s). End the call. High-definition audio quality. Calling from your personal directory. Encrypted communication. Programming your personal directory. Add new contact/Modify a contact/Deleting a contact. Radio reception quality - Normal power mode.
Need help?
Do you have a question about the 8214 and is the answer not in the manual?
Questions and answers