Table of Contents
Advertisement
ASSEMbLy ANd OpERATION INSTRucTIONS
Diagrams within this manual may not be drawn proportionally.
Due to continuing improvements, actual product may differ slightly from the product described herein.
distributed exclusively by Harbor Freight Tools
Visit our website at: http://www.harborfreight.com
Read this material before using this product.
Failure to do so can result in serious injury.
SAVE THIS MANuAL.
Copyright
2003 by Harbor Freight Tools
©
manual or any artwork contained herein may be reproduced in any shape or form
without the express written consent of Harbor Freight Tools.
For technical questions or replacement parts, please call 1-800-444-3353.
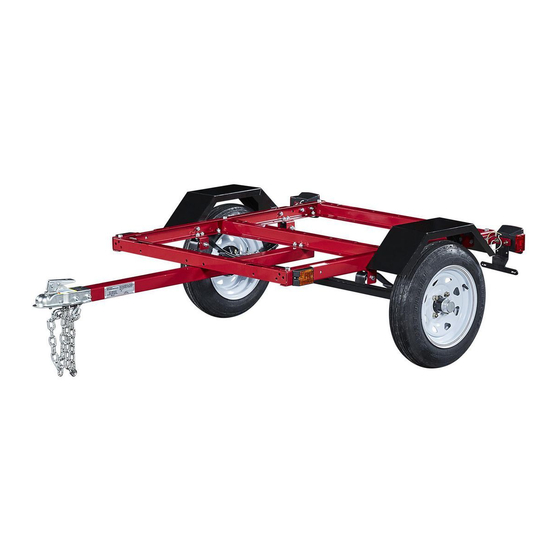
MINI-TRAILER
WITH 12" WHEELS
Model
3491 Mission Oaks Blvd., Camarillo, CA 93011
Manual Revised 04j, 07f
90153
IMPORTANT INFORMATION
This trailer's Hitch Coupler MUST be
properly secured to the hitch ball of the towing
vehicle. After assembly and attachment, pull
up and down on the Hitch Coupler to make
sure the hitch ball is fitting snugly in the Hitch
Coupler. There must be no play between the
hitch ball and Hitch Coupler. If there is play,
tighten the Adjustment Nut until no play is
present. If the Adjustment Nut is too tight, the
Handle will not lock. Carefully read and follow
the complete instructions in this manual
BEFORE setup or use.
If the Coupler is not secured
properly, the ball could come loose
while the trailer is in motion, possibly
causing property damage, SERIOUS
PERSONAL INJURY, or DEATH.
. All rights reserved. No portion of this
®
WARNING!
.
®
Advertisement
Table of Contents

Related Manuals for HAUL MASTER 90153


Summary of Contents for HAUL MASTER 90153
- Page 1 MINI-TRAILER WITH 12” WHEELS Model 90153 ASSEMbLy ANd OpERATION INSTRucTIONS WARNING! IMPORTANT INFORMATION This trailer’s Hitch Coupler MUST be properly secured to the hitch ball of the towing vehicle. After assembly and attachment, pull up and down on the Hitch Coupler to make sure the hitch ball is fitting snugly in the Hitch Coupler.
-
Page 2: Table Of Contents
VEHIcLE LOAd LIMIT ................21 Steps for determining correct Load Limit ............21 INSpEcTION, MAINTENANcE, ANd cLEANING ........ 21 pARTS LIST ANd dIAGRAMS ............... 22 parts List .......................22 Assembly diagram ....................23 Wiring diagram .....................24 SKU 90153 For technical questions, please call 1-800-444-3353. PAGE 2... -
Page 3: Specifications
Harbor Freight Tools. dRESS SAFELy. Do not wear loose clothing or jewelry, as they can become caught in moving parts. Wear a protective hair covering to prevent long hair from REV 09b SKU 90153 For technical questions, please call 1-800-444-3353. PAGE 3... -
Page 4: Specific Product Warnings And Precautions
ANd ANy OTHER cONdITION THAT MAy AFFEcT ITS SAFE OpERA- TION. Do not use the Trailer even if minor damage appears. NEVER ALLOW AduLTS, cHILdREN, OR pETS TO RIdE IN THE TRAILER. REV 09b SKU 90153 For technical questions, please call 1-800-444-3353. PAGE 4... - Page 5 1-800-424-9393 or 202-366-0123 or write NHTSA, U.S. Department, 400 7th Street SW NSA-11, Washington, D.C. 20590. You may also obtain other information about motor vehicle safety from the Hotline. SKU 90153 For technical questions, please call 1-800-444-3353. PAGE 5...
-
Page 6: Unpacking
Lay out three Cross Members (4), the Right Side Rail (5A), and the Left Side Rail (5). Then assemble the parts, using Hex Bolts (1) and Nylon Nuts (3). (See Figure A.) SKU 90153 For technical questions, please call 1-800-444-3353. PAGE 6... - Page 7 Spring Hangers, each with a Spring Side plate (8), to the rear portions of the Right Side Rail (5A) and the Left Side Rail (5), using Hex Bolts (1) and Nylon Nuts (3). (See Figure b.) SKU 90153 For technical questions, please call 1-800-444-3353. PAGE 7...
- Page 8 Insert the Outer Bearings (18) and a 3/4” Flat Washer (19) on the Spindles. Screw a Castle Nut (20) tightly onto each Spindle. Then back the Castle Nuts off slightly so that the Hubs (15) can just move freely. (See Figure d.) SKU 90153 For technical questions, please call 1-800-444-3353. PAGE 8...
- Page 9 Hex Bolts (1) and Nylon Nuts (3). (See Figure E.) Attach the License Plate Bracket (28) and Left Tail Light (29) to the Left Side Rail (5), using Hex Bolts (1) and Nylon Nuts (3). (See Figure E.) SKU 90153 For technical questions, please call 1-800-444-3353. PAGE 9...
- Page 10 Side Running Light (30) located on the Left Side Rail (5). Then, run the Green/ brown Wires along the inside of the front Cross Member (4) to the other Side Run- ning Light located on the Right Side Rail (5A). (See Figure F.) SKU 90153 For technical questions, please call 1-800-444-3353. PAGE 10...
- Page 11 (not included) to the frame of the Trailer, you will need the following materials and parts: Qty. 1 3/4” thick Plywood (not included). Qty. 12: 3/8” x 1-1/2” Cross Head Bolts (not included). SKU 90153 For technical questions, please call 1-800-444-3353. PAGE 11...
- Page 12 With assistance, place the 3/4” plywood on the Trailer frame and align the predrilled 3/8” holes in the plywood with the pre-drilled 3/8” holes in the Trailer frame. (See Figure H.) SKU 90153 For technical questions, please call 1-800-444-3353. PAGE 12...
- Page 13 Cut the Stakes, Front End Rails, Back End Rails, and Side Rails to the sizes indi- cated in the illustration. (See Figure I.) Drill 3/8” holes through the Stakes as indicated in the illustration. (See Figure I.) REV 05j SKU 90153 For technical questions, please call 1-800-444-3353. PAGE 13...
- Page 14 Attach the Steel Angles to the Side Rails and Front/Back Rails, using the 3/8” x 1-3/4” Hex Bolts, 3/8” Flat Washers, 3/8” Spring Washers, and 3/8” Hex Nuts. (See Figure J.) SKU 90153 For technical questions, please call 1-800-444-3353. PAGE 14...
-
Page 15: Operating Instructions
Safety pin and “R” pin. (See Figure K.) Make sure to attach each side of the Safety Chain (25) equally to the towing vehicle’s rear bumper or frame. (See Figure K.) REV 05f SKU 90153 For technical questions, please call 1-800-444-3353. PAGE 15... -
Page 16: Tire Information
2.3 kilograms in excess of those standard items which they replace, not previously con- sidered in curb weight or accessory weight, including heavy duty brakes, ride levelers, roof rack, heavy duty battery, and special trim. SKU 90153 For technical questions, please call 1-800-444-3353. PAGE 16... -
Page 17: Tire Markings
This information is used to contact consumers if a tire defect requires a recall. • Maximum Load Rating - This number indicates the maximum load in kilograms and pounds that can be carried by the tire. SKU 90153 For technical questions, please call 1-800-444-3353. PAGE 17... -
Page 18: Tire Inflation And Load Limit
See the Tire Care section starting on the following page for an explanation of tire pressure and see the Vehicle Load Limit section following that for an explanation of load limit. REV 09b, 09g SKU 90153 For technical questions, please call 1-800-444-3353. PAGE 18... -
Page 19: Tire Care
At a service station, add the missing pounds of air pressure to each tire that is underinflated. Check all the tires to make sure they have the same air pressure. SKU 90153 For technical questions, please call 1-800-444-3353. PAGE 19... -
Page 20: Tire Size
Tires should be removed from the rim to be inspected before being plugged and patched. A qualified mechanic should remove the tire from the rim, perform the repair, and remount the tire. SKU 90153 For technical questions, please call 1-800-444-3353. PAGE 20... -
Page 21: Vehicle Load Limit
Nut about 1/6 turn from this point. Insert a new Cotter Pin through the Castle Nut and the hole in the axle. Bend the Pin back, locking it and the Nut in place. TO cLEAN, use only water and a mild detergent. SKU 90153 For technical questions, please call 1-800-444-3353. PAGE 21... -
Page 22: Parts List And Diagrams
Self Tapping Screw U-Bolt (10) Seal Spring Plate Cotter Pin (3 mm) Fender Tire Grease Fitting Lug Nut R-Pin (3 mm) Bearing Safety Pin (10 x 25 mm) Washer (3/4”) REV 04g SKU 90153 For technical questions, please call 1-800-444-3353. PAGE 22... -
Page 23: Assembly Diagram
17: LuG NuTS NOT SHOWN. 19: WASHERS (3/4”) NOT SHOWN. 21: cOTTER pINS (4 MM) NOT SHOWN. 24: bOLTS (10 X 90 MM) NOT SHOWN. 36: R-pIN (3 MM) NOT SHOWN. REV 04h SKU 90153 For technical questions, please call 1-800-444-3353. PAGE 23... -
Page 24: Wiring Diagram
Wiring diagram Note: Some trailer tail lights will have two leads instead of three. They connect to the harness leads the same way; brown to brown, color to color. REV 06e SKU 90153 For technical questions, please call 1-800-444-3353. PAGE 24... - Page 25 Finish assembling the hub/wheel assembly as explained in this manual, being care- ful not to get any dirt or debris on any part of the assembly. SKU 90153 For technical questions, please call 1-800-444-3353. PAGE 25...
- Page 26 This warranty gives you specific legal rights and you may also have other rights which vary from state to state. 3491 Mission Oaks Blvd. • PO Box 6009 • Camarillo, CA 93011 • (800) 444-3353 SKU 90153 For technical questions, please call 1-800-444-3353. PAGE 26...
Need help?
Do you have a question about the 90153 and is the answer not in the manual?
Questions and answers
certification of origin of trailer made in china needed in pdf file should be with trailer manual ?