Advertisement
Table of Contents
Advertisement
Table of Contents

Related Manuals for AirMaid 5000V


Summary of Contents for AirMaid 5000V
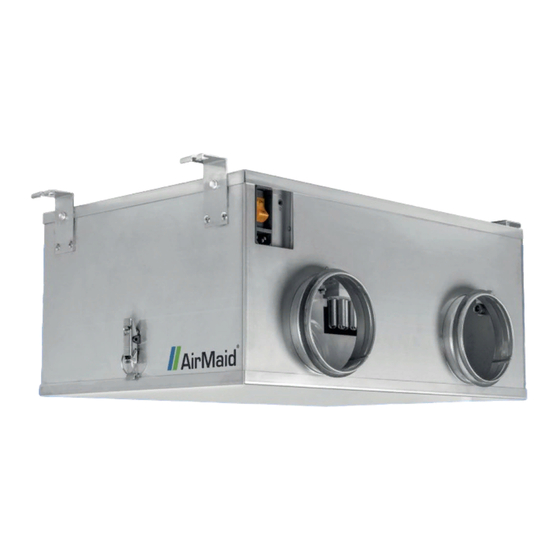
- Page 1 5000V 10000V 20000V Installation, Operation and Maintenance AirMaid V Series Ozone Cleaning System (NORTH AMERICAN 120 VAC) ® A i d o z o n e c l e A n i n g s y s t e M...
- Page 3 WARNINGS AND SAFETY CONSIDERATIONS General This installation and service guide contains important instructions and safety information for the AirMaid® Ozone Generator (hereafter referred to as ”The Generator”). Read this guide fully before attempting to install, operate, or perform maintenance on The Generator.
-
Page 4: Table Of Contents
The warranty covers only the repair or replacement of the part itself and does not include any labor, travel or other incidental charges related to its replacement. CONTENTS 1. Check Product............4 7. The AirMaid Alarm Panel ........13 2. Planning Your Installation ........5 8. Service and maintenance......... 16 3. Sample Installations ..........7 9. -
Page 5: Planning Your Installation
Inlet Air Supply (Bleed Air): Adjust to the "Target Bleed Airflow" when able Filtered Air. The air supplied and bled through the AirMaid generator is the “fuel“ to create its ozone and must be filtered. To minimize equipment maintenance, use an air source with the least pollutants. Inlet air is preferred taken from a filtered central ventilation or MUA supply. - Page 6 To obtain good odor reduction results with AirMaid it is important that the ozone have enough time to react with the odor particles in the duct airstream. We call this “reaction time” or “dwell time” and is measured from the point where the ozone gas is mixed in with the exhaust airstream ahead of the hood connection.
-
Page 7: Sample Installations
(twice/year recommended) to the regular maintenance schedule for the facility. AIRMAID® OZONE CLEANING SYSTEMS ARE SOLD AND SHIPPED WITH AN ALARM PANEL. INSTALLATION MATERIALS ARE N OT PROVIDED BY INTERZON AB. THIS TYPICAL INSTALLATION DETAIL IS FOR REFERENCE ONLY. -
Page 8: Installation Detail
At times there are misconceptions regarding our sample installation detail available as shown on the previous page, as it only shows a “general case” side view of an AirMaid generator. Since certain models of AirMaid have multiple pipes, sometimes an engineer or contractor has unnecessarily drawn/constructed multiple inlet and outlet connections to... - Page 9 Fasten the outlet pipe between the ozone generator and the eventual connecting point to the exhaust duct. AirMaid AirMaid 2000V/5000V 20000V 10000V Note that the direction of the airflow must correspond to the arrows on the generator and the pictures below.
-
Page 10: Electrical Installation
Alarm Panel Mounting Remove the four screws that fasten the AirMaid alarm panel to its base. Fasten the base to the wall using devices suitable for the wall material. In commercial kitchens place the alarm panel where it will be visible to the staff but not to customers. -
Page 11: Commissioning
Turn off the generator’s main power switch and remove the bottom access hatch. Visually inspect all glass electrode tubes that they are all intact. If any are found to be cracked or damaged, contact your AirMaid Authorized Service Company for assistance. - Page 12 Register the generator online within 10 days installation at www.interzon.com Registering the AirMaid generator installation is important to both the reseller and end customer. Firstly, this allows us to more easily contact you regarding important product updates. Secondly, this determines the date the 3-year limited warranty will begin, otherwise the shipment date from our production plant will be used for warranty evaluation.
-
Page 13: The Airmaid Alarm Panel
CALL SERVICE: Red indicator is blinking. An error condition has lasted more than 72 hours. Contact your AirMaid Authorized Service Company for assistance. CALIBRATION FAILURE: The Red lamp is flashing. - Page 14 Do not recalibrate at any other time unless instruct- ed to do so by the manufacturer. EXIT MENU: Leave the settings menu. SETTINGS MENU FLOW DIAGRAM AIRMAID 5 sec. RUNNING ...
- Page 15 EVENT LOG 1: Number of registered events 2: Cause A = Alarm, C = Calibration, P = Pressure Fault, N = Not Connected (generator not detected) 3: Event Duration 4: When (Year/month/day) 5: When (Time) KEYPAD FUNCTIONS INSPECT/CLEAN Next Service & Maintenance: Press to display days how many days remain until the next inspecton.
-
Page 16: Service And Maintenance
Switch OFF the main power to the ozone generator and then remove the service hatch from the bottom of the ozone generator. Note: AirMaid® Models 2000V and 5000V have one set of ozone cells to clean; the 10000V has two sets; and the 20000V has four sets. -
Page 17: Specifications
9. SPECIFICATIONS AirMaid Ozone Capacity Power Voltage Main Breaker Dimensions Weight 2000V 2000 mg/h 100 W 120V/60Hz 15A Slow 12x16x10 in 20 lbs 5000V 5000 mg/h 100 W 120V/60Hz 15A Slow 12x16x10 in 20 lbs 10000V 10000 mg/h 200 W... -
Page 18: Troubleshooting
Most common causes for display status message: "Not Running", "Pressure Fault" or "Call Service" The AirMaid system is not properly interlocked with the exhaust fan. This can cause an error state every evening when the ventilation is shut down, persisting into the following morning, even after the ventilation is started back up. -
Page 19: Product Registration
11. PRODUCT REGISTRATION TO BEGIN THE 3-YEAR WARRANTY ON THE DATE OF INSTALLATION, PLEASE SUBMIT THIS FORM TO INTERZON WITHIN TEN (10) DAYS. This can be done most easily online at www.airmaid.com. Installation/Service Company Company Name: Installed by: Telephone: E-mail:... - Page 20 Reproduction, modification or translation without a prior written consent is forbidden with the exception of what is permitted by the Act on Copyright. Copyright Information © 2018 Copyright Interzon AB Edition 15/ 27 August / 2018 36629 36629_Manual_V_USA_ed15 / 27 August 2018, 11:27 AM Distributor: Manufacturer: Interzon AB...
Need help?
Do you have a question about the 5000V and is the answer not in the manual?
Questions and answers