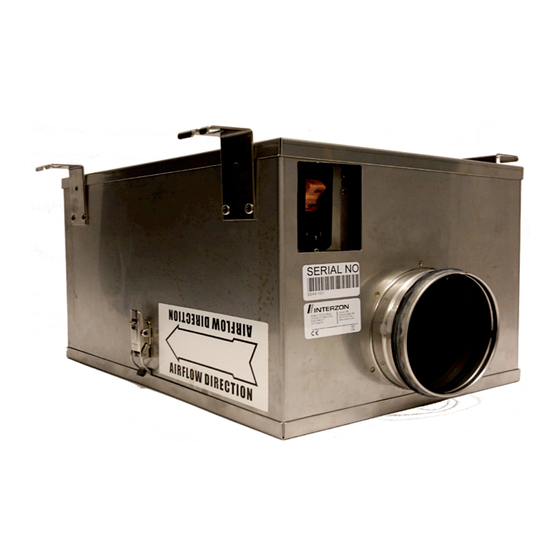
Summary of Contents for AirMaid 2 000 V
- Page 1 10 000 V 20 000 V 30 000 V Installation and service guide for AirMaid® V ozone cleaning system ® A i d o z o n e c l e A n i n g s y s t e M...
- Page 3 Supervise children to ensure that they do not play with the device. This manual contains important information about instructions and safety concerning AirMaid® ozone generator (hereinafter referred to as the generator). Read this manual carefully before installation, commissioning or performing service and maintenance on the generator.
-
Page 4: Table Of Contents
Check that the shipment consists of the components below and that there are no visible damages. Any discrepancy must always be reported to the distributor or manufacturer. Read through the complete guide before starting the installation. 1 x AirMaid® Ozone Generator 1 x AirMaid® Alarm Panel... -
Page 5: System Overview
The temperature of supply air should not exceed 40°C. AirMaid® is very effective in reducing odors provided that the reaction time between the ozone and the exhaust air in the kitchen duct is at least 2 seconds. This reaction time is important and must be taken into account during the planning stage. -
Page 6: Installation Guidelines
Note that the direction of the airflow must correspond to the arrows on the generator and the pictures below. Make sure that you have selected the correct ozone generator. AirMaid Ozone Capacity Pressure Drop Max Treated Exhaust Airflow through the ozone generator (ΔP @ Target Airflow rate) - Page 7 SPLITTING 20000V30000V OUTLET PIPES BETWEEN DUCTS (OPTIONAL) As the AirMaid 20000V generator has two outlet pipes, it is possible to share the generated ozone between two nearby sections of the exhaust duct system. Because each duct section can have a unique pressure, it is the responsibility of the engineer to ensure the proper airflow is delivered into each section of channel.
-
Page 8: Electrical Connection And Settings
ASSEMBLY Remove the four screws that fasten the AirMaid® alarm panel to it’s base. Fasten the base to the wall using devices suitable for the wall material. In commercial kitchens place the alarm panel where it will be visable to the staff but not to customers. -
Page 9: Airmaid Startup
Once you have adjusted and configured the required airflow and under-pressure, you can then apply power to the generator. The first time the alarm panel is started the time and date must be configured. THE AIRMAID® ALARM PANEL ... - Page 10 This menu option must be used after the generator has been repaired and electronic components have been replaced. Do not recalibrate at any other time. EXIT MENU: Leave the settings menu. SETTINGS MENU FLOW DIAGRAM AIRMAID 5 sec. RUNNING ...
- Page 11 EVENT LOG CAUSE A = Alarm C = Calibration P = Pressure Fault N = Not Connected (ozone generator not detected) X = Calibration Failure 1: Number of registered events 2: Cause 3: Event Duration 4: When (Year/month/day) 5: When (Time) KEYPAD FUNCTIONS INSPECT/CLEAN ...
-
Page 12: System Test
Ensure that there is no leak in the tubing after the ozone generator. If the ozone generator is installed with a filter box, make sure that the filter is clean. Reset the active alarm, see section “5 AIRMAID STARTUP”. If the system still does not start call the distributor or the manufacturer. -
Page 13: Service And Maintenance
Switch OFF the main power to the ozone generator and then remove the service hatch from the bottom of the ozone generator. Note: AirMaid® 2000V/5000V has one set of ozone cells; 10000V has two sets; and 20000V has four sets and 30000V has six sets. -
Page 14: Technical Specifications
8 TECHNICAL SPECIFICATIONS AirMaid Ozone Capacity Power Voltage Main Dimensions Weight Breaker 2000V 2000 mg/h 100 W 230V/50-60 Hz 6A Slow 300 x 402 x 252 mm 10 kg 5000V 5000 mg/h 100 W 230V/50-60 Hz 6A Slow 300 x 402 x 252 mm... -
Page 15: Airmaid® Product Registration
9 AIRMAID® PRODUCT REGISTRATION In order to receive the 3-year warranty from the installation date, you have to submit the product registration form to Interzon within ten (10) days. The easiest way to do this is online at www.interzon.com. INSTALLATION/SERVICE COMPANY... - Page 20 Reproduction, modification or translation without a prior written consent is forbidden with the exception of what is permitted by the Act on Copyright. Original Instructions Copyright Information © 2018 Copyright Interzon AB Edition 8, 8/2018 36659 Distributor: Manufacturer: Interzon AB Tel: +46 8 544 444 30 Propellervägen 4A...


Need help?
Do you have a question about the 2 000 V and is the answer not in the manual?
Questions and answers