Table of Contents
Advertisement
Advertisement
Table of Contents

Related Manuals for Avery Weigh-Tronix 7880-75


Summary of Contents for Avery Weigh-Tronix 7880-75
-
Page 1: User Instructions
Model 7800 Family Weight Classifiers User Instructions AWT35-501540 Issue AA... - Page 2 This publication was correct at the time of going to print, however Avery Weigh-Tronix reserves the right to alter without notice the specification, design, price or conditions of supply of any product or service at any time.
-
Page 3: Table Of Contents
Table of Contents page Table of Contents ............................3 Chapter 1 General information and warnings ..................5 About this manual ......................5 Text conventions ......................5 Special messages ....................... 5 Installation .......................... 6 Electrical installation ......................6 Pluggable equipment ....................6 Wet conditions ...................... - Page 4 7800 Family User Instructions...
-
Page 5: Chapter 1 General Information And Warnings
Text conventions General information and warnings 1.1 About this manual This manual is divided into chapters by the chapter number and the large text at the top of a page. Subsections are labeled as shown by the 1.1 and 1.1.1 headings. The names of the chapter and the next subsection level appear at the top of alternating pages of the manual to remind you of where you are in the manual. -
Page 6: Installation
PARTS. REFER TO QUALIFIED SERVICE PERSONNEL FOR SERVICE. CAUTION: Installation, configuration, and servicing are only to be done by qualified service personnel as authorized by Avery Weigh-Tronix. 1.3 Electrical installation CAUTION: The power cable must be connected to an earth-grounded electrical outlet. -
Page 7: Routine Maintenance
Wet conditions 1.4 Routine maintenance IMPORTANT: This equipment must be routinely checked for proper operation and calibration. Application and usage will determine the frequency of calibration required for safe operation. Always turn off the machine and isolate from the power supply before starting any routine maintenance to avoid the possibility of electric shock. -
Page 8: Fcc And Emc Declarations Of Compliance
1.7 FCC and EMC declarations of compliance United States This equipment has been tested and found to comply with the limits for a Class A digital device, pursuant to Part 15 of the FCC Rules. These limits are designed to provide reasonable protection against harmful interference when the equipment is operated in a commercial environment. -
Page 9: Chapter 2 Specifications
Capacity/Resolution Model Capacity (lb) Capacity (kg) n(max) 7820-50 100 x 0.02 lb 50 x 0.01 kg 5000d 7820-70 150 x 0.05 lb 60 x 0.02 kg... - Page 10 Dimensions Model 7820: 14" L x 12.5" W x 4.1" H Model 7880: 18" L x 18" W x 4.6" H Model 7885: 18" L x 18" W x 3.0" H Model 7829: 20" L x 20" W x 5.3" H Model 7840: 18"...
- Page 11 Zero Window Initial automatic zero setting is ±10% of maximum capacity—active at power up. Manual zero setting range is ±2% of maximum capacity—active using the ZERO key. Under Capacity Limits Under capacity indication will be given with dashes appearing on the bottom line of the display whenever the display is more than 2 percent below the initial zero value.
-
Page 12: Chapter 3 Initial Setup
Initial Setup 3.1 Unpacking the Scale Remove contents of the shipping container. Inspect the scale for evidence of shipping damage. Immediately report any damage to the shipper. 3.2 Installing the Scale Mount the scale on a stable, level surface that is free from air currents and vibration. - Page 13 Model 7840 Scale Dimensions Min. Cut-Out Dimensions 24 in. (61.0 cm)24.75 in. (62.9 cm) 18 in. (45.7 cm)18.75 in. (47.6 cm) 4.6 in. (11.7 cm)* *Adjustable to 5.1 in. (12.9 cm) Model 7824 Scale Dimensions Min. Cut-Out Dimensions 24 in. (61.0 cm)24.75 in. (62.9 cm) 24 in.
-
Page 14: Chapter 4 Operation
Operation 4.1 Power Up Test Sequence If RAM or ROM error is reported, you must press the TEST key to acknowledge the condition. See Error Codes and Troubleshooting on page 35. When the scale is first powered on, it will perform a test sequence. During this sequence, the display will show the following: The model number and the software revision level. -
Page 15: Operation Controls
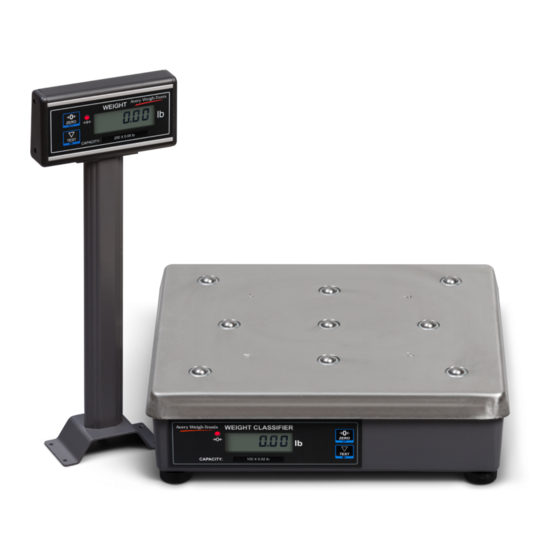
WEIGHT CLASSIFIER ZERO TEST CAPACITY: Figure 4.1 7815 and 7820 display WEIGHT ZERO TEST CAPACITY: Figure 4.2 7824, 7829, 7840 and 7880 display 4.3 Operation Controls ZERO Key The ZERO key will zero the scale if weight is stable, and acts as the NO or SCROLL key in the Menu Mode and as the INCREASE key in the Gravity Mode. -
Page 16: Chapter 5 Accessing The Menu Mode
Accessing the Menu Mode The 7800 models power up ready for weighing operations. Access the Menu mode by setting Switch 1 shown in Figure 5.1 Figure 5.2 to the OPEN or Menu mode position. 5.1 Accessing the Gravity Mode Access the Gravity setting mode by setting Switch 2, shown in Figure 5.1 Figure 5.2, to the OPEN or Gravity mode position. - Page 17 The structure for these menus is shown in Figure 5.3. Specific information about each mode followed by step-by-step instructions for accessing them are described in the following pages. Normal Weighing Mode Set Switch 1 to Set Switch 2 to Press the ZERO key to move in the menu...
-
Page 18: Gravity Mode
5.3 Gravity Mode With Switch 2 in the Gravity Mode or OPEN position, you may increase the local gravity value by pressing the ZERO key, or decrease the value by pressing the TEST key. 5.4 Alternative Calibration Points The NCI 7800 bench scales allow calibration using less than full capacity weights. See Table 5.1 for alternative weights that can be used to calibrate your scale for its designated capacity. -
Page 19: Baud Rate And Parity Options
5.5 Baud Rate and Parity Options The databits and stop bits default values are 7 data bits and 1 stop bit. These are not configurable. Table 5.2 Baud Rate and Parity Options Display Baud Parity 12 E 1200 Even 24 E 2400 Even 48 E... - Page 20 Units, Prtout and Gravity Setting. Follow these steps to access the tests in the DIAG menu. If you encounter any failure in these tests, contact your local Avery Weigh-Tronix dealer. From normal weighing mode, move Switch 1 to the MENU Mode or OPEN position.
- Page 21 Press the ZERO key … RO is displayed. This stands for the ROM test. Press the TEST key to make a selection. To skip a test, press the ZERO key to scroll to the next test. Press the TEST key to perform the ROM test … PASS or FAIL is displayed briefly;...
- Page 22 Press the TEST key to stop the test … DIV-N is displayed. The remaining selections are for viewing current settings only. You can scroll through the menu to verify the settings, but to make changes, you must enter configuration or calibration.
-
Page 23: Configuration Mode
Pres the ZERO key … LOC-GR is displayed. This stands for local gravity. Press the TEST key … The current local gravity setting is displayed. Press the ZERO key … CAL-GR is displayed. This stands for calibration gravity. Press the TEST key … The current calibration gravity settings is displayed. - Page 24 Press the TEST key … The current setting, FAST or SLO, is displayed. Use the ZERO key to toggle between the two choices. Press the TEST key when the choice you want is displayed. The choice is accepted and the display shows FILT.
-
Page 25: Print Modes
Press the ZERO key to scroll through the choices. When the choice you want is displayed, press the TEST key … Your choice is accepted and the display shows PRTOUT. Table 5.3 Output Print Formats Selection Formatted Output Data String Display <LF>... -
Page 26: Calibration Mode
AUTO-2: Weight is automatically transmitted when the item is placed on the scale and the weight stabilizes. This option is normally used in an application where the item placed on the scale is sealed and ready for the shipment weight to be registered. The minimum stable weight required to trigger an auto SEND is set at five display divisions (i.e. -
Page 27: Gravity Mode
5.10 Step-by-Step Instructions for CAL Mode Press the ZERO key to toggle between the choices. When the choice you want is displayed, press the TEST key to accept … The choice is accepted. If LBS (lb) was selected, the scale will display CLASS. If 1000G (kg) was selected, scale displays the present capacity setting. -
Page 28: Re-Calibration Mode
To make the adjustment, you must know the value of the gravity constant for the local site. This value is expressed in meters per second, per second (i.e., m/s2). It is not necessary to calibrate the scale, therefore, no calibration weights are needed to make this adjustment. -
Page 29: Review/Test Scale Settings
5.12 Step-by-Step Instructions for RE-CAL mode Press the ZERO key until … RE-CAL is displayed. Press the TEST key … ROUND is displayed. To change the weight rounding method, press the TEST key. The current rounding method is displayed. Press the ZERO key to toggle between SCALE and CLASS. When the choice you want is displayed, press the TEST key. - Page 30 Operating Mode Press the TEST and hold Displays the scales model number, program, DISP version-revision, and performs a display test. Performs a test of RAM (run time memory) Performs a test of ROM (program memory) Performs a serial I/O loopback test (See diagnostics section for further details) DIVA Performs an A/D count test wAZT enabled...
-
Page 31: Chapter 6 Communication
Communication The 7800 family scales come factory configured with one communication port, however the data can be transfered out of the base using one of the following interface devises: 1 serial RS232, 1 USB VCP or 1 USB HID Only one of these interface devises can be used from the scale at a time. Below are the connections present on a 7820 and a 7880. -
Page 32: Communications Enabled
Driver required when connected to a PC. Download driver from the password protected portion of www.averyweigh-tronix.com. USB HID Used to connect to a dedicated PC terminal where the Avery Weigh-Tronix OPOS or UPOS (POS.NET) drivers have been integerated into a 3 party software application. -
Page 33: Interface Cable Specifications
6.2 Interface Cable Specifications JMP 1 Pins 1, 4 and 6, and JMP 2 Pins 7 and 8 are internally jumpered inside the scale. DE-9 Female Scale DE-9 Male Host Name Direction Name Direction JMP 1 JMP 1 JMP 1 JMP 2 JMP 2 6.3 NCI Serial Communications Protocol... -
Page 34: Optional Commands
Z<CR> Scale Response <LF>hh<CR><ETX> Results Scale is zeroed, returns status. 6.5 Optional Commands H<CR> Scale Response <LF>xxxx.xxxuu<CR> <LF>hh<CR><ETX> Results Returns decimal wt in 10x with units plus scale status. d<CR> (for factory diagnostics only) Scale Response xxxxxx (div-A) <CR> xxxxxx (div-n) <CR> Results Returns weight normalized to 100,000 division with AZT on/off. -
Page 35: Chapter 7 Error Codes And Troubleshooting
Not used 7.1 Troubleshooting Perform the following steps in the order presented until the described problem is corrected. If the problem cannot be corrected, contact your Avery Weigh-Tronix service provider. No Power (Display is Blank) Check that the primary side of the cord is plugged into the AC outlet, and the secondary side is properly connected to the power jack on the back of the scale. - Page 36 Scale will not return to zero, or incorrect weight is displayed Press the ZERO key. Check for interference of weighing platform. Power off, remove all items from the platter, and then power on the scale. Recalibrate the scale. Replace the load cell. Replace the main board.
- Page 37 _ _ _ _ Display shows upper dashes (Indicates the scale is over capacity.) Remove all items from the scale. Press the ZERO key. Power off, and then power on the scale. Recalibrate the scale. Replace the load cell. Replace the main board. Scale is not transmitting data to the host device Check cable connection at both the rear of the scale and the host device.
-
Page 38: Chapter 8 Spare Parts
PCB ASSY Main RS232 USB Option AWT25-501295 PCB ASSY, 78XX 2X USB Option AWT25-501976 Power Supply - in-line 1148-15536 Power Supply - wallmount (7885 only) 1148-15535 RS232 Cable 1140-13842 7820-50 Loadcell 7154-16335-50 7820-70 Loadcell 7154-16333-100 7820-75 Loadcell 7154-16335-100 7880-50 Loadcell 7154-16365-75 7880-75 Loadcell 7154-16365-100... - Page 40 Avery Weigh-Tronix USA 1000 Armstrong Dr. Fairmont MN 56031 USA Tel: 507-238-4461 Fax: 507-238-4195 Email: usinfo@awtxglobal.com www.averyweigh-tronix.com Avery Weigh-Tronix UK Foundry Lane, Smethwick, West Midlands, England B66 2LP Tel: +44 (0) 8453 66 77 88 Fax: +44 (0)121 224 8183 Email: info@awtxglobal.com...
Need help?
Do you have a question about the 7880-75 and is the answer not in the manual?
Questions and answers