Table of Contents
Advertisement
Advertisement
Table of Contents
Troubleshooting

Related Manuals for Avery Weigh-Tronix 7821


Summary of Contents for Avery Weigh-Tronix 7821
-
Page 1: User Instructions
Model 7821 User Instructions AWT35-501542 Issue AA... - Page 2 This publication was correct at the time of going to print, however Avery Weigh-Tronix reserves the right to alter without notice the specification, design, price or conditions of supply of any product or service at any time.
-
Page 3: Table Of Contents
Gravity Mode ........................22 Chapter 6 Communication ........................23 Interface Cable ......................... 23 Serial Communications Protocol ..................24 NCI Communications Protocol ..................25 Chapter 7 Error Codes and Troubleshooting ..................27 Troubleshooting ....................... 28 Chapter 8 Spare parts ..........................30 7821 User Instructions... - Page 4 7821 User Instructions...
-
Page 5: Chapter 1 General Information And Warnings
Cautions give information about procedures that, if not observed, could result in damage to equipment or corruption to and loss of data. NOTE: This is a Note symbol. Notes give additional and important information, hints and tips that help you to use your product. 7821 User Instructions... -
Page 6: Installation
PARTS. REFER TO QUALIFIED SERVICE PERSONNEL FOR SERVICE. CAUTION: Installation, configuration, and servicing are only to be done by qualified service personnel as authorized by Avery Weigh-Tronix. 1.3 Electrical installation CAUTION: The socket-outlet shall be installed near the equipment and shall be easily accessible. -
Page 7: Routine Maintenance
To avoid the risk of RSI (Repetitive Strain Injury), place the machine on a surface which is ergonomically satisfactory to the user. Take frequent breaks during prolonged usage. 7821 User Instructions... -
Page 8: Fcc And Emc Declarations Of Compliance
Communications du Canada. European Countries WARNING: This is a Class A product. In a domestic environment, this product may cause radio interference in which the user may be required to take adequate measures. 7821 User Instructions... -
Page 9: Chapter 2 Specifications
4000d 7821-100 200 x 0.05 lb 100 x 0.02 kg 5000d Approvals Model 7821-70, 7821-75 and 7821-100 USA: NTEP COC #95-070 Canada: Ministry of Industry #AM5076 Zero Window Initial automatic zero setting is ±10% of maximum capacity—active at power up. -
Page 10: Chapter 3 Unpacking And Installing The Scale
Mount the scale on a stable, level surface that is free from air currents and vibration. Be sure the scale platter does not touch any adjacent surfaces. Cutout Dimensions To install the scale surface flush with a countertop, use these dimensions to guide your construction: 7821 Platform Minimum Cutout Dimensions Dimensions 14" (35.6cm) W x 14.75"... -
Page 11: Chapter 4 Operation
If it not, press the key … ZERO 0.00 is displayed. 2. Place an item to be weighed on the scale platter … The scale will display the gross weight. 3. Remove the item from the scale platter. 7821 User Instructions... -
Page 12: Chapter 5 Modes Of Operation
Modes of Operation Modes of Operation 5.1 Accessing the Menu The 7821 powers up in normal weighing mode ready for weighing operations. Access the Menu Mode by setting Switch 1 shown in Figure 5.1 to the OPEN or MENU Mode position. -
Page 13: Display
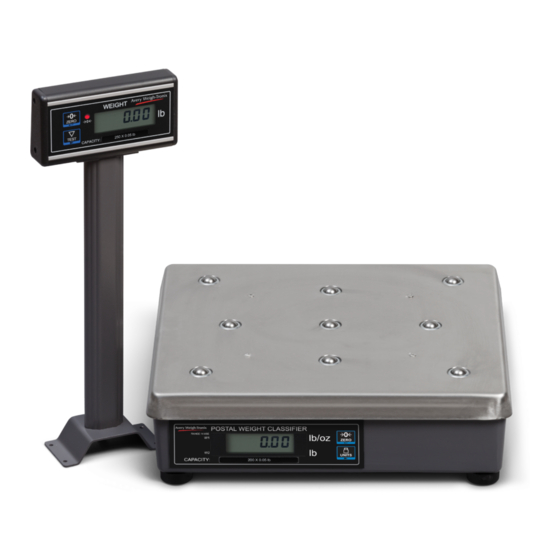
ZERO UNITS CAPACITY: 5.1.3 Remote Display The NCI 7821 bench scale has an optional remote display. Typically, the remote display is used to display weight only (i.e., the keys are not operable). ZERO UNITS Alternatively, it is possible to have operable... - Page 14 Figure 5.2 Menu structure The NCI 7821 bench scale allows calibration of the scale using less than full capacity weights. The following tables show alternative weights that can be used to calibrate the scale at its designated capacity. See Table 1 for alternate calibration span loads.
-
Page 15: Alternative Calibration Span Points
9600 Even 192 E 19,200 Even 12 o 1200 48 o 4800 96 o 9600 192 o 19,200 12 n 1200 None 48 n 4800 None 96 n 9600 None 192 n 19,200 None *Factory Default Setting 7821 User Instructions... -
Page 16: Scale Lb/Kg Capacity And Count-By Choices
Weight data is normalized to 100,000 counts of displayed resolution. AZT is enabled. Typically used by service technicians. Division, Test w/o AZT (HRESN) Weight data is normalized to 100,000 counts of displayed resolution. AZT is disabled. Typically used by service technicians. 7821 User Instructions... -
Page 17: Step-By-Step Instructions For Diag Mode
… PASS or FAIL is displayed. If the test fails, check your connections and/ or contact your local Avery Weigh-Tronix distributor for service. Press the ZERO key … HRESA is displayed. This stands for the high resolution test with AZT enabled. - Page 18 The calibration gravity setting is displayed. When you are finished, press the ZERO key, which displays DONE, and press the UNITS key, DIAG is displayed, or place Switch 1 back to the closed position to return back to normal weighing mode. 7821 User Instructions...
-
Page 19: Configuration Mode
The current baud and parity choice is displayed. Use the ZERO key to scroll the choices found in Table 5.2. When the choice you want is displayed, press the UNITS key … The choice is accepted and the display shows BAUD. 7821 User Instructions... -
Page 20: Calibration Mode
Follow these steps to calibrate the scale. Refer to Figure 5.2. From normal weighing mode, move Switch 1 to the Menu Mode or OPEN position … DIAG is displayed. Press the ZERO key until CAL is displayed. 7821 User Instructions... - Page 21 Remove all calibration weights from scale. Return Switch 1 to the closed position … The scale returns to normal weighing mode. The scale is now tested, configured and calibrated. It is ready for use in your application. 7821 User Instructions...
-
Page 22: Gravity Mode
UNITS key to decrement the value. The gravity value will change in steps of .0002. When the correct value is displayed, return Switch 2 to the CLOSED position. The scale will now use this new relationship between calibration and local gravity for its weight calculations. 7821 User Instructions... -
Page 23: Chapter 6 Communication
Communication 6.1 Interface Cable The 7821 scale comes factory configured with one communication port, however the data can be transfered out of the base using one of the following interface devises: 1 serial RS232, 1 USB VCP or 1 USB HID Only one of these interface devises can be used from the scale at a time. -
Page 24: Serial Communications Protocol
Driver required when connected to a PC. Download driver from the password protected portion of www.averyweigh-tronix.com. USB HID Used to connect to a dedicated PC terminal where the Avery Weigh-Tronix OPOS or UPOS (POS.NET) drivers have been integerated into a 3 party software application. -
Page 25: Nci Communications Protocol
Returns decimal weight, units, plus scale status S<CR> Scale Response <LF>hh…<CR><ETX> Results Returns scale status. Z<CR> Scale Response <LF>hh…<CR><ETX> Results Scale is zeroed, returns status. H<CR> Scale Response <LF>xxxx.xxuu<CR> <LR>hh...<CR><ETX> Results Returns decimal weight in 10x with units plus scale status. 7821 User Instructions... - Page 26 Communication U<CR> Scale Response <LF>uu<CR><ETX> Results Changes unit of measure, returns new units. M<CR> Scale Response <LF>xxxxxxxMM<CR> <LF>hh...<CR><ETX> Results Returns normalized raw counts and count status. All other commands Scale Response <LF>?<CR><ETX> Results Unrecognized command 7821 User Instructions...
-
Page 27: Chapter 7 Error Codes And Troubleshooting
The error codes are defined as follows: Most Significant Digit 8 4 2 1 Reserved for Future Use Least Significant Digit 8 4 2 1 Calibration error (E-01 ROM error (E-02) RAM error (E-04) Serial EE (E-08) PROM error 7821 User Instructions... -
Page 28: Troubleshooting
Error Codes and Troubleshooting 7.1 Troubleshooting Perform the following steps in the order presented until the described problem is corrected. If the problem cannot be corrected, contact your Avery Weigh-Tronix service provider. No Power (Display is Blank) Check that the primary side of the cord is plugged into the AC outlet, and the secondary side is properly connected to the power jack on the back of the scale. - Page 29 Check communication setting and baud rate on both scale and software. Perform I/O loopback test. Replace the main PC board. key and the key do not function ZERO UNITS Replace the display panel. Replace the display PCB. Replace the main PCB. 7821 User Instructions...
-
Page 30: Chapter 8 Spare Parts
Spare parts Spare parts Description Part Number Keyboard Panel AWT25-501980 Display PCB 7405-15465 Loadcell (100kg) 7154-16335-100 Main PCB 7405-14704-2 Power Supply 1148-15536 RS-232 Cable 1140-13842 7821 User Instructions... - Page 32 Avery Weigh-Tronix USA 1000 Armstrong Dr. Fairmont MN 56031 USA Tel: 507-238-4461 Fax: 507-238-4195 Email: usinfo@awtxglobal.com www.averyweigh-tronix.com Avery Weigh-Tronix UK Foundry Lane, Smethwick, West Midlands, England B66 2LP Tel: +44 (0) 8453 66 77 88 Fax: +44 (0)121 224 8183 Email: info@awtxglobal.com...
Need help?
Do you have a question about the 7821 and is the answer not in the manual?
Questions and answers