Table of Contents
Advertisement
Quick Links
Advertisement
Table of Contents

Related Manuals for NCR 7600


Summarization of Contents
Preface
Audience
Information about the intended audience for this book.
Safety Requirements
Essential safety guidelines and warnings for using the terminal.
Fuse Replacement
Procedure and precautions for replacing fuses.
Lithium Battery Warning
Warning regarding the risks associated with lithium battery replacement.
Battery Disposal (Switzerland)
Reference for battery disposal procedures in Switzerland.
IT Power System
Information on connecting the terminal to an IT power system.
Chapter 1: Product Overview
Introduction
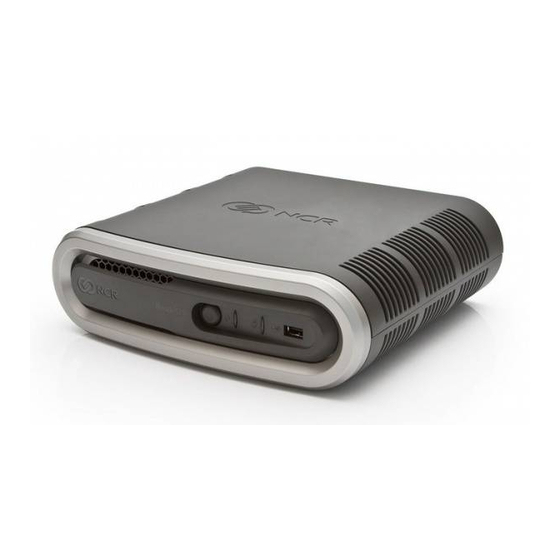
Overview of the NCR RealPOS 40 as a compact POS solution.
Product IDs
Details on the different product models and their configurations.
RealPOS 40 Base Model Comparison
Comparison table detailing specifications of RealPOS 40 base models.
Energy Star
Information on ENERGY STAR compliance and benefits for the POS terminal.
Power Management Settings
Configuration options for power management features.
Touch Screen Considerations
Notes on touch screen behavior with power management.
More Information about Energy Star
Links and information for learning more about Energy Star.
Configurations
Description of the various physical and modular configurations available.
Modular Configuration
Description of how the system can be configured modularly.
Stacked Configuration
Description of the stacked configuration with an optional stand.
Vertical Stand Configuration
Details about mounting the terminal vertically using a stand.
Operator Controls
Overview of the terminal's operator controls and indicators.
LED Diagnostic Indicators
Explanation of the front panel LED indicators and their meanings.
Cabinet Security
Information on securing the terminal's case.
Security Hasp
Information on securing the terminal using a Kensington lock or padlock.
Serial Number/Model Number Label
Location of the serial and model number labels on the terminal.
Model/Serial Number Label
Details about the terminal's model and serial number label.
Certificate of Authenticity Label
Details about the Microsoft Certificate of Authenticity label.
Features
Overview of the terminal's key hardware and software features.
7600 Processor Board
Technical specifications of the processor board.
Storage Media
Information on the types of storage media supported.
Power Supply
Details about the power supply unit.
Operating Systems
List of supported operating systems.
Power Management
Explanation of the terminal's power management capabilities.
G3 Mechanical Off
Description of the mechanical off power state.
G2/S5 Soft Off
Description of the soft off power state.
G1 Sleeping
Description of the sleeping power state.
G0 Working
Description of the working power state.
ACPI Sleep States (S0 - S5)
Explanation of ACPI sleep states supported by the terminal.
Requirements for S3 support
Conditions required for the system to support S3 sleep state.
Requirements for S4 support
Conditions required for the system to support S4 sleep state.
Enabling Wake on LAN
Procedure to enable Wake on LAN functionality.
Windows 7
Procedure to enable Wake on LAN for Windows 7.
Windows XP
Procedure to enable Wake on LAN for Windows XP.
ACPI Processor C-States
Explanation of ACPI processor C-states for power saving.
Operator Displays
Overview of the different operator display options.
NCR 5954 15-Inch DynaKey
Details about the NCR 5954 USB DynaKey display and keypad.
5942 12.1-Inch Color LCD
Description of the 5942 12.1-inch color LCD display.
5942 15-Inch Color LCD
Description of the 5942 15-inch color LCD display.
5964 15-Inch Touch Screen
Features of the NCR 5964 15-inch LCD touch screen display.
5965 15-Inch Touch Screen
Description of the NCR 5965 15-inch TFT LCD touch screen.
5966 15-Inch Touch Screen
Features of the NCR 5966 15-inch low cost XGA touch screen.
NCR 5982 6.5-Inch LCD Display
Details of the NCR 5982 terminal-powered color 6.5-inch VGA LCD.
Keyboards
Overview of the different keyboard options for the terminal.
5932 Keyboards
Description of the NCR 5932 Keyboards for retail environments.
Keyboard Power
Information on how keyboards receive power from the RealPOS 80.
NCR 64-Key PS/2 POS Keyboard (5932-2xxx)
Details of the NCR 64-Key PS/2 POS Keyboard with function keys.
Keylock
Explanation of the four-position keylock switch on keyboards.
Speaker
Function of the programmable speaker for tones and clicks.
Buzzer
Information about the internal on-board buzzer.
System Status Indicator LED
Description of the two-color LED for system status indication.
MSR (Magnetic Stripe Reader)
Details on the optional Magnetic Stripe Reader feature.
NCR 5932-5xxx USB Alphanumeric Big Ticket Keyboard
Features of the NCR 5932 USB Alphanumeric Big Ticket Keyboard.
NCR 5932-65xx PS/2 Programmable POS Keyboard
Description of the NCR 5932 PS/2 Programmable POS Keyboard.
NCR 5932-66xx USB Programmable POS Keyboard
Features of the NCR 5932 USB Programmable POS Keyboard.
NCR 5975 2x20 VFD Customer Display
Details of the NCR 5975 2x20 VFD Customer Display.
Display
Specifications of the Vacuum Fluorescent Display.
PCB
Information on the Printed Circuit Board components.
Cabinet
Description of the cabinet material and color options.
Connectors
Information on the available connectors.
Cables
Details about the various cables used.
Power Supply
Information on the power supply unit.
EIA-232 or USB 2.0 I/F support
Support for EIA-232 and USB 2.0 interface.
Mounting Options
Options for mounting the display.
Character Sets
Information on supported character sets.
Printers
Overview of the different printer models.
NCR 7167 Printer
Description of the NCR 7167 multi-function printer.
7168 Printer
Details of the NCR 7168 printer with MICR capability.
7197 Printer
Description of the NCR 7197 printer with front and back printing.
NCR 7198 Printer
Features of the NCR 7198 printer with front and back printing.
Chapter 2: Hardware Installation
Installation Restrictions
Guidelines and restrictions before installing the RealPOS 40.
Installing the Terminal
Procedure for unpacking and connecting the terminal.
Installing the Keyboard and Mouse
Instructions for connecting keyboards and mice to the terminal.
Connecting AC Power
Steps for connecting the terminal to AC power.
Disconnecting the Power Cable
Procedure for safely disconnecting the terminal's power cable.
PS/2 Cable Connection
Instructions for securing PS/2 cables with tie wraps.
Installing the Transaction Printer
Procedure for installing a transaction printer via USB.
RS-232 Installation
Procedure for installing a transaction printer via RS-232.
Installing a 5942 15-Inch LCD Monitor
Steps to connect the 5942 15-inch monitor.
Installing a 5942 12-Inch Monitor
Instructions for connecting the 5942 12-inch monitor using a powered USB cable.
Installing a 5964 15-Inch LCD Touch Monitor
Procedure for connecting the 5964 15-inch touch screen monitor.
DVI Connections (Video)
Steps for connecting the monitor using a DVI cable.
VGA Connections (Video)
Steps for connecting the monitor using a VGA cable.
Powered USB Cable Connections (Data and Power)
Procedure for connecting powered USB cables for data and power.
NCR 5954 USB DynaKey Cable Connections
Instructions for connecting the NCR 5954 USB DynaKey.
DVI Cable Connections
Connecting the DVI cable to the DynaKey and terminal.
VGA Cable Connections
Connecting the VGA cable to the DynaKey and terminal.
Powered USB Cable Connections
Connecting the powered USB cable to the DynaKey and terminal.
Installing a 5982 6.5-Inch LCD
Procedure for installing the 5982 6.5-inch LCD display.
External Power Supply
Steps for connecting the external power supply.
Terminal Powered (7446-30303131)
Connecting the terminal powered via a 12V USB port.
Installing a Secondary Display (Dual Display)
Procedure for installing and configuring a secondary display for dual display mode.
Dual Display Clone
Steps to configure the dual display mode as a clone.
Extended Desktop Dual Display
Steps to configure the dual display mode as an extended desktop.
Single Display Mode
Steps to configure the display in single display mode.
Intel Graphics Controller Hot Keys
Using hot keys for Intel graphics controller functions.
Installing a Cash Drawer
Procedure for connecting a cash drawer to the terminal or printer.
Installing Two Cash Drawers
Procedure for installing two cash drawers using a Y-cable.
Replacing the Hard Disk Drive
Step-by-step guide for replacing the hard disk drive.
Chapter 3: BIOS Setup
Entering Setup
Steps to access the BIOS setup utility.
How to Select Menu Options
Keyboard controls for navigating BIOS menus.
Restoring Factory Settings
Procedure to reset BIOS settings to factory defaults.
BIOS Default Values
Default configurations for various BIOS settings.
Main Menu
Description of the main menu options in BIOS.
Advanced Menu
Description of the advanced menu options in BIOS.
Boot Menu
BIOS settings related to boot devices and order.
Security Menu
BIOS settings for user and supervisor passwords.
Chipset Menu
BIOS settings related to the chipset configuration.
Chapter 4: Operating System Recovery
Introduction
Overview of the OS recovery process using CD ROM media.
Prerequisites
Required items for performing an OS recovery.
OS Recovery Procedures for Windows XP
Steps to recover the operating system for Windows XP.
OS Recovery Procedures for Windows 7 Professional
Steps to recover the operating system for Windows 7 Professional.
Chapter 5: BIOS Updating Procedure
Introduction
Overview of procedures for updating the terminal BIOS.
Prerequisites
Requirements for performing a SPI/BIOS update.
Creating the Bootable Media
Instructions for creating bootable media for BIOS updates.
Creating a Bootable CD
Steps to create a bootable CD for BIOS updates.
Creating a Bootable USB Memory Drive
Steps to create a bootable USB memory drive for BIOS updates.
BIOS Updating Procedures
Detailed procedures for updating the terminal BIOS.
Manually Updating the MAC Address
Procedure for manually updating the Motherboard MAC address.
Chapter 6: Solid State Drive Optimization
About the Intel® SSD Optimizer
Explanation of the Intel SSD Optimizer tool and its function.
Notes: Microsoft Windows* 7 and the Standard Microsoft AHCI Driver
Notes on Trim functionality with Windows 7 and AHCI driver.
Windows 7 and Intel® Matrix Storage Manager Version 8.x or Intel® Rapid Storage Technology (Intel® RST) Driver Version 9.5 or Earlier
Notes on Trim implementation with older Intel RST versions.
Windows 7 and Intel® Rapid Storage Technology (Intel® RST) 9.6 or Later
Notes on Trim support with newer Intel RST versions.
Installation and Startup
Steps to install the Intel Solid-State Drive Toolbox.
Start Intel SSD Toolbox
Instructions for launching the Intel SSD Toolbox application.
Manually Running the Intel® SSD Optimizer
Steps to manually run the Intel SSD Optimizer.
Scheduling the Intel® SSD Optimizer
Procedure for scheduling automated Intel SSD Optimizer runs.
Removing a Scheduled Intel® SSD Optimizer Session
Steps to remove a scheduled Intel SSD Optimizer session.
Known Limitations
List of known limitations for the Intel SSD Toolbox.
Appendix A: Disabling USB Ports for Security Purposes
BIOS Changes (1.2.2.0)
Steps to disable USB ports via BIOS settings.
Windows Operating System changes
Steps to disable USB ports through Windows Device Manager.
Need help?
Do you have a question about the 7600 and is the answer not in the manual?
Questions and answers