NCR VOYIX CX7 User Manual
All-in-one pos
Hide thumbs
Also See for VOYIX CX7:
- Kit instructions (20 pages) ,
- Kit instructions (11 pages) ,
- Kit instructions (11 pages)

Related Manuals for NCR VOYIX CX7


Summary of Contents for NCR VOYIX CX7
- Page 1 NCR CX7 All-in-One POS (7772) User Guide 7772 BCC5-0000-5363 Issue AA Confidential and proprietary information of NCR Corporation. Unauthorized use, reproduction and/or distribution is strictly prohibited...
- Page 2 NCR, therefore, reserves the right to change specifications without prior notice. All features, functions, and operations described herein may not be marketed by NCR in all parts of the world. In some instances, photographs are of equipment prototypes. Therefore, before using this document, consult with your NCR representative or NCR office for information that is applicable and current.
- Page 3 This book is written for hardware installer/service personnel, system integrators, and field engineers. Note This document is NCR proprietary information and is not to be disclosed or reproduced without consent. Confidential and proprietary information of NCR Corporation. Unauthorized use, reproduction and/or distribution is strictly prohibited.
- Page 4 Safety Requirements The NCR CX7 All-in-One POS (7772) conforms to all applicable legal requirements. To view the compliance statements see the NCR POS Terminals Safety and Regulatory Information (B005-0000-1589). Caution The on/off switch is a logic switch only. The AC line voltage primaries are live at all times when the AC power cord is connected to the AC outlet.
- Page 5 AC power. This can result in system or printer damage. Warning DO NOT connect or disconnect any serial peripherals while the terminal is connected to AC power. This can result in system or printer damage. Confidential and proprietary information of NCR Corporation. Unauthorized use, reproduction and/or distribution is strictly prohibited.
- Page 6 Use only 3–wire extension cords that have 3–prong grounding plugs and 3–pole receptacles that accept the product’s plug. Repair or replace damaged or worn cords immediately. Confidential and proprietary information of NCR Corporation. Unauthorized use, reproduction and/or distribution is strictly prohibited.
- Page 7 If you experience an out of box failure (OBF) during installation or staging that is related to a missing, wrong or defective unit or item, simply provide NCR with a detailed description of the issue and the item will be replaced free of charge.
- Page 8 Improper or insufficient maintenance Improper use or unauthorized modifications of the product. Inadequate location or surroundings. Site installation must conform to guidelines listed in the NCR CX7 All-in-One POS (7772) Site Preparation Guide (BCC5-0000- 5364) and the NCR Workstation and Peripheral AC Wiring Guide (BST0-2115-53).
- Page 9 Description of the problem, including any system error codes, error condition, or guidance to the area of failure The NCR Agent will provide you with a work order number, which serves as your Return Material Authorization (RMA). Please provide the RMA on the outside of the shipping box.
-
Page 10: Table Of Contents
Table Top Stand with Integrated Power Supply Remote I/O Chassis – Pole Mount Remote I/O Chassis Options Remote I/O Chassis Cable Options Pole Mount Options Integrated I/O Chassis – Stand/Wall/Pole Mount Integrated I/O Chassis Options Confidential and proprietary information of NCR Corporation. Unauthorized use, reproduction and/or distribution is strictly prohibited. - Page 11 Remote I/O Chassis Serial Centric I/O (Hospitality) Base Integrated I/O Remote I/O Chassis I/O Board Connector Pinouts 12V USB + Power 24V USB + Power Cash Drawer DisplayPort Power In USB-C USB 3.0 Confidential and proprietary information of NCR Corporation. Unauthorized use, reproduction and/or distribution is strictly prohibited.
- Page 12 CX7 15” 4:3 Display with Remote I/O CX7 15.6” 16:9 or 18.5” Display with Remote I/O Hardware Installation Installation Restrictions Ergonomic Workplace Installing the Terminal Connecting AC Power Confidential and proprietary information of NCR Corporation. Unauthorized use, reproduction and/or distribution is strictly prohibited.
- Page 13 OPOS Configuring through RSM LE utility Configuring through Windows Registry JavaPOS Configuring through RSM LE utility Configuring through config.xml settings RPSL JavaPOS Configuring through FitClient LE utility Configuring through config.xml settings NCRPSW/NCRPSL Confidential and proprietary information of NCR Corporation. Unauthorized use, reproduction and/or distribution is strictly prohibited.
- Page 14 Administrator Login Projected Capacitive (PCAP) Touchscreen Using the PCAP Touchscreen Cleaning the Touchscreen Magnetic Stripe Reader Using the MSR Care of Cards Card Thickness Cleaning the MSR Confidential and proprietary information of NCR Corporation. Unauthorized use, reproduction and/or distribution is strictly prohibited.
- Page 15 Using the Biometrics Reader Cleaning the Sensor Software Drivers Cleaning the CX7 Cabinet Cleaning the Cooling Vents Disk Image Backup and NCR Image Recovery Tool Introduction Running the NCR Image Recovery Tool Starting the NCR Image Recovery Tool Main Screen Save or Load Image...
- Page 16 Introduction Prerequisites USB Flash Key update prerequisites Windows Flash Executable update prerequisites SPI/BIOS Updating Procedures Using the Bootable USB Flash Key Using the Windows Flash Executable Confidential and proprietary information of NCR Corporation. Unauthorized use, reproduction and/or distribution is strictly prohibited.
- Page 17 Verifying Intel® AMT Using Internet Explorer Verifying Intel® AMT Using MeshCommander Reference Configuring AMT Configuring the Terminal APA Graphical Display Configuring the APA Graphical Display Flip Functionality CX Display Touch Tool Confidential and proprietary information of NCR Corporation. Unauthorized use, reproduction and/or distribution is strictly prohibited.
- Page 18 Added F107 Taiwan Power Cord and F755 NCRLinuxU 1.0 Removed F256 SSD 480 GB NVMe 4-channel Dec 2021 Release 1.8 and 1.9 Added Standard/Enhanced label to Serial Ports Updated Power Switch section Confidential and proprietary information of NCR Corporation. Unauthorized use, reproduction and/or distribution is strictly prohibited.
- Page 19 Added CX Display Touch Tool Jul 2023 Added Motherboard LAN Pinout and LAN Diagnostics LEDs Oct 2023 Release 2.0 CX7ii Jan 2024 Added Migration sectio Added OS Features: F702, F711, F757. F770, F791 Confidential and proprietary information of NCR Corporation. Unauthorized use, reproduction and/or distribution is strictly prohibited.
-
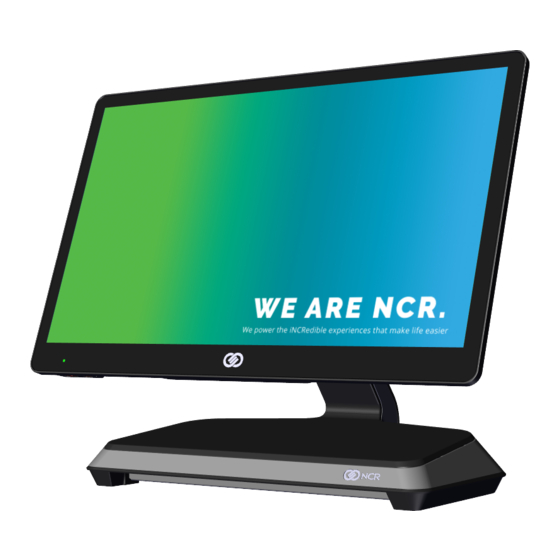
Page 20: Product Overview
Product Overview The NCR CX7 All-in-One POS (7772), powered by an Intel chipset (option of 8th Generation Coffee Lake or 13th Generation Raptor Lake), features a sleek design, packed with superior performance. The new, stylish design provides a wide range of configuration versatility. - Page 21 In addition to the integration of the board in the base, each I/O can be configured for a wall mount solution, pole mount solution, or ordered in a remote chassis to permit placement under the counter. Confidential and proprietary information of NCR Corporation. Unauthorized use, reproduction and/or distribution is strictly prohibited.
-
Page 22: Base Models
18.5" PCAP RGB w/ Intel i5, 8GB DDR4 memory, No HDD, No Power Supply 7772-2518-8801 18.5" PCAP RGB w/ Intel i5-9500TE, No memory, No HDD, No Power Supply Confidential and proprietary information of NCR Corporation. Unauthorized use, reproduction and/or distribution is strictly prohibited. -
Page 23: Cx7Ii
CX7ii, 18.5" PCAP RGB w/ Gen13 Intel i3, No Memory, No HDD, No Power Supply 7772-5518-8801 CX7ii, 18.5" PCAP RGB w/ Gen13 Intel i5, No Memory, No HDD, No Power Supply Confidential and proprietary information of NCR Corporation. Unauthorized use, reproduction and/or distribution is strictly prohibited. -
Page 24: Features
No Peripheral Filler Plate ✓ ✓ Features F141 NCR Encrypted MSR ✓ ✓ F149 External CX Keypad Module ✓ ✓ F340 No Peripheral Filler Plate, White ✓ ✕ Confidential and proprietary information of NCR Corporation. Unauthorized use, reproduction and/or distribution is strictly prohibited. - Page 25 WiFi 6 Wireless Card and Antenna ✕ ✓ F168 Wireless Card and Antenna ✓ ✕ F169 External Speaker Module ✓ ✓ F360 No Peripheral Filler Plate, White ✓ ✕ Confidential and proprietary information of NCR Corporation. Unauthorized use, reproduction and/or distribution is strictly prohibited.
- Page 26 APA (All Points Addressable) Graphical Display (18.5” ✓ ✓ Display) F492 7" Non-Touch LCD (XL7) Customer Display (18.5” ✓ ✓ Display) F493 7" Touch LCD (XL7) Customer Display (18.5” Display) ✓ ✓ Confidential and proprietary information of NCR Corporation. Unauthorized use, reproduction and/or distribution is strictly prohibited.
- Page 27 10" Touch (PCAP) LCD (XL10) with Cube Imager ✓ ✓ F475 10" Non-Touch LCD (XL10) High Mount ✓ ✓ F476 10" Touch (PCAP) LCD (XL10) High Mount ✓ ✓ Confidential and proprietary information of NCR Corporation. Unauthorized use, reproduction and/or distribution is strictly prohibited.
- Page 28 ✓ ✓ Power Supply (15” 4:3 Display) F046 Integrated USB Centric I/O (Retail) (15” 4:3 Display) ✓ ✓ F047 Integrated Serial Centric I/O (Hospitality) (15” 4:3 ✓ ✓ Display) Confidential and proprietary information of NCR Corporation. Unauthorized use, reproduction and/or distribution is strictly prohibited.
- Page 29 F107 Taiwan Power Cord ✓ ✓ F108 Argentina Power Cord ✓ ✓ F109 Power Cord 120V Twist Lock ✓ ✓ F119 No Power Cord ✓ ✓ Confidential and proprietary information of NCR Corporation. Unauthorized use, reproduction and/or distribution is strictly prohibited.
-
Page 30: Optional Features
UEFI BIOS - Coffee Lake -S ✓ ✕ (Windows) F421 UEFI BIOS - Raptor Lake (Windows ✕ ✓ and Linux) F422 UEFI BIOS - Coffee Lake - S (Linux) ✓ ✕ Confidential and proprietary information of NCR Corporation. Unauthorized use, reproduction and/or distribution is strictly prohibited. -
Page 31: Usbc Cable Options
1432-C851-0003 USBC Cable, PSU Adapter for CX Use with RJ45 Ethernet Plug (1432- C852-0003) 1432-C852-0003 Cable, RJ45 Ethernet Plug Use with USBC Cable, PSU Adapter for CX (1432-C851-0003) Confidential and proprietary information of NCR Corporation. Unauthorized use, reproduction and/or distribution is strictly prohibited. - Page 32 I/O 1432-C883-0025 XL7W/XL10W USBC Cable for Use when connecting XL7W/XL10W CX5/CX7 remote or integrated I/O pole mounted to CX with remote I/O (2.5m) or integrated I/O Confidential and proprietary information of NCR Corporation. Unauthorized use, reproduction and/or distribution is strictly prohibited.
-
Page 33: Operating Systems
✕ Value (64 bit) (UEFI BIOS) the factory 7772-F760 Windows 10 IoT Enterprise 2021 LTSC Value (64 bit) Pre-installed in ✓ ✕ (UEFI BIOS) the factory Confidential and proprietary information of NCR Corporation. Unauthorized use, reproduction and/or distribution is strictly prohibited. - Page 34 Pre-installed in ✕ ✓ 64 bit Operating System–Raptor Lake Only the factory Base client and third-party software are also available on the public NCR Platform Software Website: http://www.ncr.com/support/support_drivers_ patches.asp?Class=External\display Confidential and proprietary information of NCR Corporation. Unauthorized use, reproduction and/or distribution is strictly prohibited.
-
Page 35: Specifications
Up to 3.6 GHz Loads Cores Level 2 Cache Thermal Design Power 35 Watts 35 Watts 35 Watts 35 Watts Intel vPro Image Recovery Button Odometer Chip RAID Support Confidential and proprietary information of NCR Corporation. Unauthorized use, reproduction and/or distribution is strictly prohibited. - Page 36 400 nits 400 nits Screen Life 50K Hours to half 50K Hours to half 50K Hours to half 50K Hours to half brightness brightness brightness brightness Anti-Glare Confidential and proprietary information of NCR Corporation. Unauthorized use, reproduction and/or distribution is strictly prohibited.
- Page 37 400 nits 400 nits Screen Life 50K Hours to half 50K Hours to half 50K Hours to half 50K Hours to half brightness brightness brightness brightness Anti-Glare Confidential and proprietary information of NCR Corporation. Unauthorized use, reproduction and/or distribution is strictly prohibited.
- Page 38 Integrated UV Bill Option Option Option Option Validator Integrated Camera Option Option Option Option Integrated External Option Option Option Option Speaker Integrated Speaker Standard Standard Standard Standard Confidential and proprietary information of NCR Corporation. Unauthorized use, reproduction and/or distribution is strictly prohibited.
- Page 39 (Touch or Non-touch) 10” Color LCD Option Option Option Option (Touch or Non-touch) 10” Color LCD with Option Option Option Option Cube Scanner (Touch or Non-touch) Confidential and proprietary information of NCR Corporation. Unauthorized use, reproduction and/or distribution is strictly prohibited.
- Page 40 Dimensions (w x d x h) integrated I/O 14.95” x 2.29” x 9.32” (379.7 mm x 58.1 mm x 236.6 mm) Weight 6.30 lbs (2.86 kg) Confidential and proprietary information of NCR Corporation. Unauthorized use, reproduction and/or distribution is strictly prohibited.
- Page 41 Dimensions (w x d x h) integrated I/O 13.88” x 2.37” x 10.76” (352.5 mm x 60.2 mm x 273.4 mm) Weight 6.80 lbs (3.08 kg) Confidential and proprietary information of NCR Corporation. Unauthorized use, reproduction and/or distribution is strictly prohibited.
- Page 42 Dimensions (w x d x h) integrated I/O 17.90” x 2.53” x 11.11” (454.7 mm x 64.2 mm x 282.3 mm) Weight 9.50 lbs (4.31 kg) Confidential and proprietary information of NCR Corporation. Unauthorized use, reproduction and/or distribution is strictly prohibited.
-
Page 43: Cx7Ii
Form Factor SODIMM SODIMM Memory Slots Standard Memory 8GB (1 x 8GB) 8GB (1 x 8GB) Maximum Memory 32GB (2 x 16GB) 32GB (2 x 16GB) Confidential and proprietary information of NCR Corporation. Unauthorized use, reproduction and/or distribution is strictly prohibited. - Page 44 15” 4:3 Projected Capacitive 1024 x 768 10-point touch Brightness 400 nits 400 nits Screen Life 50K Hours to half brightness 50K Hours to half brightness Anti-Glare Confidential and proprietary information of NCR Corporation. Unauthorized use, reproduction and/or distribution is strictly prohibited.
- Page 45 Option Option Integrated 2-in-1 Sign-in Device Option Option Integrated UV Bill Validator Option Option Integrated Camera Option Option Integrated External Speaker Option Option Integrated Speaker Standard Standard Confidential and proprietary information of NCR Corporation. Unauthorized use, reproduction and/or distribution is strictly prohibited.
- Page 46 15.6” CX7 terminal with integrated I/O Dimensions (w x d x h) 14.95” x 2.29” x 9.32” (379.7 mm x 58.1 mm x 236.6 mm) Weight 6.30 lbs (2.86 kg) Confidential and proprietary information of NCR Corporation. Unauthorized use, reproduction and/or distribution is strictly prohibited.
- Page 47 15” 4:3 CX7 terminal with integrated I/O Dimensions (w x d x h) 13.88” x 2.37” x 10.76” (352.5 mm x 60.2 mm x 273.4 mm) Weight 6.80 lbs (3.08 kg) Confidential and proprietary information of NCR Corporation. Unauthorized use, reproduction and/or distribution is strictly prohibited.
- Page 48 18.5” CX7 terminal with integrated I/O Dimensions (w x d x h) 17.90” x 2.53” x 11.11” (454.7 mm x 64.2 mm x 282.3 mm) Weight 9.50 lbs (4.31 kg) Confidential and proprietary information of NCR Corporation. Unauthorized use, reproduction and/or distribution is strictly prohibited.
-
Page 49: Migration
15" 4:3 Projected Capacitive 15" 4:3 Projected Capacitive 18.5" Projected Capacitive 18.5" Projected Capacitive 21.5" Projected Capacitive Driver Packages Supports NCRPSW/NCRPSL Supports NCRPSW/NCRPSL Supports RPSW or RPSL Supports RPDM/CADD Supports Gen3 Confidential and proprietary information of NCR Corporation. Unauthorized use, reproduction and/or distribution is strictly prohibited. - Page 50 F790 and F791 will be different due to the different BIOS contents. Warning The CX7 image is not usable on the CX7ii. When migrating from CX7 to CX7ii, images must be updated based on the latest NCR Gold Images. BIOS Requires a different BIOS for...
-
Page 51: Mounting Configurations
USB Centric I/O (Retail) (F033) with Serial Centric I/O (Hospitality) (F035) For CX7 15” 4:3 Display with USB Centric I/O (Retail) (F043) with Serial Centric I/O (Hospitality) (F045) Confidential and proprietary information of NCR Corporation. Unauthorized use, reproduction and/or distribution is strictly prohibited. - Page 52 For CX7 15.6” 16:9 or 18.5” Display with USB Centric I/O (Retail) (F032) with Serial Centric I/O (Hospitality) (F034) For CX7 15” 4:3 Display with USB Centric I/O (Retail) (F042) with Serial Centric I/O (Hospitality) (F044) Confidential and proprietary information of NCR Corporation. Unauthorized use, reproduction and/or distribution is strictly prohibited.
-
Page 53: Remote I/O Chassis - Pole Mount
The following kits provide an option to mount the CX7 with Remote I/O on a Pole. 7772-K400 – Pole Mount 7772-K503 – 14” Surface Mount Pole 7772-K504 – 14” Bolt-thru Mount Pole Confidential and proprietary information of NCR Corporation. Unauthorized use, reproduction and/or distribution is strictly prohibited. -
Page 54: Integrated I/O Chassis - Stand/Wall/Pole Mount
Integrated I/O Chassis – Stand/Wall/Pole Mount The CX7 with Integrated I/O can be mounted on a stand, on a wall, or on a Pole. Confidential and proprietary information of NCR Corporation. Unauthorized use, reproduction and/or distribution is strictly prohibited. -
Page 55: Integrated I/O Chassis Options
7772-K325 – Wall Mount Bracket with Power Supply enclosure, Integrated I/O Pole Mount 7772-K400 – Pole Mount 7772-K503 – 14” Surface Mount Pole 7772-K504 – 14” Bolt-thru Mount Pole Confidential and proprietary information of NCR Corporation. Unauthorized use, reproduction and/or distribution is strictly prohibited. -
Page 56: Cx Head Ports
CX Head Ports Confidential and proprietary information of NCR Corporation. Unauthorized use, reproduction and/or distribution is strictly prohibited. -
Page 57: Cx Head (Motherboard) Connector Pinouts
The Power Deliver (PD) Controller communicates with existing products which use TI TPS6598x devices. TThe port only supports standard 5V and non-PD (non-Power Delivery) standard voltage of 12V on +V pins to power NCR Customer Displays. The port requires an MUX with Redriver to support cable lengths up to 4m. -
Page 58: Lan
MDIP1 MDIN1 MDIP2 MDIN2 MDIP3 MDIN3 The LAN connector features Activity, Link, and Speed indicator LEDs. For more information, refer to LAN Diagnostic LEDs on page 124. Confidential and proprietary information of NCR Corporation. Unauthorized use, reproduction and/or distribution is strictly prohibited. -
Page 59: Usb-C (Power/Data)
+V (24V) Display Port Display Port Display Port Display Port Since reversibility is not required, the CC1 and CC2 signals will be re-purposed for the following functions: Confidential and proprietary information of NCR Corporation. Unauthorized use, reproduction and/or distribution is strictly prohibited. - Page 60 Display Port Hot Plug Detect The port does not require an MUX, but requires independent Redrivers on the USB 3.0 and DP signals to support long cable lengths. Confidential and proprietary information of NCR Corporation. Unauthorized use, reproduction and/or distribution is strictly prohibited.
-
Page 61: I/O Ports
Base on the next page Integrated I/O on page 64 Remote I/O Chassis on page 66 Serial Centric I/O (Hospitality) Base on page 67 Integrated I/O on page 69 Remote I/O Chassis on page 71 Confidential and proprietary information of NCR Corporation. Unauthorized use, reproduction and/or distribution is strictly prohibited. -
Page 62: Usb Centric I/O (Retail)
USB Centric I/O (Retail) Base The following are the default I/O ports for the NCR CX7 All-in-One POS (7772) with a USB Centric I/O (Retail) Base. Callout Port Name Cash Drawer USB 24V USB 12V, Ports C to E 24V Power In Status LED USB-C LAN Out... - Page 63 Callout Port Name LAN In Note Connect to Ethernet Network DB9 Serial (Standard UART) DisplayPort Dual USB 3.0 RJ50 Serial (Enhanced UART) Confidential and proprietary information of NCR Corporation. Unauthorized use, reproduction and/or distribution is strictly prohibited.
-
Page 64: Integrated I/O
Integrated I/O The following are the default I/O ports for the NCR CX7 All-in-One POS (7772) with Integrated USB Centric I/O (Retail). Callout Port Name Cash Drawer USB 24V USB 12V 24V Power In Status LED USB-C DB9 Serial (Standard UART) DisplayPort Dual USB 3.0... - Page 65 Confidential and proprietary information of NCR Corporation. Unauthorized use, reproduction and/or distribution is strictly prohibited.
-
Page 66: Remote I/O Chassis
Remote I/O Chassis The following are the default I/O ports for the NCR CX7 All-in-One POS (7772) Remote USB Centric I/O (Retail) Chassis. Callout Port Name RJ50 Serial (Enhanced UART) Dual USB 3.0 DisplayPort DB9 Serial (Standard UART) LAN In Note Connect to Ethernet Network LAN Out... -
Page 67: Serial Centric I/O (Hospitality)
Serial Centric I/O (Hospitality) Base The following are the default I/O ports for the NCR CX7 All-in-One POS (7772) with a Serial Centric I/O (Hospitality) Base. Callout Port Name RJ45 Serial COM5 (Enhanced UART) COM6 (Standard UART) Dual USB 3.0 USB 12V USB 24V 24V Power In... - Page 68 LAN In Note Connect to Ethernet Network DisplayPort Cash Drawer B Cash Drawer RJ12 Serial COM1 (Enhanced UART) COM2 (Standard UART) COM3 (Enhanced UART) COM4 (Standard UART) Confidential and proprietary information of NCR Corporation. Unauthorized use, reproduction and/or distribution is strictly prohibited.
-
Page 69: Integrated I/O
Integrated I/O The following are the default I/O ports for the NCR CX7 All-in-One POS (7772) with Integrated Serial Centric I/O (Hospitality). Callout Port Name RJ45 Serial COM5 (Enhanced UART) COM6 (Standard UART) Dual USB 3.0 USB 12V USB 24V 24V Power In Status LED... - Page 70 The Integrated Serial Centric I/O (Hospitality) does not include a LAN Port. A LAN Port is available on the Motherboard. To connect to a network, refer to Connecting to a Network on page 100. Confidential and proprietary information of NCR Corporation. Unauthorized use, reproduction and/or distribution is strictly prohibited.
-
Page 71: Remote I/O Chassis
Remote I/O Chassis The following are the default I/O ports for the NCR CX7 All-in-One POS (7772) Remote Serial Centric I/O (Hospitality) Chassis. Callout Port Name RJ12 Serial COM1 (Enhanced UART) COM2 (Standard UART) COM3 (Enhanced UART) COM4 (Standard UART) Cash Drawer A Cash Drawer B DisplayPort LAN In... - Page 72 Callout Port Name USB 12V Dual USB 3.0 RJ45 Serial COM5 (Enhanced UART) COM6 (Standard UART) Confidential and proprietary information of NCR Corporation. Unauthorized use, reproduction and/or distribution is strictly prohibited.
-
Page 73: I/O Board Connector Pinouts
12V USB + Power The I/O Board provides latching 12V Powered USB port (Foxconn P/N UB11123-GHT2-4F or NCR approved equivalent). The 12V Powered USB port is capable of supplying 12V at 2.0A max. The color of the connector is teal. The 12V of each port is fused with a self-healing poly-fuse (Polytronics Everfuse P/N SMD2920P300TF/15 or NCR approved equivalent). - Page 74 The 24V is fused with a resettable fuse (Tyco RUEF250U or NCR approved equivalent). An overcurrent signal is used to detect when this fuse is open. This signal is connected to a GPIO on the Super I/O. A separate return line, 24V_RET, is used instead of ground to provide noise isolation.
-
Page 75: Cash Drawer
The USB Centric I/O Board provides a single 6-position RJ12 connector (Molex 44248- 0065 or NCR approved equivalent). Signal Name Frame Gnd Solenoid A Drawer A/B +24V/12V Solenoid B Logic Gnd Confidential and proprietary information of NCR Corporation. Unauthorized use, reproduction and/or distribution is strictly prohibited. - Page 76 The Serial Centric I/O Board provides a dual package RJ12 connector. The color of the connector is red. Signal Name Frame Gnd Solenoid A Drawer A/B +24V/12V Logic Gnd Confidential and proprietary information of NCR Corporation. Unauthorized use, reproduction and/or distribution is strictly prohibited.
-
Page 77: Displayport
The I/O Board provides a 2-lane DisplayPort. Lanes 2 and 3 of the DisplayPort are not connected internally. Signal Name ML_Lane0 (p) ML_Lane0 (n) ML_Lane1 (p) ML_Lane1 (n) ML_Lane2 (p) ML_Lane2 (n) ML_Lane3 (p) ML_Lane3 (n) CONFIG1 CONFIG2 AUX CH (p) Confidential and proprietary information of NCR Corporation. Unauthorized use, reproduction and/or distribution is strictly prohibited. -
Page 78: Lan
RJ45 connector using a passthrough connection to the motherboard. The connector does not feature an LED indicator. Note The Integrated I/O does not have LAN Out and LAN In Ports. Confidential and proprietary information of NCR Corporation. Unauthorized use, reproduction and/or distribution is strictly prohibited. -
Page 79: Power In
Both USB Centric and Serial Centric I/O Boards accept +24V DC voltage input from an external power supply. The Power In connector is a 4-pin DIN - CUI PD-40S or equivalent. Signal Name Confidential and proprietary information of NCR Corporation. Unauthorized use, reproduction and/or distribution is strictly prohibited. -
Page 80: Usb-C
Display Port Since reversibility is not required, the CC1 and CC2 signals will be re-purposed for the following functions: Signal Function CC1 (GPIO1) Power Status from Motherboard Confidential and proprietary information of NCR Corporation. Unauthorized use, reproduction and/or distribution is strictly prohibited. -
Page 81: Usb 3.0
1, 1.5, and 2 Stop Bits Bits Parity Even, Odd, No Parity Odd, Even, Mark, Space, No Parity Baud Rates 2,400 bps to 921,600 bps 300 bps to 2.0 Mbps Confidential and proprietary information of NCR Corporation. Unauthorized use, reproduction and/or distribution is strictly prohibited. -
Page 82: Serial (Standard Uart)
DB-9 connector. The port has a shunt to select between +12V (default), +5V, or normal RI functionality. Maximum power capability is 1A from this port. The power output from this port is protected by a self-healing fuse. Signal Name Confidential and proprietary information of NCR Corporation. Unauthorized use, reproduction and/or distribution is strictly prohibited. -
Page 83: Rj50 Serial (Enhanced Uart)
The RJ50 can be converted to DB9 using these Serial Adapter Cables: 1432-C304-0003 — RJ50 (10–pin) to DB9 (0.30m) 1432-C337-0007 — RJ50 (10–pin) to DB9 (0.65m) Confidential and proprietary information of NCR Corporation. Unauthorized use, reproduction and/or distribution is strictly prohibited. -
Page 84: Rj12 Serial (Two Enhanced Uart And Two Standard Uart)
The Serial Centric I/O Board provides a quad-package RJ12 serial port (two Enhanced UART and two Standard UART). The RJ12 port is an unshielded 6-pin. The color of the connector is black. Signal Name Confidential and proprietary information of NCR Corporation. Unauthorized use, reproduction and/or distribution is strictly prohibited. -
Page 85: Rj45 Serial (One Enhanced Uart And One Standard Uart)
The Serial Centric I/O Board provides one dual package RJ45 serial port (one Enhanced UART and one Standard UART). The RJ45 port is an unshielded 8-pin. The color of the connector is yellow. Signal Name DTR/5V RTS/12V Confidential and proprietary information of NCR Corporation. Unauthorized use, reproduction and/or distribution is strictly prohibited. -
Page 86: Operator Controls
Operating System. The ONESHOT feature disables this hardware override. To turn on the ONESHOT feature, refer to the following procedures: Enabling ONESHOT on page 199. Confidential and proprietary information of NCR Corporation. Unauthorized use, reproduction and/or distribution is strictly prohibited. -
Page 87: Image Recovery Button
The Image Recovery Button is for the OS Image Recovery Tool option. The recessed button is located on the bottom of the display. The button is a momentary contact, push-on-push- off switch. Confidential and proprietary information of NCR Corporation. Unauthorized use, reproduction and/or distribution is strictly prohibited. -
Page 88: Trusted Platform Module (Tpm)
The CX7 supports fTPM (software) version 2.0. To confirm that TPM is enabled, follow these steps: 1. Go to Windows Device Manager. 2. Click the drop-down for Security devices. Trusted Platform Module 2.0 should display as shown below. Confidential and proprietary information of NCR Corporation. Unauthorized use, reproduction and/or distribution is strictly prohibited. -
Page 89: Imager
To program the imager to work on a Retail or Hospitality (Aloha) POS, refer to the following sections in the Imager Setup Sheets document (BCC5-0000-5470): https://onlinehelp.ncr.com/Retail/Scanners/ImagerSetup/HTML/FrontMatter- HTML/Home.htm Retail Honeywell N6600/N6700 Retail Quick Imager Setup Hospitality (Aloha) Honeywell N6600 Aloha Programming Sheet Confidential and proprietary information of NCR Corporation. Unauthorized use, reproduction and/or distribution is strictly prohibited. -
Page 90: Keypad
1x1 Keytip Lens (Qty. 1) 1x1.5 Keytip Lens (Qty. 11) 2x1.5 Keytip Lens (Qty. 1) Keypad/Keyboard Remap Utility The NCR POS Keyboard Remap Utility provides a graphical user interface for keyboard remapping. The utility is located in the following location: http://www5.ncr.com/support/support_drivers_ patches.asp?Class=External/NCRKeyboard\Remap\display Refer to the Readme document for the utility installation procedure. -
Page 91: Label Locations
CX7 15” 4:3 or 15.6” 16:9 or 18.5” Display with Integrated I/O on page 93 CX7 15.6” 16:9 or 18.5” Display with Remote I/O on page 95 CX7 15” 4:3 Display with Base Confidential and proprietary information of NCR Corporation. Unauthorized use, reproduction and/or distribution is strictly prohibited. -
Page 92: Cx7 15.6" 16:9 Or 18.5" Display With Base
CX7 15.6” 16:9 or 18.5” Display with Base Confidential and proprietary information of NCR Corporation. Unauthorized use, reproduction and/or distribution is strictly prohibited. -
Page 93: Cx7 15" 4:3 Or 15.6" 16:9 Or 18.5" Display With Integrated I/O
CX7 15” 4:3 or 15.6” 16:9 or 18.5” Display with Integrated I/O Confidential and proprietary information of NCR Corporation. Unauthorized use, reproduction and/or distribution is strictly prohibited. -
Page 94: Cx7 15" 4:3 Display With Remote I/O
CX7 15” 4:3 Display with Remote I/O Confidential and proprietary information of NCR Corporation. Unauthorized use, reproduction and/or distribution is strictly prohibited. -
Page 95: Cx7 15.6" 16:9 Or 18.5" Display With Remote I/O
CX7 15.6” 16:9 or 18.5” Display with Remote I/O Confidential and proprietary information of NCR Corporation. Unauthorized use, reproduction and/or distribution is strictly prohibited. -
Page 96: Hardware Installation
Do not connect or disconnect the transaction printer while the terminal is on. This can result in system or printer damage. Ergonomic Workplace The NCR CX7 All-in-One POS (7772) has a high–brightness LCD with an anti–glare screen. For best results, please observe the following when considering the terminal workplace: Avoid direct–glaring and reflective–glaring light. -
Page 97: Installing The Terminal
Note The POS LCD has a protective film. After removing the film, the LCD should be cleaned. For more information, refer to Cleaning the Touchscreen on page 131. Confidential and proprietary information of NCR Corporation. Unauthorized use, reproduction and/or distribution is strictly prohibited. -
Page 98: Connecting Ac Power
The CX7 receives power from an external 24V power brick. Caution The CX7 requires the NCR 24V power supply that is shipped with the terminal. Use of other power bricks may cause damage to the unit. 1. Connect the Power Supply cable to the Power In connector on the Base. -
Page 99: Power Consumption
The table below displays the estimated power consumption of the CX7 running on a Windows 10 operating system, Emerald POS application, and without peripherals. Duration Power Consumption (kWh) 24 hours 0.603 1 year 220.09 Confidential and proprietary information of NCR Corporation. Unauthorized use, reproduction and/or distribution is strictly prohibited. -
Page 100: Connecting To A Network
4. Connect the other end of the Flat Ethernet Cable to the port labeled LAN on the CX Head. For more information, refer to CX Head Ports on page 56. Confidential and proprietary information of NCR Corporation. Unauthorized use, reproduction and/or distribution is strictly prohibited. - Page 101 2. Connect the other end of the Ethernet Cable to the network hub. Note Consult with your business Information Technology (IT) representative to determine the available connection, and to locate the network hub. Confidential and proprietary information of NCR Corporation. Unauthorized use, reproduction and/or distribution is strictly prohibited.
-
Page 102: Installing The Cash Drawer
Installing the Cash Drawer The Cash Drawer can be connected to the Cash Drawer connector on the Base. Warning Non-NCR Cash Drawers must contain a protective diode. The table below shows the cable options. Cable Description Notes 1432-C516-0009 Dual Cash Drawer Splitter for 24V... - Page 103 Dual 12V Cash Drawer 1432-C517-0009 1432-C828-0010 (Qty. 2) Single 24V Cash Drawer standard option on I/O standard option on I/O Dual 24V Cash Drawer 1432-C516-0009 standard option on I/O Confidential and proprietary information of NCR Corporation. Unauthorized use, reproduction and/or distribution is strictly prohibited.
-
Page 104: Installing The Second Cash Drawer
1432-C516-0009 (24V) 1432-C517-0009 (12V) Caution The two cables look very similar. Make sure to use the correct one. Connecting the wrong cable can cause system damage. Confidential and proprietary information of NCR Corporation. Unauthorized use, reproduction and/or distribution is strictly prohibited. -
Page 105: Second Cash Drawer For Serial Centric I/O (Hospitality)
Second Cash Drawer for Serial Centric I/O (Hospitality) 24V Cash Drawers 24V Cash Drawers can be connected to the Cash Drawer connectors on the Serial Centric I/O. Confidential and proprietary information of NCR Corporation. Unauthorized use, reproduction and/or distribution is strictly prohibited. -
Page 106: 12V Cash Drawers
12V Cash Drawers Single port adapter cables (1432-C828-0010) are required to connect 12V Cash Drawers to the Serial Centric I/O. Confidential and proprietary information of NCR Corporation. Unauthorized use, reproduction and/or distribution is strictly prohibited. -
Page 107: Configuring Cash Drawer Switch Polarity
DWORD value or set registry the value of value. 2. Set the Terminal DWORD to HKLM/Software/Wow6432Node/Radiant/ value of the Platform/CashDrawer/ReverseOpenDetect2 Cash Drawer 2 DWORD to Confidential and proprietary information of NCR Corporation. Unauthorized use, reproduction and/or distribution is strictly prohibited. -
Page 108: For 32-Bit Operating Systems
DWORD value or set registry the value of value. 2. Set the Terminal DWORD to HKLM/Software/Radiant/ value of the Cash Platform/CashDrawer/ReverseOpenDetect2 Drawer 2 DWORD to Confidential and proprietary information of NCR Corporation. Unauthorized use, reproduction and/or distribution is strictly prohibited. -
Page 109: Rpsw
To change the sense settings in the Windows Registry, set the registry value. Normally Normally Closed Open Switch Switch Polarity Polarity (Default) Registry Value Value Printer Cash HKLM\SOFTWARE\Wow6432Node\OLEForRetail\ Drawer ServiceOPOS\CashDrawer\<ProfileName>\ InvertCDPolarity Confidential and proprietary information of NCR Corporation. Unauthorized use, reproduction and/or distribution is strictly prohibited. -
Page 110: Javapos
Drawer Printer Cash Drawer Invert CashDrawer Status True False Configuring through config.xml settings To change the sense settings in config.xml , go to C:\ProgramData\NCR\NCR JavaPOS\jpos\res\config.xml and configure the following registry values. Normally Closed Normally Open Switch Polarity Switch Polarity (Default) -
Page 111: Rpsl
To change the sense settings in config.xml , go to /usr/local/NCRRetail/jpos/res/config.xml and configure the following registry values. Normally Closed Normally Open Switch Polarity Switch Polarity (Default) Registry Name Value Value Printer Cash Drawer InvertCDPolarity Confidential and proprietary information of NCR Corporation. Unauthorized use, reproduction and/or distribution is strictly prohibited. -
Page 112: Ncrpsw/Ncrpsl
The command echoes back the new polarity. The table below displays the result codes. Result Code Description AERO_SUCCESS Valid parameters and successfully set in configuration. AERO_ERR_INTERNAL_ERROR Failed to set configured polarity to requested polarity. AERO_ERR_INVALID_P1 Invalid input polarity. Confidential and proprietary information of NCR Corporation. Unauthorized use, reproduction and/or distribution is strictly prohibited. -
Page 113: Configuring Through The Configuration File
Configuring through the Configuration File To change the sense settings in the configuration file, go to ..\ncr\aero\config\cashdrawer.factory.json and configure the value of the following parameters. Normally Closed Normally Open Switch Polarity Switch Polarity (Default) Parameter Name Parameter Value Parameter Value... -
Page 114: Configuring Through The Device Configuration Tool
3. On the right pane, set the polarity: Normally Closed Normally Open Switch Polarity Switch Polarity (Default) Parameter Name Parameter Value Parameter Value Terminal Cash Drawer Polarity 4. Select the Save button. Confidential and proprietary information of NCR Corporation. Unauthorized use, reproduction and/or distribution is strictly prohibited. -
Page 115: Additional Reference
For more information on cash drawer switch polarity, refer to the CX Series (CXIO) Cash Drawer Switch Polarity sections in the Cash Drawer Ordering Guide - Retail (OCI) and Cash Drawer Ordering Guide - Hospitality and CFR (OCI) in the NCR Seismic site (https://ncr.seismic.com). -
Page 116: Installing The Transaction Printer
Connect the Powered USB Printer Interface Cable to the USB Connector and Power Connector on the printer and to the 24V Powered USB Connector on the Base. Confidential and proprietary information of NCR Corporation. Unauthorized use, reproduction and/or distribution is strictly prohibited. -
Page 117: Powering Up The Terminal
2. Accept the License Terms Agreement. Note Depending on the installed operating system and the selected settings, the amount of time it takes to boot up may vary. Confidential and proprietary information of NCR Corporation. Unauthorized use, reproduction and/or distribution is strictly prohibited. -
Page 118: Led
Solid Green Terminal is ON and all voltages from power supply and motherboard are okay. Blinking Green Terminal is in SUSPEND (S3/S4) mode. Solid Red Processor over temperature. Confidential and proprietary information of NCR Corporation. Unauthorized use, reproduction and/or distribution is strictly prohibited. -
Page 119: Diagnostic Leds
Operation with HDD Access) Activity Blinking Normal Unit in (1x/sec) Operation Suspend (S3/S4) OFF with AC OFF, Not in Present Standby. External power supply is on. Confidential and proprietary information of NCR Corporation. Unauthorized use, reproduction and/or distribution is strictly prohibited. - Page 120 Solution/CPU Temperature blocked cooling then solid red vents. as temperature 2. Check for fan increases failure. 3. Check for excessive ambient temperature. 4. Check cooling solution. Confidential and proprietary information of NCR Corporation. Unauthorized use, reproduction and/or distribution is strictly prohibited.
- Page 121 POST Memory Memory Issue 1. Check for (1x/sec) properly installed memory. 2. Replace memory. 3. Replace motherboard. Flashing POST Motherboard No Display Replace motherboard. (1x/4 sec) Confidential and proprietary information of NCR Corporation. Unauthorized use, reproduction and/or distribution is strictly prohibited.
- Page 122 3. Check for properly functioning display. 4. Replace motherboard. Display Working: 1. Use display to determine failure point via onscreen message and BIOS setup. Confidential and proprietary information of NCR Corporation. Unauthorized use, reproduction and/or distribution is strictly prohibited.
- Page 123 HDD. 4. Replace motherboard. LAN is Boot Device: 1. Check for LAN link and activity LEDs on back panel. 2. Check LAN cable. 3. Replace motherboard. Confidential and proprietary information of NCR Corporation. Unauthorized use, reproduction and/or distribution is strictly prohibited.
-
Page 124: Lan Diagnostic Leds
The LAN diagnostic LEDs are only available for the CX7 with an Integrated I/O configuration. Color Description LED 1 Green 100 Mbps Orange 1 Gbps LED 2 Yellow Link Active Confidential and proprietary information of NCR Corporation. Unauthorized use, reproduction and/or distribution is strictly prohibited. -
Page 125: I/O Panel Led
I/O Panel LED Base on the next page Integrated I/O Expansion on page 127 Remote I/O Chassis on page 128 Confidential and proprietary information of NCR Corporation. Unauthorized use, reproduction and/or distribution is strictly prohibited. -
Page 126: Base
Base The Status LED is located on the I/O Panel of the Base. Color Description Green Orange S3 Suspend Mode Confidential and proprietary information of NCR Corporation. Unauthorized use, reproduction and/or distribution is strictly prohibited. -
Page 127: Integrated I/O Expansion
Integrated I/O Expansion The Status LED is located on the I/O Panel on the back of the Display. Color Description Green Orange S3 Suspend Mode Confidential and proprietary information of NCR Corporation. Unauthorized use, reproduction and/or distribution is strictly prohibited. -
Page 128: Remote I/O Chassis
Remote I/O Chassis Color Description Green Orange S3 Suspend Mode Confidential and proprietary information of NCR Corporation. Unauthorized use, reproduction and/or distribution is strictly prohibited. -
Page 129: Operation And Cleaning
Operation and Cleaning Administrator Login In order to install certain software on the terminal you may need Administrator rights. Username: NCR Password: NCR (Password is case sensitive.) Confidential and proprietary information of NCR Corporation. Unauthorized use, reproduction and/or distribution is strictly prohibited. -
Page 130: Projected Capacitive (Pcap) Touchscreen
In addition, the active surface of PCAP touchscreens is not directly touched and does not wear off by normal use because it is located on the back side of the touchscreen, instead of the front side. Therefore, the NCR CX7 All-in-One POS (7772) can be used in public or in severe environmental conditions. -
Page 131: Cleaning The Touchscreen
Do not apply any cleaning products directly to the screen. Do not soak the cloth: wring it out before use. 4. Ensure that the glass and screen edges are completely dry before using the unit. Confidential and proprietary information of NCR Corporation. Unauthorized use, reproduction and/or distribution is strictly prohibited. -
Page 132: Magnetic Stripe Reader
Cards should never come in close proximity of a magnetic field. Card Thickness The MSR module accepts standard cards within the thickness range of 0.68–0.84 mm. Confidential and proprietary information of NCR Corporation. Unauthorized use, reproduction and/or distribution is strictly prohibited. -
Page 133: Cleaning The Msr
Cleaning the MSR Customers who are participating in the NCR Partnership Services Program can purchase cleaning cards through NCR Services using the NCR Part Number. Part NCR Part Number MSR Cleaning Card, Wet 603-9015143 Cleaning Frequency For low use retail establishments, the cleaning procedures should be followed at least once per month. -
Page 134: Biometrics Fingerprint Reader
Scotch tape can be used to clean fingers. Adhere the tape to the finger and then pull it off. Confidential and proprietary information of NCR Corporation. Unauthorized use, reproduction and/or distribution is strictly prohibited. -
Page 135: Cleaning The Sensor
Do not use abrasive materials to clean the sensor. Software Drivers The CX7 biometrics reader is a digitalPersona U.ARE.U 4500 Module. Please visit the Crossmatch website for drivers and application developer tools. https://www.crossmatch.com/company/support/request/ Confidential and proprietary information of NCR Corporation. Unauthorized use, reproduction and/or distribution is strictly prohibited. -
Page 136: Cleaning The Cx7 Cabinet
3. Wipe the cabinet using a clean and dry lint-free cloth. 4. Remove external dust around the cooling vents. Confidential and proprietary information of NCR Corporation. Unauthorized use, reproduction and/or distribution is strictly prohibited. -
Page 137: Cleaning The Cooling Vents
The air vents on the back of the terminal should be cleaned periodically to maintain optimum cooling for the CPU. Use the hose attachment on a standard household vacuum cleaner to remove the dust from the vents. Confidential and proprietary information of NCR Corporation. Unauthorized use, reproduction and/or distribution is strictly prohibited. -
Page 138: Disk Image Backup And Ncr Image Recovery Tool
HDD/SSD, making an exact duplicate of everything contained on the terminal. The NCR Image Recovery Tool uses the Windows Image ( .WIM ) file format to store the OS image. This is a file-based format for use with the ImageX and DISM tools that Microsoft created for use with Windows Vista and later OS versions. -
Page 139: Running The Ncr Image Recovery Tool
2. Press and hold the recessed Image Recovery Button. While holding the Image Recovery Button, momentarily press the Power Switch. 3. Continue holding the Image Recovery Button until the NCR logo has flashed on the screen. Confidential and proprietary information of NCR Corporation. -
Page 140: Main Screen
This button opens the screen to properly Shutdown and Reboot the POS. System Information This is where useful information of the POS is displayed, such as Serial Number and Image Names. Confidential and proprietary information of NCR Corporation. Unauthorized use, reproduction and/or distribution is strictly prohibited. -
Page 141: Save Or Load Image
Save or Load Image This function is used to either Save or Load an image from a device. 1. On the Main Screen, select Save or Load Image. Confidential and proprietary information of NCR Corporation. Unauthorized use, reproduction and/or distribution is strictly prohibited. - Page 142 2. Enter the Password. The factory default password is Recovery1234. Confidential and proprietary information of NCR Corporation. Unauthorized use, reproduction and/or distribution is strictly prohibited.
-
Page 143: Saving An Image
8GB partition. Any data stored as an incremental backup to this location is compressed. A typical, large POS software installation will not outpace the constraints of the local storage. Confidential and proprietary information of NCR Corporation. Unauthorized use, reproduction and/or distribution is strictly prohibited. - Page 144 Backups to separate slots in the NCR Image Recovery Tool only increase the total storage required by the amount of data added to the image. When the contents of the OS partition become too large to store in the 8GB local Recovery Partition, then one of the alternate storage methods available (USB or network) should be used to store backups.
- Page 145 2. Select the USB Button. Confidential and proprietary information of NCR Corporation. Unauthorized use, reproduction and/or distribution is strictly prohibited.
- Page 146 If this is the first backup performed on this POS, the image is automatically saved as a Site backup. Confidential and proprietary information of NCR Corporation. Unauthorized use, reproduction and/or distribution is strictly prohibited.
- Page 147 User Image – Use this option for routine day-to-day or periodical backups. Note Site and User backups are separate independent backups. The image information is updated with the new image date. Confidential and proprietary information of NCR Corporation. Unauthorized use, reproduction and/or distribution is strictly prohibited.
-
Page 148: Loading An Image
"Windows failed to load" or "missing or corrupt registry". If this happens you can do an Image load of the Factory image with the NCR Image Recovery Tool. 1. Select the arrow that points from the desired load device to the terminal. - Page 149 2. Select the USB Button. If you are loading from a network, the Select a Network Drive dialog screen will open. Confidential and proprietary information of NCR Corporation. Unauthorized use, reproduction and/or distribution is strictly prohibited.
- Page 150 User Image – Most recent routine backup. Site Image – Image of the terminal after application components were loaded. Factory Image – The NCR Base Image as shipped from the factory. Confidential and proprietary information of NCR Corporation. Unauthorized use, reproduction and/or distribution is strictly prohibited.
- Page 151 4. Select Yes to apply the image. Caution All the information in the current productive/working image on the drive is lost with this operation! Confidential and proprietary information of NCR Corporation. Unauthorized use, reproduction and/or distribution is strictly prohibited.
- Page 152 A progress bar is displayed as the image is applied. Confidential and proprietary information of NCR Corporation. Unauthorized use, reproduction and/or distribution is strictly prohibited.
- Page 153 A message is displayed when the load is complete. Confidential and proprietary information of NCR Corporation. Unauthorized use, reproduction and/or distribution is strictly prohibited.
- Page 154 5. Reboot the POS. Confidential and proprietary information of NCR Corporation. Unauthorized use, reproduction and/or distribution is strictly prohibited.
-
Page 155: Change Settings
On the Main Screen, select Change Settings. There are four functions available on the Change Settings screen: Change Network Settings Change Password Replace Recovery Image Change Language Confidential and proprietary information of NCR Corporation. Unauthorized use, reproduction and/or distribution is strictly prohibited. -
Page 156: Change Network Settings
Change Network Settings 1. On the Change Settings Screen, select Change Network Settings. 2. Enter the network configuration settings and then select Save. Confidential and proprietary information of NCR Corporation. Unauthorized use, reproduction and/or distribution is strictly prohibited. -
Page 157: Change Password
2. Enter the current password and the new password, and then select Enter. If you have forgotten or lost the password, select Lost Password. A unique code is generated that you can provide to NCR Support to receive a new temporary password. -
Page 158: Replace Recovery Image
Replace Recovery Image This feature is used to update the NCR Image Recovery Tool and the environment that it runs in. 1. On the Change Settings Screen, select Replace Recovery Image. Confidential and proprietary information of NCR Corporation. Unauthorized use, reproduction and/or distribution is strictly prohibited. - Page 159 2. Select the source of the Recovery Image. 3. Complete the image replacement in the same manner as with the POS Site/User image restore procedures. Confidential and proprietary information of NCR Corporation. Unauthorized use, reproduction and/or distribution is strictly prohibited.
-
Page 160: Change Language
Change Language 1. On the Change Settings Screen, select Change Language. Confidential and proprietary information of NCR Corporation. Unauthorized use, reproduction and/or distribution is strictly prohibited. - Page 161 2. Select the language of choice. Confidential and proprietary information of NCR Corporation. Unauthorized use, reproduction and/or distribution is strictly prohibited.
-
Page 162: Creating A Disk Image
This terminal has an Image Recovery Button that permits end users to quickly restore a disk backup from a hidden partition on the NCR system storage. To utilize this valuable feature, the image must be created using the NCR Imaging Suite. The NCR Imaging Suite is available from NCR at: http://www5.ncr.com/support/support_drivers_patches_... -
Page 163: Configuring A Second Ssd For Raid
When the failed drive is removed and a replacement hard drive is installed, data fault tolerance is easily restored. Confidential and proprietary information of NCR Corporation. Unauthorized use, reproduction and/or distribution is strictly prohibited. -
Page 164: Configuring A Raid System
To install and configure a RAID system, perform the following steps: 1. Install the primary SSD. 2. Load the NCR Gold Drive. 3. Install the second SSD in the terminal. 4. Run the Intel® Rapid Storage Technology Manager. - Page 165 6. Select the type of RAID volume to install. NCR supports RAID 1 and RAID 0 volume types. RAID 1: Combines two disks to create a volume where each disk stores an exact copy of the data and provides real-time redundancy.
- Page 166 If you create a volume that uses less than 100% of the hard drive space, you may create a second RAID volume to use the remaining space. 10. Select Next. Confidential and proprietary information of NCR Corporation. Unauthorized use, reproduction and/or distribution is strictly prohibited.
- Page 167 11. Select Create Volume to start the volume migration. 12. A window is displayed indicating the volume was created successfully. Select OK to close the window. Confidential and proprietary information of NCR Corporation. Unauthorized use, reproduction and/or distribution is strictly prohibited.
- Page 168 The status of the migration is displayed, showing the progress. This can take 1 to 3 hours to complete. Confidential and proprietary information of NCR Corporation. Unauthorized use, reproduction and/or distribution is strictly prohibited.
-
Page 169: Sles 15 Sp4 Software Raid Gold Master Image
Administration Guide | Configuring software RAID for the root partition (suse.com). RAID partitioning is done by using the SLES Expert Partitioner during installation of the Note The succeeding screenshots are from an NCR terminal with two 480GB hard disks: nvme0n1—disk 1 nvme1n1—disk 2 1. - Page 170 The Swap Partition can be RAIDed but is optional. In the succeeding steps, Swap Partition will not be RAIDed. To create the RAID partition, do the following: Confidential and proprietary information of NCR Corporation. Unauthorized use, reproduction and/or distribution is strictly prohibited.
- Page 171 From the New Partition Size options, select Custom Size and enter the partition size. d. Select Next. The Role options are displayed. e. Select Raw Volume (unformatted). Confidential and proprietary information of NCR Corporation. Unauthorized use, reproduction and/or distribution is strictly prohibited.
- Page 172 From the Mounting Options, select Do not mount device. h. Select Next. In the Device Overview tab, the created partitions, with Linux RAID as its corresponding Type, are displayed. Confidential and proprietary information of NCR Corporation. Unauthorized use, reproduction and/or distribution is strictly prohibited.
- Page 173 Device Overview tab, the partitions for the selected disk are displayed. Note The partitions are named using the [disk name]+p+[partition number]. Hard Disk Partitions nvme0n1 nvme0n1p1 nvme0n1p2 nvme0n1p3 nvme0n1p4 Confidential and proprietary information of NCR Corporation. Unauthorized use, reproduction and/or distribution is strictly prohibited.
- Page 174 From the Partition ID dropdown list, select Linux. From the Mounting Options, select Do not mount device. d. Select Next. For nvme0n1p1, the Mount Point is now blank. Confidential and proprietary information of NCR Corporation. Unauthorized use, reproduction and/or distribution is strictly prohibited.
- Page 175 From the Filesystem dropdown list, select Btrfs. From the Partition ID dropdown list, select Linux. From the Mounting Options, select Do not mount device. d. Select Next. A popup window is displayed. Confidential and proprietary information of NCR Corporation. Unauthorized use, reproduction and/or distribution is strictly prohibited.
- Page 176 From the Formatting Options, select Format device. From the Filesystem dropdown list, select Btrfs. From the Partition ID dropdown list, select Linux. From the Mounting Options, select Do not mount device. Confidential and proprietary information of NCR Corporation. Unauthorized use, reproduction and/or distribution is strictly prohibited.
- Page 177 Select Next. For nvme0n1p3, the Type is now Btrfs Partition and the Mount Point is now blank. 9. On the left panel, select RAID. The right panel displays the RAIDed partitions, if any. Confidential and proprietary information of NCR Corporation. Unauthorized use, reproduction and/or distribution is strictly prohibited.
- Page 178 Devices list, nvme0n1p1 and nvme1n1p1 are displayed. 12. Select Next. The Chunk Size dropdown list is displayed. 13. From the Chunk Size dropdown list, select the preferred size. Confidential and proprietary information of NCR Corporation. Unauthorized use, reproduction and/or distribution is strictly prohibited.
- Page 179 15. On the right panel, select the newly added RAID device (/dev/md/boot). 16. Select the Edit button. The Edit RAID screen is displayed. 17. From the Role options, select EFI Boot Partition. Confidential and proprietary information of NCR Corporation. Unauthorized use, reproduction and/or distribution is strictly prohibited.
- Page 180 From the Mounting Options, select Mount device. From the Mount Point dropdown list, select /boot/efi. 20. Select Next. For /dev/md/boot, the Mount Point is now /boot/efi. Confidential and proprietary information of NCR Corporation. Unauthorized use, reproduction and/or distribution is strictly prohibited.
- Page 181 Add. In the Selected Devices list, nvme0n1p2 and nvme1n1p2 are displayed . 23. Select Next. The Chunk Size dropdown list is displayed. 24. From the Chunk Size dropdown list, select the preferred size. Confidential and proprietary information of NCR Corporation. Unauthorized use, reproduction and/or distribution is strictly prohibited.
- Page 182 26. On the right panel, select the newly added RAID device (/dev/md/root). 27. Select the Edit button. The Edit RAID screen is displayed. 28. From the Role options, select Operating System. Confidential and proprietary information of NCR Corporation. Unauthorized use, reproduction and/or distribution is strictly prohibited.
- Page 183 From the Mounting Options, select Mount device. From the Mount Point dropdown list, select /. 31. Select Next. For /dev/md/root, the Mount Point is now /. Subvolumes for /dev/md/root are also displayed. Confidential and proprietary information of NCR Corporation. Unauthorized use, reproduction and/or distribution is strictly prohibited.
- Page 184 Devices list, nvme0n1p3 and nvme1n1p3 are displayed . 34. Select Next. The Chunk Size dropdown list is displayed. 35. From the Chunk Size dropdown list, select the preferred size. Confidential and proprietary information of NCR Corporation. Unauthorized use, reproduction and/or distribution is strictly prohibited.
- Page 185 37. On the right panel, select the newly added RAID device (/dev/md/home). 38. Select the Edit button. The Edit RAID screen is displayed. 39. From the Role options, select Operating System. Confidential and proprietary information of NCR Corporation. Unauthorized use, reproduction and/or distribution is strictly prohibited.
- Page 186 From the Mounting Options, select Mount device. From the Mount Point dropdown list, select /home. 42. Select Next. For /dev/md/home, the Mount Point is now /home. Confidential and proprietary information of NCR Corporation. Unauthorized use, reproduction and/or distribution is strictly prohibited.
- Page 187 43. Select Next. A popup window is displayed. Confidential and proprietary information of NCR Corporation. Unauthorized use, reproduction and/or distribution is strictly prohibited.
- Page 188 44. Select Yes, and review the Suggested Partitioning, then continue with the installation of the OS. Confidential and proprietary information of NCR Corporation. Unauthorized use, reproduction and/or distribution is strictly prohibited.
-
Page 189: Power Management
Working state. The system's context will not be preserved by the hardware. The system must be restarted to return to the Working state. It is not safe to disassemble the machine in this state. Confidential and proprietary information of NCR Corporation. Unauthorized use, reproduction and/or distribution is strictly prohibited. -
Page 190: G1 Sleeping
This state is similar to the S1 sleeping state except that the CPU and system cache context is lost (the OS is responsible for maintaining the caches and CPU context). Control starts from the processor's reset vector after the wake event. In NCR systems, during S3, power is only provided to the USB 3.0 ports. - Page 191 Power State S0 Working S0 Idle, S3 Suspend S5 Soft S0 Idle, Backlight to RAM Hibernate Backlight Off, SSD Idle Supported: Confidential and proprietary information of NCR Corporation. Unauthorized use, reproduction and/or distribution is strictly prohibited.
- Page 192 Core i3– 62.2W 17.4W 3.25W 3.0W 3.0W 24.9W 8100T Core i5– 63.9W 17.4W 3.25W 3.0W 3.0W 24.9W 8500T Core i5- 65.7W 27.3W 4.12W 3.6W 3.6W 33.1W 9500TE Confidential and proprietary information of NCR Corporation. Unauthorized use, reproduction and/or distribution is strictly prohibited.
- Page 193 **Passmark Burn in test. This represents a maximum use case. Actual customer usage will differ. †USB 3.0 port. The USB 2.0 +12V and +24V ports do not maintain power and can’t wake the unit. Confidential and proprietary information of NCR Corporation. Unauthorized use, reproduction and/or distribution is strictly prohibited.
-
Page 194: Enabling Wake On Lan
In order for Wake on LAN to function, the Network driver must be enabled (factory default). 1. Right-click on Start, then select Device Manager. 2. Select Network adapters. Confidential and proprietary information of NCR Corporation. Unauthorized use, reproduction and/or distribution is strictly prohibited. - Page 195 3. Right-click Intel(R) Ethernet Connection I219-LM >> Properties. Confidential and proprietary information of NCR Corporation. Unauthorized use, reproduction and/or distribution is strictly prohibited.
- Page 196 4. Under the Advanced tab, Wake on Magic Packet and Wake on Pattern Match should be enabled. Select OK after making any changes. Confidential and proprietary information of NCR Corporation. Unauthorized use, reproduction and/or distribution is strictly prohibited.
- Page 197 5. Under the Power Management tab, Allow this device to wake the computer option box should be checked. Select OK after making any changes. Confidential and proprietary information of NCR Corporation. Unauthorized use, reproduction and/or distribution is strictly prohibited.
-
Page 198: Bios Setup
1. Connect an alphanumeric USB keyboard to the terminal. 2. Apply power to the terminal. 3. When you see the NCR logo displayed, press [Del] or [F2]. Selecting Menu Options The following keyboard controls are used to select the various menu options and to make changes to their values. -
Page 199: Enabling Oneshot
ONESHOT feature disables this hardware override. To turn on the ONESHOT feature, follow these steps: 1. Enter BIOS Setup using the [Del] or [F2] hotkey. 2. In Setup, go to Advanced → NCR POS → ONESHOT Control. 3. Set the ONESHOT Control setting to ENABLED. 4. Press [F4] to save and exit. -
Page 200: Restoring Factory Settings
The terminal automatically loads the BIOS default values. To save the factory default values, go to the Save and Exit Menu, select Save Changes & Reset, and select [Enter]. Confidential and proprietary information of NCR Corporation. Unauthorized use, reproduction and/or distribution is strictly prohibited. -
Page 201: Bios Updating Procedure
The BIOS is located in the Serial Peripheral Interface (SPI) chip on the processor board. This chapter discusses procedures on how to update the terminal SPI and/or BIOS. The update software is distributed via the NCR Website: http://www5.ncr.com/support/support_drivers_patches.asp The BIOS update can be performed using the following methods:... - Page 202 Download the Rufus Tool from the Rufus Website: https://rufus.ie/ and use the tool to deploy image into USB key. a. Select the device from the Device drop-down list. Confidential and proprietary information of NCR Corporation. Unauthorized use, reproduction and/or distribution is strictly prohibited.
- Page 203 Press Select to choose the image from the Boot Selection drop-down list. Confidential and proprietary information of NCR Corporation. Unauthorized use, reproduction and/or distribution is strictly prohibited.
- Page 204 Press Start to load the image. Confidential and proprietary information of NCR Corporation. Unauthorized use, reproduction and/or distribution is strictly prohibited.
- Page 205 After the update has completed and the terminal is rebooted, the terminal may reboot additional times as it powers up. This is normal and expected behavior due to the nature of the features of the BIOS/SPI. Confidential and proprietary information of NCR Corporation. Unauthorized use, reproduction and/or distribution is strictly prohibited.
-
Page 206: Using The Windows Flash Executable
Caution The reboot is important to ensure the BIOS initializes properly. Do not interrupt the reboot process. Confidential and proprietary information of NCR Corporation. Unauthorized use, reproduction and/or distribution is strictly prohibited. -
Page 207: Initial Terminal Imaging
2. Connect a USB keyboard to the terminal. 3. Power on the terminal and boot from the USB Flash Drive. This can be done by pressing [F8] during the boot and choosing the USB option (NCR), or by entering BIOS Setup and changing the boot order. -
Page 208: Wireless Adapter Switching
Wireless Adapter Switching is a feature that disables the wireless adapter when a wired Ethernet connection is present. The latest NCR OS Images include the driver, but is not pre-installed. The driver can be installed from the \Install\drivers\wireless directory. Installing the Software and Driver 1. - Page 209 5. Enter the Administrator Tool Password (not the Windows Administrator password). You are prompted to create a password if this is the first time using the tool. The password cannot be blank. Confidential and proprietary information of NCR Corporation. Unauthorized use, reproduction and/or distribution is strictly prohibited.
- Page 210 6. Select Create a new package>>OK. 7. Select the Application Settings tab. 8. Check Include Application Settings in this package. 9. Select Adapter Switching. 10. Check Enable Adapter Switching. Confidential and proprietary information of NCR Corporation. Unauthorized use, reproduction and/or distribution is strictly prohibited.
- Page 211 11. Click Close. 12. Click Yes. Confidential and proprietary information of NCR Corporation. Unauthorized use, reproduction and/or distribution is strictly prohibited.
- Page 212 13. Enter a filename and choose a location to save the package file. 14. Click Finish after the save operation completes. Confidential and proprietary information of NCR Corporation. Unauthorized use, reproduction and/or distribution is strictly prohibited.
- Page 213 Administrator Toolkit installed. When connecting and disconnecting the wired LAN cable you should now see system tray icons, indicating PROSet disabling and enabling the wireless adapter. Confidential and proprietary information of NCR Corporation. Unauthorized use, reproduction and/or distribution is strictly prohibited.
-
Page 214: Enabling Intel® Vpro (Active Management Technology)
Enabling Intel® vPro (Active Management Technology) This chapter describes how to enable Intel® Active Management Technology (Intel® AMT) in NCR motherboards. It also provides an overview of the features, as well as information on configuring Intel® Active Management Technology, and minimum system requirements. -
Page 215: Preconditions
1. In DOS shell in Windows, type ipconfig /all . 2. Record the IP Address. Example 153.60.36.39 To know the IP Address in other operating systems, consult your system manual. Confidential and proprietary information of NCR Corporation. Unauthorized use, reproduction and/or distribution is strictly prohibited. -
Page 216: Enabling Intel® Active Management In Bios Utility
Enabling Intel® Active Management in BIOS Utility To enable Intel® AMT in NCR Motherboard with vPro processor, follow these steps: 1. Reboot the system. 2. Press [F2] or [Delete] during POST. 3. Enter the current BIOS admin password. 4. Go to Advanced tab and do one of the following:... -
Page 217: Configuring Intel® Amt Settings In Intel® Mebx Menu
%, ^, &, *). Also, you should use a unique password for each provisioned Intel AMT system, to prevent someone from possibly obtaining a master password and compromising the security of the entire network. Confidential and proprietary information of NCR Corporation. Unauthorized use, reproduction and/or distribution is strictly prohibited. -
Page 218: Activating Network Access
8. Check the Radio Button for Use the following IP address. 9. Provide the IP Address, Subnet Mask, and Default Gateway. 10. Click OK. Note CX7 and CX8 support both IPv4 and IPv6 protocol. Confidential and proprietary information of NCR Corporation. Unauthorized use, reproduction and/or distribution is strictly prohibited. -
Page 219: Verifying Intel® Amt Using Internet Explorer
Login to system during all power states (On, Off and Standby) 3. Verify Remote Control functions. Perform system resets Perform system power cycles (Off then On) Bring system out of standby Confidential and proprietary information of NCR Corporation. Unauthorized use, reproduction and/or distribution is strictly prohibited. -
Page 220: Verifying Intel® Amt Using Meshcommander
IP Address Username — typically admin MEBx Password — as set up in Configuring Intel® AMT Settings in Intel® MEBx Menu on page 217 b. Click OK. Confidential and proprietary information of NCR Corporation. Unauthorized use, reproduction and/or distribution is strictly prohibited. - Page 221 Audit Log Storage Network Settings Internet Settings (on i5 processor only) Security Settings Agent Presence System Defense User Accounts Subscriptions Wake Alarms Script Editor WSMAN Browser Confidential and proprietary information of NCR Corporation. Unauthorized use, reproduction and/or distribution is strictly prohibited.
- Page 222 6. In the list of Intel AMT features, select System Status and record the details. Confidential and proprietary information of NCR Corporation. Unauthorized use, reproduction and/or distribution is strictly prohibited.
- Page 223 In the Power Actions window, verify that the AMT motherboard will respond properly to the following remote power commands: Power up Power cycle Power down Reset b. Record the results. Confidential and proprietary information of NCR Corporation. Unauthorized use, reproduction and/or distribution is strictly prohibited.
- Page 224 On the desktop, right-click and create a new Text Document. b. Double-click the document to open. c. Test keypresses to ensure the correct keystrokes are being sent to the remote desktop. Confidential and proprietary information of NCR Corporation. Unauthorized use, reproduction and/or distribution is strictly prohibited.
- Page 225 11. In the list of Intel AM T features, select Network Settings. 12. In the Network Settings tab, check network settings and record the details. Confidential and proprietary information of NCR Corporation. Unauthorized use, reproduction and/or distribution is strictly prohibited.
- Page 226 13. In the list of Intel AMT features, select Security Settings. 14. In the Security Settings tab, check security settings and record the details. Confidential and proprietary information of NCR Corporation. Unauthorized use, reproduction and/or distribution is strictly prohibited.
-
Page 227: Reference
15. In the list of Intel AMT features, select Wake Alarms. 16. In the Wake Alarms tab, verify the operations of alarm clock. Reference https://www.intel.com/content/www/us/en/architecture-and-technology/intel- active-management-technology.html Confidential and proprietary information of NCR Corporation. Unauthorized use, reproduction and/or distribution is strictly prohibited. -
Page 228: Configuring Amt
Configuring AMT This chapter explains how to configure an NCR CX7 All-in-One POS (7772) so it can be accessed remotely using Intel’s Active Management Technology (AMT). Configuring the Terminal 1. Boot the terminal. 2. When the NCR logo appears, press [Del] several times to start the BIOS Setup Utility. - Page 229 3. Under the Advanced tab, select AMT Configuration and press [Enter]. Confidential and proprietary information of NCR Corporation. Unauthorized use, reproduction and/or distribution is strictly prohibited.
- Page 230 5. Press [F10] and [Enter] to Save and Exit. 6. After the system reboots, press [Ctrl] + [P] to launch the Intel(R) Management Engine BIOS Extension Main Menu. 7. Highlight MEBx Login and press [Enter]. Confidential and proprietary information of NCR Corporation. Unauthorized use, reproduction and/or distribution is strictly prohibited.
- Page 231 At the prompt, enter the new password (write it down to remember). The password must contain upper, lower, symbol, and numeric characters. Example Ncr@2011 You must enter the password a second time for verification. Confidential and proprietary information of NCR Corporation. Unauthorized use, reproduction and/or distribution is strictly prohibited.
- Page 232 9. Highlight Intel(R) Standard Manageability Configuration and press [Enter]. Confidential and proprietary information of NCR Corporation. Unauthorized use, reproduction and/or distribution is strictly prohibited.
- Page 233 12. Press [ESC]>>[ESC]>>[Y] to exit the Intel(R) Management Engine BIOS Extension and reboot the system. 13. The terminal should now be accessible using its IP address. Confidential and proprietary information of NCR Corporation. Unauthorized use, reproduction and/or distribution is strictly prohibited.
-
Page 234: Apa Graphical Display
APA Graphical Display Configuring the APA Graphical Display To configure the APA Graphical Display to read Kanji characters, follow these steps: 1. Download the latest RPSW Installer from the NCR website: http://www5.ncr.com/support/support_drivers_ patches.asp?Class=External/RPSW\5\3\4\0\display 2. Install RPSW. 3. Run RSM. 4. In the left menu, select Peripherals >> Line Display. In the Line Display window, select Profile Name >>... - Page 235 5. Select Default Screen Mode >> 13x29 or 16x16 >> OK. 6. Select Default Character Set >> 101 (Katakana) >> OK. Confidential and proprietary information of NCR Corporation. Unauthorized use, reproduction and/or distribution is strictly prohibited.
- Page 236 7. Select the Diagnostics button. The Run Diagnostics window is displayed. 8. Select Local Attended >> OK. The Select Test window is displayed. Confidential and proprietary information of NCR Corporation. Unauthorized use, reproduction and/or distribution is strictly prohibited.
- Page 237 Display a Character – Select this test to display a specific Kanji character. Example To display ヅ, enter 8364, then select Finish. Display Specified Text – Select this test to input and display the desired Kanji text. Confidential and proprietary information of NCR Corporation. Unauthorized use, reproduction and/or distribution is strictly prohibited.
- Page 238 Kanji characters. a. Enter the character set, then select Next. b. Enter the time delay in milliseconds, then select Finish. The Test Results window is displayed. Confidential and proprietary information of NCR Corporation. Unauthorized use, reproduction and/or distribution is strictly prohibited.
- Page 239 Select OK to close the window. Confidential and proprietary information of NCR Corporation. Unauthorized use, reproduction and/or distribution is strictly prohibited.
-
Page 240: Flip Functionality
Flip Functionality The flip functionality is a feature that detects and automatically adjusts the screen orientation depending on the device position. Default Screen Orientation Flipped Sideways Confidential and proprietary information of NCR Corporation. Unauthorized use, reproduction and/or distribution is strictly prohibited. - Page 241 Flipped Upwards To enable the flip functionality, the G-Sensor driver must be installed. The NCR OS Image includes a pre-installed G-Sensor driver. The driver can be found in the C:\Install\drivers\G-Sensor directory. If not using an NCR OS Image, follow these steps: 1. Download the G-Sensor driver from the NCR website: https://www5.ncr.com//support/support_drivers_...
-
Page 242: Cx Display Touch Tool
The tool supports the following CX terminals: NCR CX3 POS (7776) NCR CX5 POS (7773) NCR CX7 POS (7772) The tool is located in the following location: https://www5.ncr.com//support/support_drivers_ patches.asp?Class=External/CXDisplay%5CTouch%5CTool%5CDisplay Refer to the Readme document for the installation procedure. Confidential and proprietary information of NCR Corporation. Unauthorized use, reproduction and/or distribution is strictly prohibited.
Need help?
Do you have a question about the VOYIX CX7 and is the answer not in the manual?
Questions and answers