Table of Contents
Advertisement
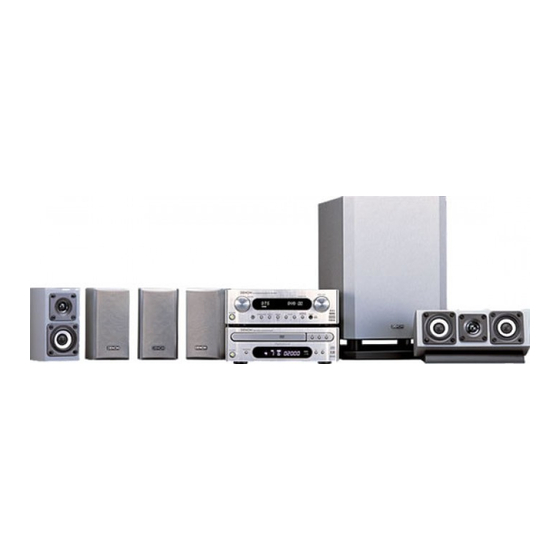
HOME THEATER SYSTEM
DHT-M330DV
OPERATING INSTRUCTIONS
BEDIENUNGSANLEITUNG
MODE D'EMPLOI
ISTRUZIONI PER L'USO
INSTRUCCIONES DE OPERACION
GEBRUIKSAANWIJZING
BRUKSANVISNING
AVR-M330
SYS-M330
(SC-AM330)
• DVD-M330(DVD PLAYER):
• DVD-M330 (DVD-PLAYER):
• DVD-M330 (LECTEUR DVD):
• DVD-M330 (LETTORE DVD):
• DVD-M330 (REPRODUCTOR DVD):
• DVD-M330 (DVD-SPELER):
• DVD-M330 (DVD-SPELARE):
FOR ENGLISH READERS
FÜR DEUTSCHE LESER
POUR LES LECTEURS FRANCAIS
PER IL LETTORE ITALIANO
PARA LECTORES DE ESPAÑOL
VOOR NEDERLANDSTALIGE LEZERS
FOR SVENSKA LÄSARE
(SC-CM330)
Please refer to the operating Instructions of the DVD-M330.
Bitte beziehen Sie sich auf die Bedienungsanleitung des DVD-M330.
Veuillez vous référer au mode d'emploi du DVD-M330.
Fare riferimento al manuale delle istruzioni del modello DVD-M330.
Consulte las instrucciones de funcionamiento del DVD-M330.
Zie de gebruiksaanwijzing van de DVD-M330.
Läs bruksanvisningen till DVD-M330.
PAGE
004 ~ PAGE
057
SEITE
058 ~ SEITE
111
PAGE
112 ~ PAGE
165
PAGINA
166 ~ PAGINA 219
PAGINA
220 ~ PAGINA 273
PAGINA
274 ~ PAGINA 327
SIDA
328 ~ SIDA
381
DVD-M330
DSW-M330)
(SC-AM330)
Advertisement
Table of Contents

Related Manuals for Denon DHT-M330DV


Summary of Contents for Denon DHT-M330DV
-
Page 1: Home Theater System
HOME THEATER SYSTEM DHT-M330DV OPERATING INSTRUCTIONS BEDIENUNGSANLEITUNG MODE D’EMPLOI ISTRUZIONI PER L’USO INSTRUCCIONES DE OPERACION GEBRUIKSAANWIJZING BRUKSANVISNING AVR-M330 SYS-M330 (SC-AM330) • DVD-M330(DVD PLAYER): Please refer to the operating Instructions of the DVD-M330. • DVD-M330 (DVD-PLAYER): Bitte beziehen Sie sich auf die Bedienungsanleitung des DVD-M330. -
Page 2: Risk Of Electric Shock
ENGLISH DEUTSCH FRANCAIS CAUTION: TO REDUCE THE RISK OF ELECTRIC SHOCK, DO NOT REMOVE COVER (OR BACK). NO USER SERVICEABLE PARTS INSIDE. REFER SERVICING TO QUALIFIED SERVICE PERSONNEL. The lightning flash with arrowhead symbol, within an equilateral triangle, is intended to alert the user to the presence of uninsulated “dangerous voltage”... - Page 3 SVENSKA NOTE ON USE / HINWEISE ZUM GEBRAUCH /OBSERVATIONS RELATIVES A L’UTILISATION/ NOTE SULL’USO/NOTAS SOBRE EL USO / ALVORENS TE GEBRUIKEN / OBSERVERA • Avoid high temperatures. Allow for sufficient heat dispersion when installed on a rack. • Vermeiden Sie hohe Temperaturen. Beachten Sie, daß...
-
Page 4: Table Of Contents
INTRODUCTION Thank you for choosing the DENON DHT-M330DV HOME THEATER SYSTEM. This remarkable component has been engineered to provide superb surround sound listening with home theater sources such as DVD, as well as providing outstanding high fidelity reproduction of your favourite music sources. -
Page 5: Before Using
When using a stand, brackets, etc., follow the instructions included with the stand or brackets and check for safety before installing and using. Denon will accept no responsibility for damages or accidents caused by the unit falling. The quality of the sound produced from the speaker system is affected by the size and type (Japanese or Western) of the room, as well as by the method of installation. -
Page 6: Cautions On Handling
• Be sure to check for safety after installing the speaker systems. Afterwards, perform safety inspections at regular intervals to be sure there is no danger that the speaker systems will fall. Denon will accept no responsibility for damages or accidents caused by inappropriate choice of the place of installation or improper installation procedures. -
Page 7: Connections
(1) Speaker system connections • When connecting, use connection cords A and B included with the DHT-M330DV. The connection cords are color-coded by different colored plugs and labels. Connect in such a way that the colors are the same as the AV surround receiver’s speaker terminals. - Page 8 ENGLISH Be sure to turn the amplifier’s power off when connecting the speaker systems. • Use the included cables to connect the input terminals on the back of the speaker systems (see diagram) to the amplifier’s speaker output terminals. Inverting the polarities will result in unnatural sound, with the phase off or no low bass sound. •...
- Page 9 AV surround amplifier. Unplug the AV surround amplifier’s power cord from the power outlet, then contact a DENON service or repair center. • The protector circuit may be activated if the set is played for long periods of time at high volumes when speakers with an impedance lower than the specified impedance (for example speakers with an impedance of lower than 4 Ω/ohms) are connected.
- Page 10 ENGLISH (2) Connecting the DVD Player and TV • Connect the DVD player’s video signals directly to the TV and switch the picture on the TV. • When making connections, also refer to the operating instructions of the other components. Connecting the AUDIO Jack •...
- Page 11 (3) Connecting the Audio Signals of a Digital Satellite Tuner and VCR • Connect the video signals directly to the TV and switch the picture on the TV. • When making connections, also refer to the operating instructions of the other components. Connection to the optical digital input terminal •...
-
Page 12: Connecting The Antenna Terminals
ENGLISH (4) Connecting the antenna terminals DIRECTION OF BROADCASTING STATION FM ANTENNA 75 Ω/ohms COAXIAL CABLE • An PAL-type FM antenna cable plug can be connected directly. • If the FM antenna cable’s plug is not of the PAL-type, connect using the PAL-type antenna adapter (Option). AM loop antenna assembly Remove the vinyl tie and take out the... - Page 13 (5) Using the active subwoofer • Use Subwoofer jack to connect in case you had additional active subwoofer. • You can connect a larger active subwoofer to the system. Connect the active subwoofer to the SW (Subwoofer) PRE-OUT jack using a shielded audio cable.
- Page 14 ENGLISH (7) Connecting the audio components (DVD-M330) • The AVR-M330 can be used connected in a system with the DVD-M330 DVD player. • For instructions on operating the DVD-M330 DVD player, refer to their respective operating instructions. • Only the DVD-M330 DVD player can be connected directly to the AVR-M330 using system connections. NOTES: •...
-
Page 15: Part Names And Functions
6 PART NAMES AND FUNCTIONS AV SURROUND RECEIVER (AVR-M330) Front Panel • For details on the functions of these parts, refer to the pages given in parentheses ( ). !1 !1 Power operation switch (ON/STANDBY)...(29) Remote control sensor...(19) Surround mode button (SURROUND MODE)...(30) Super Dynamic Bass/Preset EQ button (SDB/P.EQ) ...(32) Menu/set button (MENU/SET) ...(27, 31, 42) Select button (SELECT... - Page 16 ENGLISH Remote control unit • For details on the functions of these parts, refer to the pages given in parentheses ( ). • Some of the buttons on the remote control unit have some functions. The functions are switched using the remote control mode selector switches. Transmission indicator Sleep timer button ...(53) NTSC/PAL button...
- Page 17 Names and functions of remote control unit buttons on the DHT-M330DV • Buttons in sections q ~ e can be operated regardless of the position of mode switches 1 and 2. • Consider as standard positions, and switch as necessary to operate.
- Page 18 ENGLISH Operate the DHT-M330DV. [1] Surround amplifier system buttons (Operated with mode switch 2 set to “AMP.”) • These operations are possible with mode switch 1 at any position. SLEEP TUNER TV/AUX1 TAPE AUX2 5CH STEREO : 5ch stereo mode set...
-
Page 19: Remote Control Unit
• The included remote control unit (RC-996) can be used to operate not only this unit but other remote control compatible DENON components as well. In addition, the memory contains the control signals for other remote control units, so it can be used to operate non-DENON remote control compatible products. -
Page 20: Operating Denon Audio Components
ENGLISH • The included remote control unit (RC-996) can be used to operate not only the DHT-M330DV but also and to operate other remote control compatible DENON products. In addition, the remote control operation codes of other major brands of TVs and video decks are also stored in the remote control unit, so the unit can be used to operate these TVs and video decks as well. - Page 21 (4) TV and video deck preset memories • Components of other brands can be operated with the included remote control unit by storing their codes in the preset memory. Note that depending on the model some operations may not be possible and some buttons may not operate properly.
- Page 22 ENGLISH Combinations of preset codes for different brands Admiral 045, 121 Adventura Aiko Akai 016, 027, 046 Alleron A-Mark Amtron Anam 006, 007, 036 Anam National 061, 147 003, 007, 033, 038, 039, 047, 048, 049, 133 Archer Audiovox 007, 061 Bauer Belcor Bell &...
- Page 23 National Quenties 002 031, 038, 039, 048, 057, 084, 086, 135, 147 Nikko Optimus Optonica 011, 012, 093, 121 Orion 004, 139 Panasonic 002, 009, 017, 036, 037, 071, 141, 143, 147 Philco 005, 010, 030, 050, 051, 056, 079, 085, 127, 131, 132, 145, 147 Philips 005, 015, 017, 050, 051, 056, 078, 087, 088, 089,...
- Page 24 ENGLISH Admiral Aiko Aiwa Akai 026, 027, 070, 072, 082, 083, 084 Alba Amstrad Asha Audio Dynamic 005, 085 Audiovox Beaumark Broksonic 086, 093 Calix Candle 006, 087, 088, 089, 090 Canon 049, 057 Capehart 025, 055, 056, 071 Carver Citizen 006, 007, 087, 088, 089, 090, 095 Craig...
- Page 25 Randex 007, 013, 019, 023, 058, 063, 064, 065, 073, 080, 082, 087 Realistic 009, 021, 031, 033, 049, 053, 081, 087, 088, 091, 094, 097, 098 Ricoh Salora 033, 041 Samsung 007, 011, 051, 059, 070, 083, 087, 089, 113 Sanky Sansui 005, 026, 029, 045, 061, 085, 114...
- Page 26 ENGLISH (5) Operating the TV/video deck after storing its remote control signals in the preset memory Set mode switch 1 to the “DVD” position. Set mode switch 2 to the “TV/VCR” position. Operate the video component. • For details, refer to the component’s operating instructions. It may not be possible to operate some models.
-
Page 27: Setting Up The System
(1) Quick setup procedure • Generally used system settings have already been made on the DHT-M330DV upon shipment from the factory, so the DHT-M330DV can be used as such if there is no need to make changes to the system. -
Page 28: Speaker System Layout
ENGLISH (2) Speaker system layout Basic system layout • The following is an example of the basic layout for a system consisting of eight speaker systems and a television monitor: Center speaker system (SC-CM330) Front speaker systems (SC-AM330) Set these at the sides of the TV or screen with their front surfaces as flush with the front of the screen as possible. -
Page 29: Surround Playback
9 OPERATING THE SURROUND FUNCTIONS • Surround sound can be achieved using the settings made upon shipment from the factory (the default settings), but to achieve even more optimum surround sound, we recommend using the test tones to adjust the levels of the different channels, set the speaker distances (delay time), etc. - Page 30 ENGLISH (2) Input mode setting Press the FUNCTION button to select the input function to be played. Main unit • The function switches as shown below. • The function only changes in the “Æ” direction when operated from the remote control unit. •...
- Page 31 Start playback on the selected component. • For operating instructions, refer to the component’s manual. Either turn the MASTER VOLUME dial on the main unit or use the VOLUME buttons on the remote control unit to adjust the volume. D I I T Main unit •...
- Page 32 ENGLISH (3) After starting playback [1] Adjusting the sound quality (SDB/P.EQ) The SDB/P.EQ function will not work in the direct mode. Press the SDB/P.EQ button. • The tone switches as follows each time the SDB/P.EQ button is pressed. Main unit ( DRC ON ) SDB ON DEFEAT...
-
Page 33: Surround Playback
10 SURROUND PLAYBACK (1) Before playing with the surround function • Adjustments using the test tones can only be performed in the “Auto” mode and are only valid for the AUTO DECODE Surround modes. The adjusted levels are automatically stored in the memory. 1, 4 Press the TEST TONE button. - Page 34 ENGLISH (2) Playing in the AUTO DECODE mode • In the auto decode mode it is possible to play in the Dolby Digital or DTS Surround mode, depending on the format of the input signal. • It is also possible to play in the Auto Stereo, Dolby Pro-Logic II Cinema/Music/Game or DTS NEO:6 Cinema/Music mode, according to the 2- channel mode setting.
- Page 35 [2] 2-channel mode settings • In the AUTO DECODE mode, it is possible to automatically conduct multi-channel playback in the Dolby Digital or DTS surround mode or play in the stereo 2-channel mode (AUTO STEREO mode: factory default setting). For 2-channel input signals, one of four play modes can be set with the 2-channel mode setting (Auto Stereo, Dolby Pro Logic II Cinema, Dolby Pro Logic II Music and Dolby Pro Logic II Game).
- Page 36 ENGLISH AUTO-ST (auto stereo) mode 2-channel sources are played in 2-channel stereo. When this mode is selected in the auto decode mode, multi-channel sources (DVD, BS digital, etc.) are played in the multi-channel mode, while 2-channel sources (CDs, etc.) are automatically played in stereo. PLII CINEMA / PLII MUSI / PLII GAME Even 2-channel sources undergo Dolby Pro Logic II processing and are played in the multi-channel mode.
- Page 37 Select surround parameters. (On the remote control unit, use the cursor buttons to set the parameters.) If nothing is done for 4 seconds from when the parameter is displayed, the normal display reappears. Setting the DOLBY VS mode 2SP Ref. 2SP Wide The mode is not displayed if it cannot be selected.
- Page 38 ENGLISH (5) Playback using the Dolby Headphone mode • The AVR-M330 is equipped with the Dolby Headphone mode, a technology developed jointly by Dolby Laboratories and Lake Technology for achieving 3D sound over regular headphones. • The Dolby Headphone mode is set when headphones are connected to the AVR-M330’s headphones jack. •...
-
Page 39: Setting The Speaker Distance
(6) Setting the speaker distance • Input the distances from the listening position to the speakers and set the surround delay time. • The default settings below are set upon shipment from the factory. Preparations: Measure the distances from the listening position to the speakers (L1 to L3 on the diagram at the right). L1: Distance from center speaker to Center listening position... - Page 40 ENGLISH Table of Surround Mode Parameters (1) Surround Mode DVS: Dolby Virtual Speaker DH: Dolby Headphone DOLBY DIGITAL DTS SURROUND DOLBY PL AUTO STEREO DTS NEO:6 DOLBY PL DOLBY DIGITAL EX/+PL DTS SURR.+NEO:6 DTS-ES DISCRETE/MATRIX 2SPEAKER MODE 3SPEAKER MODE 5SPEAKER MODE BYPASS STEREO DIRECT...
- Page 41 Table of Surround Mode Parameters (3) Surround Mode DVS: Dolby Virtual Speaker (Default: DEFEAT all OFF) DH: Dolby Headphone SDB ON DOLBY DIGITAL DTS SURROUND DOLBY PL AUTO STEREO DTS NEO:6 DOLBY PL DOLBY DIGITAL EX/+PL DTS SURR.+NEO:6 DTS-ES DISCRETE/MATRIX 2SPEAKER MODE 3SPEAKER MODE 5SPEAKER MODE...
-
Page 42: Listening To The Radio
ENGLISH LISTENING TO THE RADIO (1) Tuning Example: Tuning in FM/AM stations Select the FUNCTION “TUNER”. Main unit Select “FM” or “AM”. • The selected “FM AUTO”, “FM MONO” or “AM” is displayed. • When using the remote control, the mode button is used to select FM AUTO and MONO. - Page 43 (2) Presetting stations (remote control unit only) 2 A total of 40 stations (including both FM and AM stations) can be preset. 2 Preset stations using the including remote control unit. Set the remote control selector switches Switch1 to DVD 2, 3 Switch2 to TUNER Tune in the station you want to preset.
- Page 44 ENGLISH (4) Listening to preset stations (remote control unit only) Example: Listening to the station preset at number P03 (This operation is only possible from the remote control unit.) Set the remote control selector switches Switch1 to DVD Switch2 to TUNER The preset buttons on the remote control unit (TUNER CH “+”...
-
Page 45: Rds Search
(6) RDS search Use this function to automatically tune to FM stations that provide RDS service. Set the band to “FM”. Press the RDS button until “RDS” appears on the display. Press the TUNING + (UP) or – (DOWN) button to automatically begin the RDS search operation. - Page 46 ENGLISH (8) TP search Use this function to find RDS stations broadcasting traffic program (TP stations). Set the band to “FM”. Press the RDS button until “TP” appears on the display. (9) RT (Radio Text) “RT” appears on the display when radio text data is received. To turn the RT mode on, press the RT button on the remote control unit until the RT indicator is lit.
-
Page 47: Expanding To A 6.1- Or 7.1-Channel System
(Signals are constantly output from the subwoofer pre-out connector.) • A separately sold stereo amplifier and surround back speaker systems can be used in combination with the DHT-M330DV to create a 6.1- or 7.1-channel surround system. - Page 48 ENGLISH (3) 6.1- or 7.1-channel surround playback Changing the Quick Setup settings At “SPEAKER SETUP” under “Quick Setup procedure” (page 27), select the configuration to be used, “6.1CH” or “7.1CH”. Checking and adjusting the playback level using test tones Before playing, use test tones to check and adjust the playback level of the different speakers. (Page 33) •...
-
Page 49: Dolby/Dts Surround
DOLBY/DTS SURROUND Surround The AVR-M330 is equipped with a digital signal processing circuit that lets you play program sources in the surround mode to achieve the same sense of presence as in a movie theater. Dolby Surround (1) Dolby Digital Dolby Digital is the multi-channel digital signal format developed by Dolby Laboratories. -
Page 50: Dts Digital Surround
3 A DVD player with DTS-compatible digital output is required to play DTS DVDs. A DTS Digital Output logo is featured on the front panel of compatible DVD players. Recent DENON DVD player models feature DTS-compatible digital output – consult the player’s owner’s manual for information on configuring the digital output for DTS playback of DTS-encoded DVDs. -
Page 51: Dts-Es Extended Surround
DTS-ES Extended Surround DTS-ES Extended Surround is a new multi-channel digital signal format developed by Digital Theater Systems Inc. While offering high compatibility with the conventional DTS Digital Surround format, DTS-ES Extended Surround greatly improves the 360-degree surround impression and space expression thanks to further expanded surround signals. -
Page 52: Dolby Virtual Speaker
ENGLISH Dolby Virtual Speaker Dolby Virtual Speaker technology uses proprietary technology of Dolby Laboratories to create a virtual surround sound field using only two speakers for the front channels, allowing the user to experience sound as if surround speakers were actually being used. Features of Dolby Virtual Speaker sound Accurate surround sound field positioning The virtual surround speakers are positioned at 105°... -
Page 53: Using The Sleep Timer
USING THE SLEEP TIMER (1) Setting the sleep timer (remote control unit only) • The included remote control unit can be used to turn the power to the standby mode after a maximum of 120 minutes. (Sleep timer) • Use this function to automatically switch the power to the standby mode after a specific amount of time (minutes). Example: To set the power to the standby mode in 50 minutes according to the clock. -
Page 54: System Functions
ENGLISH SYSTEM FUNCTIONS 2 Making system connections between the AVR-M330 and the DVD player (DVD-M330) makes operation even easier. (For instructions on connections, refer to “Connecting the audio components” on pages 14.) 2 System functions will not work properly if the input/output function settings are not right for the connected components. Be sure to set the input/output functions for the components being used. -
Page 55: Last Function Memory
LAST FUNCTION MEMORY • This unit is equipped with a last function memory which stores the input and output setting conditions as they were immediately before the power is switched off. This function eliminates the need to perform complicated resettings when the power is switched on. •... -
Page 56: Troubleshooting
If this unit does not seem to be functioning properly, check the table below. If this does not solve the problem, this unit may be damaged. Turn off the power, unplug the power cord from the power outlet, and contact your store of purchase or nearest Denon sales office. -
Page 57: Specifications
SPECIFICATIONS 2 Audio Section • Power Amplifier Section Rated output: Output terminals: • Analog Section Input sensitivity/Input impedance: Frequency response: Signal-to-noise ratio: 2 Tuner Section Reception frequency range: Receiving sensitivity: FM stereo separation: • Digital Section Digital input/output: 2 Timer Section Timer: 2 General Power supply:... - Page 58 MEMO...
- Page 60 TOKYO, JAPAN www.denon.com Printed in China 00D 511 4267 006...
Need help?
Do you have a question about the DHT-M330DV and is the answer not in the manual?
Questions and answers