
Related Manuals for Denon DHT-S316


Summary of Contents for Denon DHT-S316
- Page 1 Contents Connections Playback Settings Tips Appendix DHT-S316 HOME THEATER SYSTEM Owner’s Manual...
-
Page 2: Table Of Contents
Contents Connections Playback Settings Tips Appendix Playback Accessories Inserting the batteries Enjoying television, movies and music Operating range of the remote control unit Status LED table Features Listening to music on a Bluetooth device Part names and functions Pairing a Bluetooth device for the first time Sound bar Pairing with other Bluetooth devices Subwoofer... - Page 3 Contents Connections Playback Settings Tips Appendix Tips Troubleshooting Power does not turn on / Power is turned off Operations cannot be performed through the remote control unit No sound comes out Bluetooth playback does not work The HDMI Control function does not work Resetting factory settings Appendix About HDMI...
-
Page 4: Accessories
Playback Settings Tips Appendix Thank you for purchasing this Denon product. To ensure proper operation, please read this owner’s manual carefully before using the product. After reading this manual, be sure to keep it for future reference. Accessories Check that the following parts are supplied with the product. -
Page 5: Inserting The Batteries
Contents Connections Playback Settings Tips Appendix Inserting the batteries NOTE 0 Remove the batteries from the remote control unit if it will not be in use for long periods. Slide the rear cover off the remote control unit in the 0 If the battery fluid should leak, carefully wipe the fluid off the inside of the battery arrow direction. -
Page 6: Features
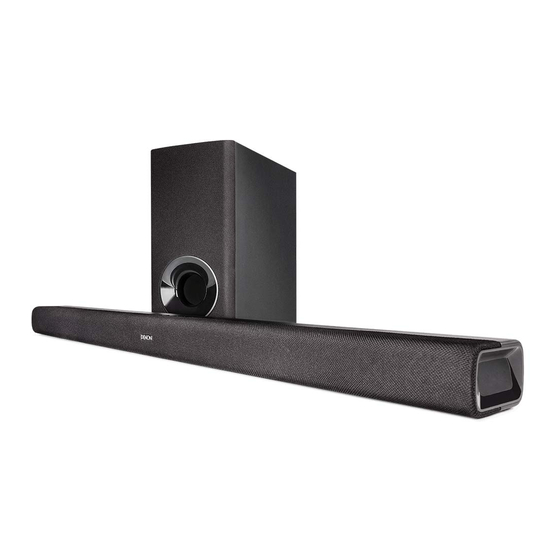
9 m of the sound bar for optimal enjoyment. intelligibility - ideal for movies and TV shows. Turn up the dialogue 5 cm Low-profile Design: At 5 cm tall, the Denon DHT-S316 fits most without having to adjust overall volume. -
Page 7: Part Names And Functions
Contents Connections Playback Settings Tips Appendix Part names and functions Sound bar o Top panel A Power operation button (c) C Bluetooth button (g) Turns the sound bar power on/off (standby). (v p. 20) Switches the input source to “Bluetooth”. (v p. 22) Links to sound bar power and turns the subwoofer power on/off Used to pair with Bluetooth devices. - Page 8 Contents Connections Playback Settings Tips Appendix o Front panel A Status LED B Remote control sensor Displays the status of input source / input signal / listening mode, etc. This receives signals from the remote control unit. (v p. 5) (v p.
- Page 9 Contents Connections Playback Settings Tips Appendix o Rear panel A Wall hook hole D Optical digital input connector (TV OPTICAL) Used to mount the sound bar on a wall. (v p. 13) Use the included optical digital cable to a TV with an optical digital terminal.
-
Page 10: Subwoofer
Contents Connections Playback Settings Tips Appendix Subwoofer o Rear panel A Status LED Displays subwoofer status. LED indication Status When subwoofer power is on/off (standby) When the sound bar and subwoofer are wirelessly connected 0 The sound bar and subwoofer are wirelessly connected as the factory default. If no audio is output from the subwoofer, wirelessly connect the sound bar and subwoofer again. -
Page 11: Remote Control Unit
Contents Connections Playback Settings Tips Appendix Remote control unit This section mainly explains remote control operations. A Power button (c) Turns the sound bar power on/off. (v p. 20) Links to sound bar power and turns the subwoofer power on/off. B Input source buttons (TV, AUX, g) This selects the input source. -
Page 12: Positioning
Contents Connections Playback Settings Tips Appendix Positioning Positioning the sound bar Position the sound bar in front of your TV, etc., on a flat surface. NOTE 0 When positioning the sound bar in front of your TV, make sure the sound bar does not obstruct the TV’s remote control light sensor, etc. - Page 13 0 Also, periodically check the safety of this unit and whether there is a possibility that the unit may fall. 0 Denon cannot accept any responsibility for damage, injury or accidents caused by problems with the mounting location or mounting method.
-
Page 14: Positioning The Subwoofer
Contents Connections Playback Settings Tips Appendix Positioning the subwoofer Position the subwoofer in a flat location near the sound bar. -
Page 15: Connecting A Tv
Contents Connections Playback Settings Tips Appendix Connecting a TV How to connect a TV depends on the connectors and functions equipped on the TV. 0 Enable the TV’s HDMI control function when using an HDMI cable to connect this device to your TV. (See the TV Owner’s Manual for details.) 0 Turn off the TV’s speaker or minimize the volume when using this device. -
Page 16: Connection 1: Tv Equipped With An Hdmi Connector And Compatible With The Arc (Audio Return Channel)
Contents Connections Playback Settings Tips Appendix Connection 1: TV equipped with an HDMI connector and compatible with the ARC (Audio Return Channel) Use the included HDMI cable to connect this device to an ARC function-compatible TV. HDMI INPUT (ARC) TV(OPTICAL) TV(HDMI ARC) Soundbar (Rear panel) -
Page 17: Connector
Contents Connections Playback Settings Tips Appendix Connection 2: TV equipped with an HDMI connector and incompatible with the ARC / TV equipped with an optical digital connector Use the included HDMI and optical digital cables to connect this device to your TV. HDMI OPTICAL INPUT... -
Page 18: Connector
Contents Connections Playback Settings Tips Appendix Connection 3: TV equipped with an HDMI connector and incompatible with the ARC / TV equipped with an analog connector Use the included HDMI cable and a commercially available 3.5 mm stereo audio cable to connect this device to your TV. HDMI INPUT AUDIO OUT... -
Page 19: Connecting The Power Cords
Contents Connections Playback Settings Tips Appendix Connecting the power cords After completing all the connections, insert the power plug into the power outlet. Subwoofer Soundbar (Rear panel) Power cord (included) Power cord (included) Connect to household power outlet (AC 230 V, 50/60 Hz) -
Page 20: Enjoying Television, Movies And Music
Contents Connections Playback Settings Tips Appendix Enjoying television, movies and music Turn on the power of the TV and connected devices. Press c to turn on power to the unit. Press the input source button. Input source Play the device connected to this unit. buttons For details, see the relevant device manual. -
Page 21: Status Led Table
Contents Connections Playback Settings Tips Appendix Status LED table Status LEDs change depending on the input source, input signal, etc. LED indication Status LED indication Status Input source: HDMI (ARC) When power is off/standby Audio signal: PCM Input source: HDMI (ARC) During startup Audio signal: Dolby Input source: HDMI (ARC) -
Page 22: Listening To Music On A Bluetooth Device
Activate the Bluetooth settings on your Bluetooth device. Switches to pairing mode the first time it is used. Select “DHT-S316” from the list of devices displayed on the screen of the Bluetooth device. Status display LED lights up in blue and this device and the Bluetooth device are paired. -
Page 23: Pairing With Other Bluetooth Devices
Press g. The status display LED lights up in blue and connects to the last Select “DHT-S316” from the list of devices displayed Bluetooth device connected. If the connection is cut, perform on the screen of the Bluetooth device. -
Page 24: Settings
Contents Connections Playback Settings Tips Appendix Settings Perform the below operations and settings as needed. Adjusting the volume Use VOL + or VOL – to adjust the volume. The selected input source LED blinks once every time the button is pushed. -
Page 25: Selecting A Listening Mode
Contents Connections Playback Settings Tips Appendix Selecting a listening mode Setting the Bluetooth standby function If Bluetooth standby function is set to “on”, this device automatically turns Press the listening mode button to select a listening on when Bluetooth connects via the paired Bluetooth device. mode. -
Page 26: Auto Standby Function
Contents Connections Playback Settings Tips Appendix Auto standby function If no operations have been performed for 15 minutes or more and audio is not being output, this device automatically switches to standby. Volume limiter function This device is loaded with a volume limiter function which limits excessive output. -
Page 27: Troubleshooting
Contents Connections Playback Settings Tips Appendix Troubleshooting If a problem should arise, first check the following: 1. Are the connections correct? 2. Is the set being operated as described in the owner’s manual? 3. Are the other devices operating properly? If this unit does not operate properly, check the corresponding symptoms in this section. -
Page 28: Power Does Not Turn On / Power Is Turned Off
Contents Connections Playback Settings Tips Appendix Power does not turn on / Power is turned off Power does not turn on. Check whether the power plug is correctly inserted into the power outlet. (v p. 19) If you cannot turn on the unit with the TV’s HDMI control function, press the c button to turn the unit’s power or set the Bluetooth standby function to “On”. -
Page 29: No Sound Comes Out
Contents Connections Playback Settings Tips Appendix No sound comes out No sound comes out. Check the connections for all devices. (v p. 12) Insert connection cables all the way in. Check that input connectors and output connectors are not reversely connected. Check cables for damage. -
Page 30: Bluetooth Playback Does Not Work
Contents Connections Playback Settings Tips Appendix Bluetooth playback does not work Cannot pair with a Bluetooth device. It may be that Bluetooth is not enabled on the Bluetooth device. See the Owner’s Manual of the Bluetooth device to enable the Bluetooth function. This device may be paired with another Bluetooth device. - Page 31 Contents Connections Playback Settings Tips Appendix Resetting factory settings Perform this procedure if the display is abnormal or if operations cannot be performed. Various settings are reset to the factory default values. Make settings again. Press c to turn on power to the unit. Press and hold the main unit's c, d and + at the same time for at least 5 seconds.
-
Page 32: About Hdmi
Contents Connections Playback Settings Tips Appendix About HDMI This unit supports the following HDMI functions. ARC (Audio Return Channel) function Enjoy movies, music, etc., on your TV simply by connecting an ARC function-compatible TV to this device via HDMI. HDMI control function Connect an HDMI control-compatible TV and this device via HDMI and enable the HDMI control to enable linked control from either device. -
Page 33: Trademark Information
Contents Connections Playback Settings Tips Appendix Trademark information The Bluetooth word mark and logos are registered trademarks owned ® For DTS patents, see http://patents.dts.com. Manufactured under license by the Bluetooth SIG, Inc. and any use of such marks by D&M Holdings from DTS, Inc. -
Page 34: Specifications
Contents Connections Playback Settings Tips Appendix Specifications Sound bar o General Operating temperature: 5 °C - 35 °C Power supply: AC 230 V, 50/60 Hz Power consumption: 40 W Power consumption in standby mode: 0.3 W Power consumption in Bluetooth standby: 1.6 W Sampling frequency: 32 kHz, 44.1 kHz, 48 kHz... - Page 35 Contents Connections Playback Settings Tips Appendix Dimensions (Unit: mm) Weight: 1.8 kg...
-
Page 36: Subwoofer
Contents Connections Playback Settings Tips Appendix Subwoofer o General Operating temperature: 5 °C - 35 °C Power supply: AC 230 V, 50/60 Hz Power consumption: 40 W Power consumption in standby mode: 0.26 W Power consumption in Bluetooth standby: 1.1 W... - Page 37 Contents Connections Playback Settings Tips Appendix Dimensions (Unit: mm) Weight: 5.2 kg...
- Page 38 3520 10647 00AD Copyright © 2018 D&M Holdings Inc. All Rights Reserved.
Need help?
Do you have a question about the DHT-S316 and is the answer not in the manual?
Questions and answers