Table of Contents
Advertisement
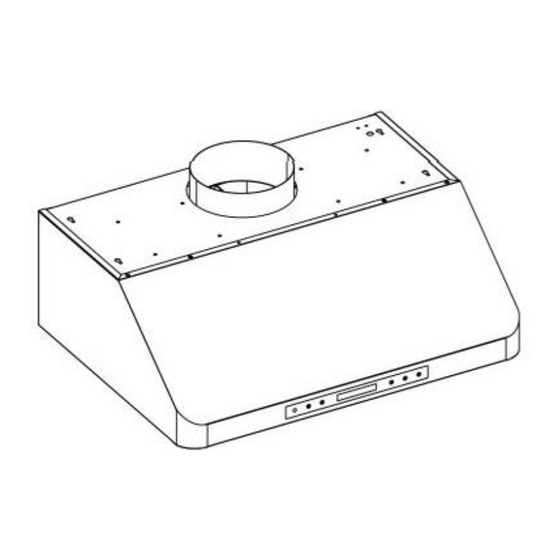
UNDER CABINET RANGE HOOD
IMPORTANT: READ AND SAVE THESE INSTRUCTIONS
FOR RESIDENTIAL & INDOOR USE ONLY
INSTALLATION GUIDE & USER'S MANUAL
www.XtremeAirUsa.com
Pro-X Series: PX10-U30/36/42/48
PX11-U30/36/42
PX12- U30/36/42
Ultra Series: UL10- U30/36/42
UL11- U30/36/42
UL13- U30/36/42
Deluxe Series: DL09-U36/42/48
PAGE
1
Advertisement
Table of Contents

Related Manuals for XtremeAIR PX12- U30


Summarization of Contents
Installation Guide
Protect the Cook Top
Protect the cook top and surrounding area from damage or dirt during installation.
Create Work Station (Optional)
Set up a temporary work station using plywood and wood blocks for easier installation.
Prepare Ductwork and Single Outlet
Ensure the 15-amp outlet and duct pipe are ready for connection before starting installation.
Attach 2-Inch Wide Wood Filler Strips
Attach 2-inch wide wood filler strips to the sides for recessed bottom cabinets.
Create Access Opening
Cut an opening under the cabinet for electrical wire and hood exhaust.
Attach the Hood to Cabinet
Lift and center the hood under the cabinet, ensuring it is flush with the front frame.
Secure the Hood to Wall Studs
Secure the hood to wall studs using provided screws and a drill bit.
Connect Ductwork and Seal Joints
Connect the hood exhaust to the ductwork, securing joints with aluminum tape.
Install Oil Tunnel or Container
Insert the oil tunnel into the recess support near the rear of the hood.
Install Baffle Filters
Install baffle filters by angling, lifting, and sliding them into the designated slots.
Range Hood Operation and Controls
Auto Function Active
Auto Function deactivates all other functions when engaged for smoke detection.
Automatic Shut Off Feature
The range hood automatically shuts off approximately every 2.5 hours of continuous operation.
Screen Turn Off Behavior
The LCD panel turns off after inactivity or when plugged into an electrical outlet.
Activating Normal Blower Function
Turn the blower on and adjust speed from lowest (F1) to highest (F4) using touch controls.
Activating Light Function
Touch the Light button to manually turn the hood lights on or off.
Activating Power-Off Delay Function
Set a delay timer (1-15 min) for the blower to shut off after cooking.
Activating Smoke Detector Function
Activate Auto Function for smoke detection; other buttons are inactive during this mode.
Changing the Clock Display
Adjust the hour and minute display on the clock for timekeeping.
Range Hood Operation for PX11 Model
Remote Control Sensor Functionality
The remote control sensor receives IR signals within 10 feet with a clear line of sight.
PX11 Button Touch Control Panel
Details the operation of the PX11 model's button touch control panel and its functions.
30-Hour Cleaning Reminder
Timer icon flashes after 30 hours of use to remind user to clean baffle filters.
Activating Blower and Adjusting Speed
Activate the blower and adjust speed by touching and holding power or +/- buttons.
Turning Off the Blower and Lights
Turn off the blower by holding the power sign; touch Light button for lights on/off.
Adjusting and Activating Timer Function
Set the delay off timer by touching and holding the Decrease Value or Power button.
Clearing the Cleaning Reminder
Reset the cleaning reminder timer by touching and holding the Increase Value button.
Specifications and Troubleshooting
Hood and Light Not Operating
Check power connection, swap light assembly, install new bulb, and test.
Hood Vibrates During Operation
Ensure hood is secured properly and check for blower wheel damage.
Weak Blower or Fan Performance
Check duct size, ensure damper is open, and verify ductwork connections.
Blower Stuck or Rattling
Check for jammed blower or shipping damage; contact support if issues persist.
Improper Venting or Airflow
Verify distance to stovetop, reduce duct length, and check joint connections.
Excessive Noise from Hood
Ensure damper is open, ductwork is secure, and correct duct size is used.
Control Panel Not Active
Ensure the auto function is not engaged and check the control panel status.
Use, Care, and Maintenance
Operating Guidelines
Read manual, keep safety grills/filters in place, never dispose foreign objects into blowers.
Cleaning Procedures
Keep unit clean, free of grease, and clean filters periodically to prevent fires.
Cleaning Exterior Surfaces
Clean exterior with stainless steel cleaner or soapy water; avoid abrasive detergents.
Cleaning Grease Filters
Clean metal filters after 30 hours of use by hand or dishwasher; dry and reinstall.
Limited Warranty Information
Parts and Motor Warranty Terms
Two-year warranty for parts, with an additional eight years for the motor.
Labor Warranty Coverage
One-year warranty for labor on repairs or replacements under specific conditions.
Warranty Performance and Claims
Contact company with written notice of malfunction and proof of purchase for service.
Repair or Replacement Warranty
Warranty applies to repairs/replacements for the remainder of the original warranty period.
Warranty Disclaimers and Exclusions
Limits liability for incidental costs and excludes specific items like bulbs and normal maintenance.
Need help?
Do you have a question about the PX12- U30 and is the answer not in the manual?
Questions and answers