
Related Manuals for Cisco WRV210 - Wireless-G VPN Router


Summary of Contents for Cisco WRV210 - Wireless-G VPN Router
- Page 1 ADMINISTRATION GUIDE Cisco Small Business WRV210 Wireless-G VPN Router with RangeBooster...
- Page 2 Collaboration Without Limitation, EtherFast, EtherSwitch, Event Center, Fast Step, Follow Me Browsing, FormShare, GigaDrive, HomeLink, Internet Quotient, IOS, iPhone, iQuick Study, IronPort, the IronPort logo, LightStream, Linksys, MediaTone, MeetingPlace, MeetingPlace Chime Sound, MGX, Networkers, Networking Academy, Network Registrar, PCNow, PIX, PowerPanels, ProConnect, ScriptShare, SenderBase, SMARTnet, Spectrum Expert, StackWise, The Fastest Way to Increase Your Internet Quotient, TransPath, WebEx, and the WebEx logo are registered trademarks of Cisco Systems, Inc.
-
Page 3: Table Of Contents
Contents Chapter 1: Introduction Product Overview Features Front Panel Back Panel Initial Installation Placement Options Desktop Option Wall Option Connecting the Equipment Verifying the Hardware Installation Configuring the Internet Connection Securing the Wireless Network Getting Started in the Configuration Utility Logging In Navigating through the Pages Saving Your Changes... - Page 4 Contents Setting Up Static Routing Chapter 3: Configuring the Wireless Network A Note About Wireless Security Wireless Security Tips General Network Security Guidelines Enabling Your Wireless Networks Wireless > Wireless Security Controlling Access to the Wireless Network Adjusting the Advanced Wireless Settings Configuring a Wireless Distribution System (WDS) Chapter 4: Configuring the Firewall Preventing Attacks...
- Page 5 Contents Bandwidth Allocation QoS Configuring QoS Settings for Specified Ports Chapter 7: Administration Managing Access and Configuring Other Management Options Resetting the Admin Password Managing LAN and WAN Access to the Configuration Utility Configuring SNMP Settings for Status Reporting Configuring Universal Plug and Play (UPnP) Settings Backing and Restoring a Configuration Setting Up Alerts and System Logs Performing Diagnostic Tests...
-
Page 6: Chapter 1: Introduction
Introduction This chapter provides information to familiarize you with the product features, guide you through the installation process, and get started using the web-based Configuration Utility. • Product Overview, page 6 • Initial Installation, page 8 • Getting Started in the Configuration Utility, page 16 Product Overview Thank you for choosing the Wireless-G VPN Router with RangeBooster. -
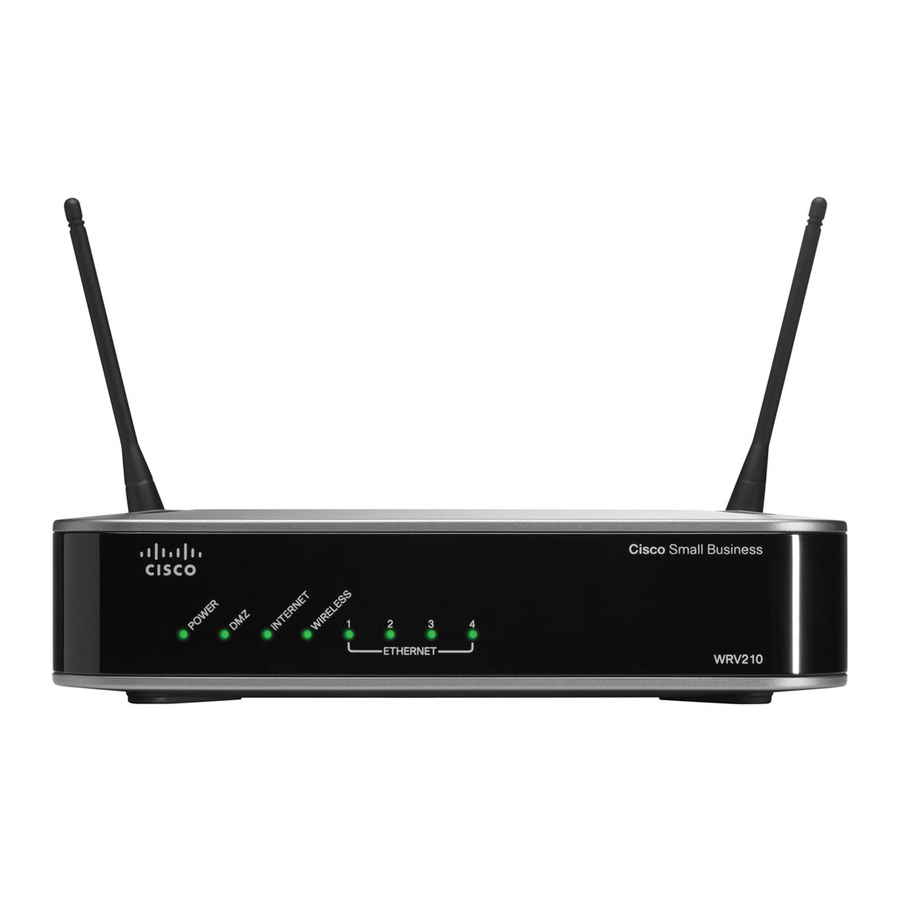
Page 7: Front Panel
Introduction Product Overview Wireless networking in business environments requires additional flexibility. The WRV210 has the capability to expand or reduce the area of your wireless network. There is support for Wireless Distribution System (WDS), which allows the wireless coverage to be expanded without wires through wireless bridging between it and select Cisco Small Business stand-alone access points. -
Page 8: Back Panel
Introduction Initial Installation Back Panel POWER—The Power port is where you connect the AC power cable. RESET—The Reset button has two functions. • If pressed for one second, the Reset button causes a warm reboot—the Router restarts without losing any of the current configuration settings. •... -
Page 9: Placement Options
Introduction Initial Installation • Securing the Wireless Network, page 13 Placement Options You can place the router horizontally on a desktop or mount it on the wall. Desktop Option For desktop placement, place the router horizontally on a surface so it sits on its four rubber feet. - Page 10 Introduction Initial Installation You must connect one computer with an Ethernet cable for the purpose of NOTE the initial configuration. After you complete the initial configuration, administrative tasks can be performed from a wireless connection. Repeat the previous step to connect more PCs, a switch, or other network devices STEP 3 to the Router.
-
Page 11: Verifying The Hardware Installation
Introduction Initial Installation Power on the cable or DSL modem. STEP 5 Connect the power adapter to the Router’s Power port, and then plug the other STEP 6 end into an electrical outlet. Use only the power adapter that is supplied with the Router. Using a different NOTE power adapter could damage the Router. -
Page 12: Configuring The Internet Connection
Introduction Initial Installation Configuring the Internet Connection Before you begin, make sure that you have the setup information for the specific type of Internet connection. The installation technician from the Internet Service Provider (ISP) should have provided this information when installing the broadband connection. -
Page 13: Securing The Wireless Network
Introduction Initial Installation • PPTP: PPTP is a service used in Europe only. If you are using a PPTP connection, check with the ISP for the necessary setup information. • L2TP: L2TP is used mostly in Europe. Check with the ISP for the necessary setup information. - Page 14 Introduction Initial Installation • RADIUS (WEP): Weak security (WEP) with a basic encryption method that is not as secure as WPA. WEP may be required if your network devices do not support WPA. Authentication is provided by a RADIUS server that is connected to the router.
- Page 15 Introduction Initial Installation • Key Renewal: For all security modes except WEP, enter the interval in seconds. The Key Renewal instructs the router how often it should change the encryption keys. The default is 3600 seconds, which is 1 hour. For WEP mode and RADIUS (WEP) mode: •...
-
Page 16: Getting Started In The Configuration Utility
Introduction Getting Started in the Configuration Utility If you chose 128-bit WEP encryption, the key must be exactly 26 hexadecimal characters in length. Valid hexadecimal characters are “0” to “9” and “A” to “F”. Keep the default values for all other settings. STEP 6 Click Save to save the changes. -
Page 17: Navigating Through The Pages
Introduction Getting Started in the Configuration Utility Navigating through the Pages Use the navigation tree in the left pane to open the configuration pages. Saving Your Changes When you finish making changes on a configuration page, click Save to save the changes, or click Cancel to undo your changes. -
Page 18: Chapter 2: Setting Up The Network
Setting Up the Network Use the Setup module to configure the Internet connection, local network settings, VLANs, DDNS, MAC Address cloning, and advanced routing. • Configuring the Basic Settings, page 18 • Setting Up Virtual LANs, page 25 • Using DDNS to Map Domain Names to Your Network, page 26 •... -
Page 19: Localizing The Configuration Utility
Setting Up the Network Configuring the Basic Settings Localizing the Configuration Utility You can change the language that appears on the configuration pages. Click Setup > Basic Settings in the navigation tree. STEP 1 From the Language Selection drop-down list, choose one of the following STEP 2 languages: English (default), French, German, Italian, Portuguese, or Spanish. -
Page 20: Setting Up The Internet Connection
Setting Up the Network Configuring the Basic Settings Click Save to save your settings, or click Cancel to refresh the page with the STEP 3 previously saved settings. —OR— Complete other sections of the Basic Settings page before saving your settings. - Page 21 Setting Up the Network Configuring the Basic Settings User Name and Password/Confirm Password: Enter the User Name and the Password provided by your ISP. Then, enter the password again to confirm it. Service Name: If your service provider has given you this information, enter it in this field.
- Page 22 Setting Up the Network Configuring the Basic Settings Keep Alive: Select this option to enable the Router to periodically check your Internet connection. If you are disconnected, then the Router automatically re-establishes your connection. • L2TP: Layer 2 Tunneling Protocol (L2TP) is a service that tunnels Point-to- Point Protocol (PPP) across the Internet.
-
Page 23: Setting Up The Local Network
Setting Up the Network Configuring the Basic Settings • MTU: The MTU (Maximum Transmission Unit) setting specifies the largest packet size permitted for network transmission. Select Enabled and enter the value desired. It is recommended that you leave this value in the 1200 to 1500 range. -
Page 24: Adjusting The Time Settings
Setting Up the Network Configuring the Basic Settings • Number of Address: Enter the maximum number of PCs that you want the DHCP server to assign IP addresses. This number cannot be greater than 253. The IP Address Range is determined by adding this number to the Start IP Address. -
Page 25: Setting Up Virtual Lans
Setting Up the Network Setting Up Virtual LANs Click Save to save your settings, or click Cancel to refresh the page with the STEP 3 previously saved settings. —OR— Complete other sections of the Basic Settings page before saving your settings. -
Page 26: Using Ddns To Map Domain Names To Your Network
Setting Up the Network Using DDNS to Map Domain Names to Your Network • Number of VLAN: Select the number of the VLAN from the drop-down menu. • VLAN No.: Select the VLAN number to associate with the desired port. Click Save to save your settings, or click Cancel to refresh the page with the STEP 3 previously saved settings. -
Page 27: Dyndns.org Setup
Setting Up the Network Using DDNS to Map Domain Names to Your Network DynDNS.org Setup Click Setup > DDNS in the navigation tree. STEP 1 From the DDNS Service Provider drop-down list, choose DynDNS.org. STEP 2 Enter the following information: STEP 3 •... -
Page 28: Tzo.com Setup
Setting Up the Network Using DDNS to Map Domain Names to Your Network TZO.com Setup Click Setup > DDNS in the navigation tree. STEP 1 From the DDNS Service Provider drop-down list, choose TZO.com. STEP 2 Enter the following information: STEP 3 •... -
Page 29: Cloning A Mac Address For Your Internet Connection
Setting Up the Network Cloning a MAC Address for Your Internet Connection Cloning a MAC Address for Your Internet Connection Some ISPs require that you register a MAC address, which is a unique 12-digit code assigned to a network device for identification. If you previously registered a different router’s MAC address with your ISP, you can use the MAC Address Clone feature to associate the registered MAC address with your WRV210 Router. -
Page 30: Setting Up Advanced Routing
Setting Up the Network Setting Up Advanced Routing address. It is recommended to use the PC registered with the ISP for this operation. Click Save to save your settings, or click Cancel to refresh the page with the STEP 4 previously saved settings. -
Page 31: Configuring Dynamic Routing
Setting Up the Network Setting Up Advanced Routing Configuring Dynamic Routing If another router on your network is hosting your Internet connection, you can configure dynamic routing. The Router, using the RIP protocol, determines the network packets’ route based on the fewest number of hops between the source and the destination. -
Page 32: Setting Up Static Routing
Setting Up the Network Setting Up Advanced Routing Setting Up Static Routing You can configure static routes to direct packets to the destination network. A static route is a pre-determined pathway that a packet must travel to reach a specific host or network. Click Setup >... - Page 33 Setting Up the Network Setting Up Advanced Routing Internet: The destination device is on a network that you reach through your Internet connection. • Show Routing Table: Click the Show Routing Table button to open a screen displaying how packets are routed through your local network. For each route, the Destination LAN IP address, Subnet Mask, Gateway, and Interface are displayed.
-
Page 34: Chapter 3: Configuring The Wireless Network
Wireless devices have a default wireless network name or Service Set Identifier (SSID) set by the factory. This is the name of your wireless network, and can be up to 32 characters in length. Linksys wireless products use linksys as the default wireless network name. You should... - Page 35 For wireless products such as access points, routers, and gateways, you will be asked for a password when you want to change their settings. These devices have a default password set by the factory. The Linksys default password is admin. Hackers know these defaults and may try to use them to access your wireless device and change your network settings.
-
Page 36: General Network Security Guidelines
Configuring the Wireless Network A Note About Wireless Security • Turn wireless routers, access points, or gateways off when they are not being used (at night, during vacations). • Use strong passphrases that are at least eight characters in length. Combine letters and numbers to avoid using standard words that can be found in the dictionary. -
Page 37: Enabling Your Wireless Networks
Configuring the Wireless Network Enabling Your Wireless Networks Enabling Your Wireless Networks Use the Basic Wireless Settings page to configure the wireless network mode, the SSIDs, the channels, and the schedules for up to four wireless networks. You may wish to set up multiple networks to segment the network traffic, to allow different levels of access, such as guest access, or to allow access for different functions such as accounting, billing, and so on. - Page 38 Configuring the Wireless Network Enabling Your Wireless Networks • G-Only: Choose this option if you have only 802. 1 1g devices in your network. • B-Only: Choose this option if you have only 802. 1 1b devices in your network. •...
-
Page 39: Wireless > Wireless Security
Configuring the Wireless Network Enabling Your Wireless Networks • SSID Schedule: Select the SSID that you want to operate according to this schedule. • Summary: Click this button to display a list of all currently defined schedules. • Status: Select Enabled to activate the SSID schedule feature for the selected SSID. - Page 40 Configuring the Wireless Network Enabling Your Wireless Networks Click Wireless > Wireless Security in the navigation tree. STEP 1 From the Select SSID drop-down list, choose the SSID for the network that you STEP 2 want to configure. From the Security Mode drop-down list, select the appropriate security mode for STEP 3 your network.
- Page 41 Configuring the Wireless Network Enabling Your Wireless Networks For WPA Personal modes and WPA Enterprise modes: • Encryption: For WPA Personal and WPA Enterprise, choose either TKIP or AES encryption. The encryption method is chosen automatically for the other WPA modes. •...
- Page 42 Configuring the Wireless Network Enabling Your Wireless Networks Share Key: A wireless client must provide the correct shared key in order to access the wireless network. • Default Transmit Key: To indicate which WEP key to use, select the appropriate Default Transmit Key number. •...
-
Page 43: Controlling Access To The Wireless Network
Configuring the Wireless Network Enabling Your Wireless Networks Controlling Access to the Wireless Network This screen allows you to control access to your wireless network for each SSID. If you configured multiple networks (SSIDs), repeat this procedure for each one. NOTE Click Wireless >... - Page 44 Configuring the Wireless Network Enabling Your Wireless Networks Prevent from accessing: Choose this option to prevent the specified computers from accessing your wireless network. Permit to access: Choose this option to allow only the specified computers to access your network. •...
-
Page 45: Adjusting The Advanced Wireless Settings
Configuring the Wireless Network Adjusting the Advanced Wireless Settings Adjusting the Advanced Wireless Settings Use the Advanced Wireless Settings page to set up the Router’s advanced wireless functions. These settings should only be adjusted by an advanced user as incorrect settings can reduce wireless performance. Click Wireless >... - Page 46 Configuring the Wireless Network Adjusting the Advanced Wireless Settings older wireless technology, and All, when the Router can transmit at all wireless rates. The Basic Rate is not the actual rate of data transmission. If you want to specify the Router’s rate of data transmission, configure the Transmission Rate setting.
-
Page 47: Configuring A Wireless Distribution System (Wds)
Configuring the Wireless Network Configuring a Wireless Distribution System (WDS) After receiving an RTS, the wireless station responds with a Clear to Send (CTS) frame to acknowledge the right to begin transmission. Click Save to save your settings, or click Cancel to refresh the page with the STEP 3 previously saved settings. - Page 48 Configuring the Wireless Network Configuring a Wireless Distribution System (WDS) Click Wireless > WDS in the navigation tree. STEP 1 To enable WDS, check the Allow wireless signal to be repeated by a repeater STEP 2 check box. Choose the method for allowing repeaters to connect: STEP 3 •...
-
Page 49: Chapter 4: Configuring The Firewall
Configuring the Firewall Use the Firewall module to prevent attacks and to control your users’ access to the Internet. • Preventing Attacks, page 50 • Enabling Port Forwarding to Allow Access to Services, page 51 • Using Port Triggering to Allow Access to Applications, page 54 •... -
Page 50: Preventing Attacks
Configuring the Firewall Preventing Attacks Preventing Attacks The Router’s firewall enhances the security of your network. You can implement a Stateful Packet Inspection (SPI) firewall, block anonymous Internet requests, and enable block mechanisms. Click Firewall > General in the navigation tree. STEP 1 Enter the following settings, as needed: STEP 2... -
Page 51: Enabling Port Forwarding To Allow Access To Services
Configuring the Firewall Enabling Port Forwarding to Allow Access to Services prevent multicasting, or uncheck the box to allow multicasting. This feature is enabled by default. • Web Block: Check the box for each type of web component that you want to block. - Page 52 Configuring the Firewall Enabling Port Forwarding to Allow Access to Services When users send this type of request to your network via the Internet, the Router forwards those requests to the appropriate PC. Any PC whose port is being forwarded must have its DHCP client function disabled and must have a new static IP address assigned to it because its IP address may change when using the DHCP function.
- Page 53 Configuring the Firewall Enabling Port Forwarding to Allow Access to Services Click Firewall > Port Forwarding in the navigation tree. STEP 1 Enter the following information: STEP 2 • Application Name: In this field, enter the name you wish to give the application.
-
Page 54: Using Port Triggering To Allow Access To Applications
Configuring the Firewall Using Port Triggering to Allow Access to Applications Using Port Triggering to Allow Access to Applications Port Triggering is used for special Internet applications that use different ports to transmit and receiving data. For this feature, the Router watches outgoing data for specific port numbers. -
Page 55: Configuring A Dmz To Allow Access To All Ports Of A Server
Configuring the Firewall Configuring a DMZ to Allow Access to All Ports of a Server port number of the range. In the End field, enter the final port number in the range. • Protocol: Enter the protocol used for this application. The options are TCP, UDP, or Both. - Page 56 Configuring the Firewall Configuring a DMZ to Allow Access to All Ports of a Server Click Firewall > DMZ in the navigation tree. STEP 1 In the Software DMZ, click Enabled. STEP 2 You can disable a DMZ at any time by clicking Disabled and saving the NOTE settings.
-
Page 57: Restricting Users' Access To The Internet
Configuring the Firewall Restricting Users’ Access to the Internet Restricting Users’ Access to the Internet By default, the Router’s firewall allows your users to access the Internet. You can use the Access Restriction page to block or allow specific kinds of Internet usage and traffic during specific days and times. - Page 58 Configuring the Firewall Restricting Users’ Access to the Internet Enter the following settings for the chosen policy: STEP 3 • Status: Click Enabled to enable the policy, or click Disabled to disable it. Policies are disabled by default. • Enter Policy Name: Type a name to identify the policy. After you save the policy, this name will appear with the policy number in the Internet Access Policy drop-down list.
-
Page 59: Blocking Web Access With Url Filtering
Configuring the Firewall Blocking Web Access with URL Filtering Blocking Web Access with URL Filtering You can use the Firewall > URL Filtering page to block access to specified websites. Click Firewall > URL Filtering in the navigation tree. STEP 1 From the URL Filtering Policy drop-down list, choose the policy that you want to STEP 2 configure. - Page 60 Configuring the Firewall Blocking Web Access with URL Filtering Enter the following settings for the chosen policy: STEP 3 • Status: Click Enabled to enable the policy, or click Disabled to disable it. Policies are disabled by default. • Enter Policy Name: Type a name to identify the policy. After you save the policy, this name will appear with the policy number in the Internet Access Policy drop-down list.
-
Page 61: Chapter 5: Configuring A Virtual Private Network (Vpn)
Configuring a Virtual Private Network (VPN) Virtual Private Networking (VPN) is a security measure that creates a secure connection between two remote locations. The security is created by the very specific settings for the connection. Use the VPN module to configure your VPN settings to make your network more secure. - Page 62 Configuring a Virtual Private Network (VPN) Managing the VPN Users and Certificates Refer to the following topics: • Managing the VPN Users, page 63 • Managing VPN Certificates, page 65 Cisco Small Business WRV210 Administration Guide...
-
Page 63: Managing The Vpn Users
Configuring a Virtual Private Network (VPN) Managing the VPN Users and Certificates Managing the VPN Users The Router supports up to 10 remote users. They use QuickVPN software to connect to your local network through the VPN tunnel. Click VPN > VPN Client Access in the navigation tree. STEP 1 To add a user, enter the username and password, and then click Add/Save. - Page 64 Configuring a Virtual Private Network (VPN) Managing the VPN Users and Certificates a. Optionally, enter a new Local IP Address and Subnet Mask for your router, and then click Save. IMPORTANT: You need to ensure that the local router and the remote NOTE router have different IP addresses.
-
Page 65: Managing Vpn Certificates
Configuring a Virtual Private Network (VPN) Managing the VPN Users and Certificates Managing VPN Certificates Certificates are used to secure the communication between the router and the QuickVPN clients. Use the VPN Certificates area of the VPN Client Access page to generate and manage the certificates. -
Page 66: Configuring Vpn Passthrough
Configuring a Virtual Private Network (VPN) Configuring VPN Passthrough Configuring VPN Passthrough Use the VPN Passthrough page to allow VPN tunnels to pass through the Router’s firewall using IPSec, L2TP, or PPTP protocols. Disabling passthrough may prevent VPN clients from connecting to your network. NOTE Click VPN >... - Page 67 Configuring a Virtual Private Network (VPN) Configuring VPN Passthrough • L2TP Passthrough: Layer 2 Tunneling Protocol is the method used to enable Point-to-Point sessions via the Internet on the Layer 2 level. L2TP Passthrough is enabled by default. To disable L2TP Passthrough, select Disabled.
-
Page 68: Vpn > Ipsec Vpn
Configuring a Virtual Private Network (VPN) VPN > IPSec VPN VPN > IPSec VPN Use the VPN > IPSec VPN page to create and configure a Virtual Private Network (VPN) tunnel for site-to-site VPN. For example, you can use IPSec VPN to connect two offices of your company that are in different locations. - Page 69 Configuring a Virtual Private Network (VPN) VPN > IPSec VPN Repeat this procedure for each tunnel that you want to configure. NOTE Click VPN > IPSec VPN in the navigation tree. STEP 1 In the VPN Tunnel section, enter the following settings: STEP 2 •...
- Page 70 Configuring a Virtual Private Network (VPN) VPN > IPSec VPN • Host: Directs the traffic, using port forwarding, to the correct computer. The VPN tunnel terminates at the router with this setting. Use Port Range Forwarding to direct traffic to the correct computer. For more information, “Enabling Port Forwarding to Allow Access to Services”...
- Page 71 Configuring a Virtual Private Network (VPN) VPN > IPSec VPN In the Key Management section, enter the following information to configure the STEP 6 security for the IPSec VPN tunnel. • Key Exchange Method: IKE is an Internet Key Exchange protocol used to negotiate key material for Security Association (SA).
- Page 72 Configuring a Virtual Private Network (VPN) VPN > IPSec VPN • IPSec DH Group: This setting is the same as the ISAKMP DH Group setting. • IPSec Key Lifetime(s:) Optionally, you can choose to have the key expire at the end of a specified time period. Enter the number of seconds you’d like the key to be used until a re-key negotiation between each endpoint is completed.
-
Page 73: Monitoring The Ipsec Vpn Tunnels
Configuring a Virtual Private Network (VPN) Monitoring the IPSec VPN Tunnels Monitoring the IPSec VPN Tunnels Use the VPN Summary page to review the settings and monitor the status of all IPSec tunnels. You also can stop, start, or restart a connection. To open this page, click VPN >... - Page 74 Configuring a Virtual Private Network (VPN) Monitoring the IPSec VPN Tunnels configured type of remote group is Host or Any, the field displays the “Host” or “Any” directly. • Local Group: The field displays the local peer that is designated for VPN communication after an IPSec VPN tunnel is established.
-
Page 75: Chapter 6: Configuring Quality Of Service (Qos)
Configuring Quality of Service (QoS) Quality of Service (QoS) ensures better service to high-priority service. Use the QoS module to configure the Router’s QoS settings. • Configuring QoS Settings for Specified Applications, page 75 • Configuring QoS Settings for Specified Ports, page 78 Configuring QoS Settings for Specified Applications Application-based QoS involves Internet traffic, which may involve demanding, real-time applications, such as video conferencing. -
Page 76: Priority Queue Qos Type
Configuring Quality of Service (QoS) Configuring QoS Settings for Specified Applications Priority Queue QoS Type With the Priority Queue option, you can manage QoS by specifying the priority of each application. There are five preset applications (FTP, HTTP, TELNET, SMTP, and POP3). -
Page 77: Bandwidth Allocation Qos
Configuring Quality of Service (QoS) Configuring QoS Settings for Specified Applications Bandwidth Allocation QoS With the Bandwidth Allocation option, you can manage QoS by controlling the bandwidth utilization of each Application Layer Gateway (ALG). FTP and NetMeeting appear by default. You can add additional applications requiring ALG. -
Page 78: Configuring Qos Settings For Specified Ports
Configuring Quality of Service (QoS) Configuring QoS Settings for Specified Ports Configuring QoS Settings for Specified Ports Port-based QoS ensures better service to specified LAN ports. For example, if there is an email server connected to a particular port, you can prioritize traffic to that server. - Page 79 Configuring Quality of Service (QoS) Configuring QoS Settings for Specified Ports • Ingress Rate: Choose the input data rate for a port. Packets exceeding this rate are dropped. The rates can be 128kbps, 256kbps, 512kbps, 1Mbps, 2Mbps, 4Mbps, 8Mbps, 16Mbps, 32Mbps, Full (highest), or no rate control. Full is the default.
-
Page 80: Chapter 7: Administration
Administration The Administration module provides access to system administration settings and tools. • Managing Access and Configuring Other Management Options, page 80 • Setting Up Alerts and System Logs, page 87 • Performing Diagnostic Tests, page 89 • Reverting to the Factory Default Settings, page 91 •... -
Page 81: Resetting The Admin Password
Administration Managing Access and Configuring Other Management Options Resetting the Admin Password To ensure the Router’s security, you are prompted for your password when you access the Router’s Configuration Utility. The default user name and password is admin. You should change this setting to prevent unauthorized access. Make these changes in the Admin Password section of the Administration >... -
Page 82: Managing Lan And Wan Access To The Configuration Utility
Administration Managing Access and Configuring Other Management Options Click Administration > Management in the navigation tree. STEP 1 In the Admin Password section, enter and confirm the new password. STEP 2 • Admin Password: Enter the new password. The password can include any alphanumeric characters. - Page 83 Administration Managing Access and Configuring Other Management Options Click Administration > Management in the navigation tree. STEP 1 In the Local Router Access section, configure the following settings: STEP 2 • Use HTTPS: To use SSL encryption, select Enabled. After HTTPS is enabled, http requests to the Router’s LAN IP are redirected to HTTPS.
-
Page 84: Configuring Snmp Settings For Status Reporting
Administration Managing Access and Configuring Other Management Options • Remote Management Port: Enter the port number that is open to outside access. The default setting is 8080. Click Save to save your settings, or click Cancel to refresh the page with the STEP 4 previously saved settings. -
Page 85: Configuring Universal Plug And Play (Upnp) Settings
Administration Managing Access and Configuring Other Management Options • Device Name: Enter a suitable name to identify this device in the SNMP software. • Location: Enter the location of the Router. • Get Community: Enter the SNMP community name for SNMP “Get” commands. -
Page 86: Backing And Restoring A Configuration
Administration Managing Access and Configuring Other Management Options Click Save to save your settings, or click Cancel to refresh the page with the STEP 3 previously saved settings. Backing and Restoring a Configuration Cisco recommends that you periodically back up your configuration. This practice is especially helpful before you make significant changes in the settings. -
Page 87: Setting Up Alerts And System Logs
Administration Setting Up Alerts and System Logs Setting Up Alerts and System Logs Use the Administration > Log page to log system activity. You can choose to enable email alerts for specified events, and you can configure the system log to send the information to a syslog server. - Page 88 Administration Setting Up Alerts and System Logs • System (for system logs only, not email alerts): May include system shutdown/startup, VPN connections, system processes, interface status changes, and DHCP events Click Administration > Log in the navigation tree. STEP 1 Configure the following settings, as needed: STEP 2 •...
-
Page 89: Performing Diagnostic Tests
Administration Performing Diagnostic Tests Performing Diagnostic Tests Use the Administration > Diagnostics page to check the connections of your network components. Click Administration > Diagnostics in the navigation tree. STEP 1 Perform a Ping Test or a Traceroute Test, as described below: STEP 2 Ping Test: To verify connectivity between devices, a ping utility sends a request, known as an ICMP echo-request packet, to the designated device. - Page 90 Administration Performing Diagnostic Tests • Times to Ping: Enter the number of times that you want to ping the device: 5, 10, 15, or Unlimited. b. Click Start to Ping to start the test. The results of the test appear in a new window.
-
Page 91: Reverting To The Factory Default Settings
Administration Reverting to the Factory Default Settings Reverting to the Factory Default Settings The Administration > Factory Defaults page allows you to restore the Router’s configuration to its factory default settings. Do not restore the factory defaults unless you are having difficulties with the Router NOTE and have exhausted all other troubleshooting measures. -
Page 92: Upgrading The Firmware
Administration Upgrading the Firmware Upgrading the Firmware Use the Administration > Firmware Upgrade page to upgrade the Router’s firmware. Do not upgrade the firmware unless you are experiencing problems with the Router or the new firmware has a feature you want to use. If you upgrade the firmware, the Router loses all of the settings you have NOTE customized. - Page 93 Administration Upgrading the Firmware Download the new firmware: STEP 2 a. Start a web browser, and enter the following address: tools.cisco.com/support/downloads b. When prompted, enter your Cisco online login. c. In the Software Search box, enter WRV210. Click Go. d. Follow the instructions to find the latest firmware and download it to your PC. Perform the upgrade: STEP 3 a.
-
Page 94: Rebooting The Router
Administration Rebooting the Router Rebooting the Router The Administration > Reboot page allows you to restart the Router without losing any of its stored settings. You may wish to reboot the router during remote troubleshooting. Click Administration > Reboot in the navigation tree. STEP 1 To reboot the router, click Yes to confirm and then click Save. -
Page 95: Chapter 8: Monitoring The Status Of The Network
Monitoring the Status of the Network Use the Status module to monitor your network. • Monitoring the Router Status, page 96 • Monitoring the LAN, page 97 • Monitoring the Wireless Network, page 99 • Monitoring the System Performance, page 100 •... -
Page 96: Monitoring The Router Status
Monitoring the Status of the Network Monitoring the Router Status Monitoring the Router Status The Status > Router page displays information about the Router and its current settings. The on-screen information varies depending on the Internet Connection Type selected on the Basic Setup page. The page automatically refreshes every 10 seconds. -
Page 97: Monitoring The Lan
Monitoring the Status of the Network Monitoring the LAN • Connection Type: The Internet connection type • IP Address: The Router’s Internet IP Address • Subnet Mask and Default Gateway: The Router’s Subnet Mask and Default Gateway address for DHCP and static IP connections •... - Page 98 Monitoring the Status of the Network Monitoring the LAN Local Network • Local MAC Address: The MAC Address of the Router’s LAN (local area network) interface • IP Address: The Router’s local IP address • Subnet Mask: The Router’s subnet mask DHCP Server •...
-
Page 99: Monitoring The Wireless Network
Monitoring the Status of the Network Monitoring the Wireless Network Monitoring the Wireless Network The Status > Wireless page displays status information about your wireless network. The information appears for each configured SSID (SSID1 through SSID4). The page automatically refreshes every 10 seconds. NOTE •... -
Page 100: Monitoring The System Performance
Monitoring the Status of the Network Monitoring the System Performance • Refresh: Click this button to update the on-screen information. Monitoring the System Performance The Status > System Performance page displays status information about network traffic for the Internet, wireless activities, and wired connectivity. The page automatically refreshes every 10 seconds. - Page 101 Monitoring the Status of the Network Monitoring the System Performance • Packets Received: The number of packets received • Packets Sent: The number of packets sent • Bytes Received: The number of bytes received • Bytes Sent: The number of bytes sent •...
-
Page 102: Monitoring The Quickvpn Clients
Monitoring the Status of the Network Monitoring the QuickVPN Clients Monitoring the QuickVPN Clients The Status > VPN Client Status page displays status information about the Router’s QuickVPN clients. The page automatically refreshes every 10 seconds. NOTE • No.: The identification number assigned to the VPN client. •... -
Page 103: Appendix A: Specifications
Specifications Feature Details Specifications Model WRV210 Standards IEEE802. 1 1g, IEEE802. 1 1b, IEEE802.3, IEEE802.3u, 802. 1 x (Security Authentication), 802. 1 1i (Security WPA2), 802. 1 1e (Wireless QoS) Ports One Power port (12V 1A), Four 10/100 RJ-45 LAN ports, One 10/100 RJ-45 Internet port Buttons Reset... - Page 104 Specifications Feature Details Firmware Upgrade Firmware Upgradeable Through Web Browser and TFTP Utility Diagnostics Flash, RAM, LAN, WLAN Wireless Spec/Modulation Radio and Modulation Type: 802. 1 1b/DSSS, 802. 1 1g/ ODFM Supported Data 802. 1 1b: 1, 2, 5.5, 11 Mbps 802. 1 1g: 6, 9, 11, 12, 18, 24, Rates 48, 54 Mbps Operating Channels...
- Page 105 Specifications Feature Details Secure HTTPS, Username/Password Management Network VLAN Support 4 LAN Ports and 4 SSIDs can be mapped to up to 5 VLANs SSID Broadcast SSID Broadcast Enable/Disable Multiple SSID Supports Multiple BSSIDs (4) which can operate on pre- defined schedules Wireless VLAN Map Supports SSID-to-VLAN Mapping with Wireless Client...
- Page 106 Specifications Feature Details Power 12V 1A Certification FCC Class B, CE, IC Operating Temp. 32 to 104ºF (0 to 40ºC) Storage Temp. -4 to 158ºF (-20 to 70ºC) Operating Humidity 10 to 85% Noncondensing Storage Humidity 5 to 90% Noncondensing Cisco Small Business WRV210 Administration Guide...
-
Page 107: Appendix B: Where To Go From Here
Where to Go From Here Cisco provides a wide range of resources to help you and your customer obtain the full benefits of the WRV210. Product Resources Support Cisco Small Business www.cisco.com/go/smallbizsupport Support Community Online Technical Support www.cisco.com/support and Documentation (Login Required) Phone Support Contacts www.cisco.com/en/US/support/tsd_cisco_small_...
Need help?
Do you have a question about the WRV210 - Wireless-G VPN Router and is the answer not in the manual?
Questions and answers