QuietCool AFG PRO-2.0 Manual
- Owner's manual (12 pages) ,
- Owner's manual (16 pages)
Advertisement
SYSTEM OVERVIEW
INTRODUCTION
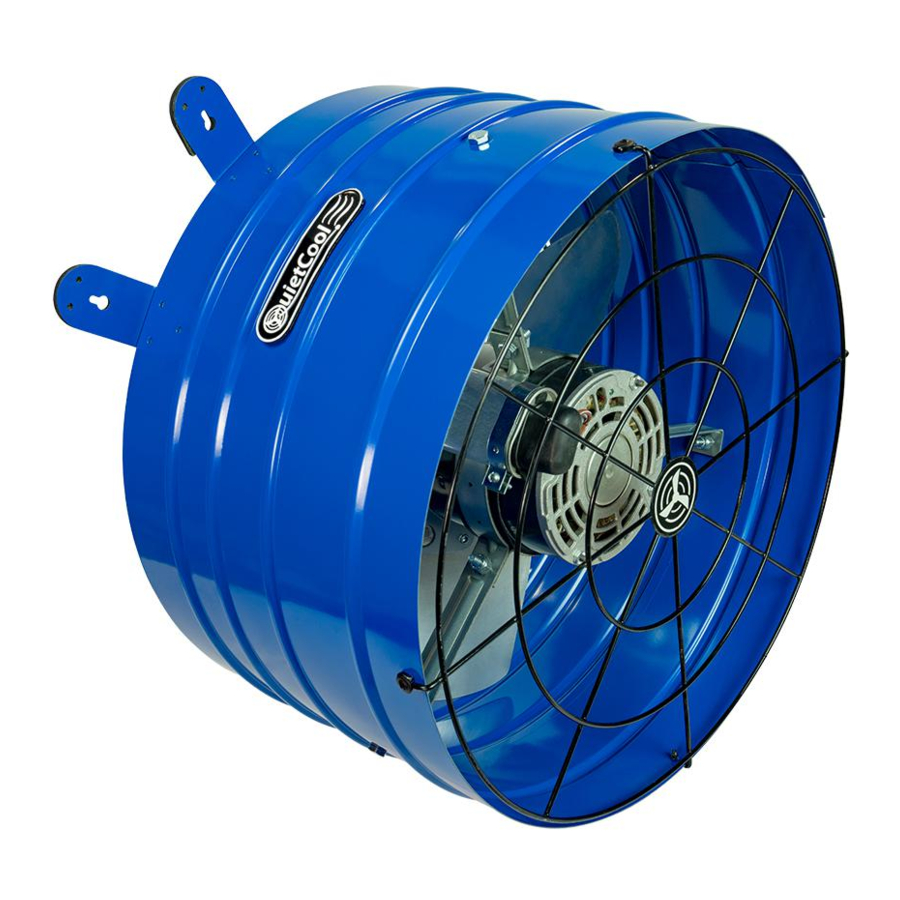
QuietCool Attic Fans are the best in the business. The AFG PRO- 2.0 is the attic gable fan that offers the best value at the best price point.
With two available speeds with an energy efficient PSC motor, powder-coated steel housing, integrated hand guard, integrated mounting tabs, and standard thermostat, this attic fan will transform your attic into a cool oasis.
QuietCool Attic Fans work almost everywhere, anytime. During the summer, an attic can be 40-50 degrees hotter than the outside temperature, which in turn heats up the house much faster. With an attic fan, you can cool the attic to the same temperature as it is outside,
greatly reducing the house from heating as quickly.
FEATURES
- High Efficiency Two-Speed PSC Motor
- Integrated Mounting Tabs with Anti-Vibration Pads
- Standard Adjustable Thermostat
- Designed and Built in California
- 15 Year Warranty
SYSTEM VENTING REQUIREMENTS

1 SQUARE FOOT OF NET FREE VENT AREA PER 750 CFM
 RECOMMENDED: 2 TO 4 SQUARE FEET OF INLET VENTS PER FAN ! !
Venting plays a very significant role in the performance of QuietCool fans. QuietCool recommends a minimum of 1 SQ. FT. of venting for every 750 CFM in the QuietCool system. If an attic has at least 1:750 attic venting, the QuietCool system will operate efficiently and effectively. If an attic has less than
1:750 attic venting, the system may not operate as efficiently, or effectively, as it could with 1:750 attic venting. But don't worry, the system will still operate if there is not enough venting.
Insufficient venting is a very simple problem to fix. Roofing contractors can add extra venting to most homes simply and easily. The most common types of venting is shown in the chart below.
| Vent Type | Model Type | Average Size | Venting Sq. Ft. |
| Gable vent |  | 12" x 19.5" | 1.20 |
| Dormer Vent |  | 14" x 8" | 0.70 |
| Eave Vent |  | 4" 5" 6" | 0.03 0.04 0.07 |
| Ridge Vent |  | 4' - 12' | 0.125 per ft |
| Soffit Vent |  | 16" x 4" 16" x 6" 16" x 8" | 0.19 0.29 0.39 |
| O'Hagin Vent |  | Low/Medium Profile Tapered Low Profile Low Profile Flat High Profile | 0.5 0.6 0.68 0.68 |
| Turbine Vent |  | 8" 12" 14" | .35.79 1.1 |
*Note: This table is only a guideline and is not a guarantee of venting capacity.
READ ALL INSTRUCTIONS IN THIS GUIDE BEFORE INSTALLING YOUR QUIETCOOL
GETTING STARTED
STOP! Read the following pages before proceeding! The manufacturer is NOT responsible for faulty installation or product damages caused through failure to fully read this guide BEFORE attempting installation.
GENERAL SAFETY INFORMATION
- READ INSTRUCTIONS - All safety and operation instructions must be read.
- RETAIN INSTRUCTIONS - The safety and operating instructions should be kept for future reference.
- HEED WARNINGS - All warnings should be followed.
- FOLLOW INSTRUCTIONS - All installation and operating instructions should be followed.
- WATER - The QuietCool system should not be used near water.
- HEAT - The QuietCool system should be situated away from heat sources.
- DAMAGE REQUIRING SERVICE - Only qualified service personnel should service the QuietCool system. The user should not attempt to service the product.


This unit has an unguarded impeller. Do not use in locations readily accessible to people or animals.
Do not operate any fan with a damaged cord or plug. Discard fan or return to an authorized service facility for examination and/or repair.
Do not run cord under carpeting. Do not cover cord with throw rugs, runners, or similar coverings. Do not route cord under furniture or appliances. Arrange cord away from traffic area and where it will not be tripped over.
Automatically started device. To reduce the risk of injury, disconnect from power supply before servicing. Do not use fan with any solid state speed control device. For residential use only.
INCLUDED IN THE BOX
- QuietCool Attic Gable Fan
- Hardware Kit
- (4) Vent Covers
HARDWARE KIT CONTENTS

- (17) All-Purpose Screws
12 for AFG tabs, 2 for Thermostat, 3 extra - (9) Pan Head Screws
8 for Vent Covers, 1 extra
INSTALLATION
INSTALLING ATTIC GABLE FAN
Installation Video:
Watch the video by scanning the QR code or visit
www.QuietCoolSystems.com/support

NOTE: The AFG model fans are designed to mount behind existing vents. If no vent exists, one must be installed. Vent should be installed in the upper center section of the gable.
- Installing the QuietCool AFG is very easy. To install the AFG, simply mount the gable fan to your gable vents as shown in the following steps. You will use the 12 included All-Purpose screws.
Flush Mount: The AFG can be mounted flush to a rectangular type louver by fastening through the mounting brackets to the frame of the louver (as shown in Figure 2.1A).
![]()
As stated in the note above, any area of the louver that is not covered by the AFG must be sealed off in order to prevent air leakage, which may hinder performance.
This is the most conventional method of mounting the AFG. We recommend using the Flush Mount option if possible for all applications.
Wide Mount: The AFG can be mounted on a wide louver, but additional mounting steps must be taken in order for the fan to work properly. As shown in Figure 2.1B, two additional boards must be fastened to the boards framing the gable vent so the AFG can be mounted securely.
As stated in the note above, any area of the louver that is not covered by the AFG must be sealed off in order to prevent air leakage, which may hinder performance.
![]()
Odd Mount: The AFG can also be mounted off center for an odd shaped louver (as shown in Figure 2.1C).
As stated in the note above, any area of the louver that is not covered by the AFG must be sealed off in order to prevent air leakage, which may hinder performance.
While this is not the most ideal way to mount the gable fan, it is possible. However, since the fan is not completely covering the vent, maximum airflow will not be achieved.
![danger]() NOTE: The AFG can be mounted on many other types of louvers, including triangle vents, round vents, half-round vents, etc. If the vent is smaller than the area of the fan, we recommend constructing a chamber that surrounds the vent, and then mount the AFG to the chamber to ensure maximum airflow and performance.
NOTE: The AFG can be mounted on many other types of louvers, including triangle vents, round vents, half-round vents, etc. If the vent is smaller than the area of the fan, we recommend constructing a chamber that surrounds the vent, and then mount the AFG to the chamber to ensure maximum airflow and performance.
![]()


INSTALLING AFG VENT COVERS
Installation Video:
Watch the video by scanning the QR code or visit
www.QuietCoolSystems.com/support

Included with your QuietCool Attic Gable Fan are four vent covers that are designed to be installed around the attic fan housing to block any air backdrafting into the attic through a gable vent that is larger than the attic fan cylinder, causing air to cycle in and out around the vent.

- Take the vent cover and match it to one of the sides around the attic fan housing.
- Using the two included Pan Head screws, attach each corner to the wood framing around your gable vent.
- Repeat step 1 and 2 for the three additional covers.
WIRING
Wiring Diagrams are for examples ONLY. Wiring should be done by a licensed electrician following local building and electrical codes and/or NEC guidelines.
NOTE: Your fan came with the Adjustable Thermostat pre-wired on High Speed to a power cord for testing purposes before installation. If you would like to hard-wire the fan, or it is required by your local building codes, please follow the wiring instructions below.
THERMOSTAT WIRING
- For this installation, you will need a 2 wire Romex, and a thermostat.
- Open up the thermostat that is connected to the fan. Remove the power cord. Bring your 2 wire Romex from the power source into the thermostat.
- With a wire nut, tie the white common wires together.
- High Speed: Tie the black wire from the fan to one of the black wires from the thermostat. Cap the red wire (see Figure 3.1A) Low Speed: Tie the red wire from the fan to one of the black wires from the thermostat. Cap the black wire (see Figure 3.1B)


- Tie the black wire from the power source to the remaining black wire from the thermostat.
- Using the ground screw in the thermostat, ground your power source and the green wire from the fan.
- Mount the thermostat to one of the joists near the attic fan.
REMOTE THERMOSTAT WIRING
- For this installation, you will need a 2 wire Romex, junction box, and a thermostat.
- Open up the thermostat that is connected to the fan. Remove the power cord. Remove the bracket mounting the thermostat to the flex tubing and remove the thermostat. Mount a junction box to the flex tubing with the included bracket and mount the junction box. Bring your 2 wire romex from the power source into the junction box.
- Mount the thermostat in the best location for thermostat readings. Run a 2 wire Romex from the junction box to the thermostat. Tape the white wire on each side of the 2 wire Romex to indicate that it is a switch leg.
- In the junction box, with a wire nut, tie the white common wires together. Using the green ground screw, ground the green wire from the fan and the 2 wire Romex from the thermostat, to the junction box.
- High Speed: Tie the black wire from the fan to the taped white wire from the thermostat (see Figure 3.2A) Low Speed: Tie the red wire from the fan to the taped white wire from the thermostat (see Figure 3.2B)

- Tie the black wire from the power source to the black wire from the thermostat. Replace the cover on the junction box.
- In the thermostat, tie the black wire to one of the black wires from the thermostat. Tie the taped wire to the other black wire from the thermostat. Using the ground screw in the thermostat, ground the ground wire from the 2 wire Romex.
- Tie the two remaining black wires together. Then, tie the remaining copper wires together.

SYSTEM OPERATING INSTRUCTIONS
SETTING THE THERMOSTAT
The thermostat for your Pro Attic Gable Fan is a simple way to control your attic fan.
The thermostat can be adjusted to any temperature between 60º and 120º. Whatever temperature you set the thermostat to will cause your attic fan to turn on when your attic temperature is at or above the set temperature.
To change the setting of the thermostat, simply take a screwdriver and twist the dial.
The thermostat also includes a Fire Fuse that will turn off the attic fan if it detects a temperature above 182ºF in your attic. The purpose of this is to shut off in the event of a house fire to prevent the spread of flames.

USING YOUR QUIETCOOL ATTIC FAN
Attic fans are designed to cool and ventilate your attic all year long. Depending on the month of the year, you will want to change the temperature setting of your thermostat.
SUMMER MONTHS
In the summer, the attic in your home can reach temperatures in excess of 150ºF. An attic fan is designed to cool and ventilate your attic space in the hot months of the year to help protect your HVAC equipment, protect the integrity of your house structure, and to prevent the heat in the attic from heating up your indoor living space.
We recommend setting your thermostat between 80ºF and 100ºF for the most effective cooling during the warmer months of the year.
With an attic fan running during the summer, we have seen attic temperature maintain as low as a 5ºF difference between the outside temperature and the attic temperature.
WINTER MONTHS
In the winter, ice and condensation can build-up on the roof and in the attic due to the drastic temperature difference between the outside air and the air inside the home. This can cause major damage to your HVAC equipment as well as the structure of your home. This is called ice damming and it is a major issue in cold climates.
With an attic fan, you can ventilate the attic space to help keep the moisture level low and keep the attic temperature close to the outside temperature. And since heat rises, you won't be wasting any of the heat within your home.
We recommend setting your thermostat to 60ºF for the most effective ventilation and protection against ice damming.
Documents / Resources
References
Download manual
Here you can download full pdf version of manual, it may contain additional safety instructions, warranty information, FCC rules, etc.
Advertisement


Need help?
Do you have a question about the AFG PRO-2.0 and is the answer not in the manual?
Questions and answers